Klann's Mechanical Spider with Longer Legs (Ver 3)
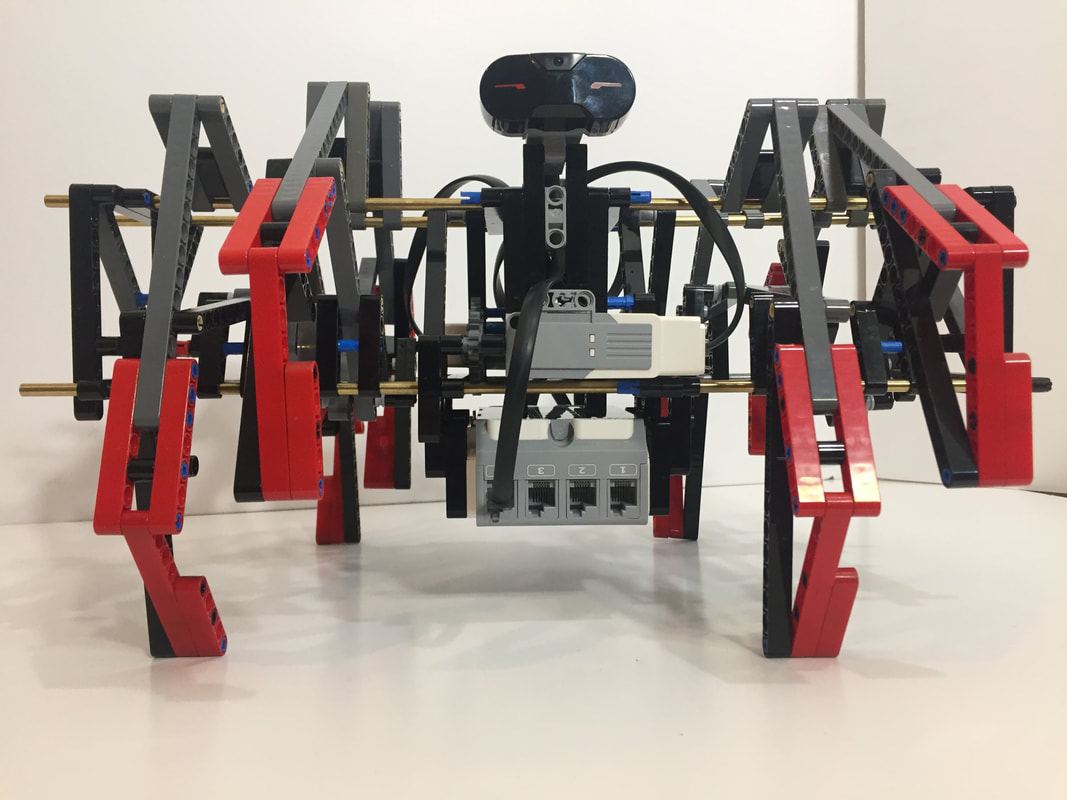
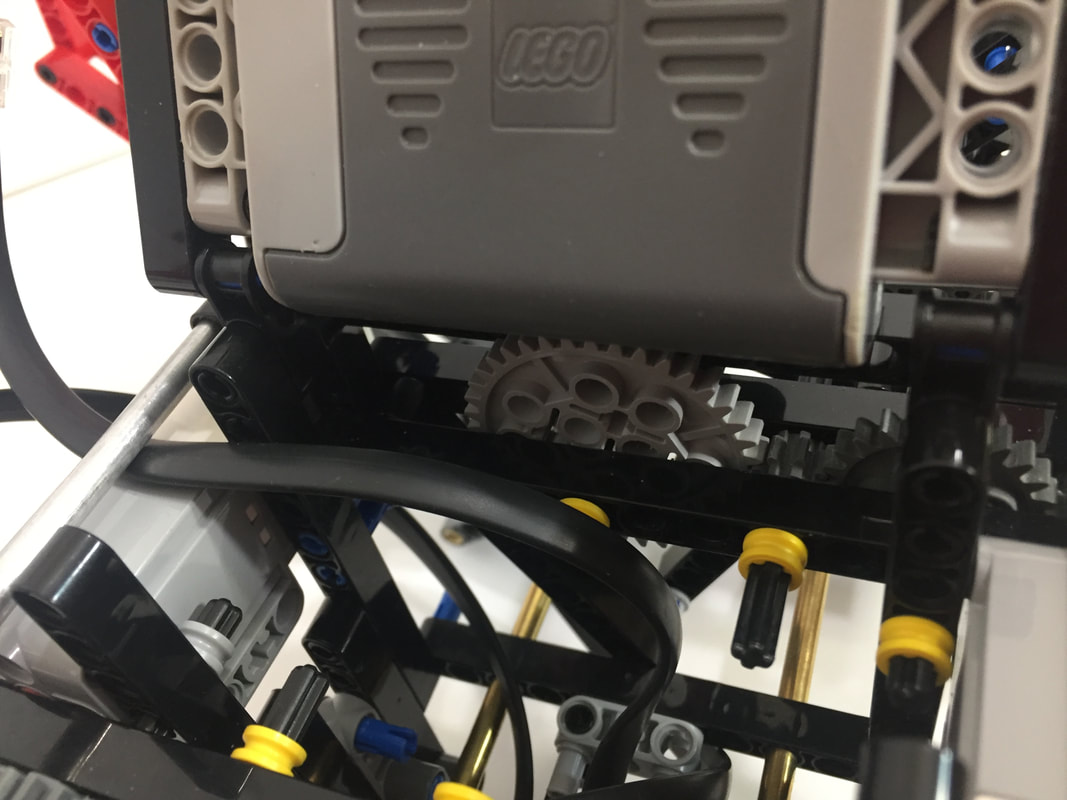
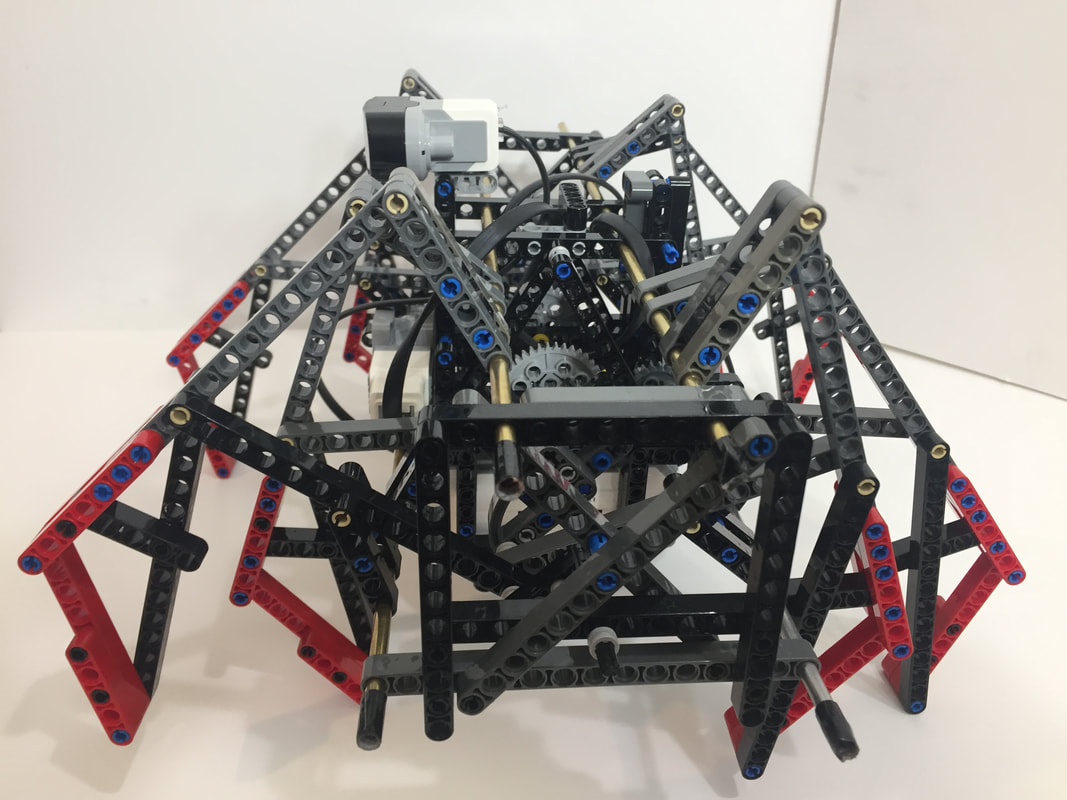
Longer legs provide more clearance, allowing the EV3 brick or battery box to be mounted underneath the frame.
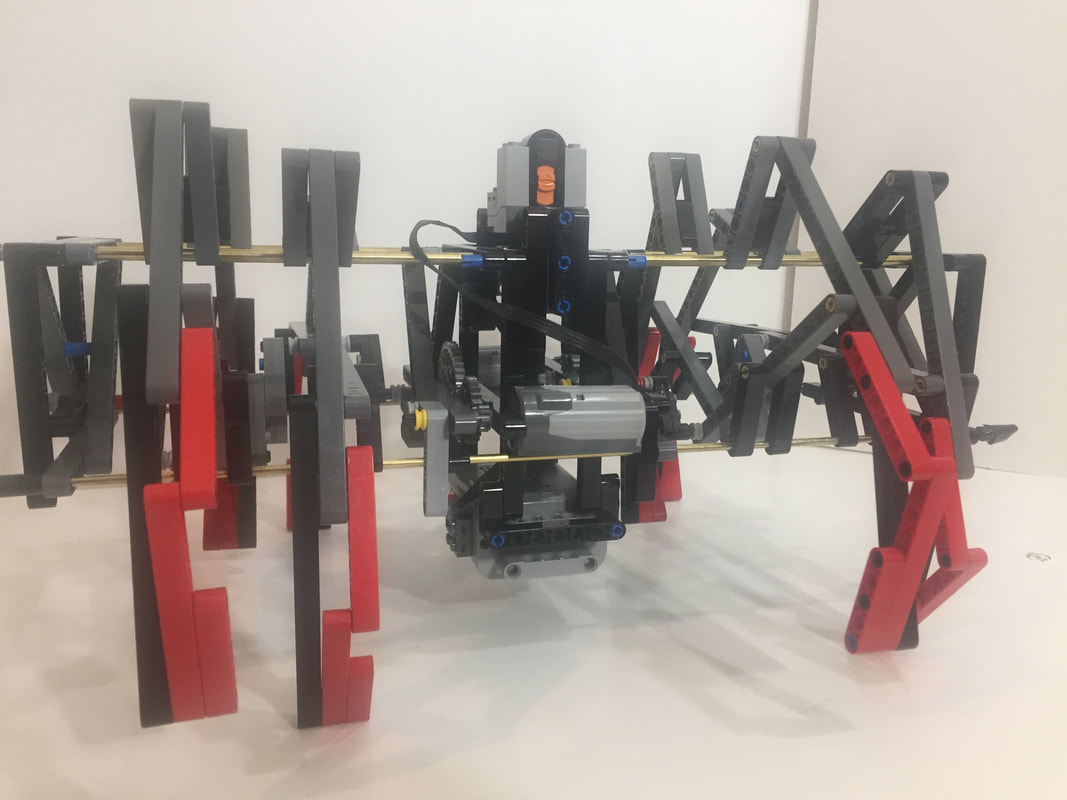
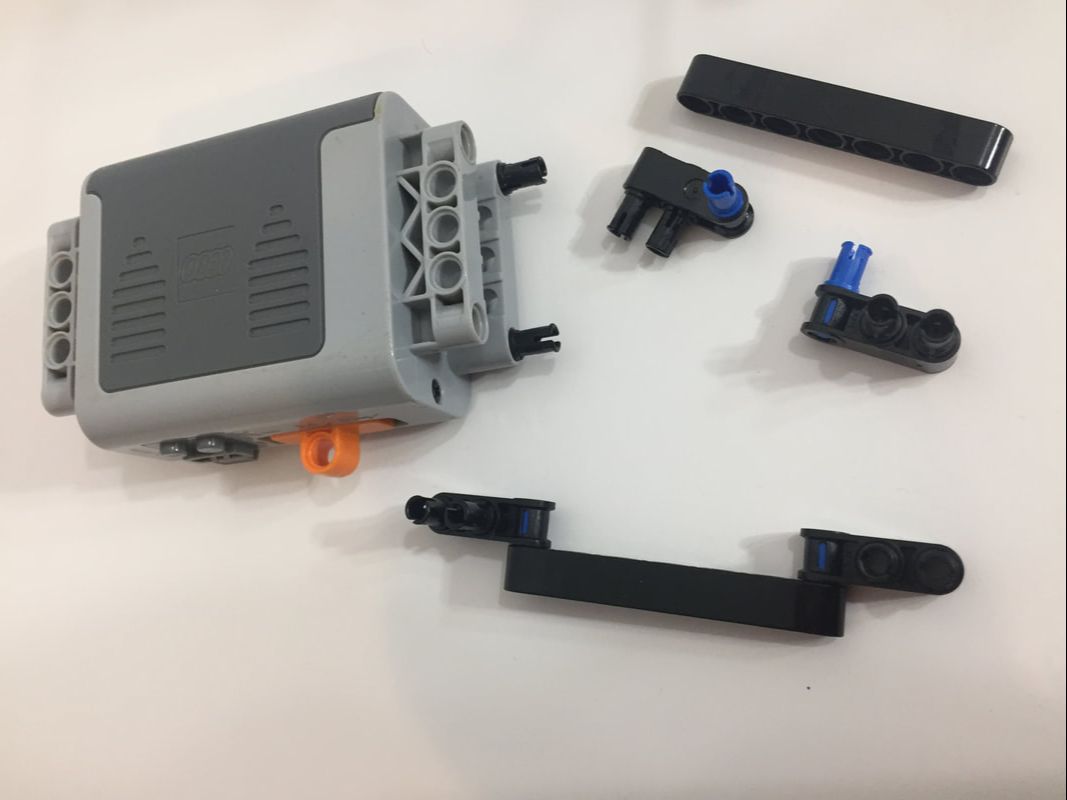
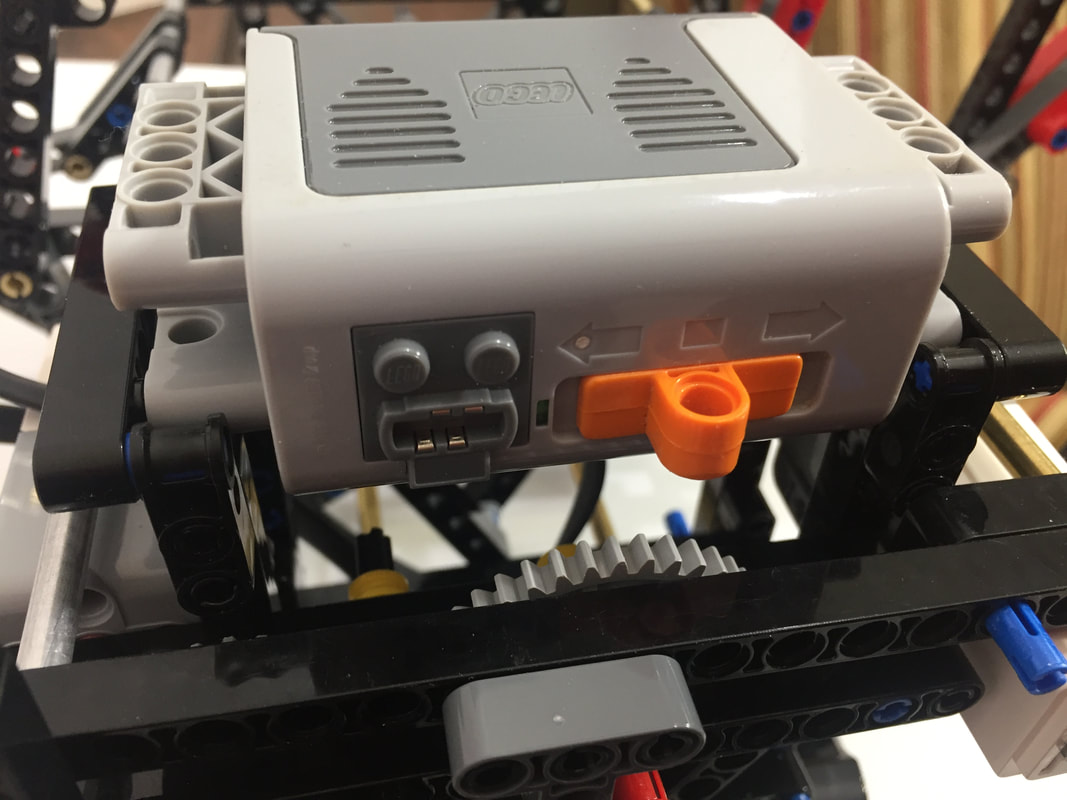
Battery box version
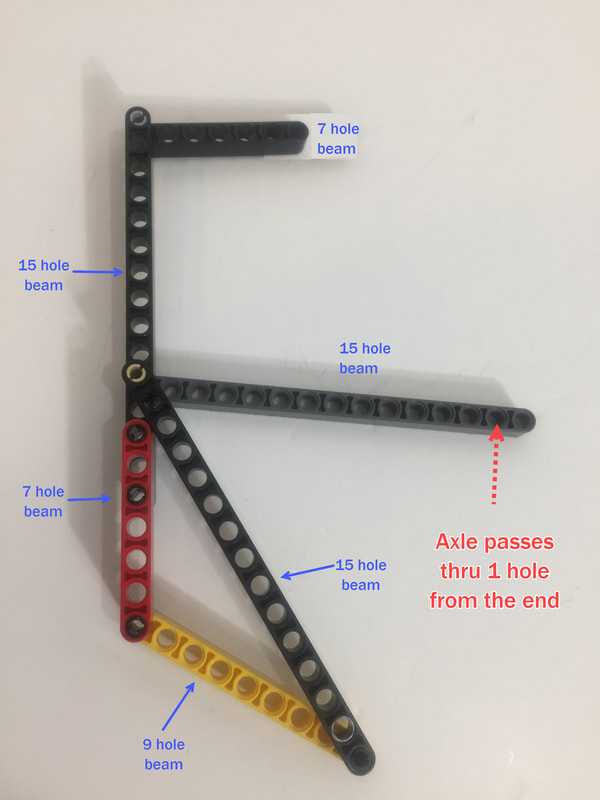
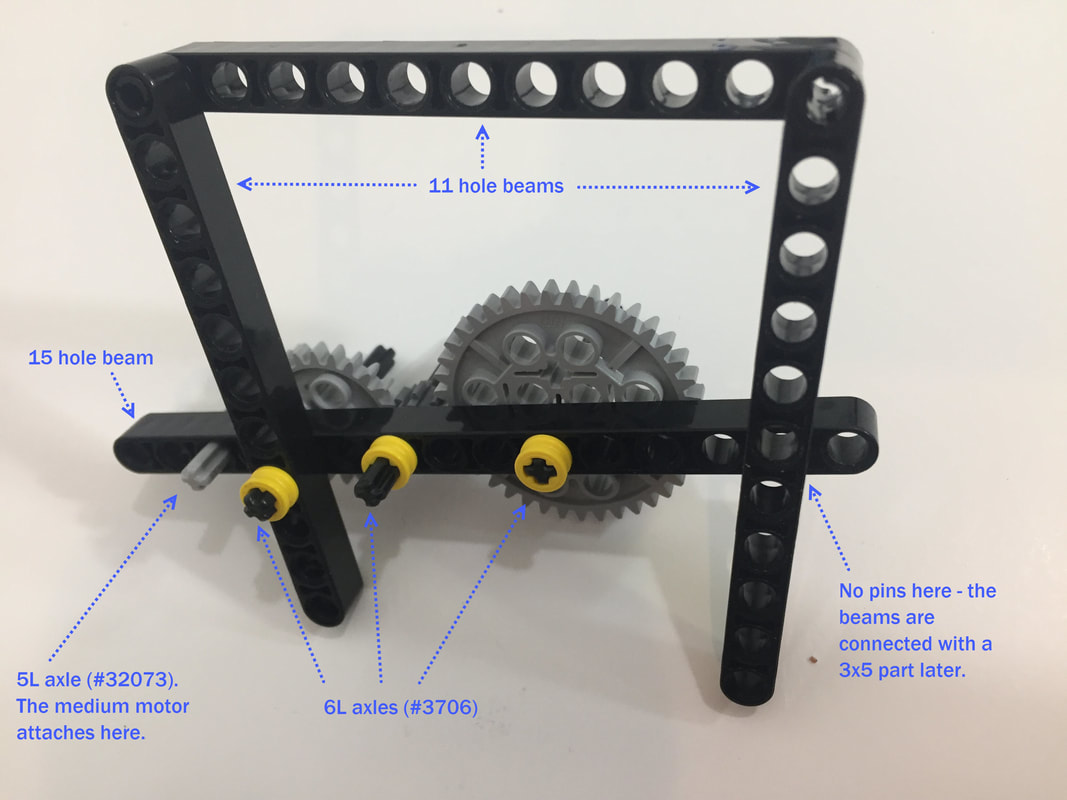
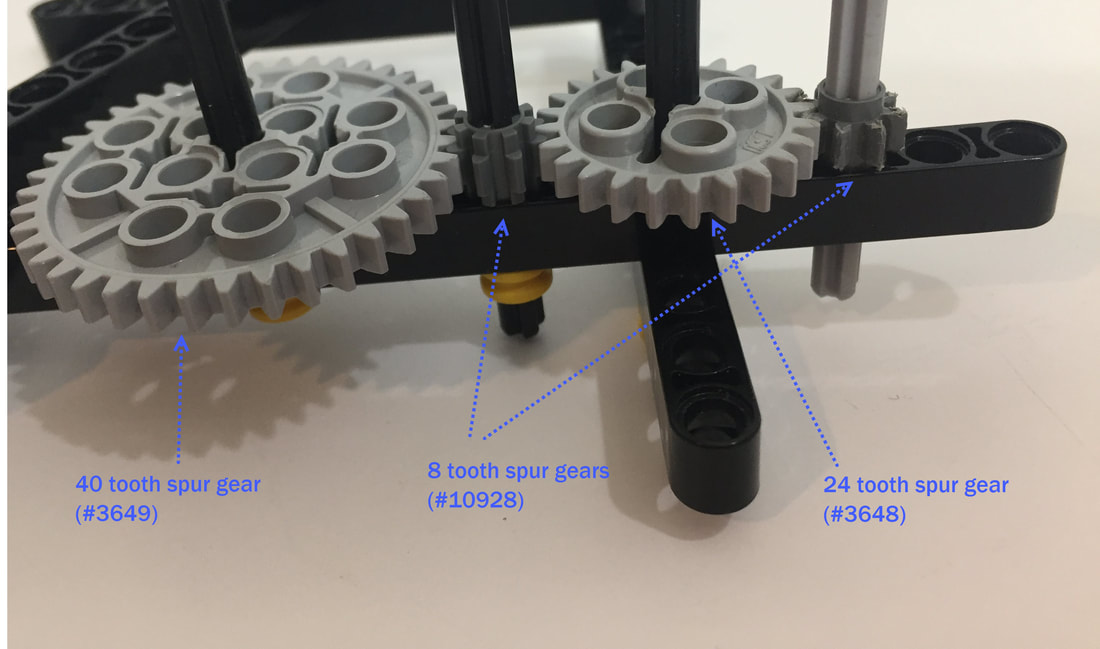
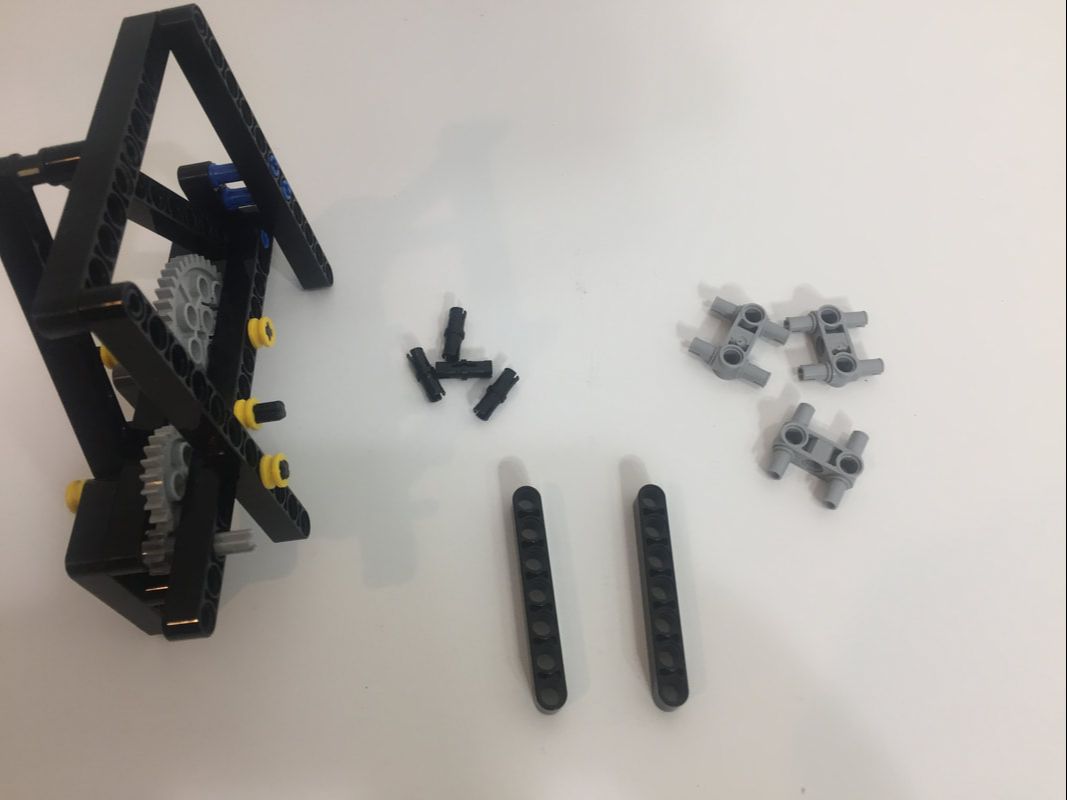
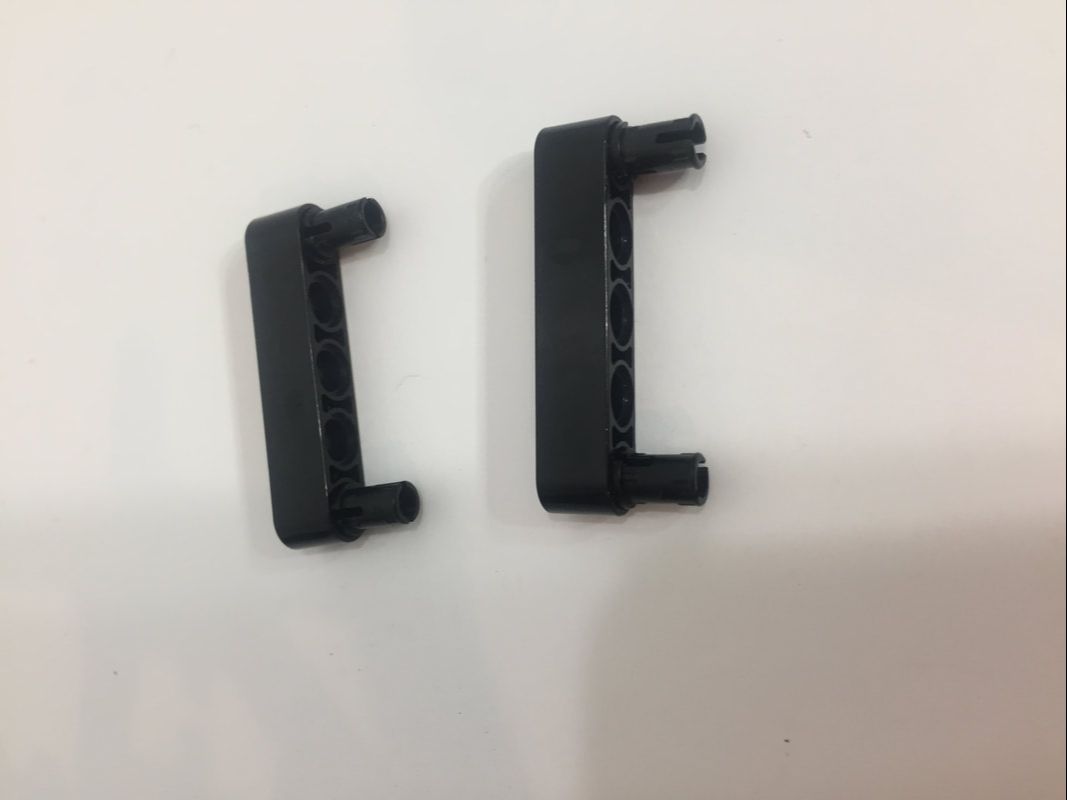
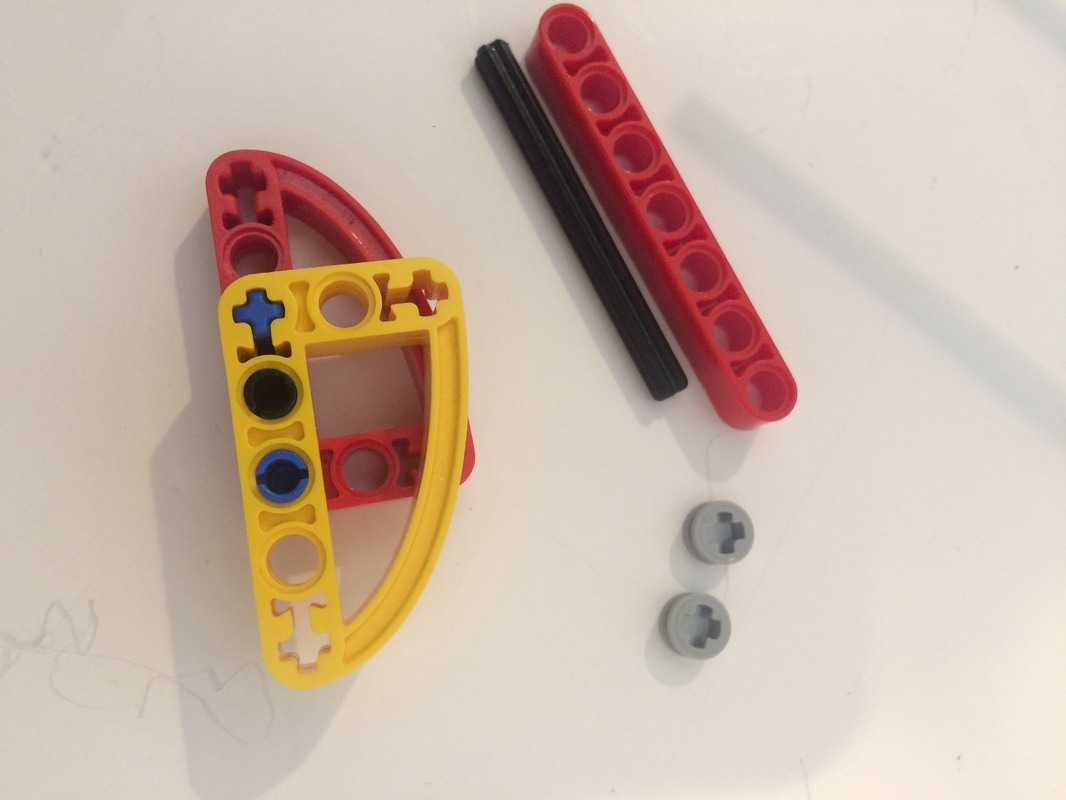
Example LEGO beams for Long-Leg Klann
Here's how this long-legged version of Klann's linkage compares to his patented version:
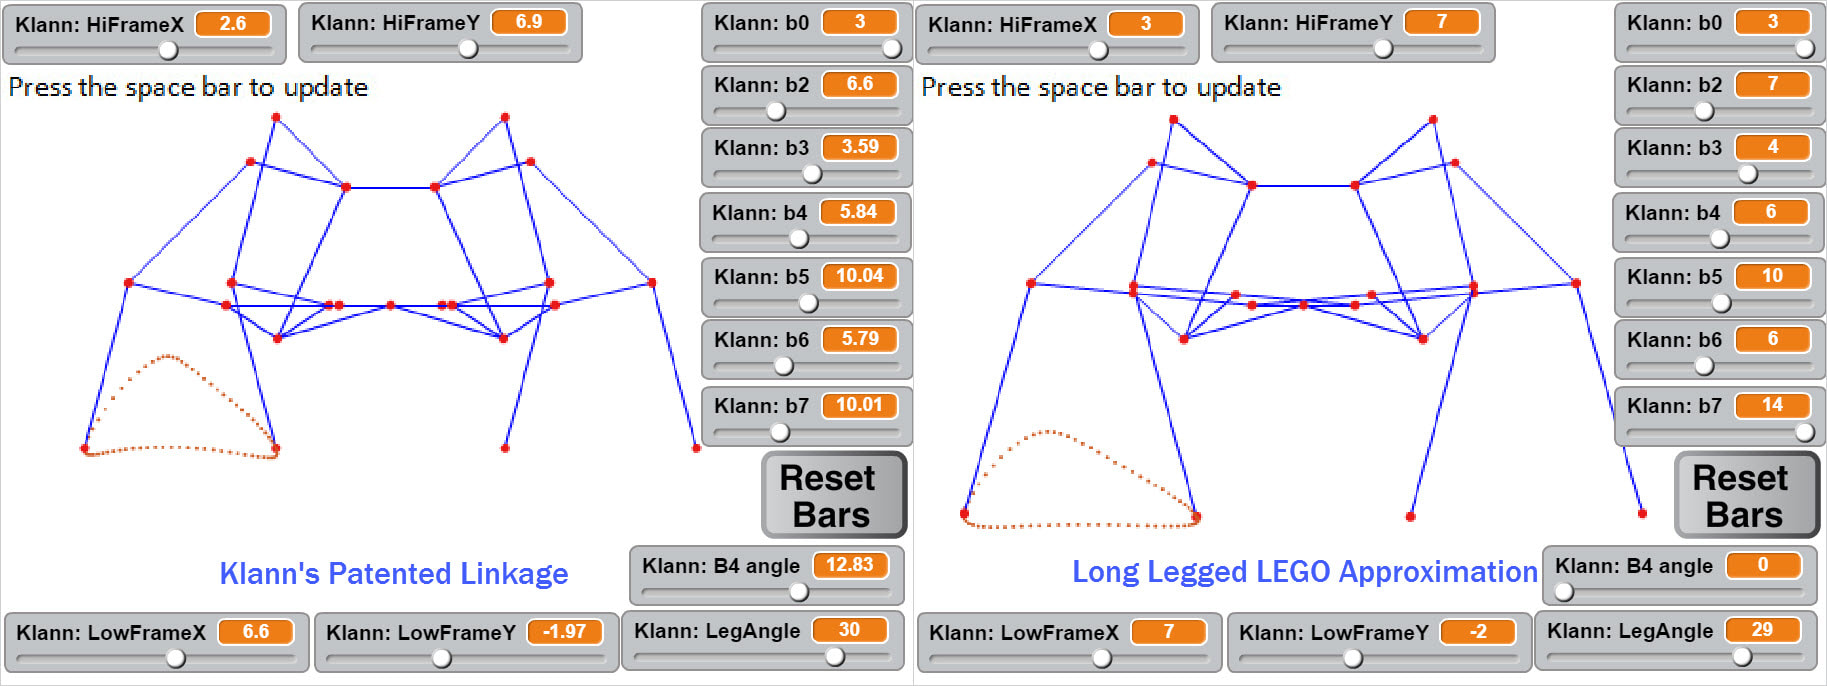
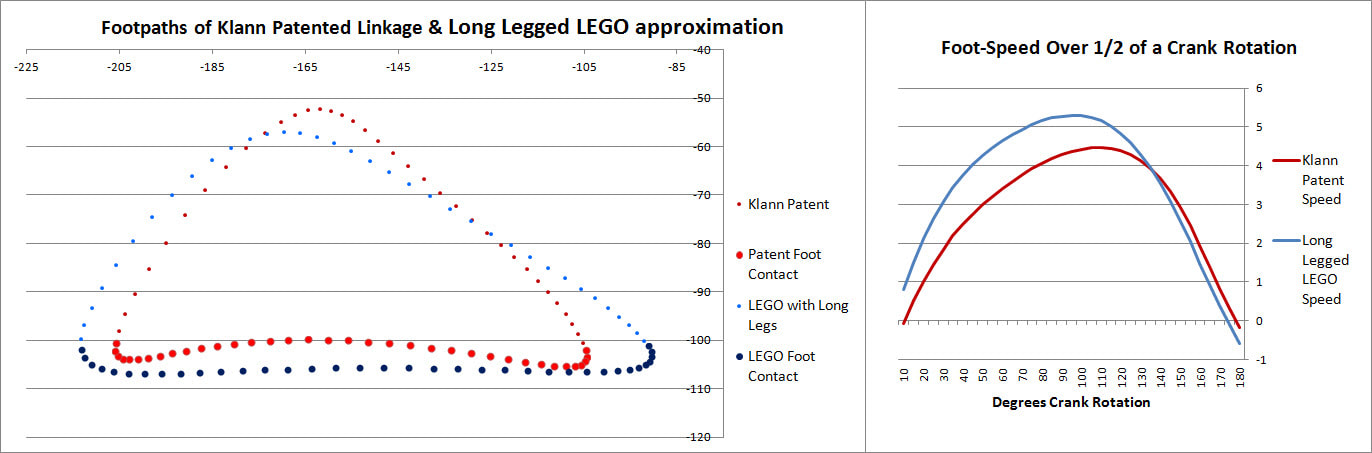
Foot-paths and speed of Klann's patented linkage and this long-legged LEGO approximation
Klann's Spider is a BEAST! Here's a video using LEGO's battery box and the faster #8883 medium motors:
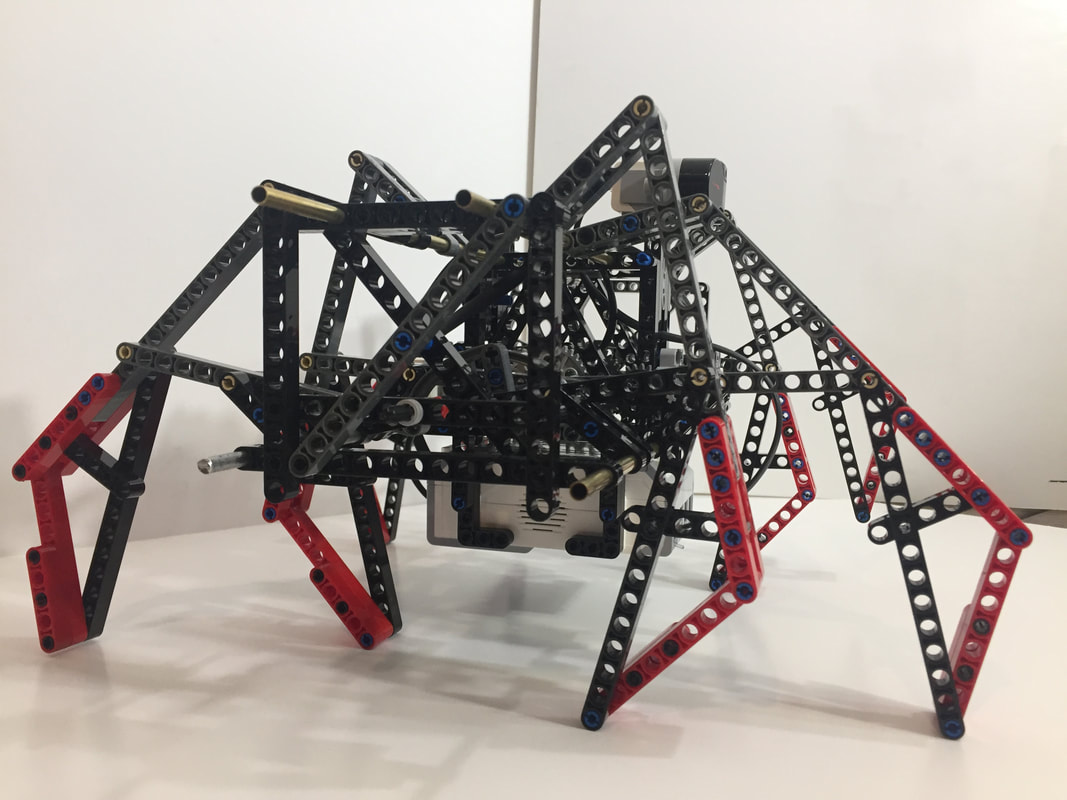
And below is the Mindstorms version:
Let's build it!
Overview
Linkage: Joe Klann's
Build Difficulty: Medium to Hard
Klann's Characteristics:
1. 8 Legs that looks spider-like.
2. Walks well on smooth-ish terrain with great stability and can carry heavy loads, making it a good EV3 candidate.
3. Steerable? Yes, by driving one side forward and the other in reverse, like a tank.
Changes from Ver 2:
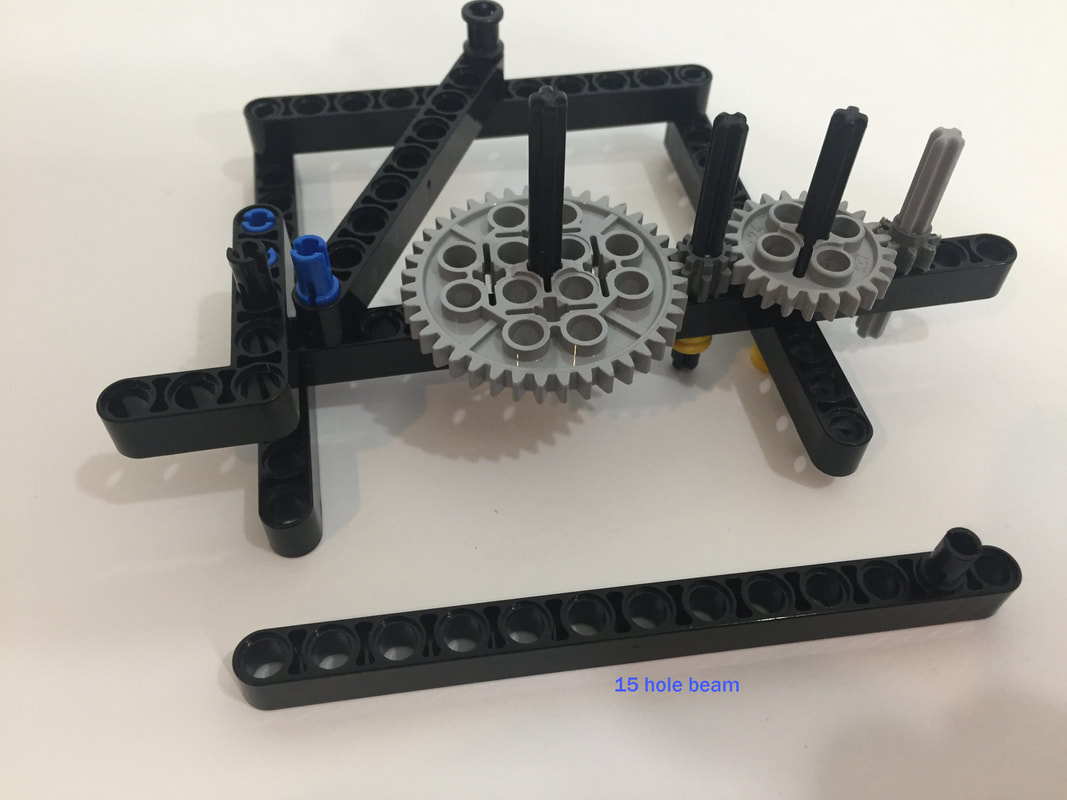
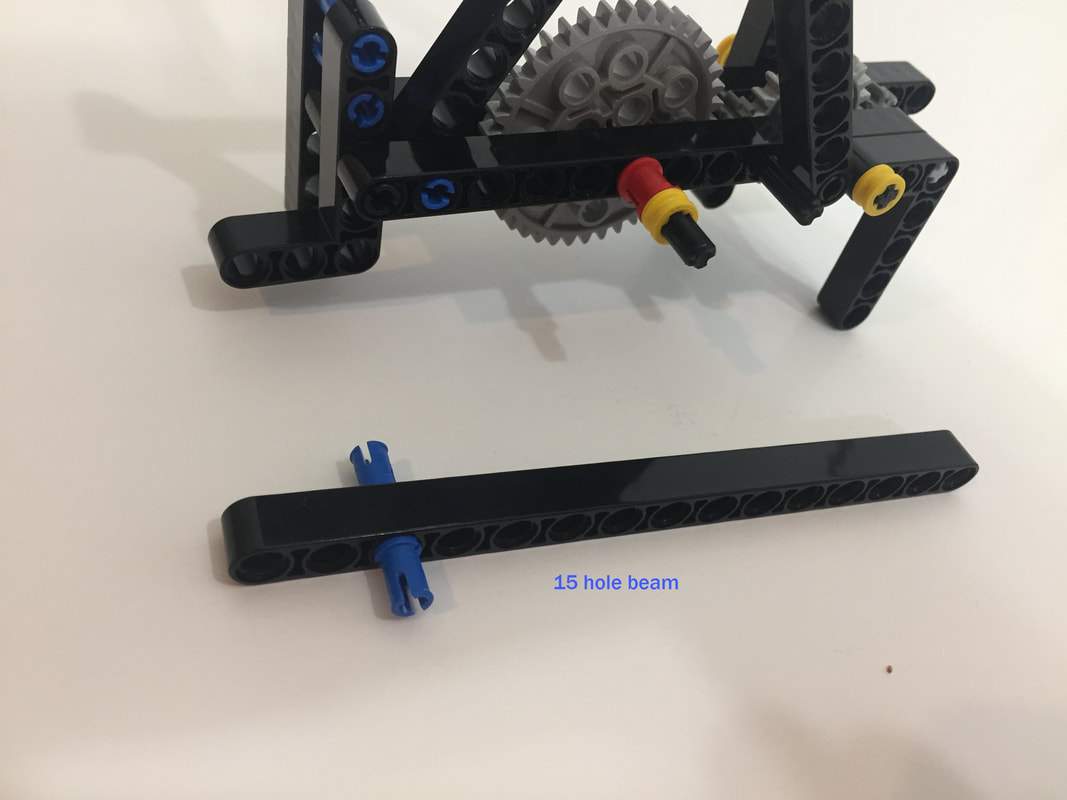
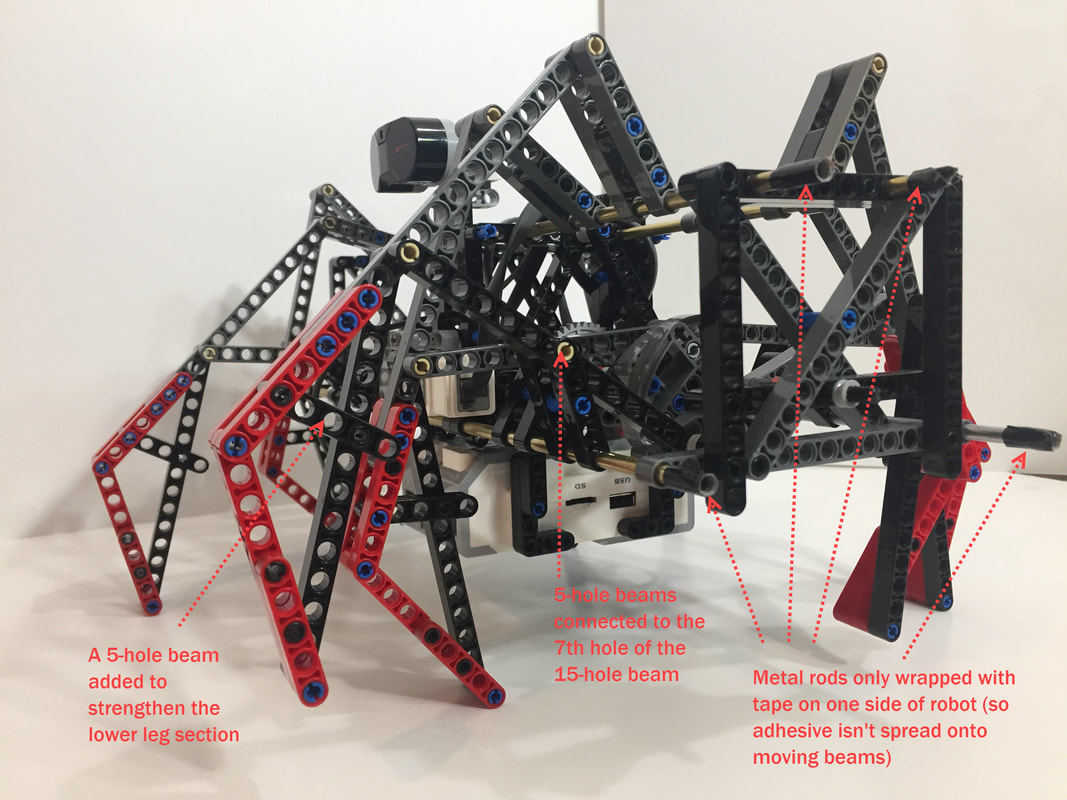
1. The length of the lower leg section was increased by 4 holes by switching from an 11-hole beam to a 15-hole beam.
2. Both the EV3 brick and battery box are mounted underneath the frame.
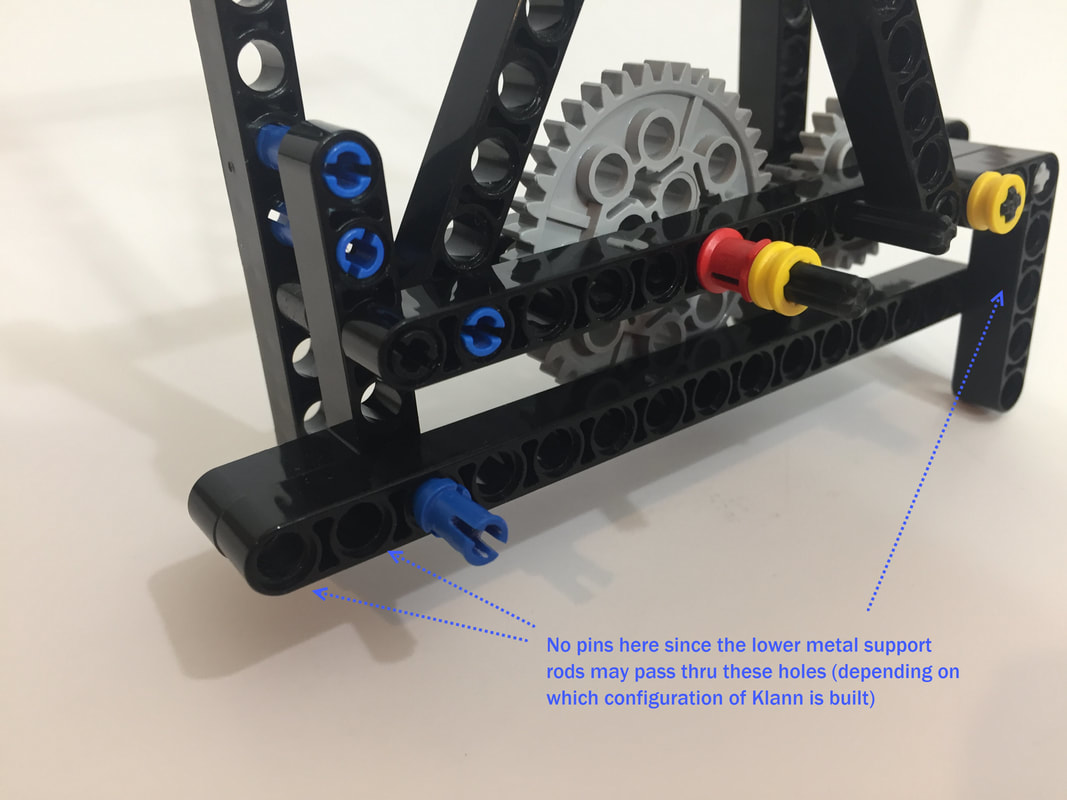
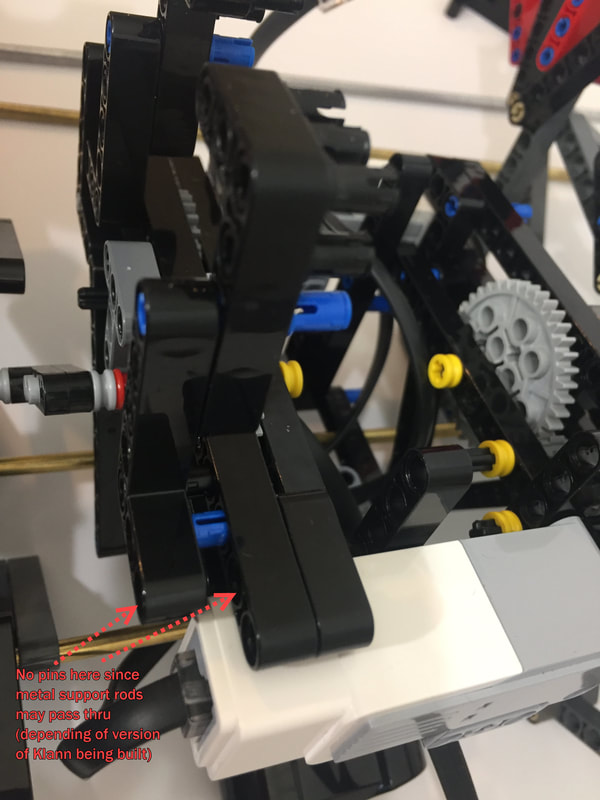
3, The frame was modified to allow metal rods to be used for the lower support rods. However, XL motors won't fit, only medium motors.
4. The longer, lower leg sections have a 29 degree bend described here, and no longer use LEGO's bent beams.
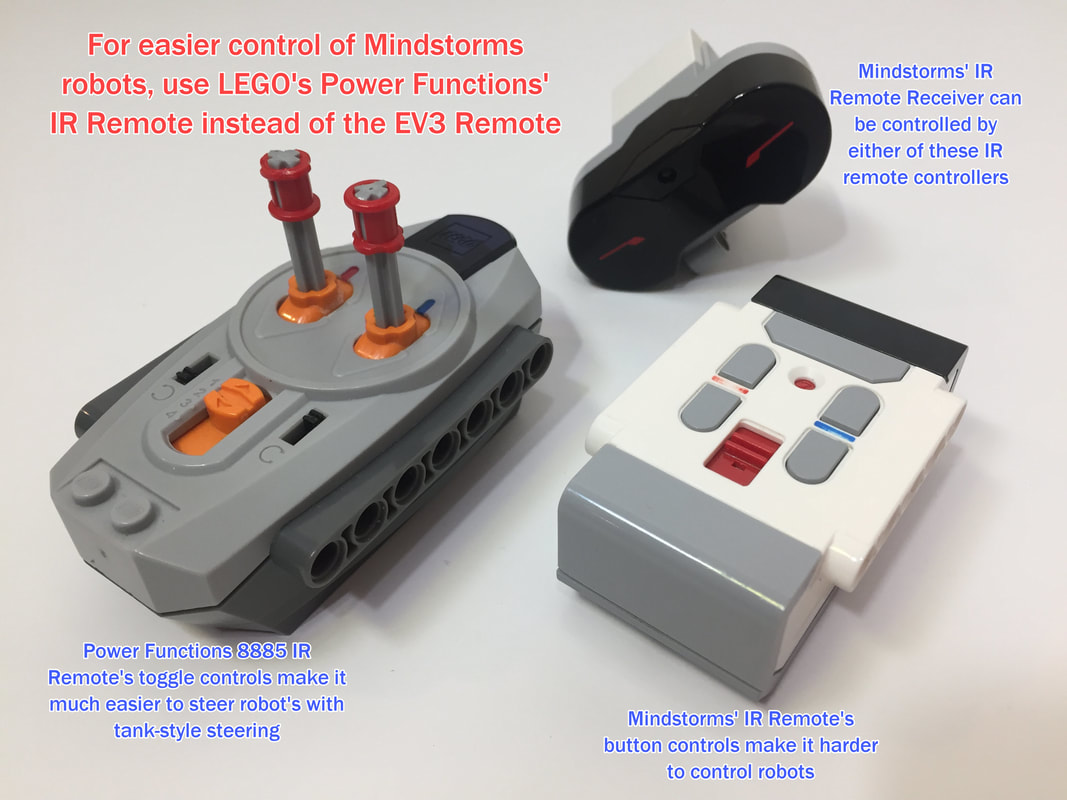
Parts Used: In addition to the Technic beams, pins, gears, etc., the battery box version uses LEGO's Power Functions IR RX 8884 remote receiver which I controlled with a 8885 IR remote, 2 LEGO 8883 medium motors, and a 8881 battery pack. The Mindstorms version uses 2 of the 45503 medium motors (part #99455). Also, to better bear the robot's weight I used 3/16" OD brass tubes for the leg's long connections to the frame (aluminum rods are fine too) rather than LEGO's plastic axles.
For batteries I recommend using Lithium Ion AA batteries as they are lighter, last longer, and will improve walking performance.
We purchased the plastic LEGO parts from Bricklink
We purchased the motors, controllers and battery box from Amazon
We purchased the metal support rods from our local hardware store
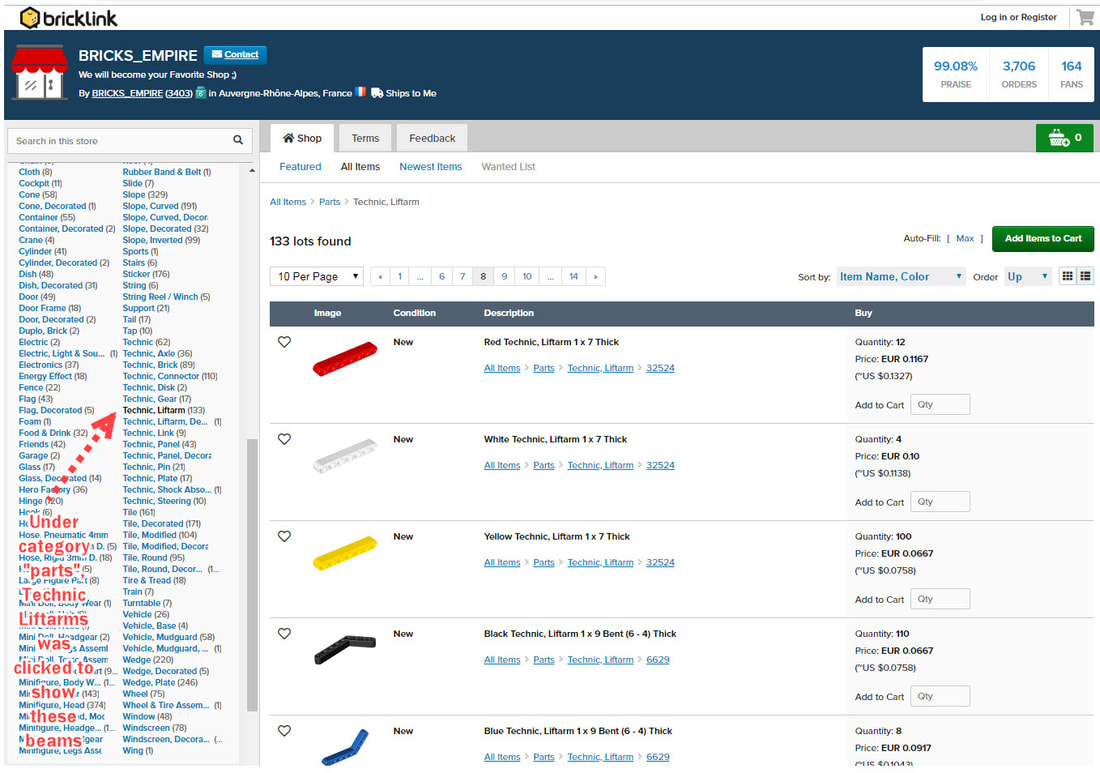
If you've never used Bricklink, an easy way to browse for parts is by going to a larger store. Here's a list of stores in the USA.
And below is an example search in a store for Technic beams.
Changes from Ver 2:
1. The length of the lower leg section was increased by 4 holes by switching from an 11-hole beam to a 15-hole beam.
2. Both the EV3 brick and battery box are mounted underneath the frame.
3, The frame was modified to allow metal rods to be used for the lower support rods. However, XL motors won't fit, only medium motors.
4. The longer, lower leg sections have a 29 degree bend described here, and no longer use LEGO's bent beams.
Parts Used: In addition to the Technic beams, pins, gears, etc., the battery box version uses LEGO's Power Functions IR RX 8884 remote receiver which I controlled with a 8885 IR remote, 2 LEGO 8883 medium motors, and a 8881 battery pack. The Mindstorms version uses 2 of the 45503 medium motors (part #99455). Also, to better bear the robot's weight I used 3/16" OD brass tubes for the leg's long connections to the frame (aluminum rods are fine too) rather than LEGO's plastic axles.
For batteries I recommend using Lithium Ion AA batteries as they are lighter, last longer, and will improve walking performance.
We purchased the plastic LEGO parts from Bricklink
We purchased the motors, controllers and battery box from Amazon
We purchased the metal support rods from our local hardware store
If you've never used Bricklink, an easy way to browse for parts is by going to a larger store. Here's a list of stores in the USA.
And below is an example search in a store for Technic beams.
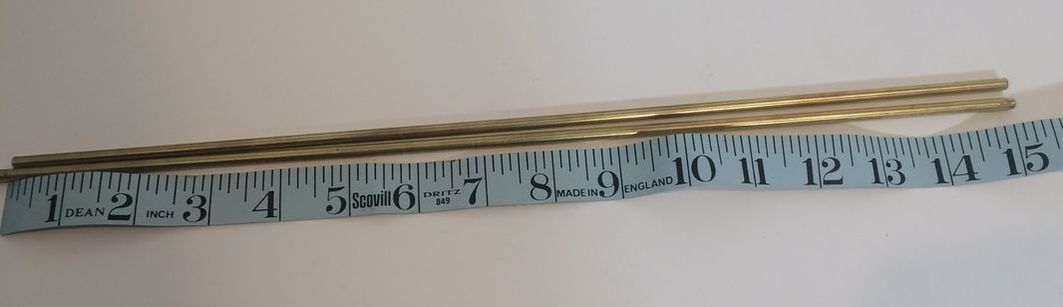
For Klann's 4 support rods I used 3/16 inch OD Brass tube, but solid aluminum rods work fine as well and may have less risk of bending. All 4 rods were cut to 15 inches in length, and be sure to file the cut smooth so that the legs parts can slide on easily.
For Klann's 4 support rods I used 3/16 inch OD Brass tube, but solid aluminum rods work fine as well and may have less risk of bending. All 4 rods were cut to 15 inches in length, and be sure to file the cut smooth so that the legs parts can slide on easily.
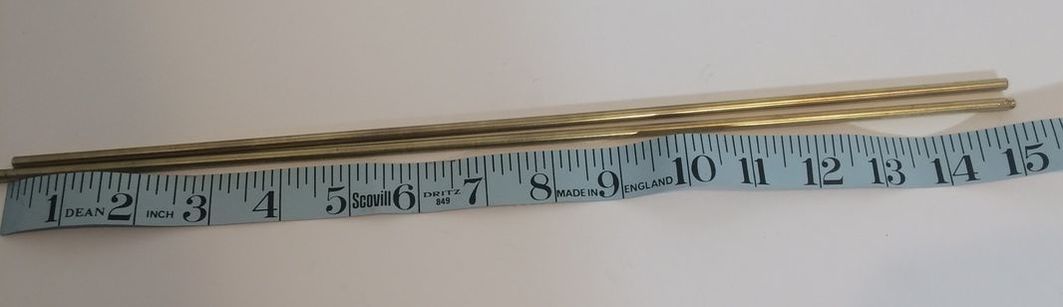
Klann Ver 3 needs 4 metal rods/tubes, cut to 15 inches in length
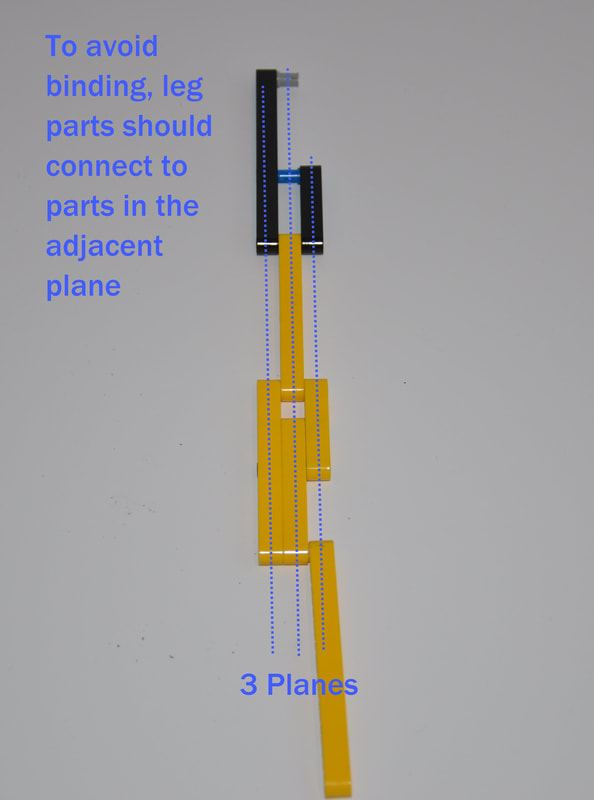
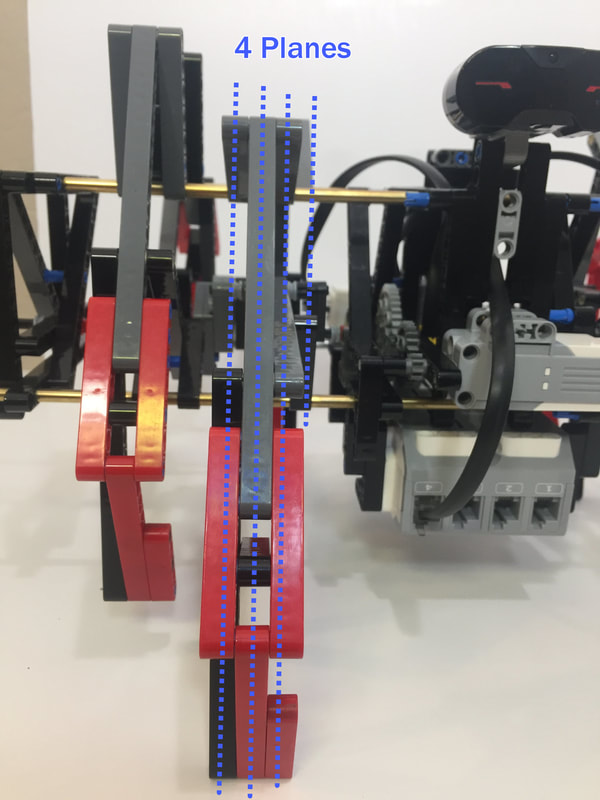
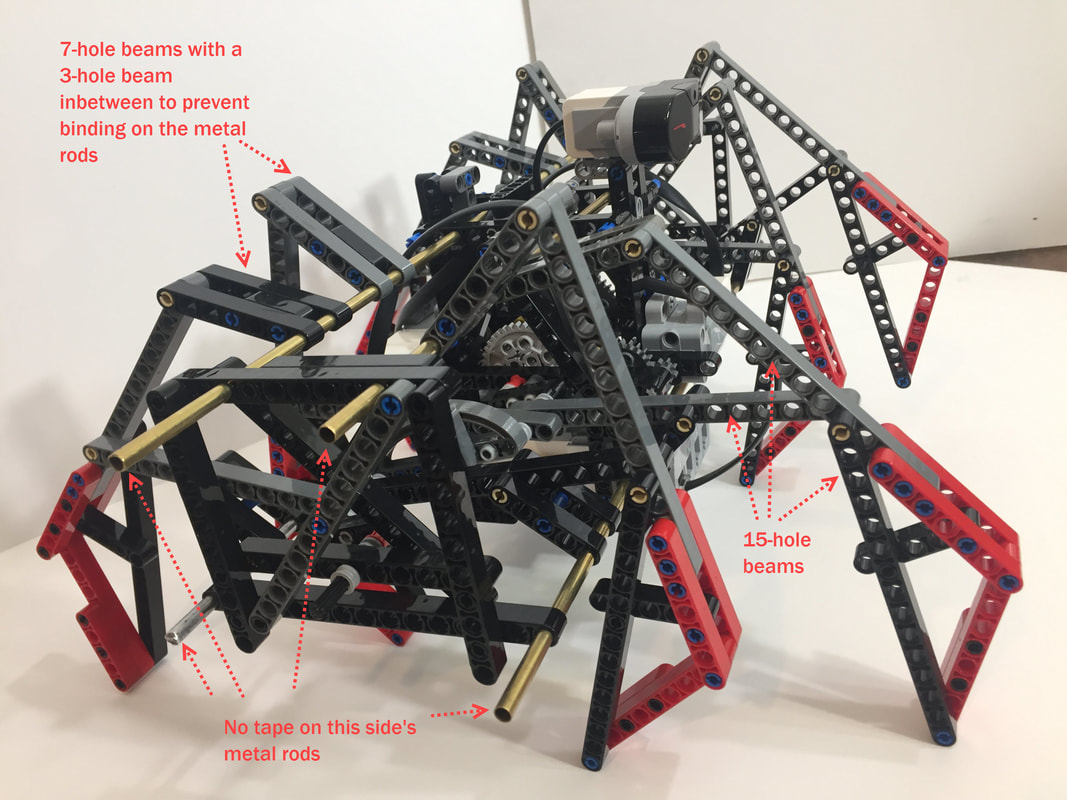
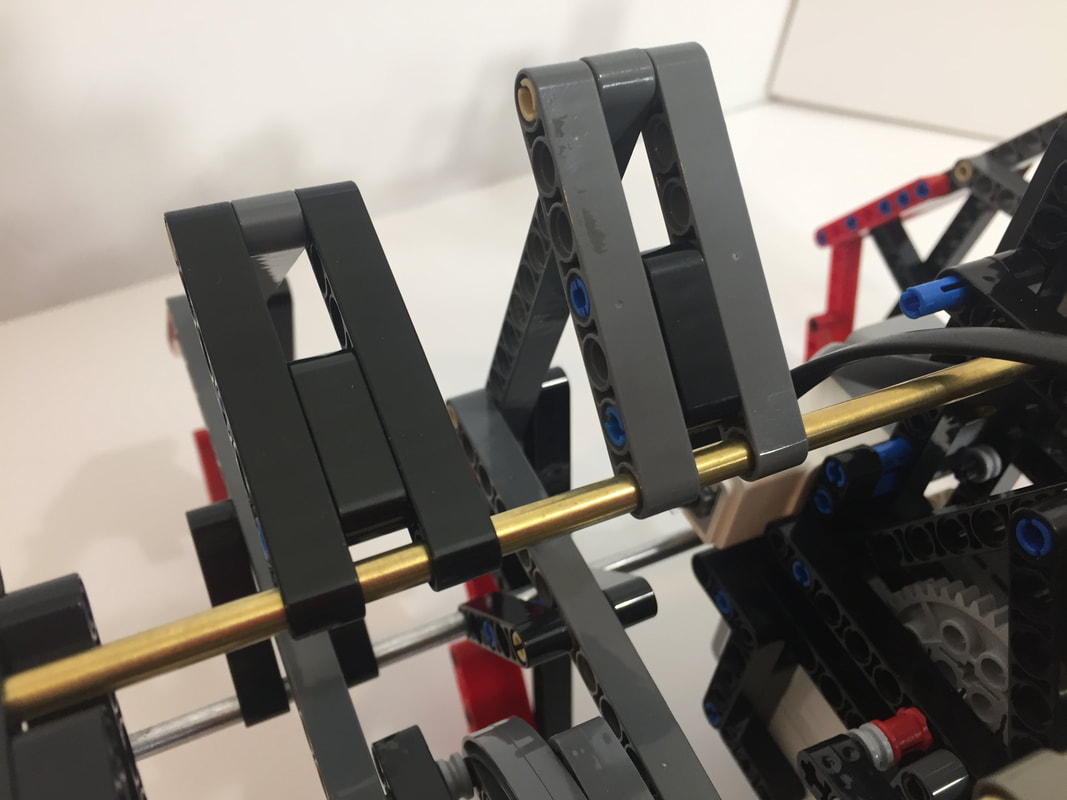
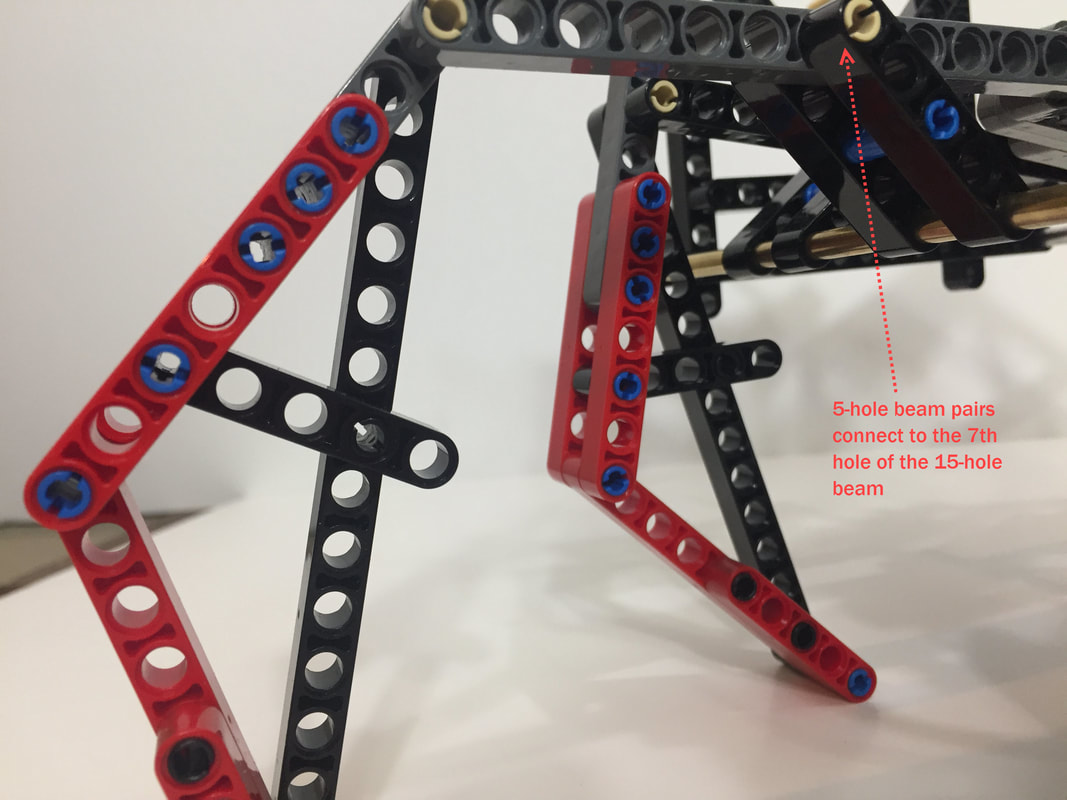
To Build Straight Legs that don't Bind or Jam, Make Sure Leg Parts Connect to Parts in Adjacent Planes
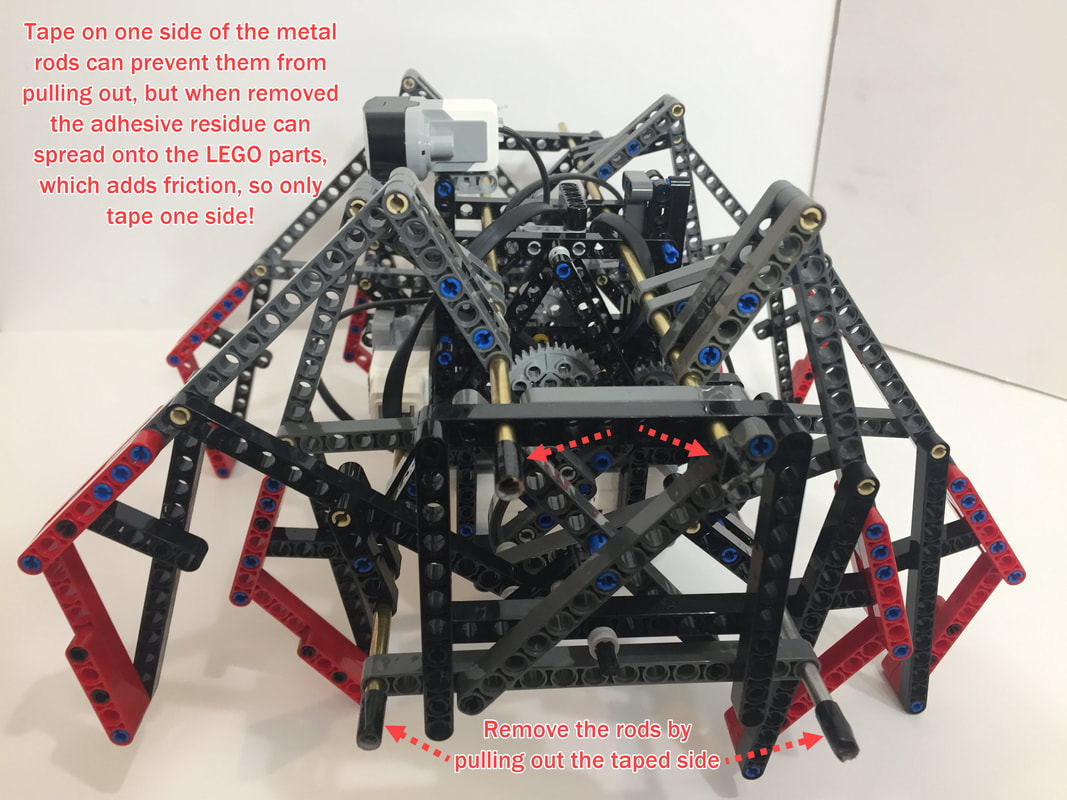
Hot glue or sections of pipe cleaner are better options than tape
How to Build
General Comments:
1. Walkers stress frames more than wheeled vehicles so strive to utilize triangles in frames.
2. Be sure to use frictionless pins for movable joints!
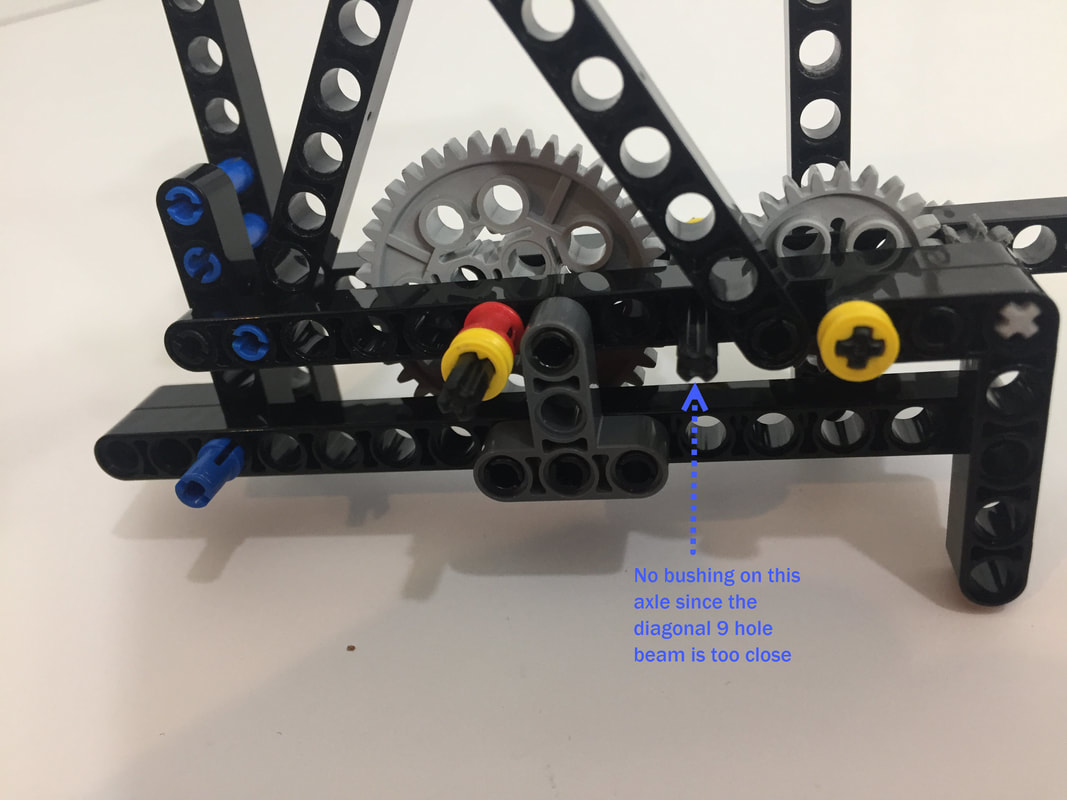
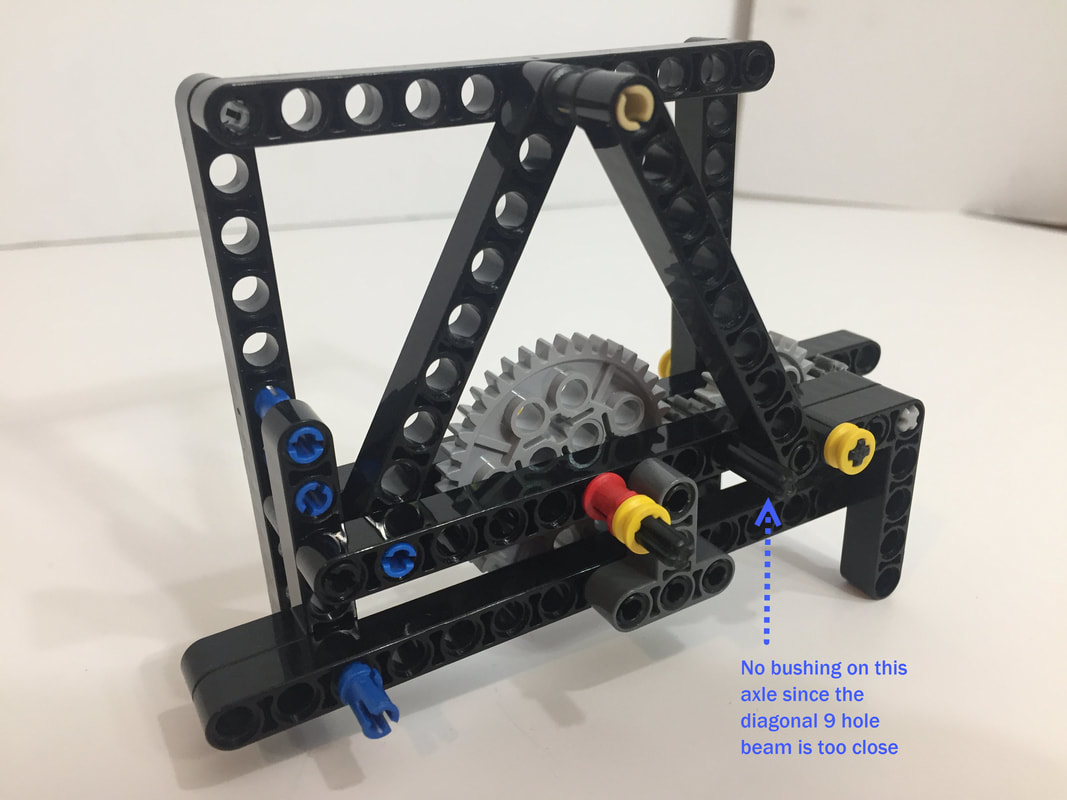
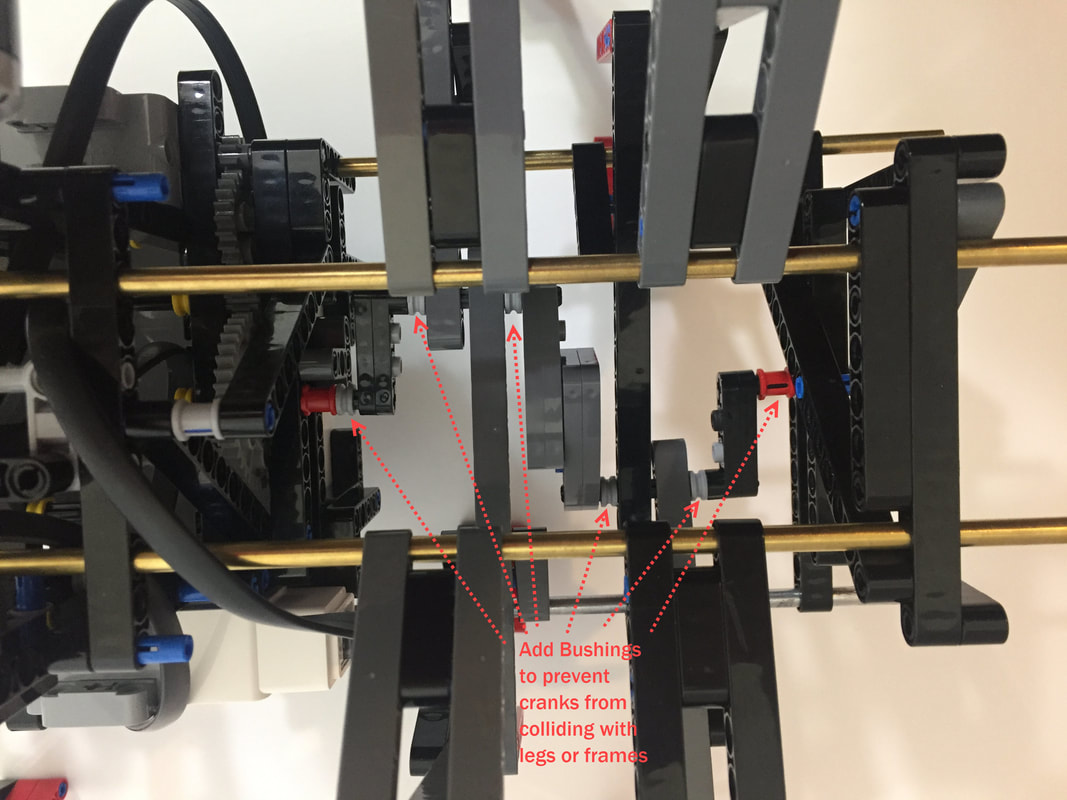
3. Take care to space each bar properly, with the bar's joint on the correct side, and with the use of bushings on axles as necessary. If the parts collide the linkage can lock up and gears will grind, and you will find it is much easier to get your leg spacing correct before assembling the entire walker than it is to fix the legs in a fully assembled walker! You will find details on how to properly space the leg parts later in these instructions.
If leg parts aren't connected to parts in the adjacent plane the linkage can be twisted, which will cause the leg joints to bind. If your legs don't rotate easily, make sure your legs aren't twisted and that each part is in its correct plane as pictured below.
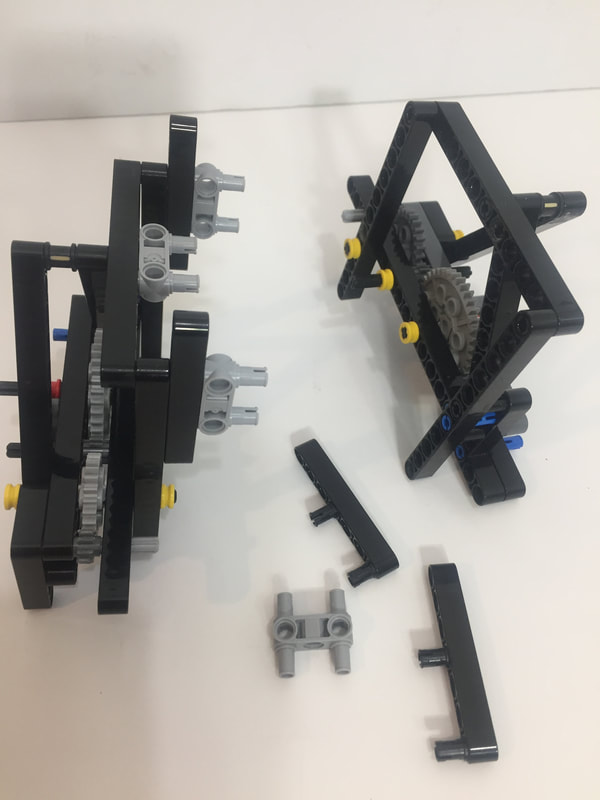
We'll start by building a lightweight, yet strong, triangle-based frame. Make two of the following frame sides.
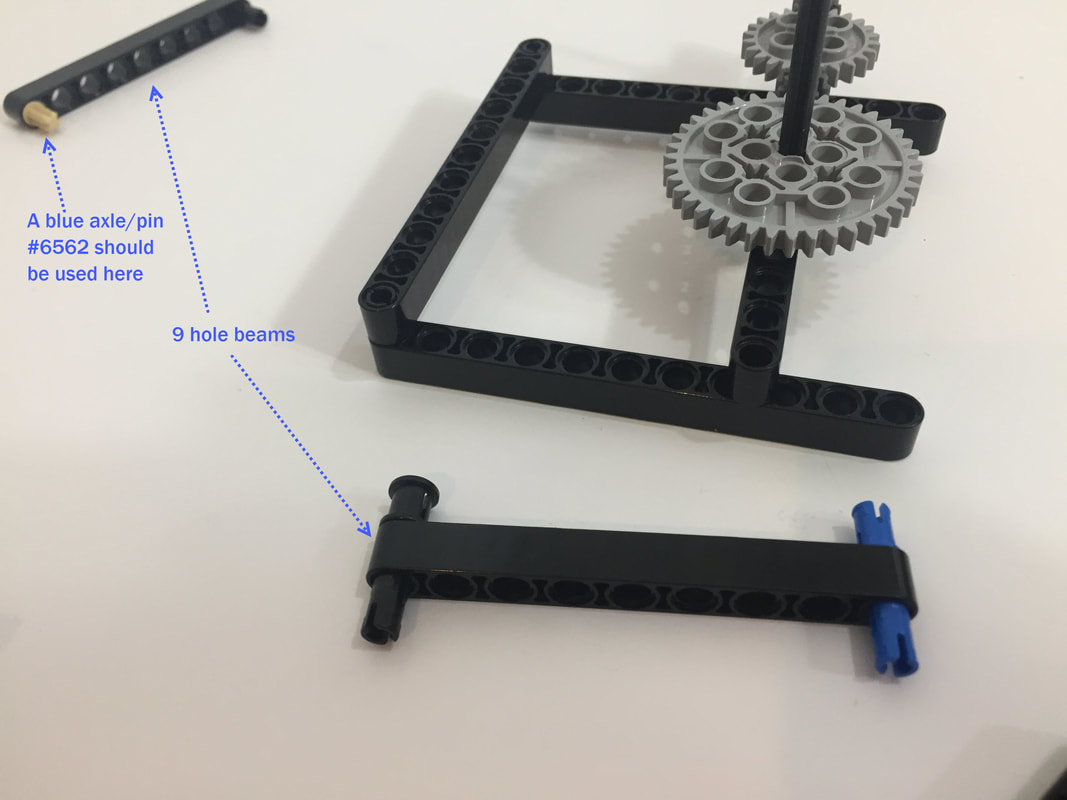
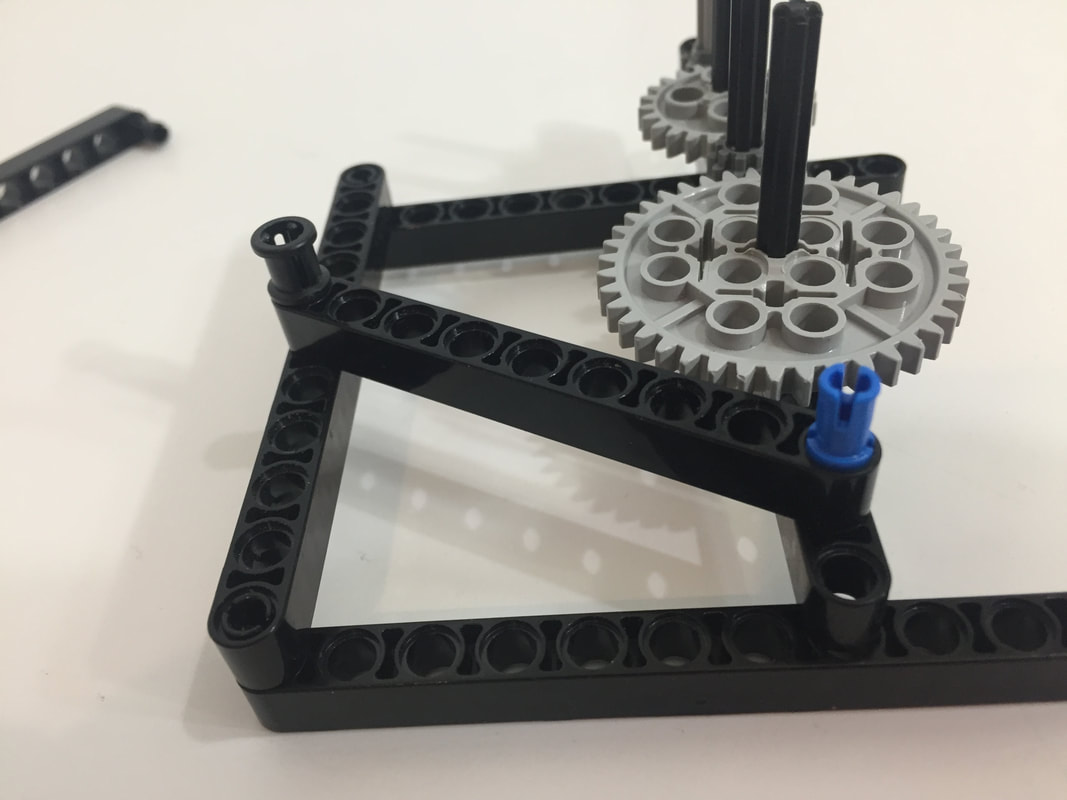
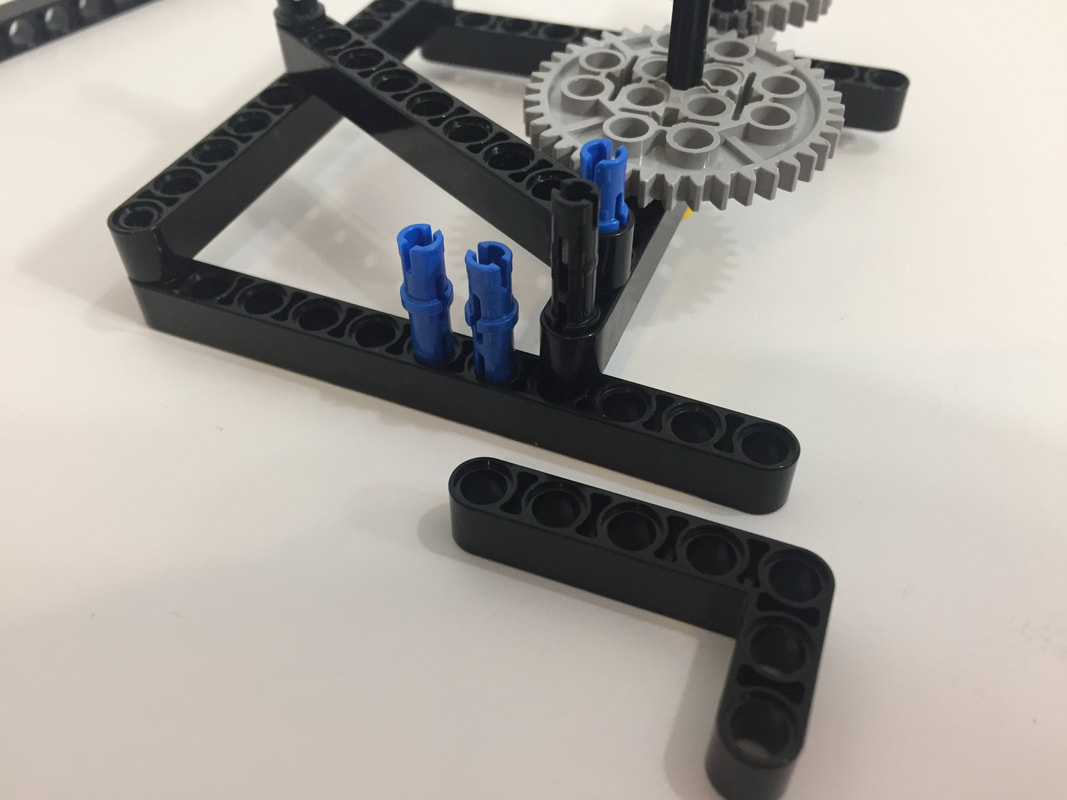
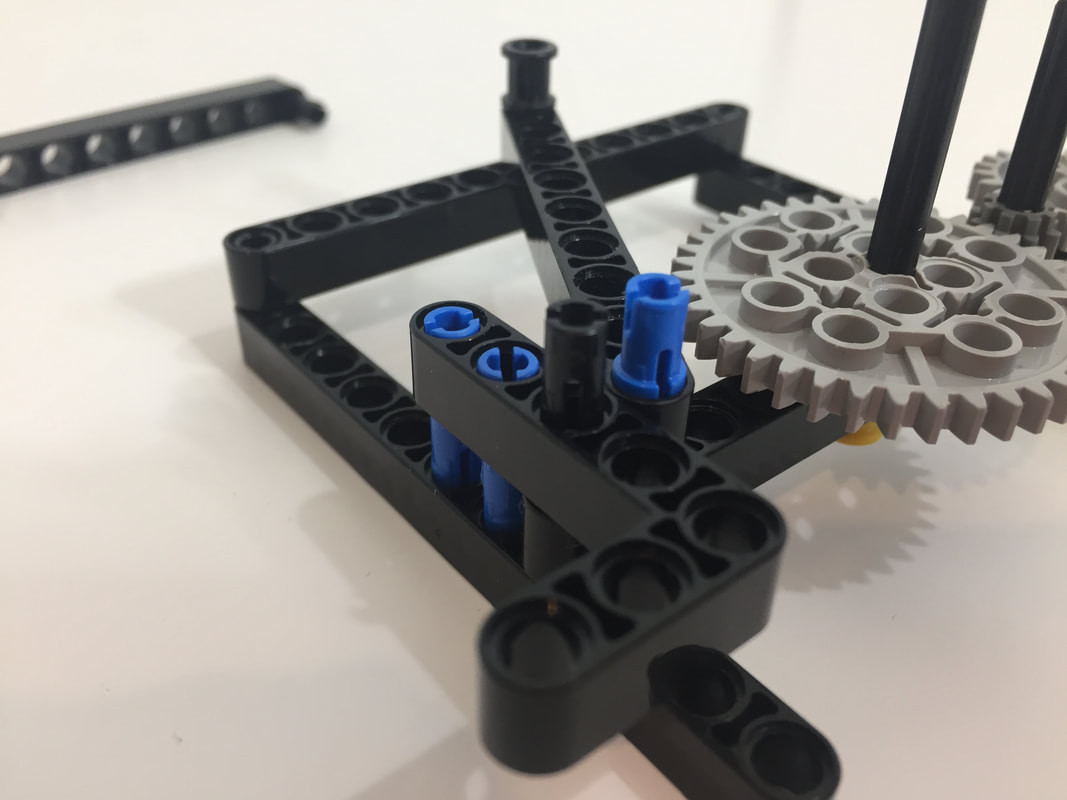
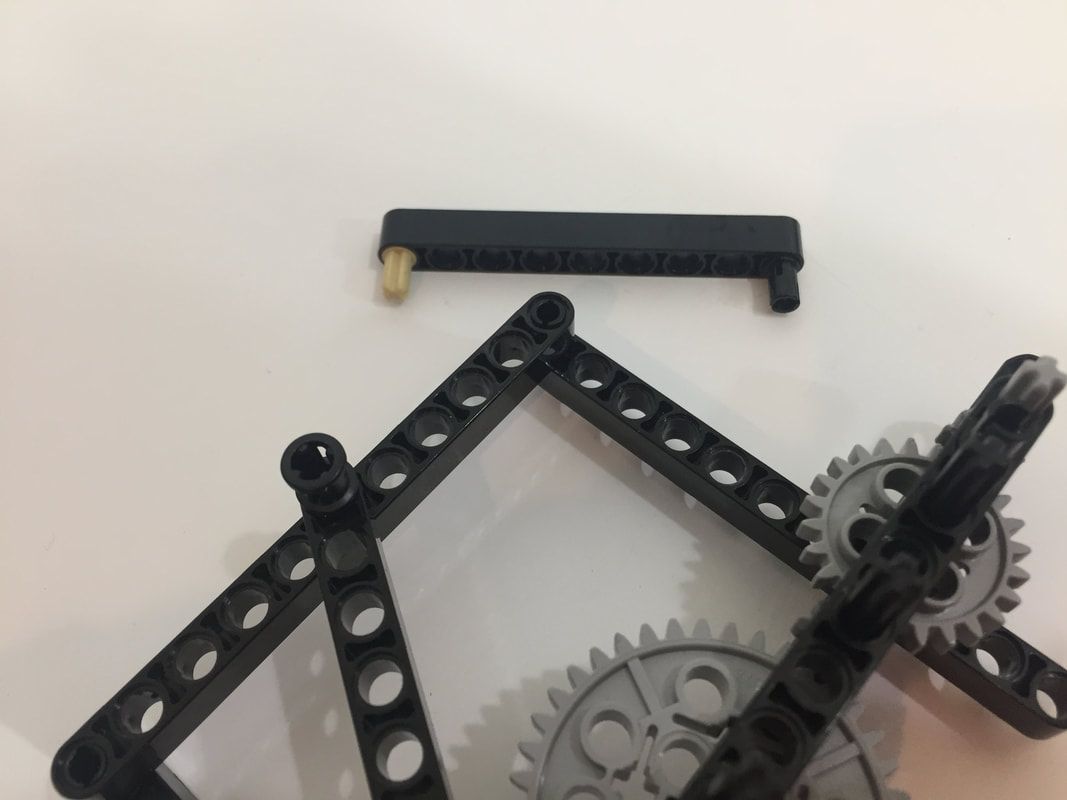
This finishes one side of Klann's frame. Build a 2nd one, identical to this one.
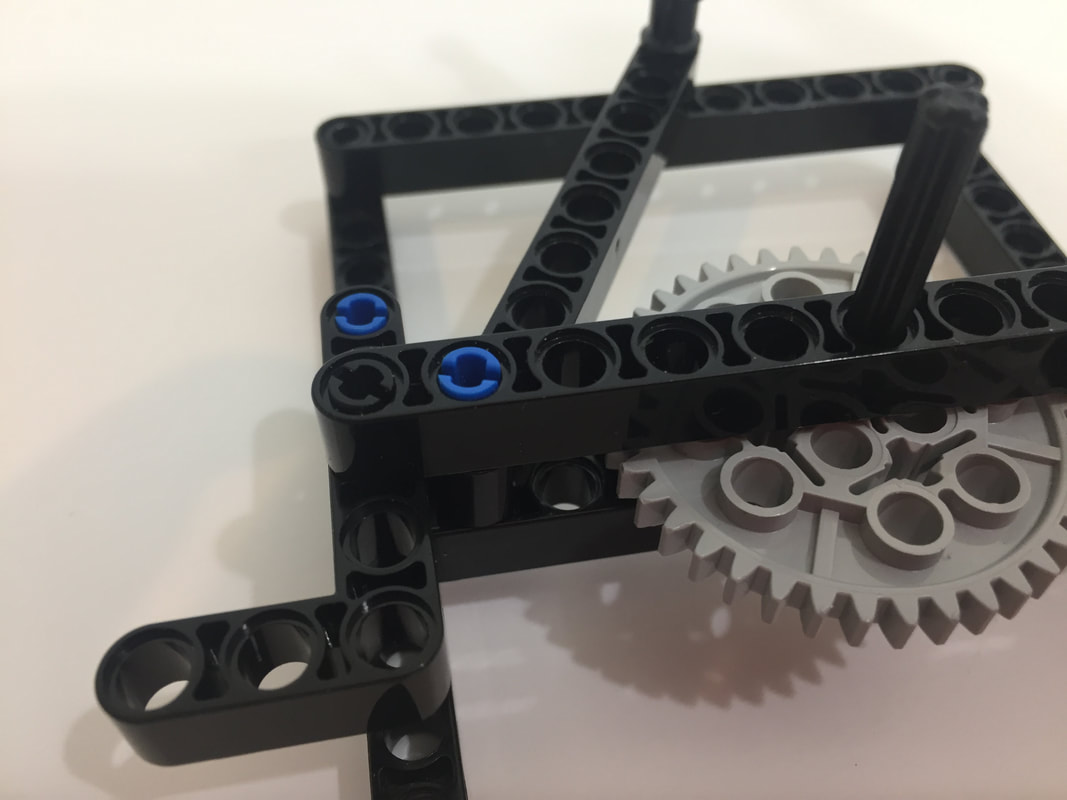
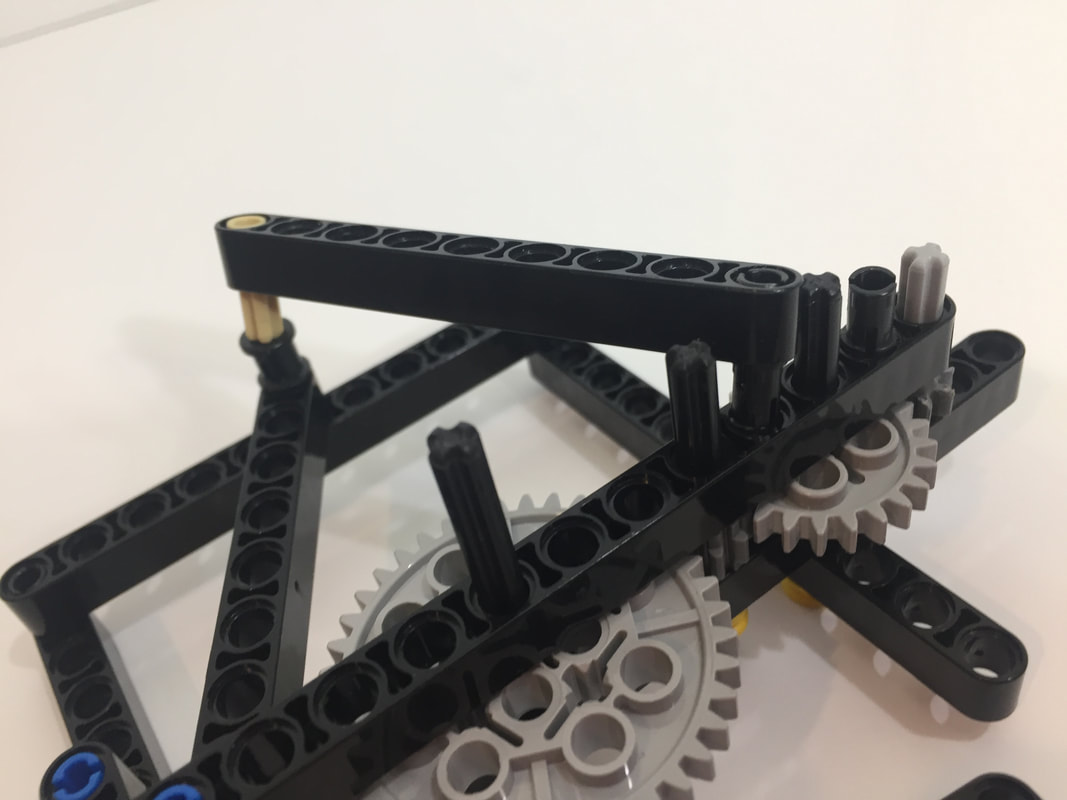
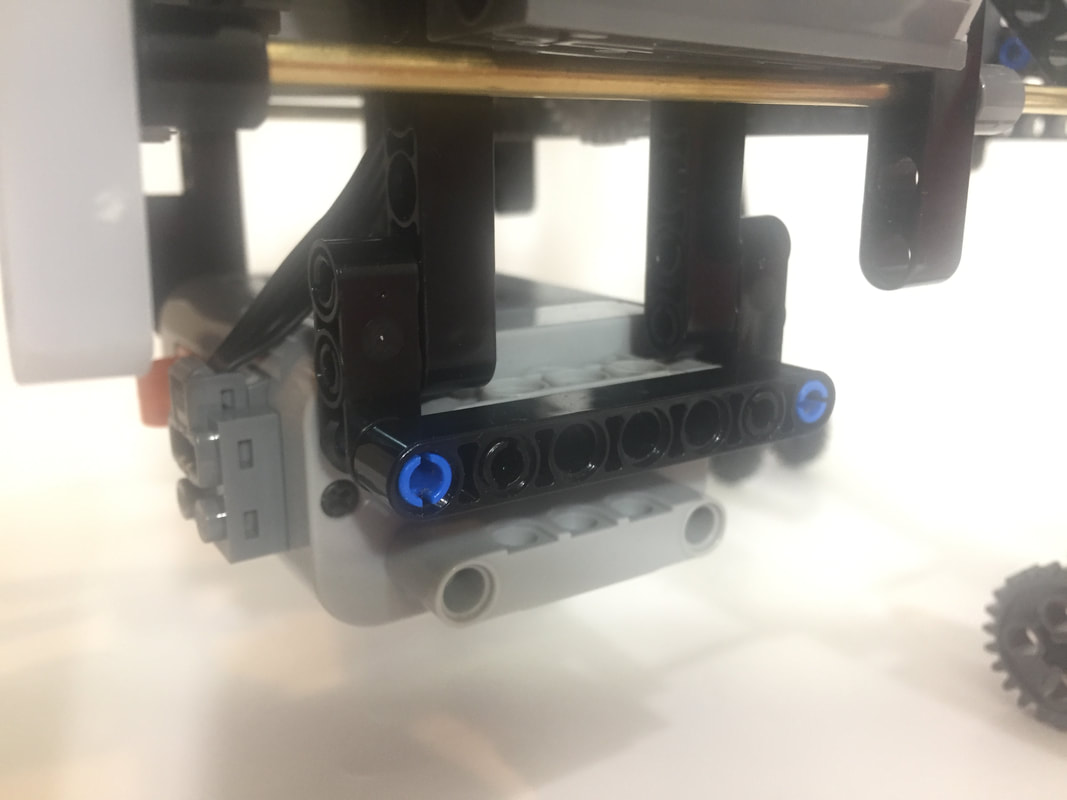
Below are some more images of the frame.
Below are some more images of the frame.
Next, connect the two sides of the frame
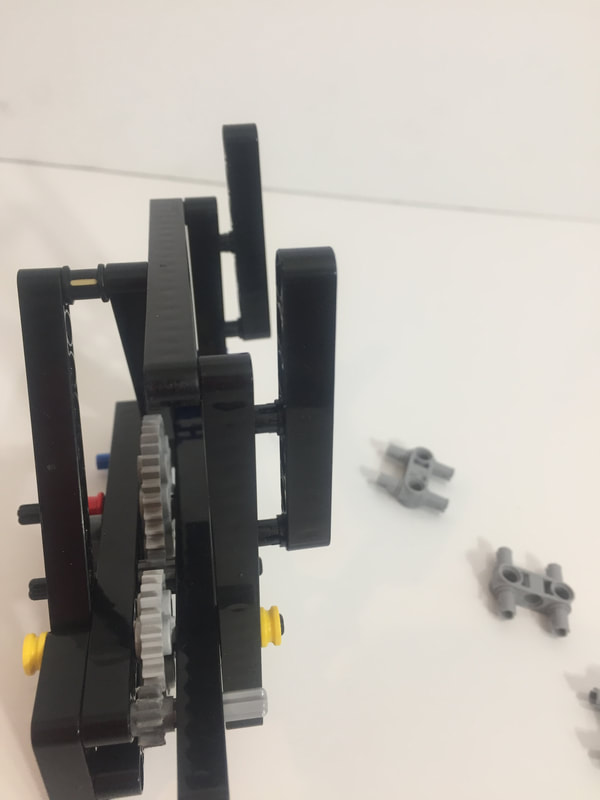
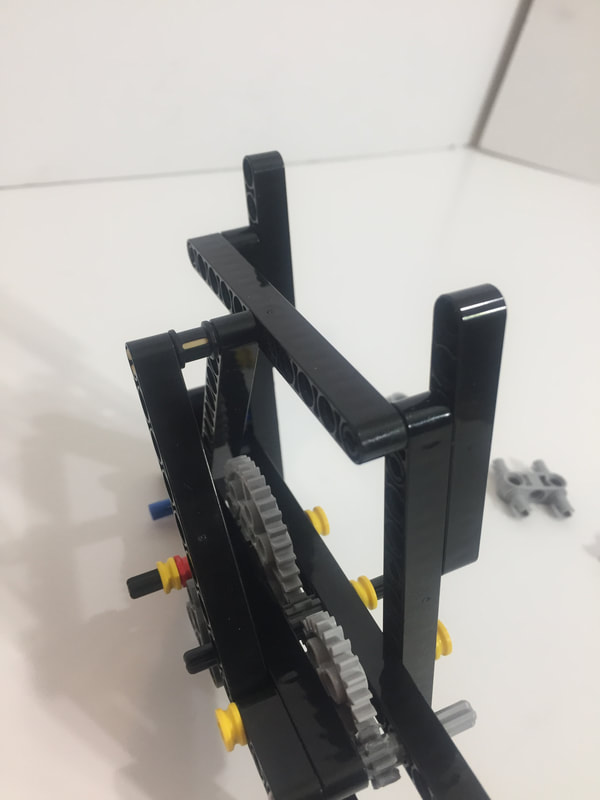
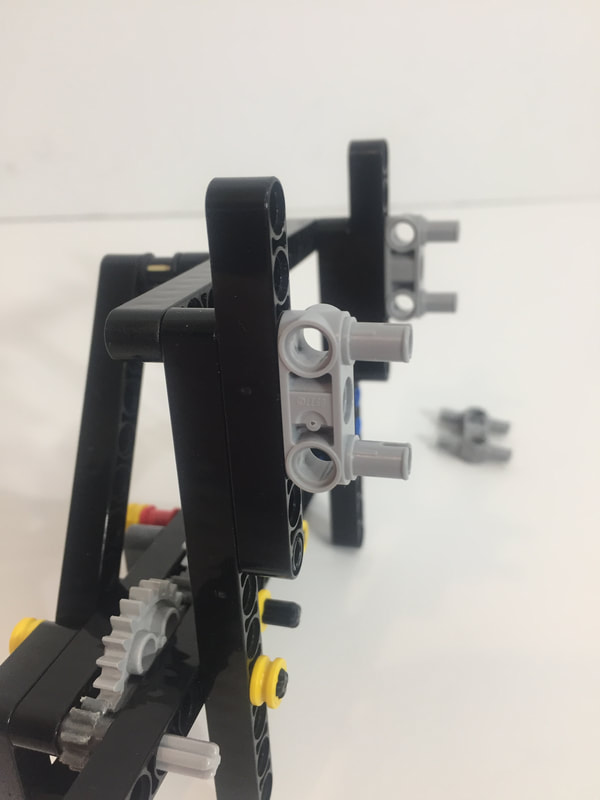
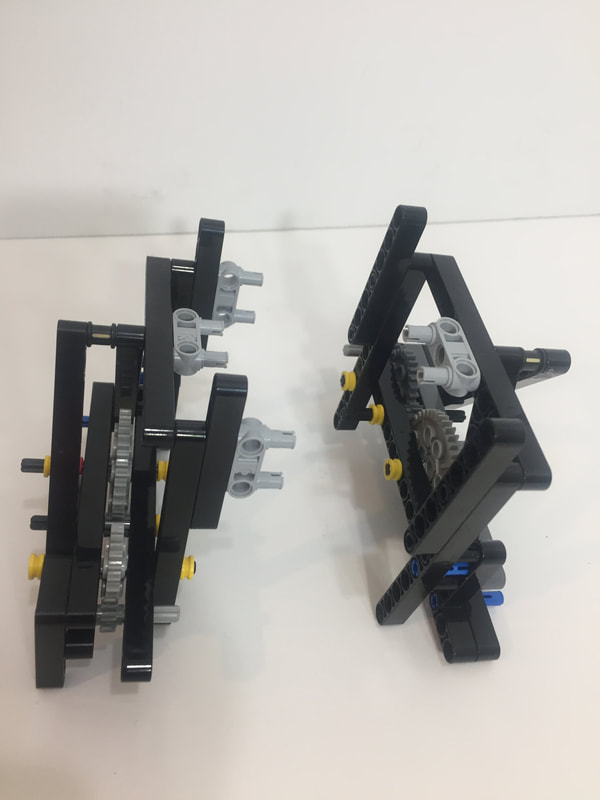
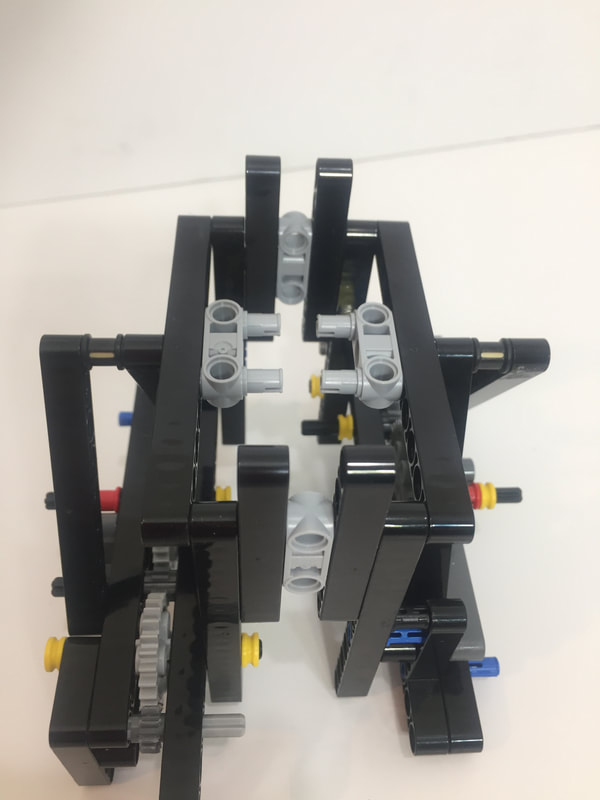
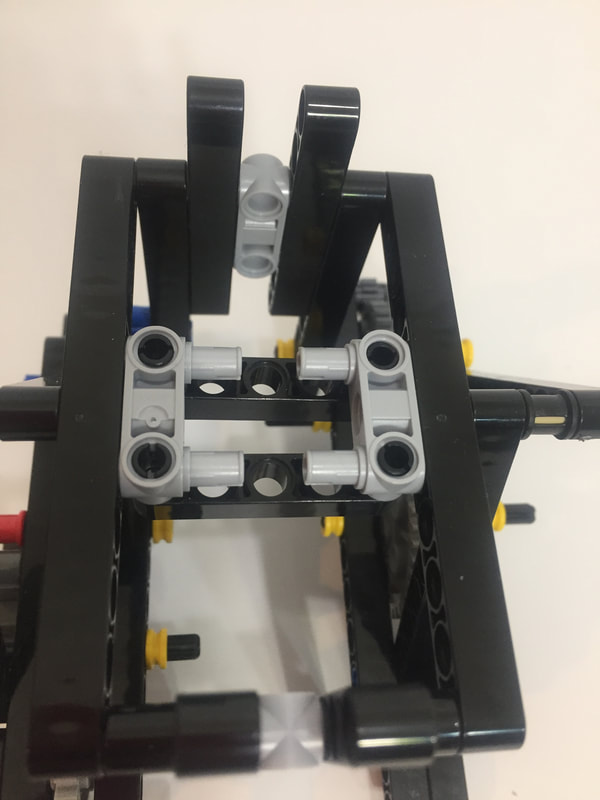
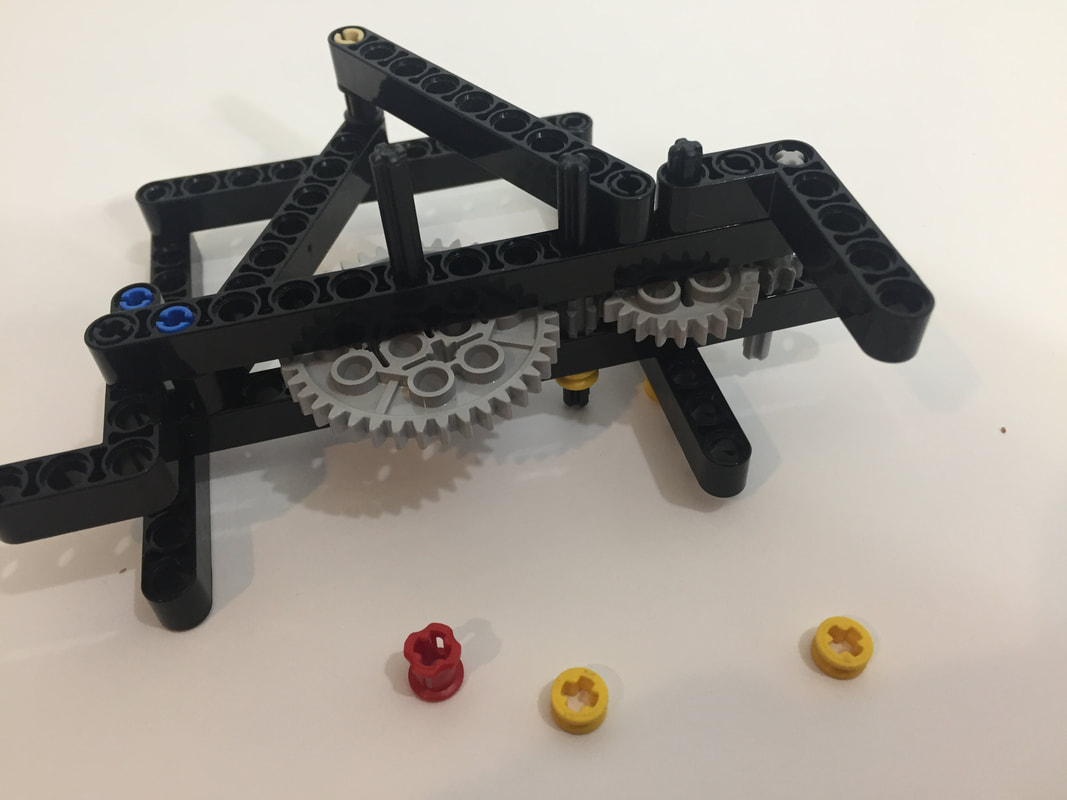
Below are a few more images of the completed frame.
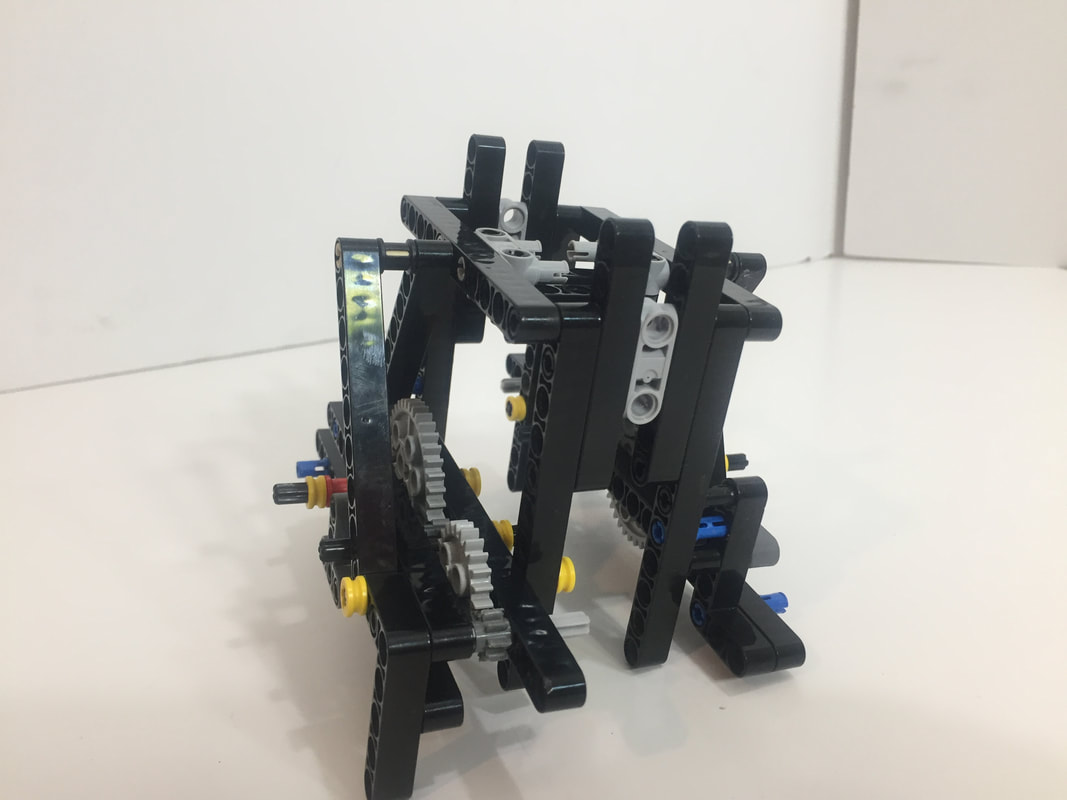

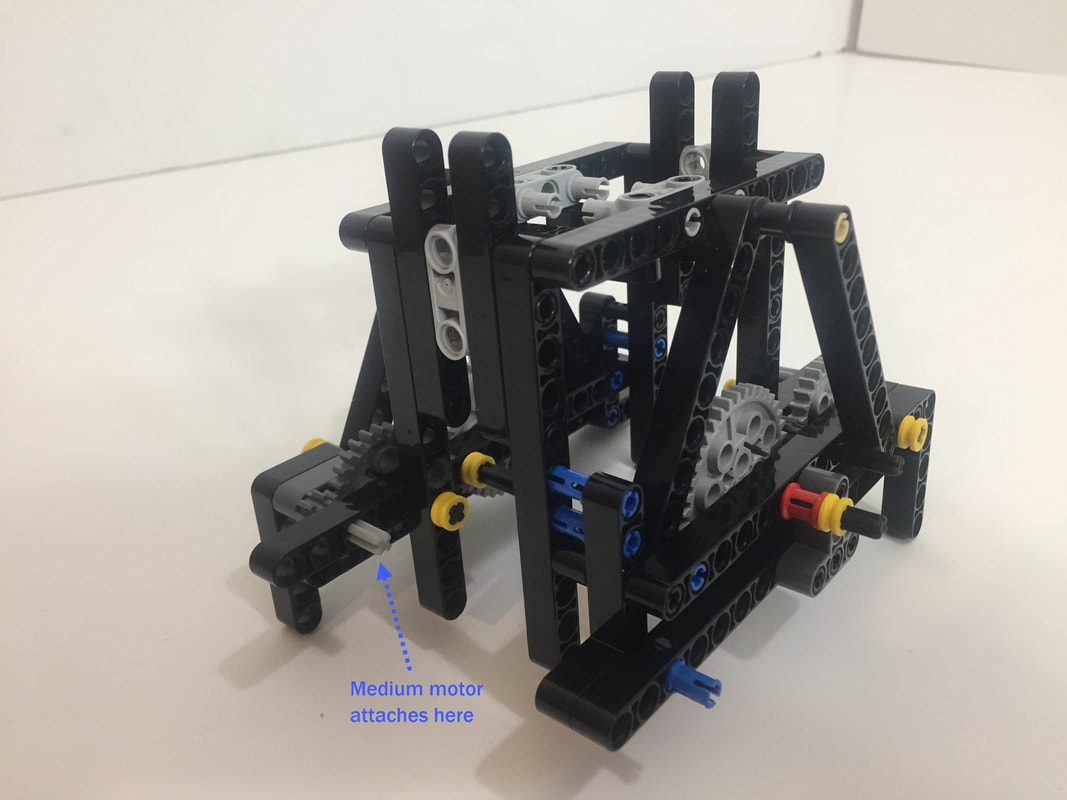
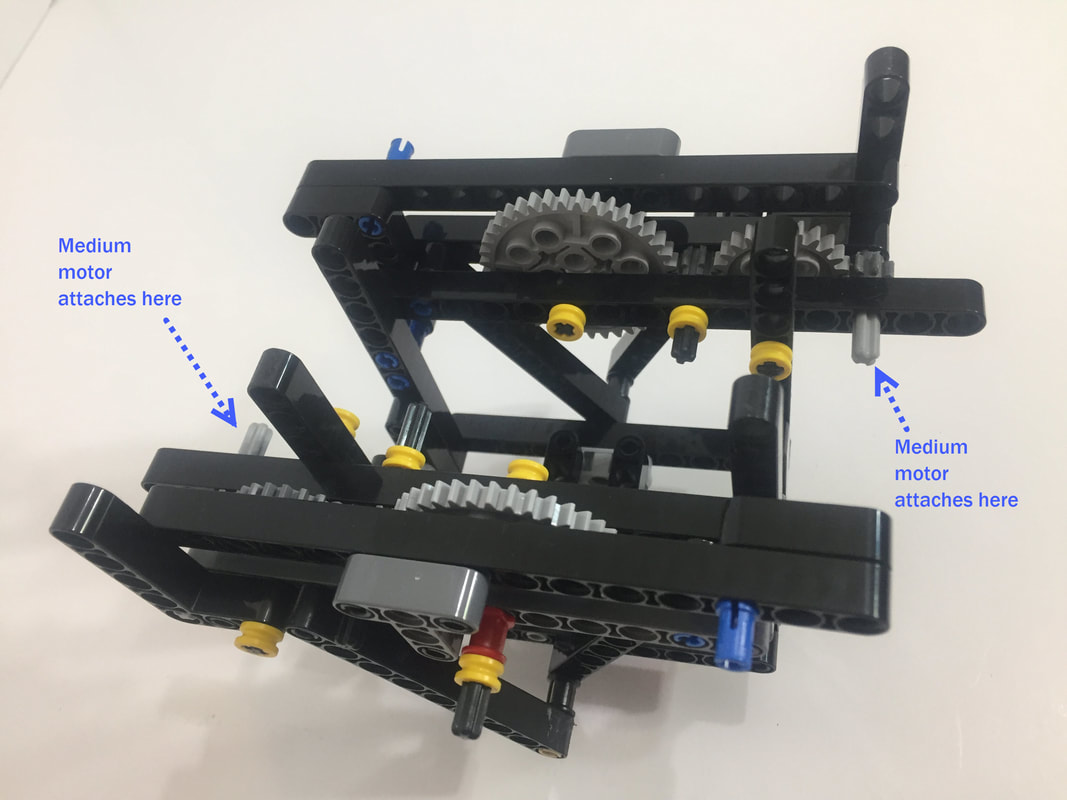
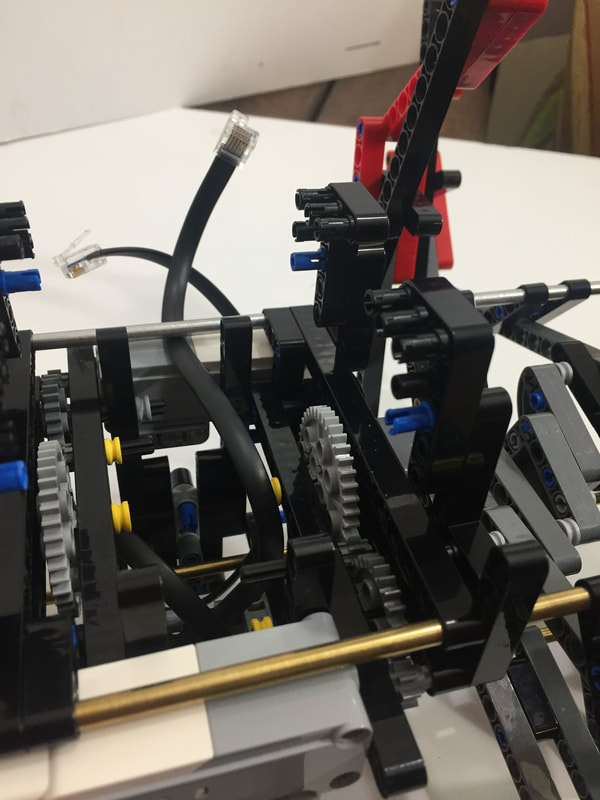
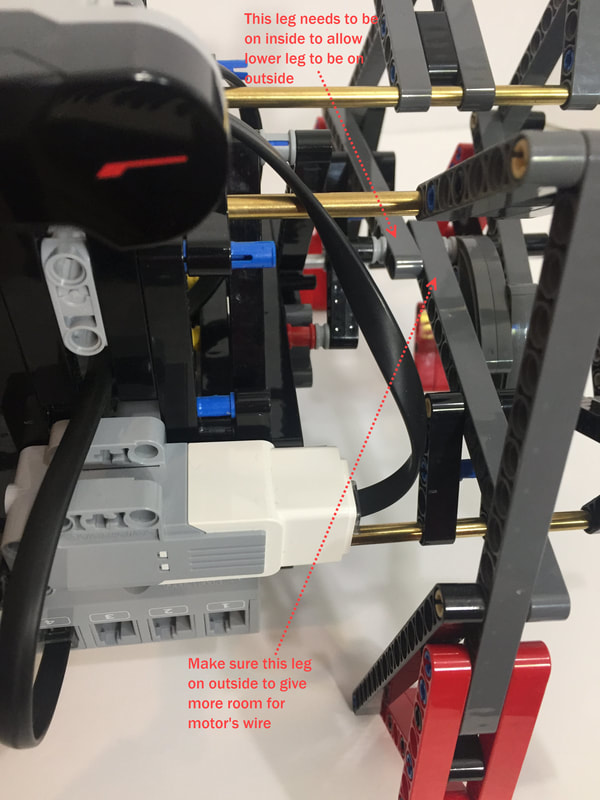
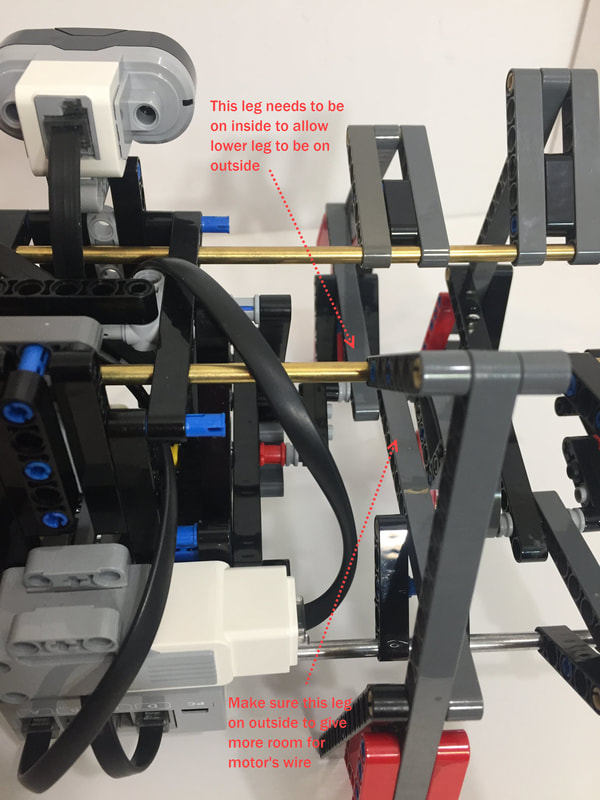
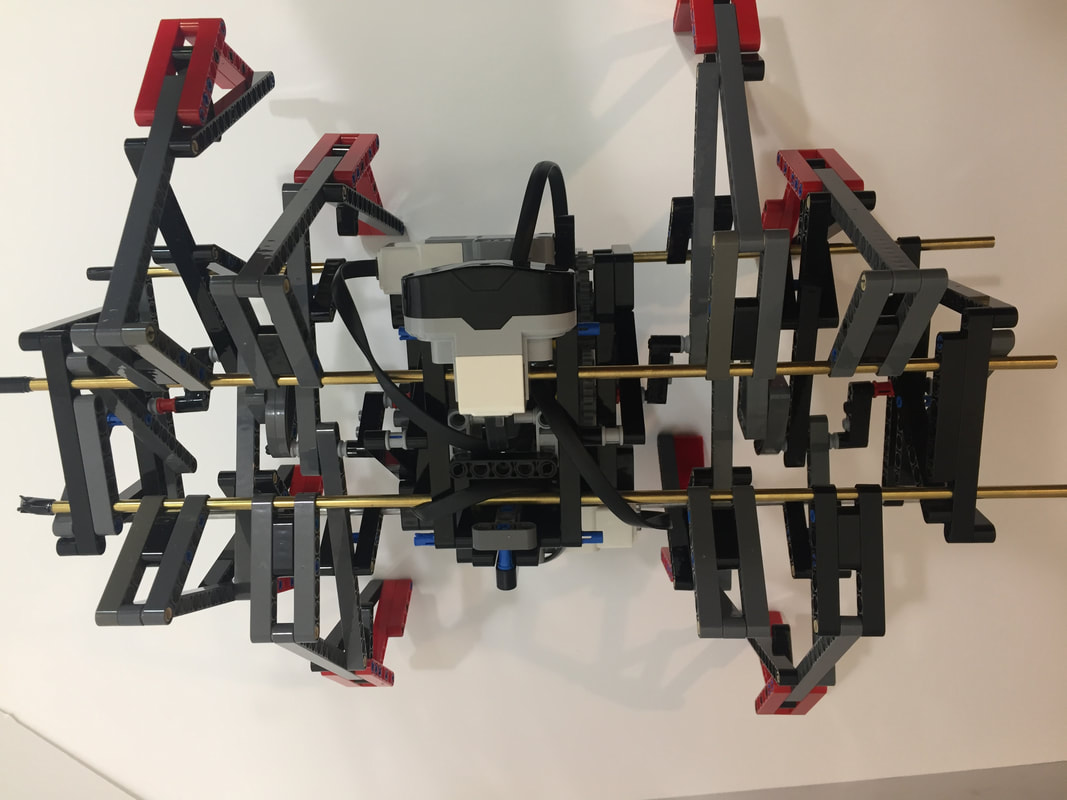
Below is a shot of the frame flipped over. Either the Mindstorms medium motors (#99455) or LEGO's power functions medium motors (#8883) can be attached at both ends of the frame.
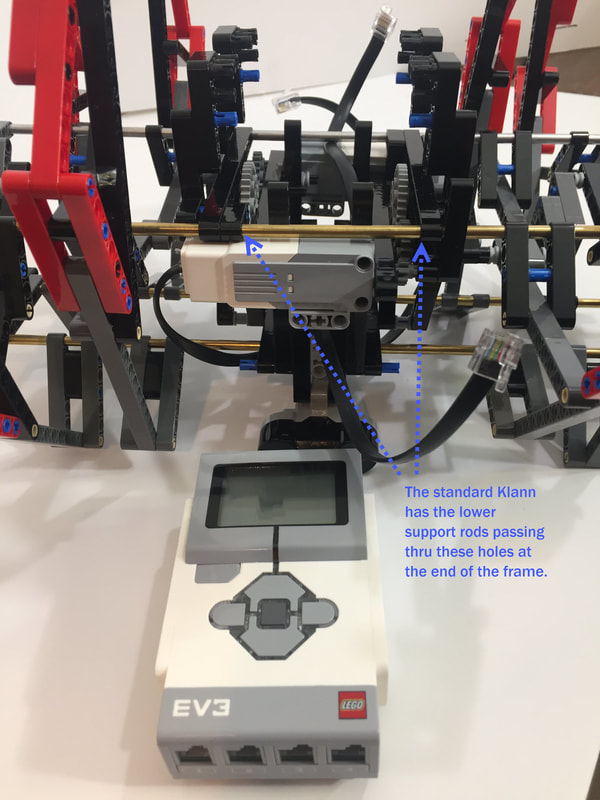
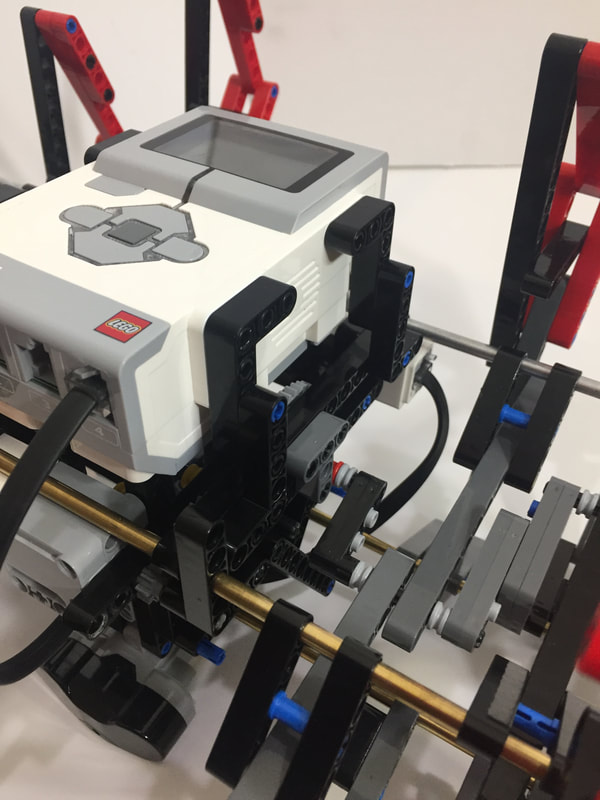
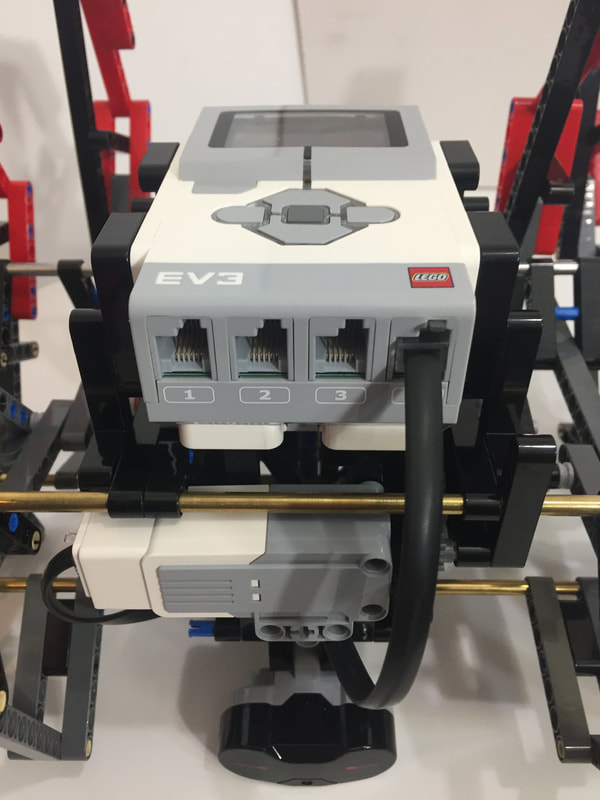
Below are some images of mounting the EV3 brick, and further down are images of mounting the power functions' battery box.
Add the same parts to the other side:

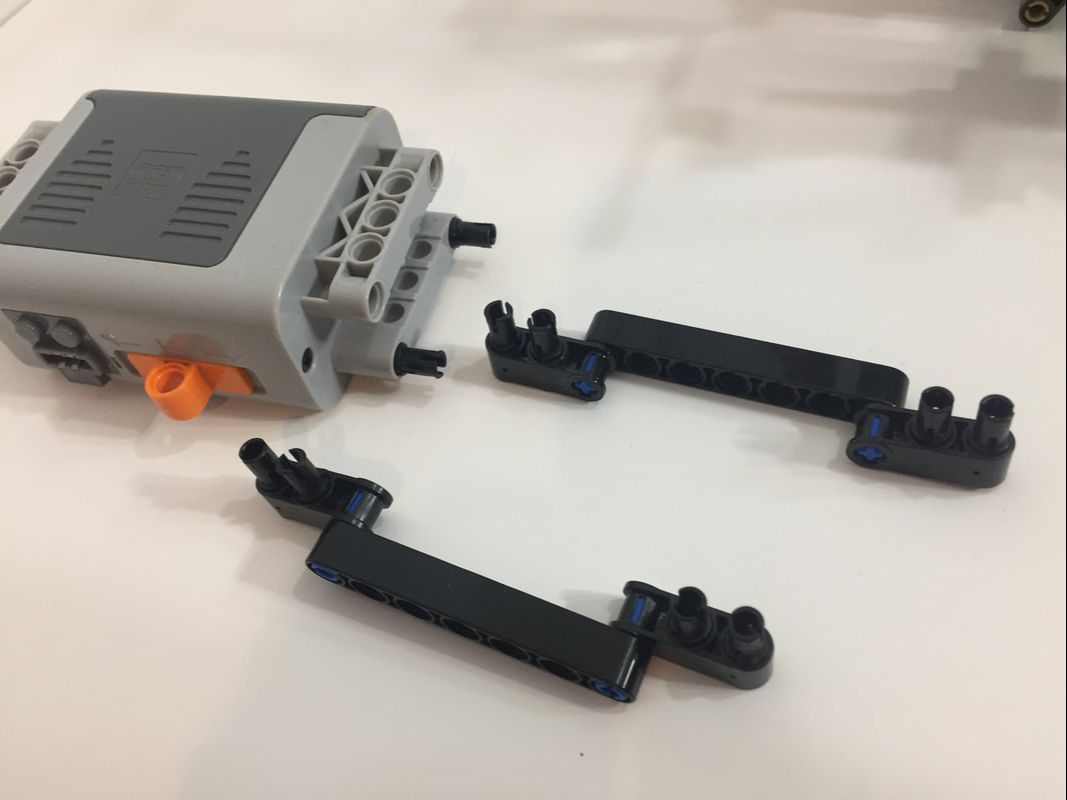
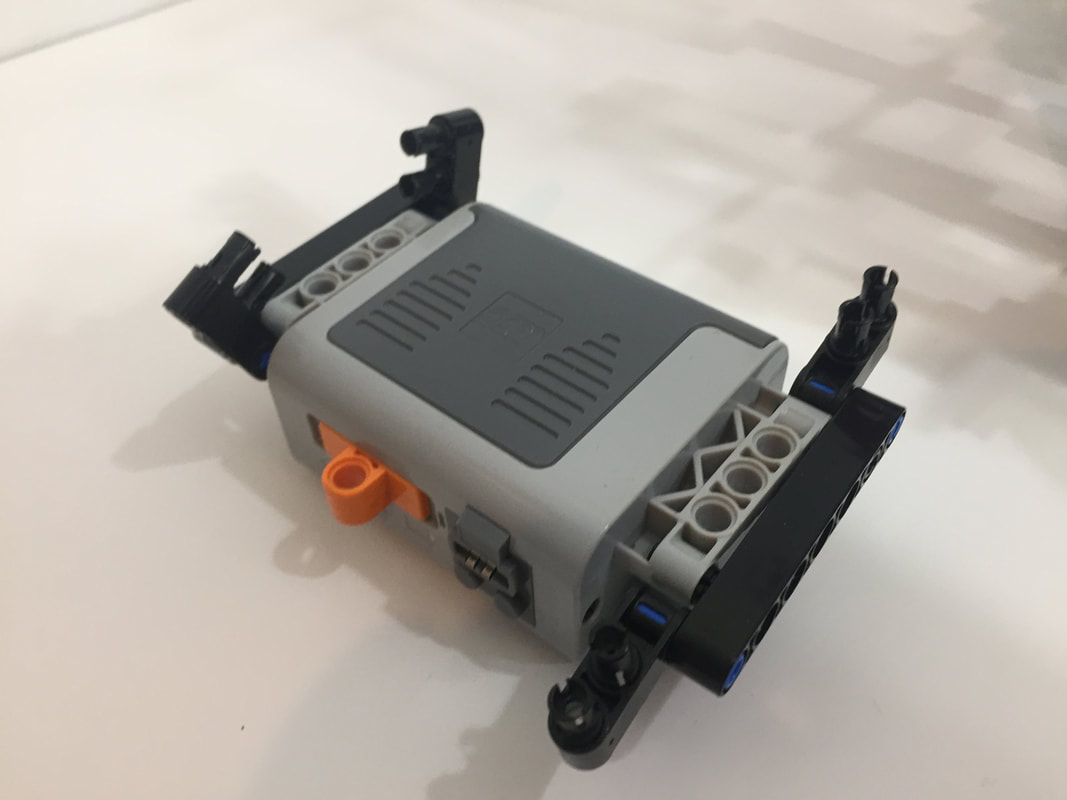
The following images show how to attach the battery box.
For Klann's 4 support rods I used 3/16 inch OD Brass tube, but solid aluminum rods work fine as well and may have less risk of bending. All 4 rods were cut to 15 inches in length, and be sure to file the cut smooth so that the legs parts can slide on easily.
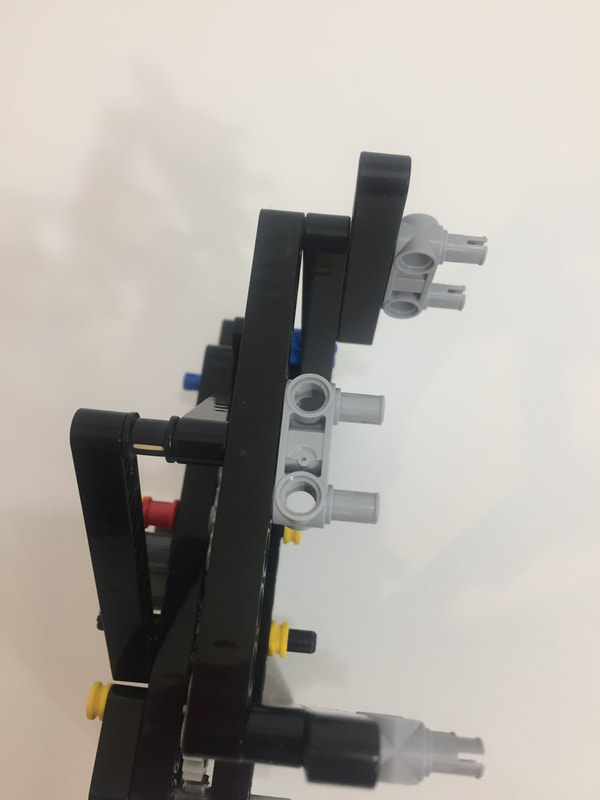
Below are some details of the legs.
Below are some details of the legs.
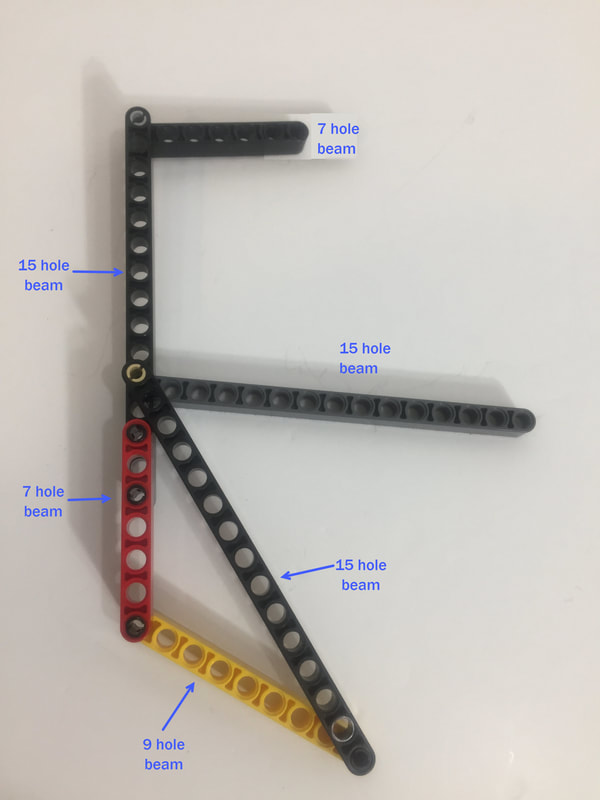
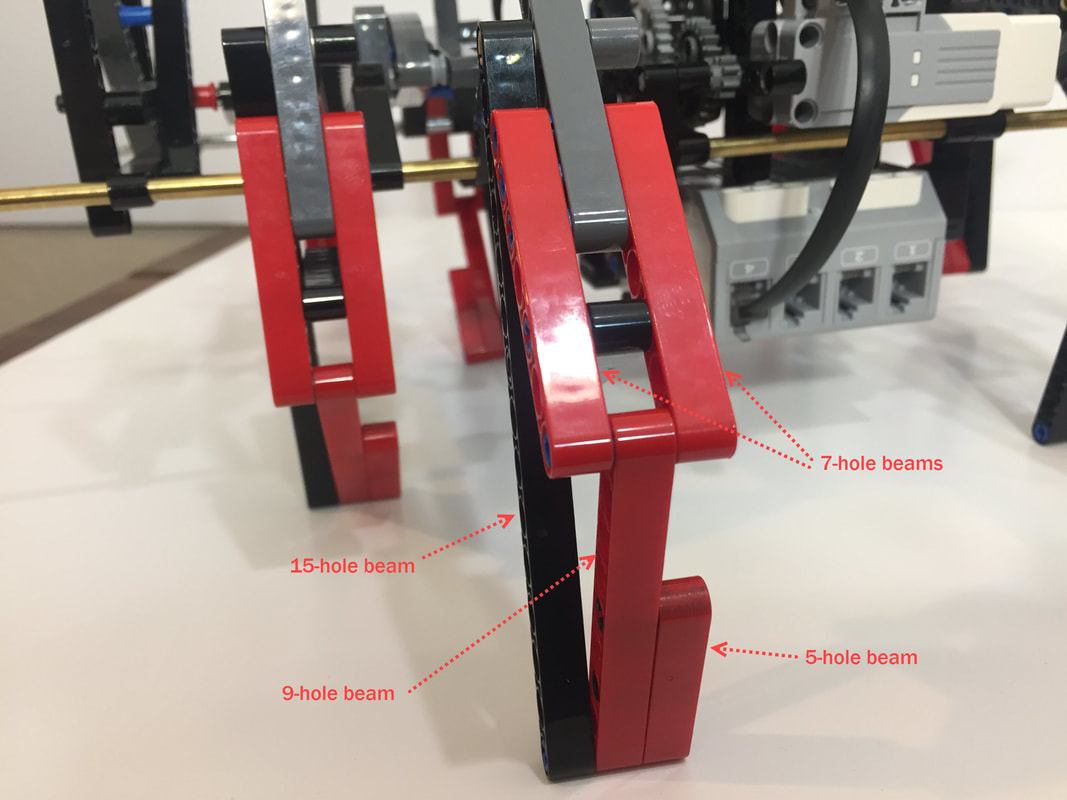
Leg beam lengths
For more details on building Klann's outer frames, see this post.
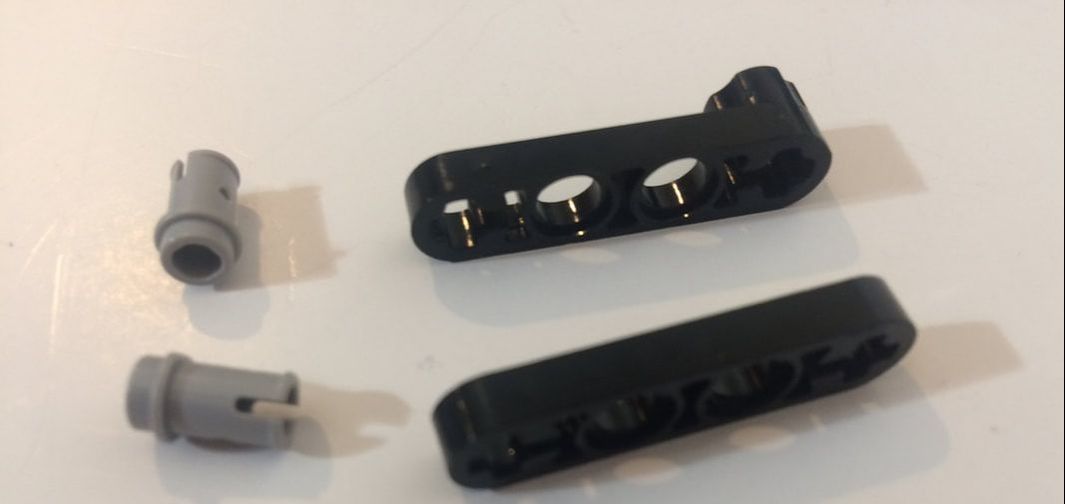
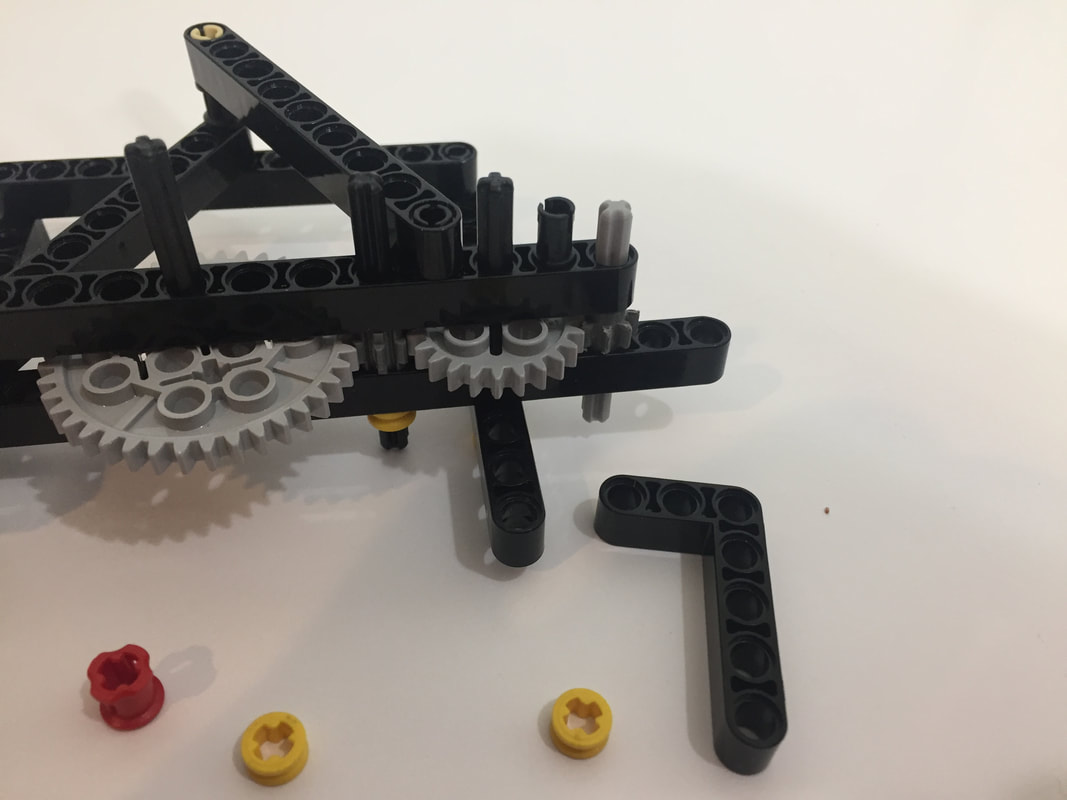
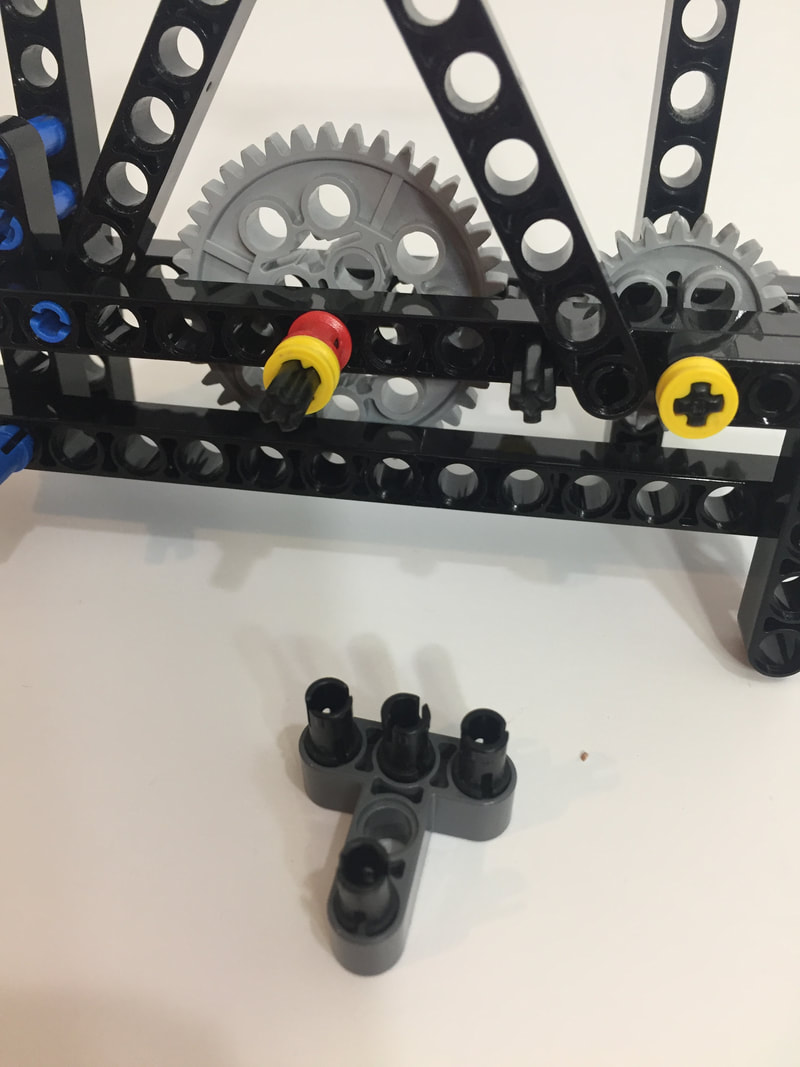
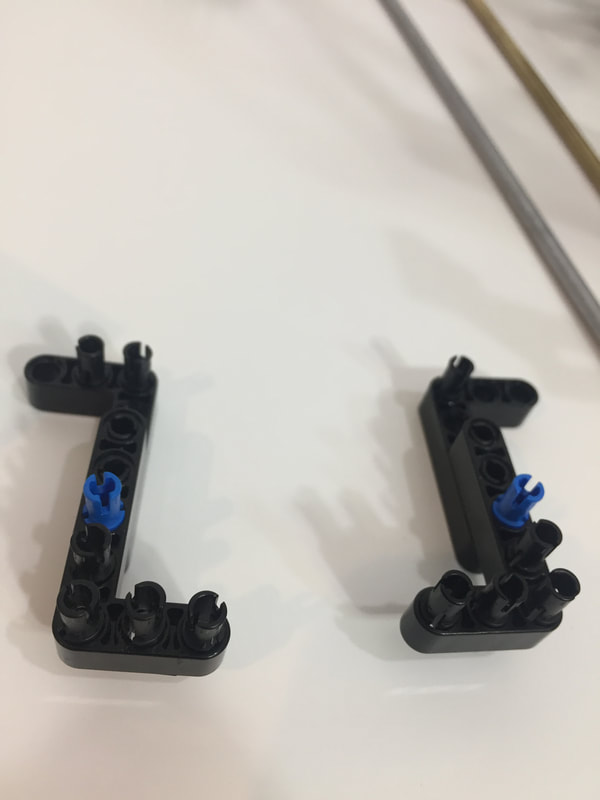
Either of the above black parts can work, since you can use bushings to create space between the cranks and the frame or legs.


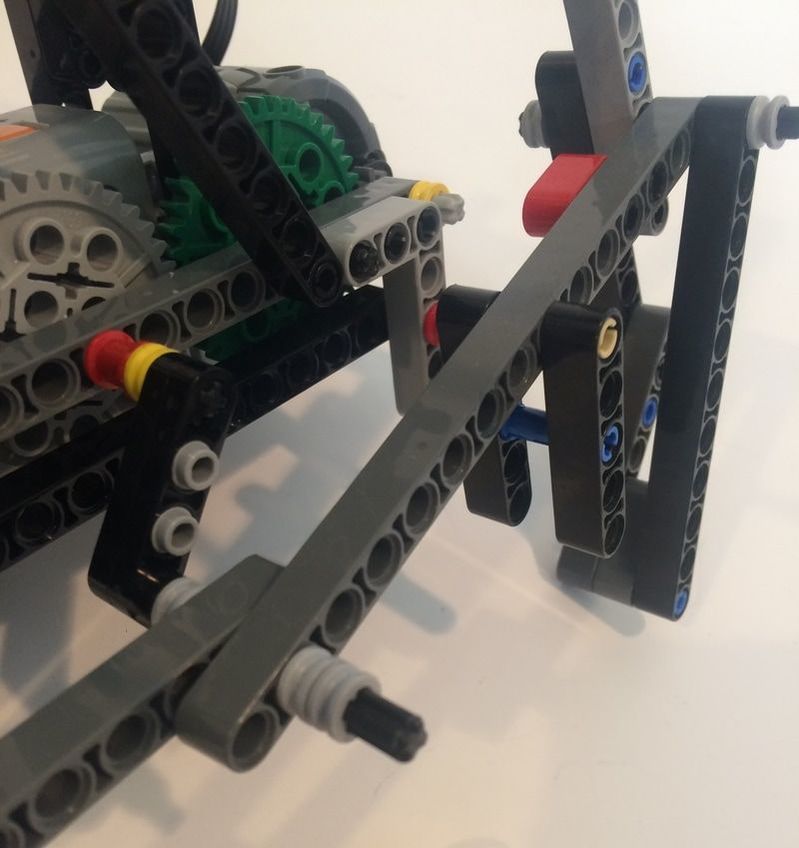
This shorter, lower leg section is from the Ver 2 build, but the mounting of the axle, and the lower rocker (the two 5 hole beams) are the same.
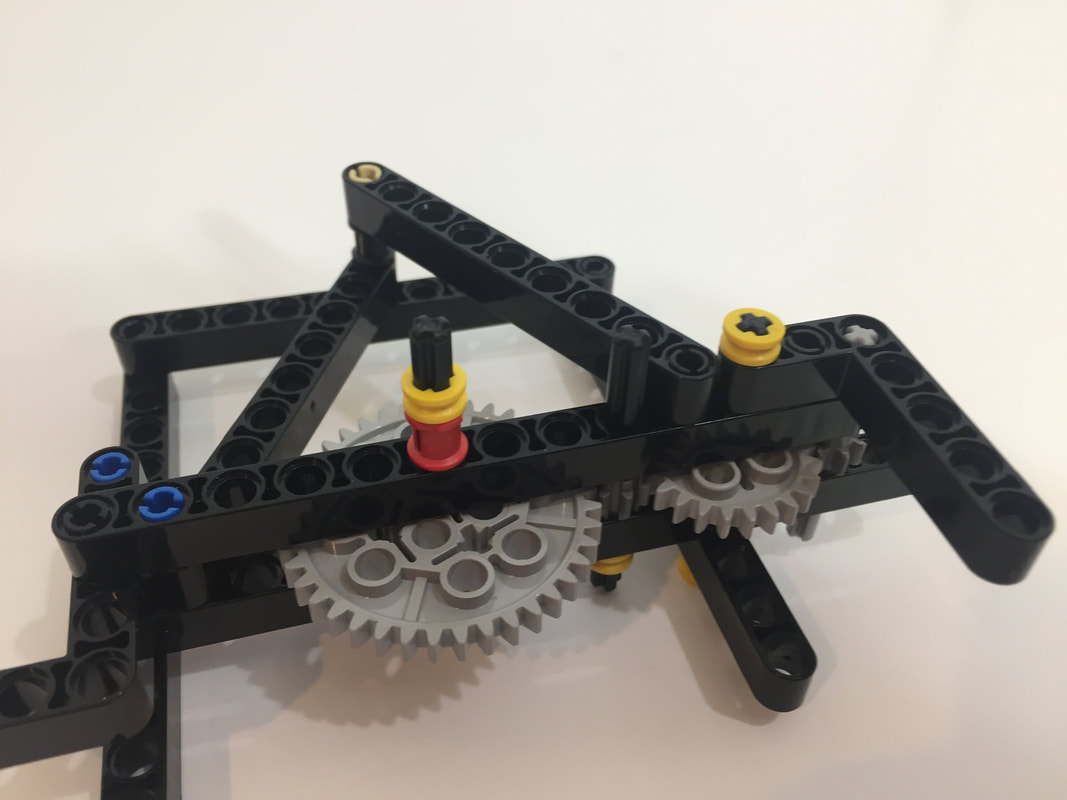
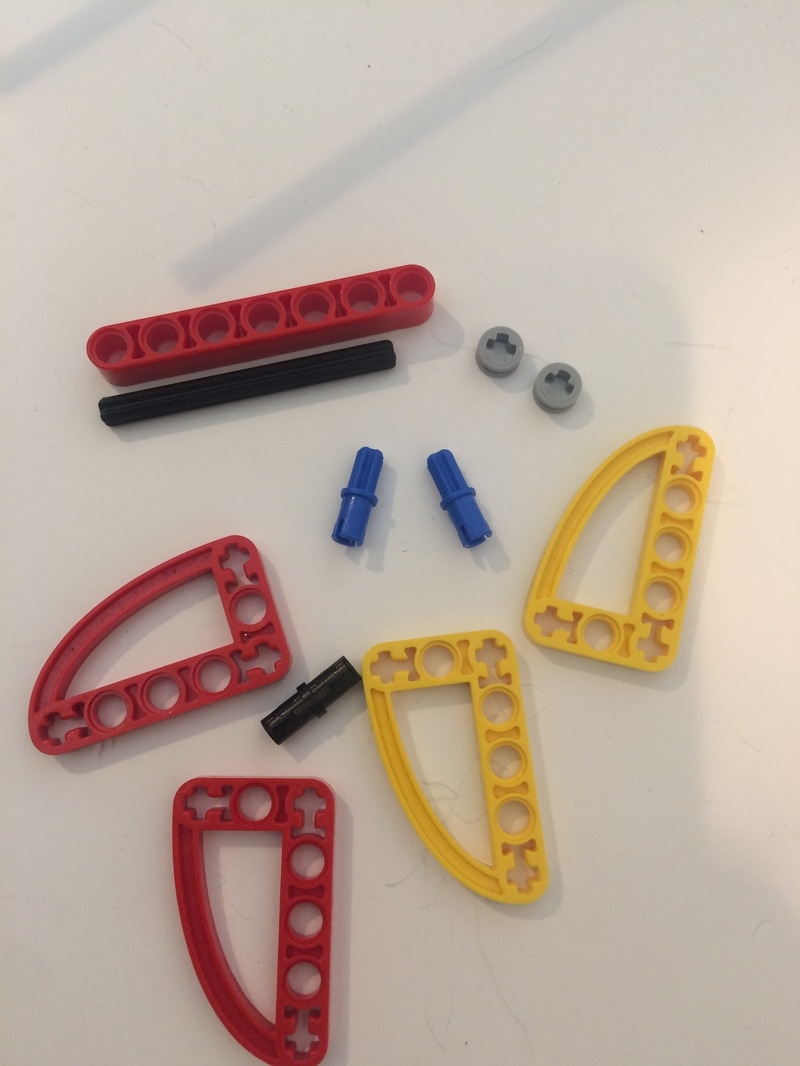
Because of the higher torque of walkers I connected two 3x5 cams together to make stronger cranks between the inner and outer legs. The red and yellow colors were chosen to make the instructions easier to follow (and I switched to gray for my finished build). The red 7 hole beam is there to show that the axle length is 6.
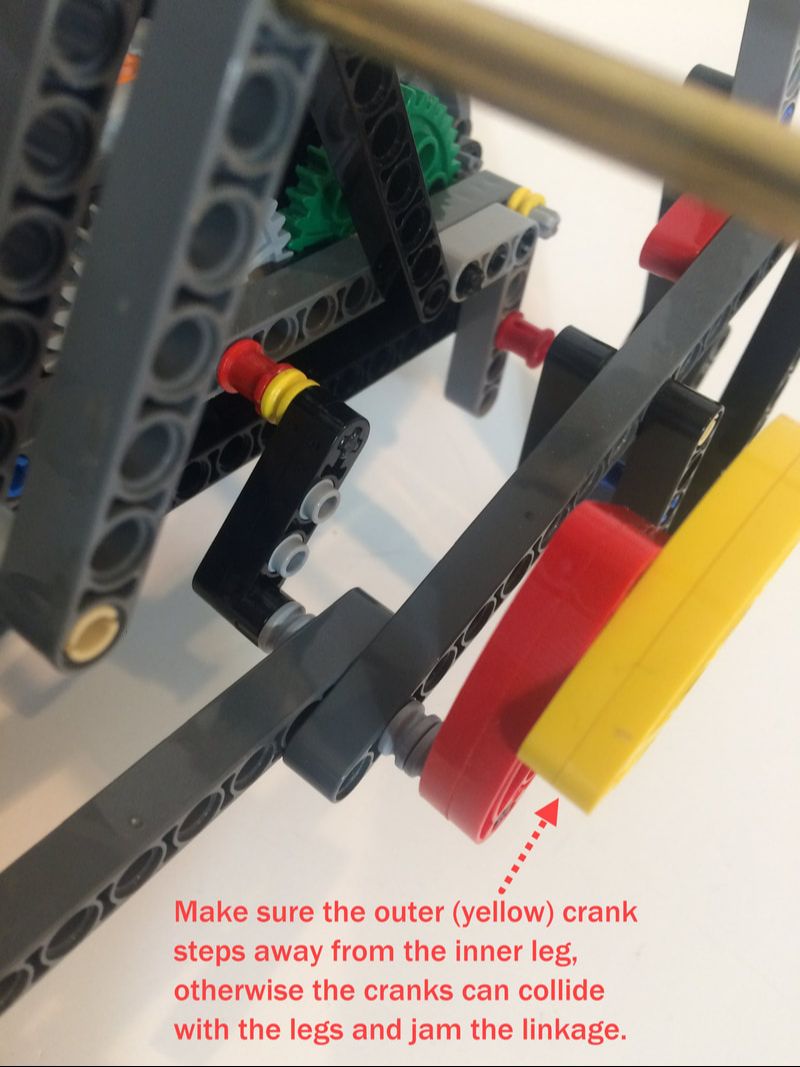
Do the same for the other side of the robot:
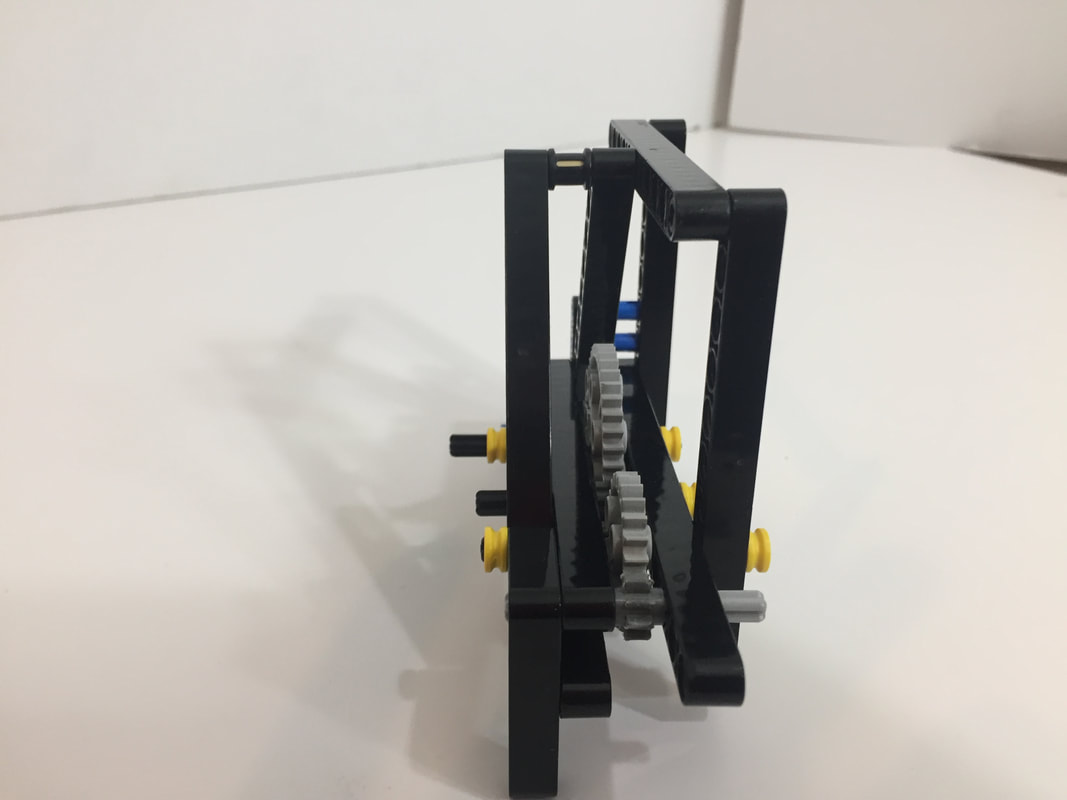
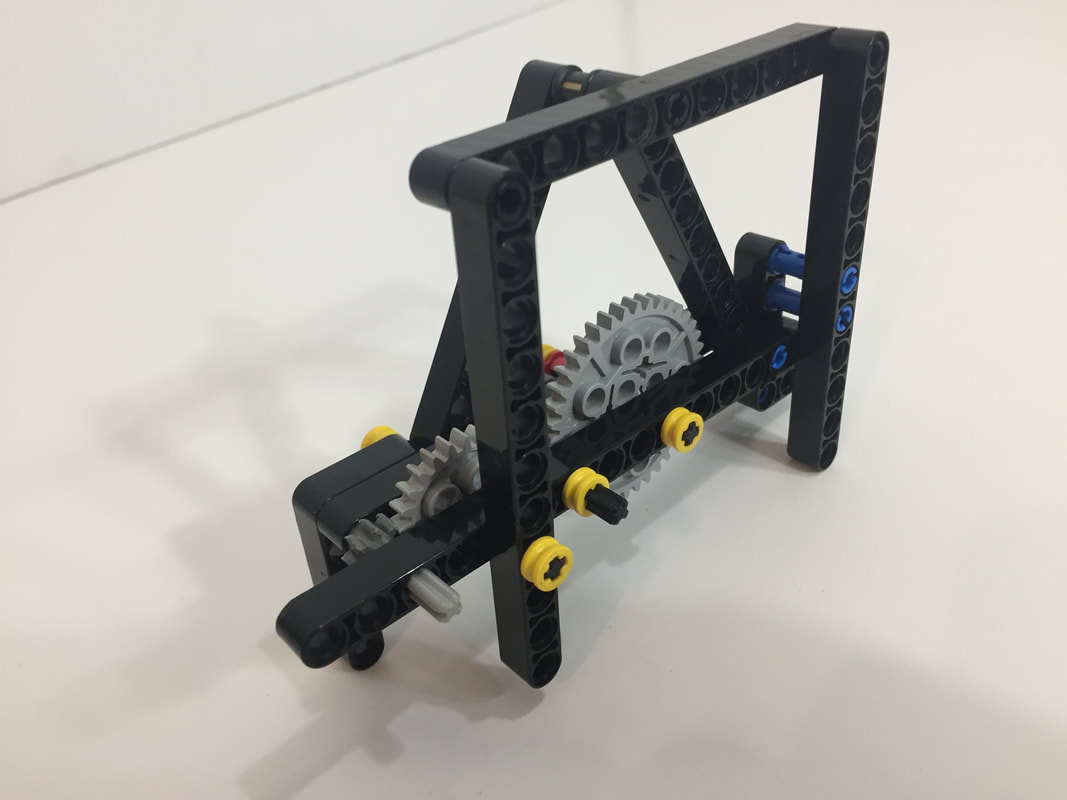
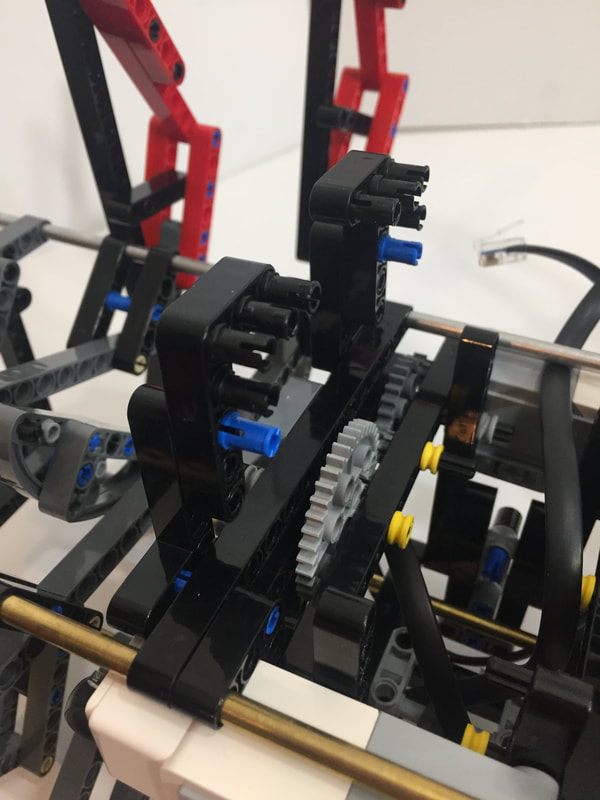
Below are a few more images from different angles

The outer frames help to match the axle's center of rotation to the inner frame's, and also keep the support rods at the correct distance from the axle so that the linkage moves as designed.