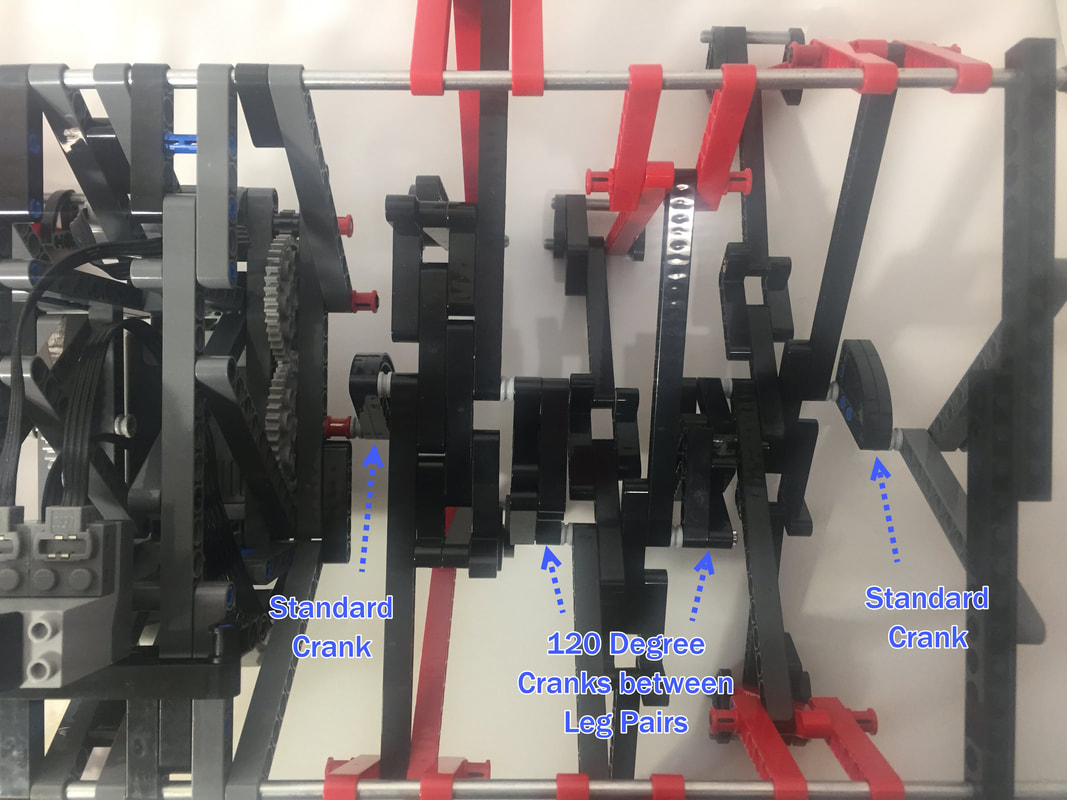
Strider Ver 3's Legs (and cranks)
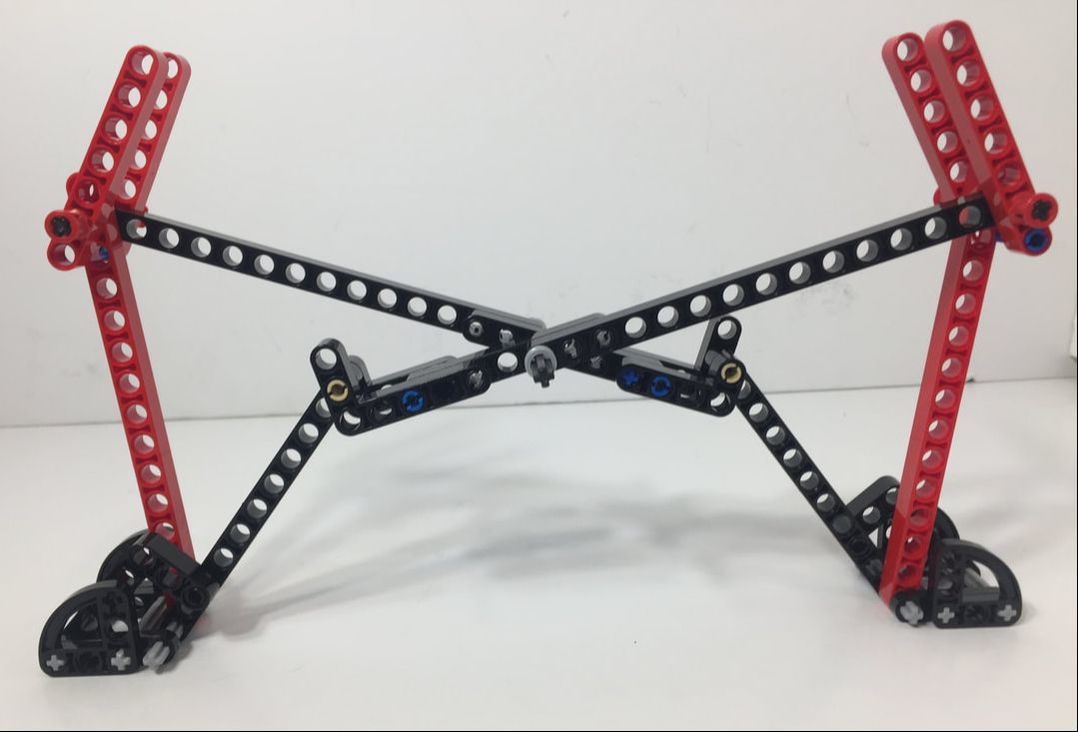
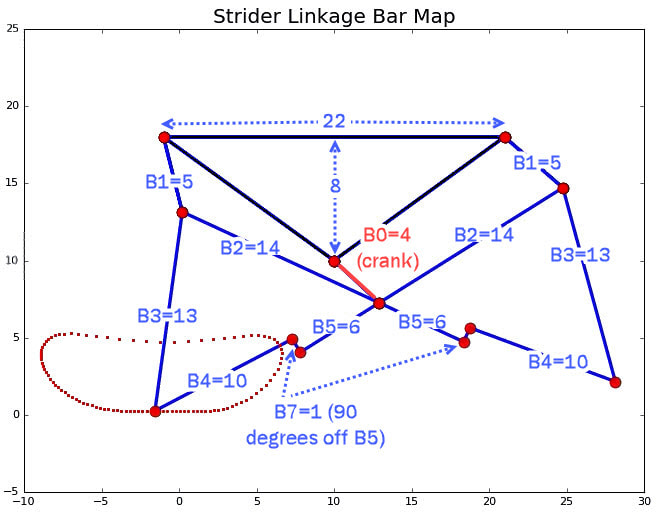
Strider Ver 3's Paired Leg, 10-Bar Linkage (with longer toes of length 3 for 8-legged Striders)

For a smooth gait, heavier and larger-scale Striders should be built with at least 12 legs, but LEGO-scale Striders can be built with 8 legs.
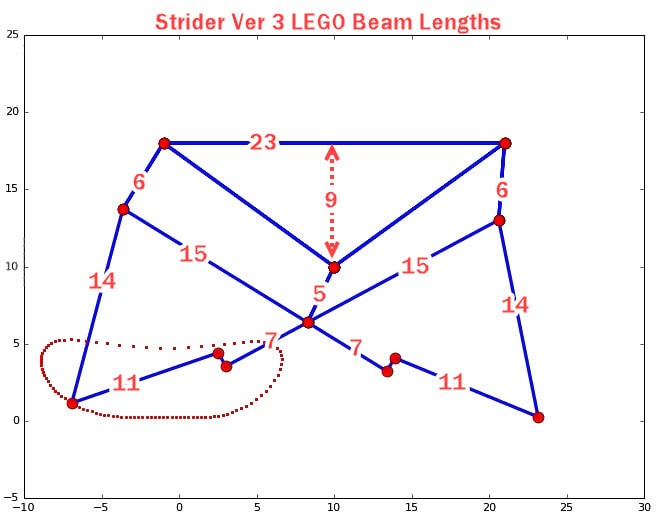
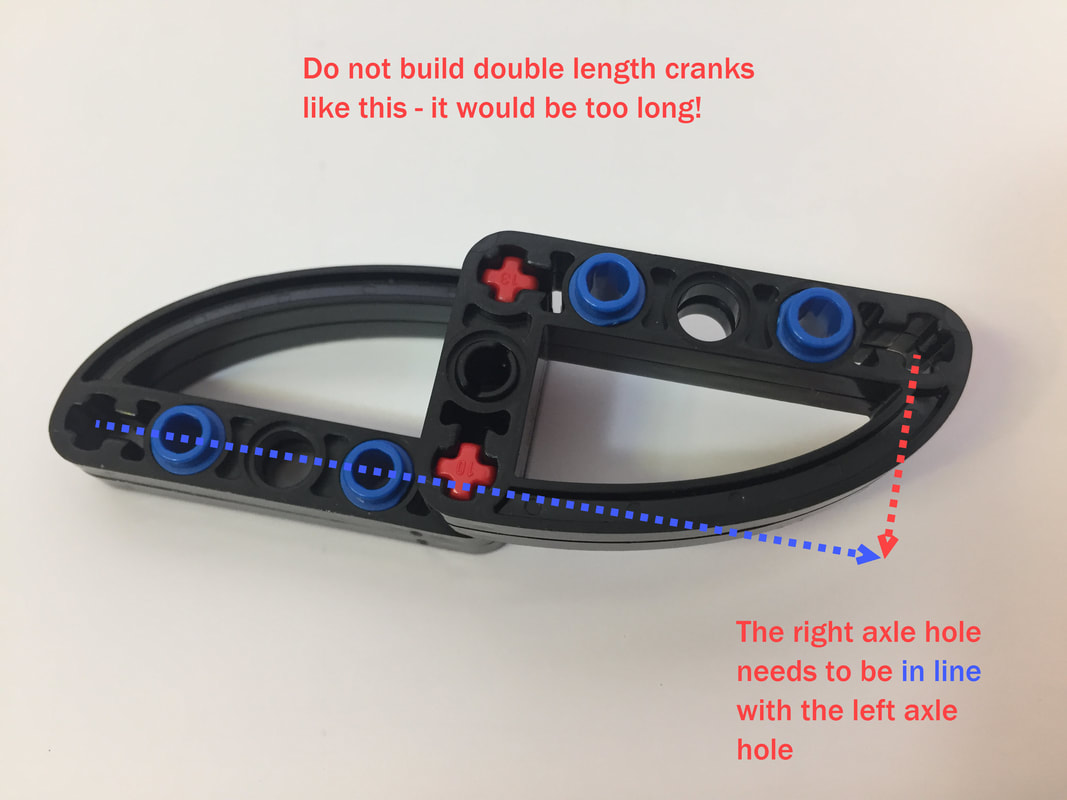
Here are Strider Ver 3's bar lengths, and the LEGO beam lengths (which are 1 hole longer)
Here are Strider Ver 3's bar lengths, and the LEGO beam lengths (which are 1 hole longer)
|
|

Strider's legs with shorter toes, used for 12-legged builds
Here's a build with 12 legs and shorter toes of length 2, filmed in low gear to better see the linkage action:
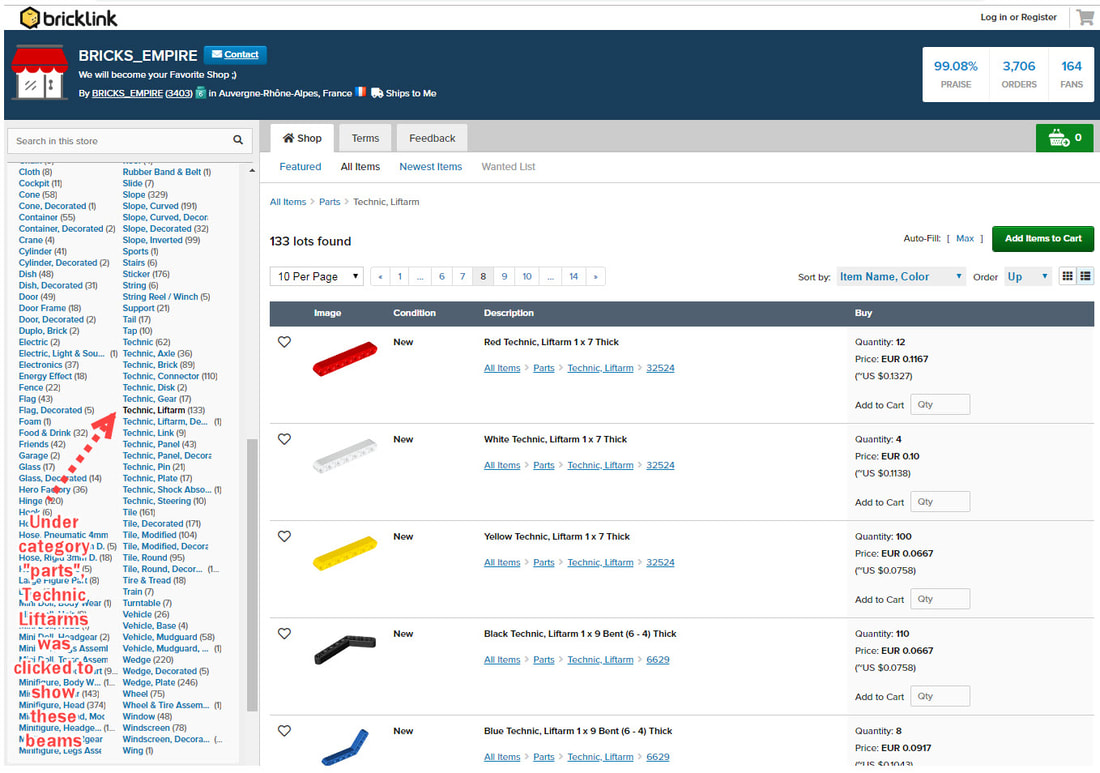
Strider's plastic LEGO parts were purchased on Bricklink.com. If you've never used Bricklink, an easy way to browse for parts is by going to a larger store. Here's a list of stores in the USA.
And below is an example search in a store for Technic beams.
And below is an example search in a store for Technic beams.
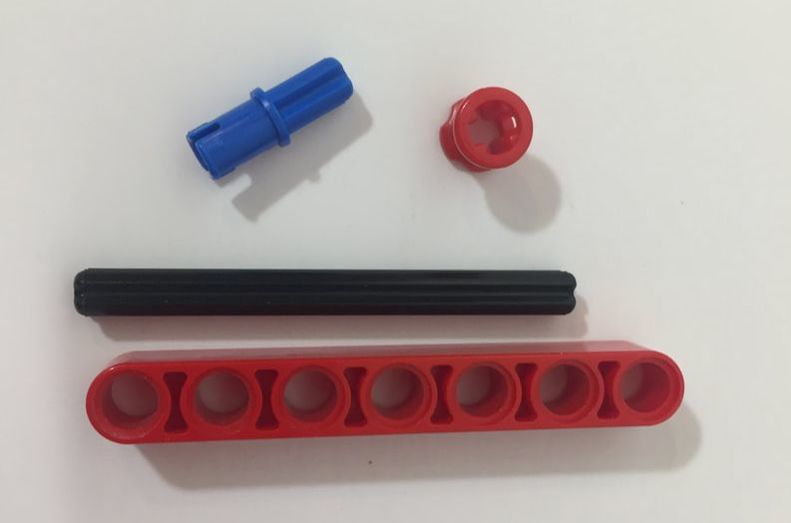
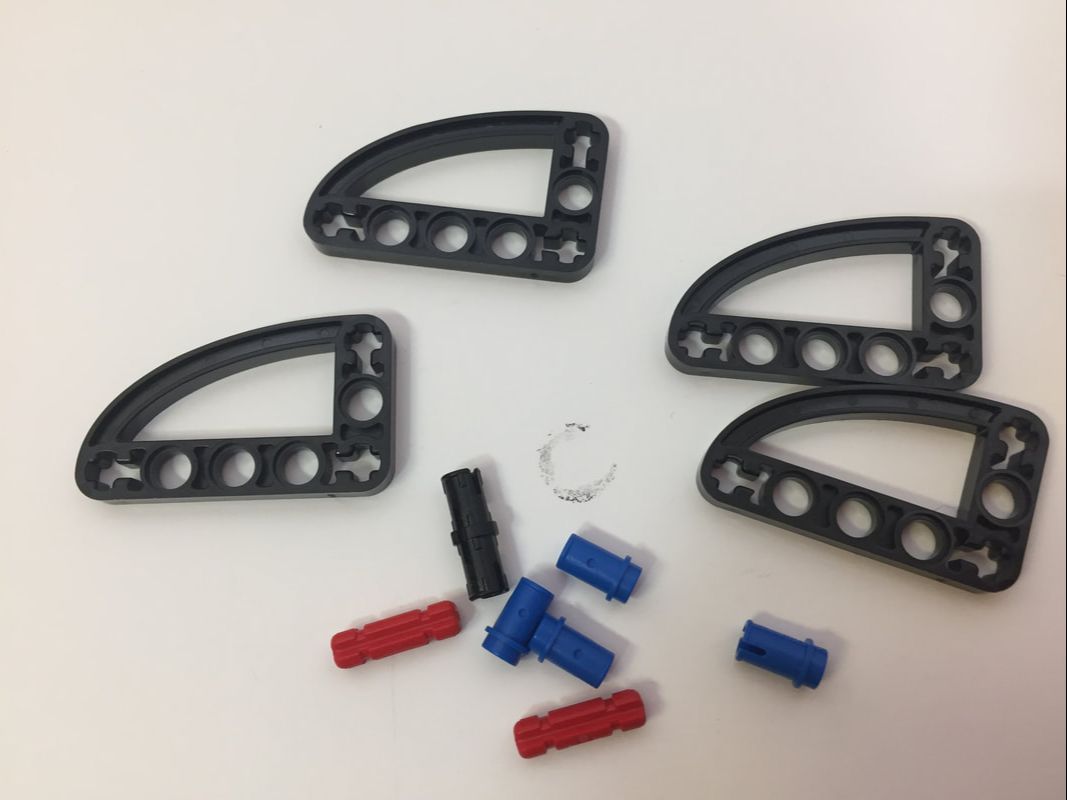
LEGO parts for one leg, which were purchased on Bricklink.com.
LEGO parts for one leg, which were purchased on Bricklink.com.

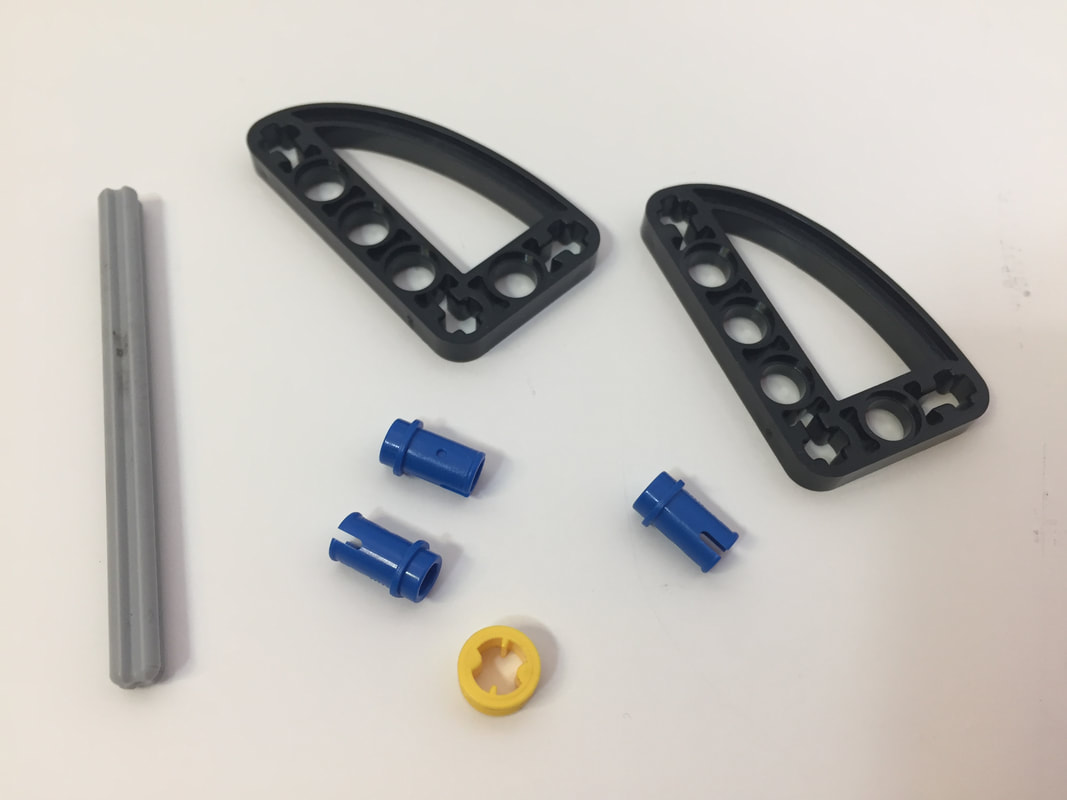
Toe parts:

Short toe parts for one foot for 12 leg Striders
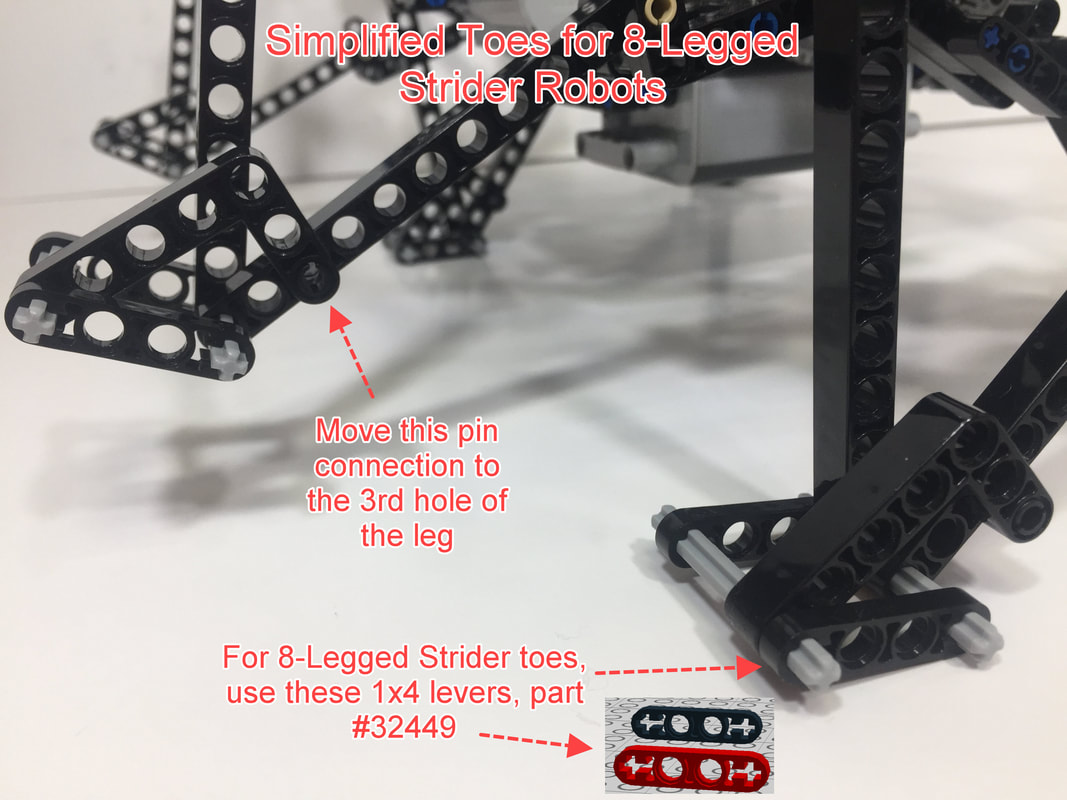
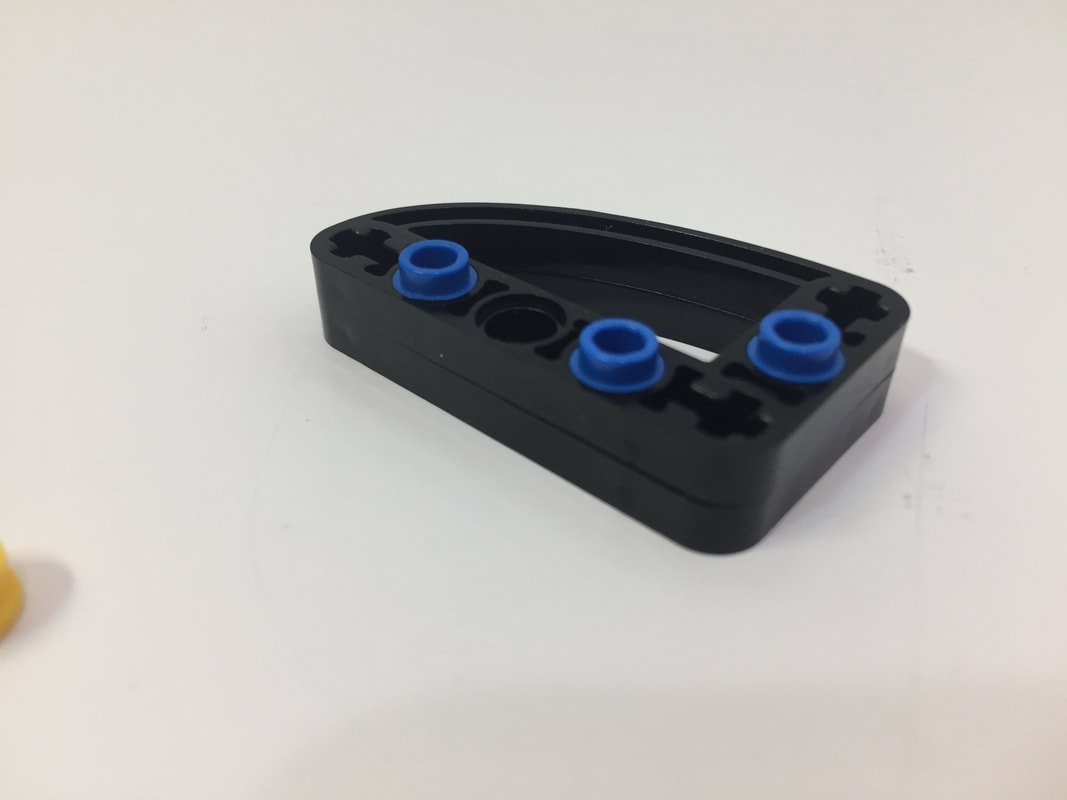
For 8-legged Striders, you can replace the above 3x3 Quarter Ellipse parts with the below 1x4 Lever parts:

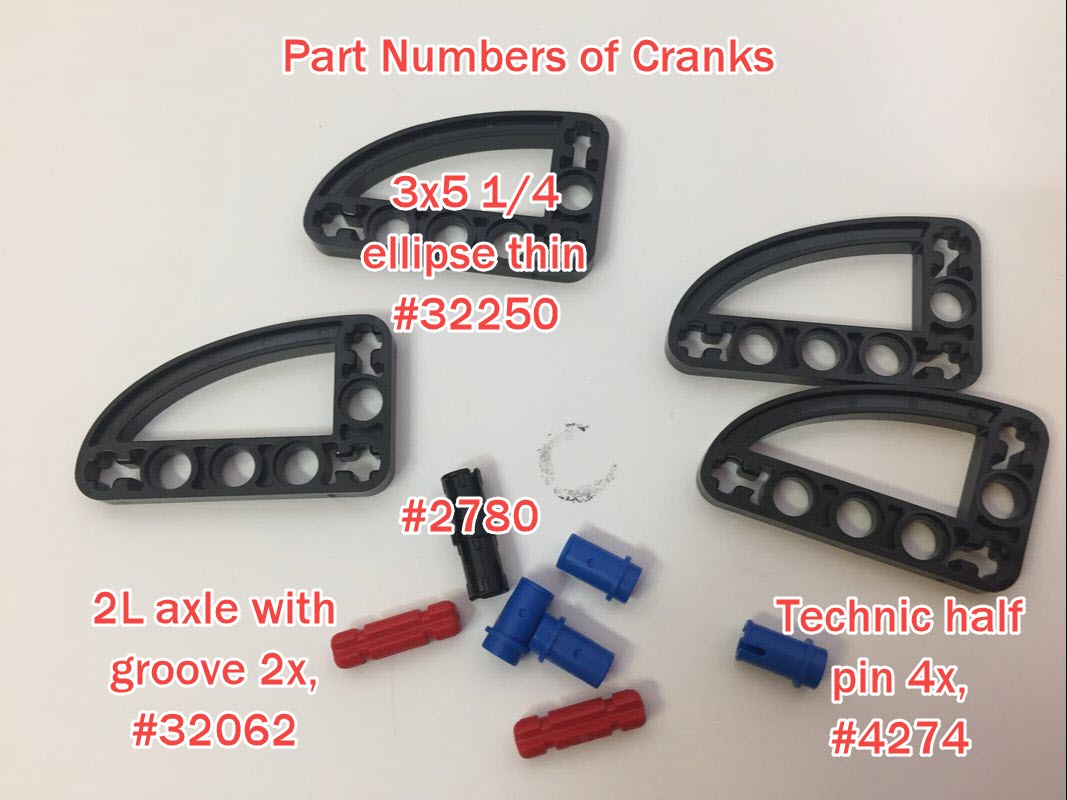
Crank Part Numbers. See Crank Section Below to Determine How Many Are Needed.
Building Instructions
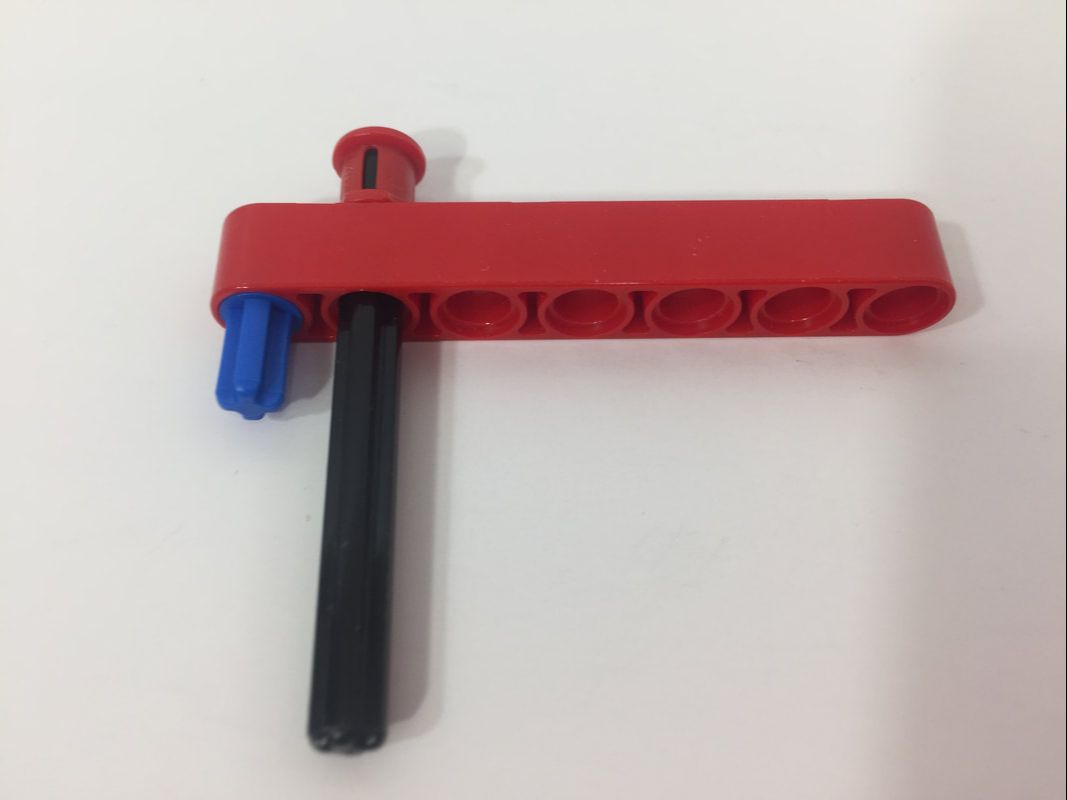
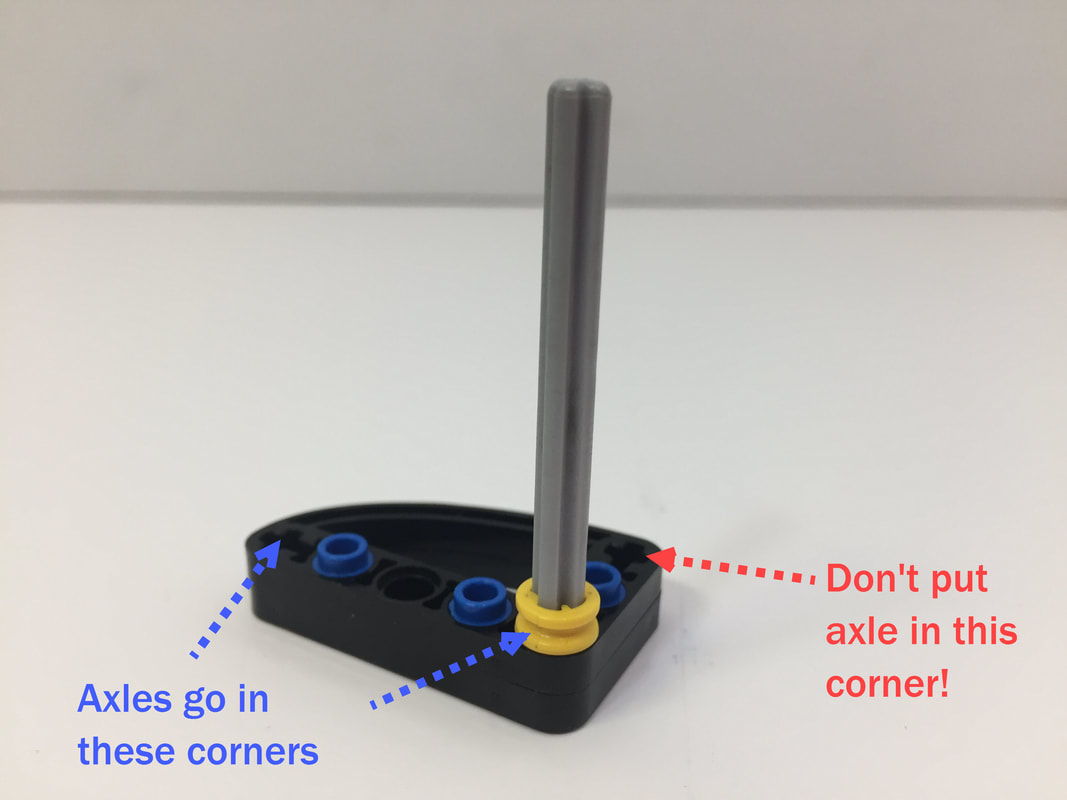
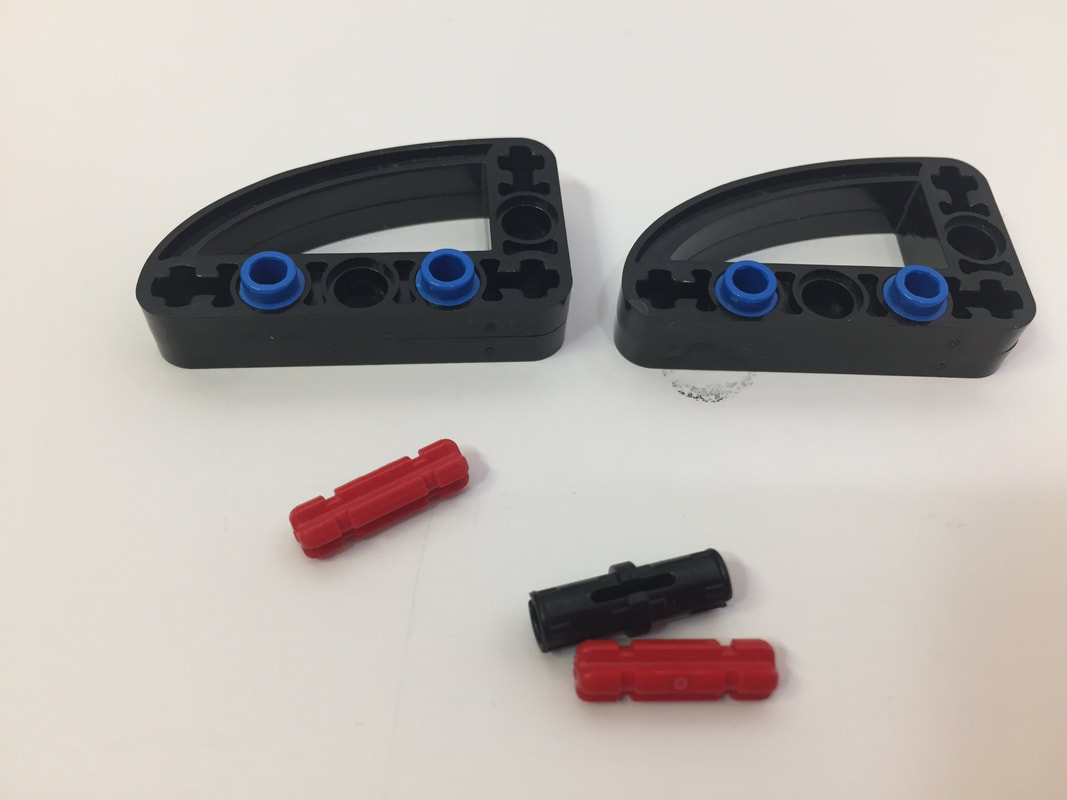
Make 8 (or 12) of the following legs.
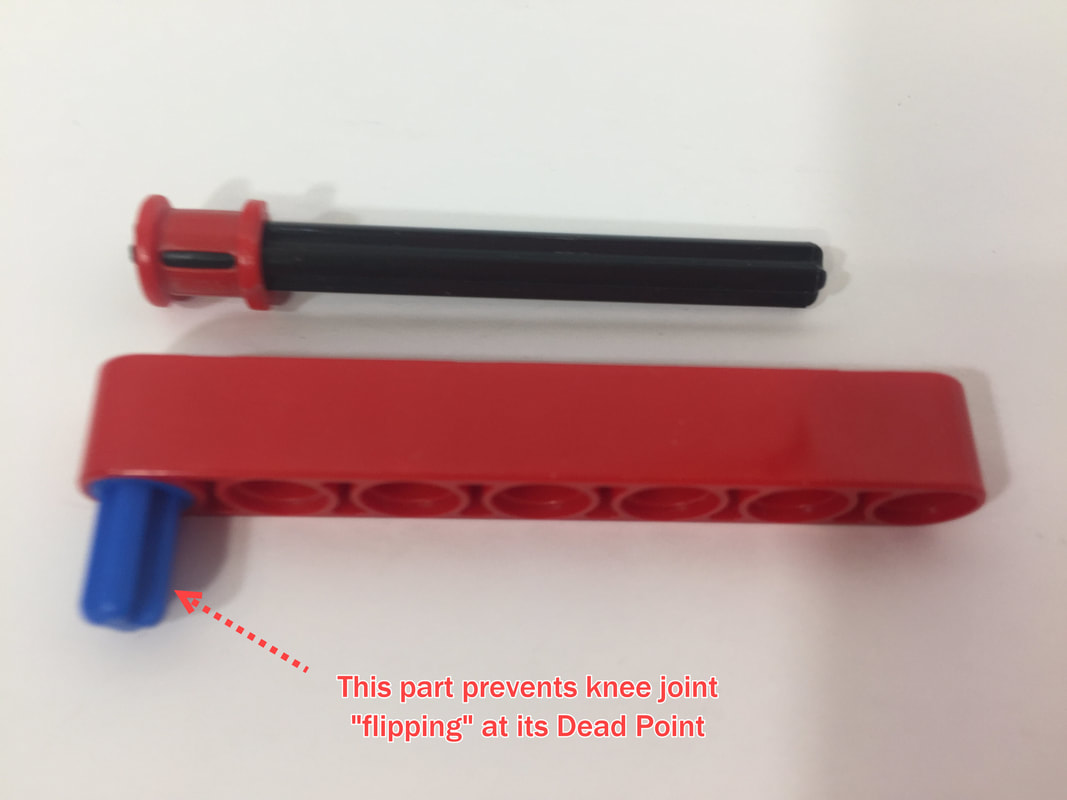
More ideas for managing Dead Points can be found here.
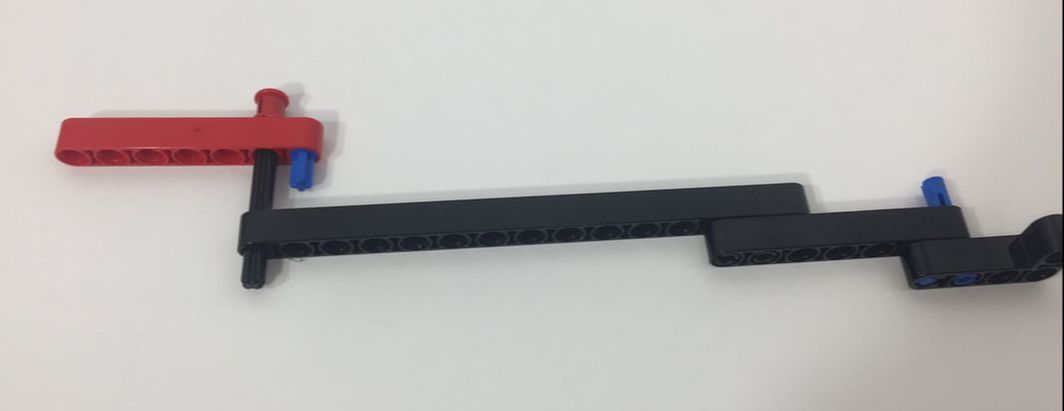
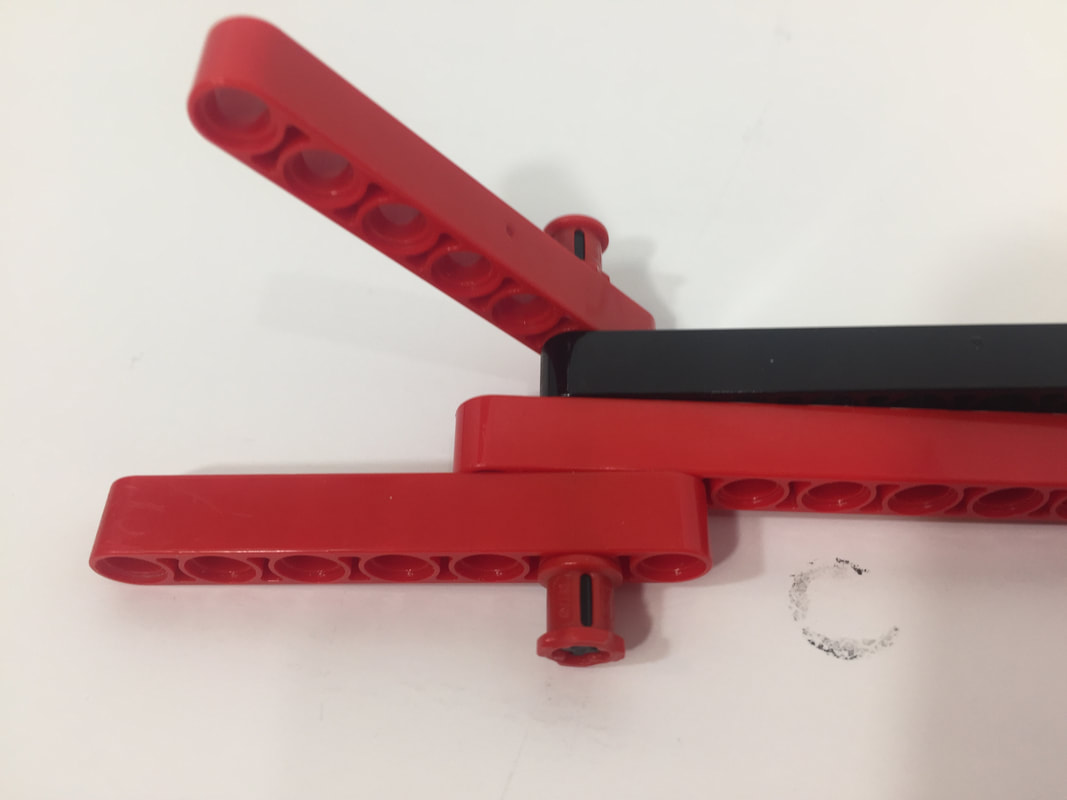
Make 8 (or 12) of the above leg sections.
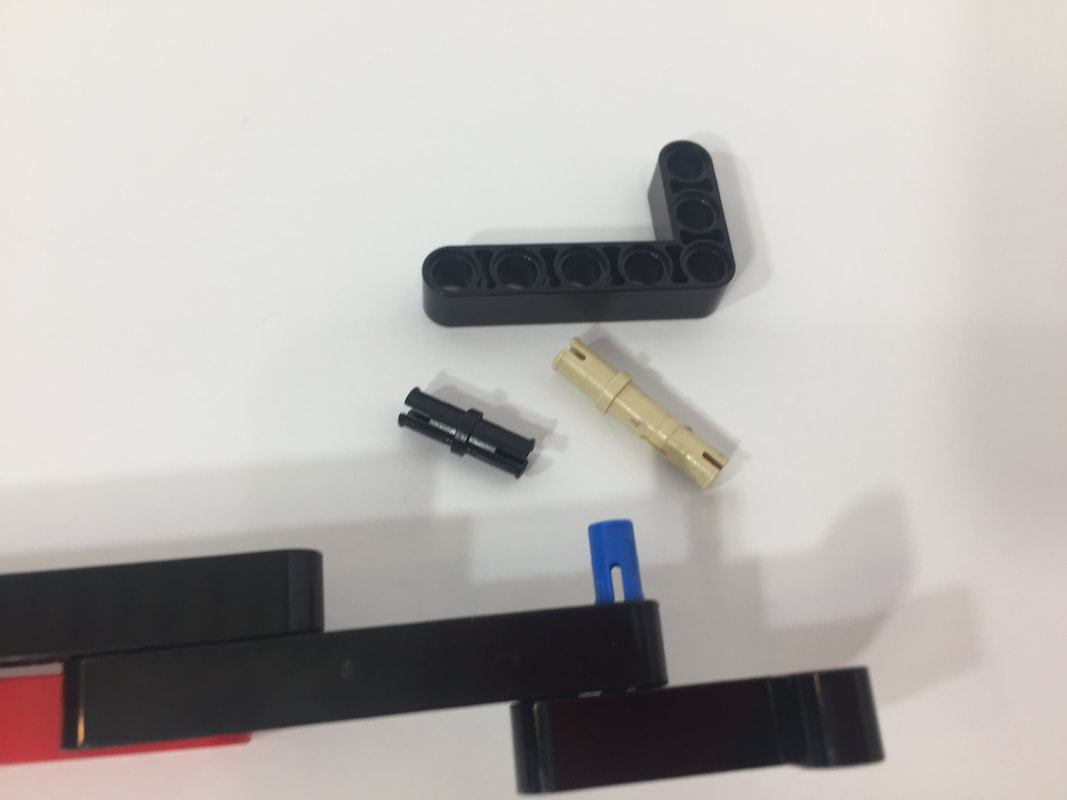
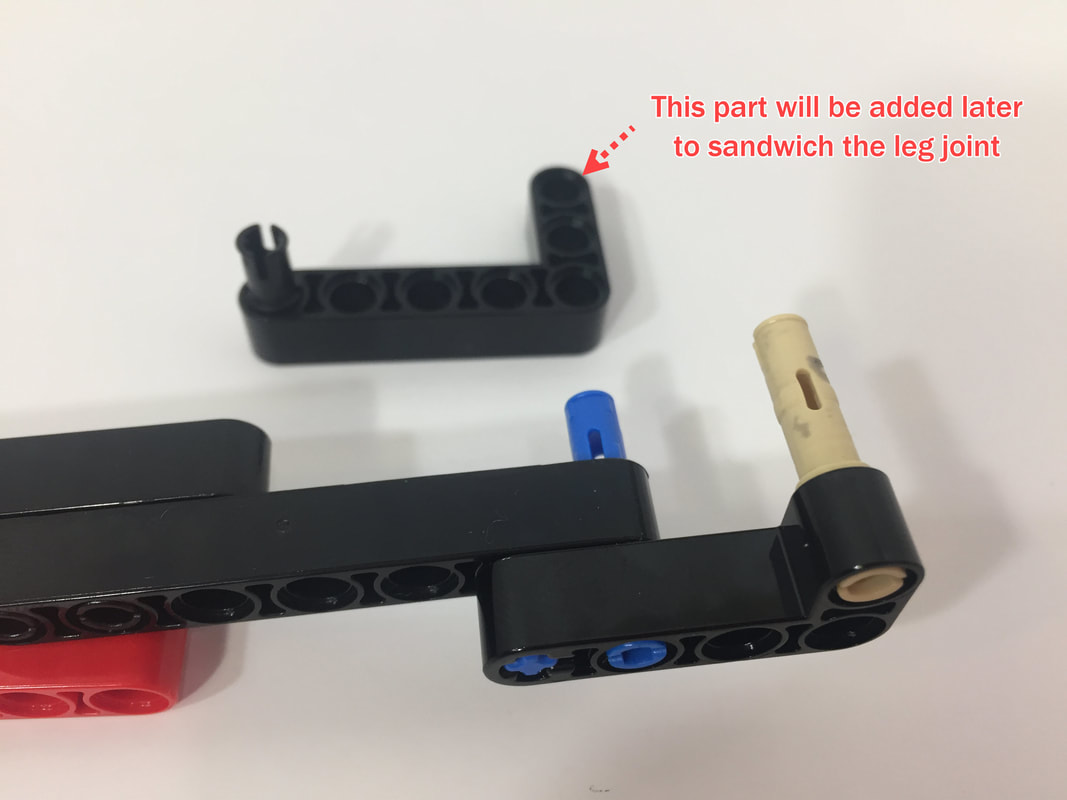
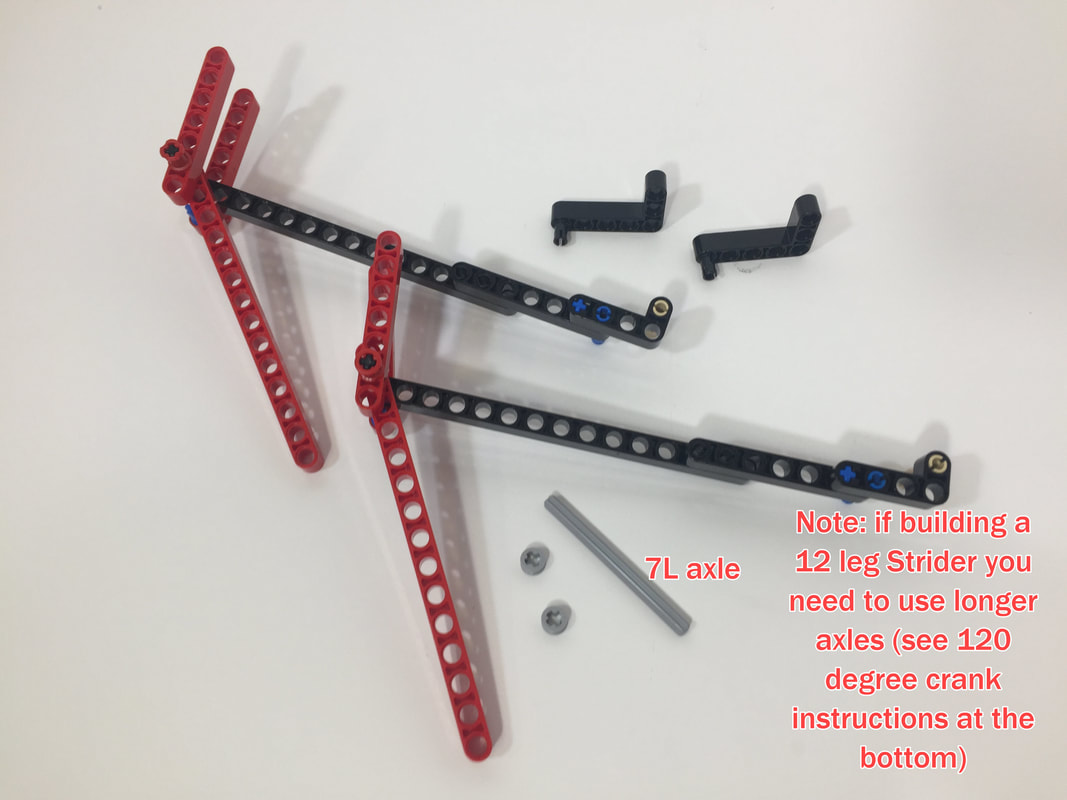
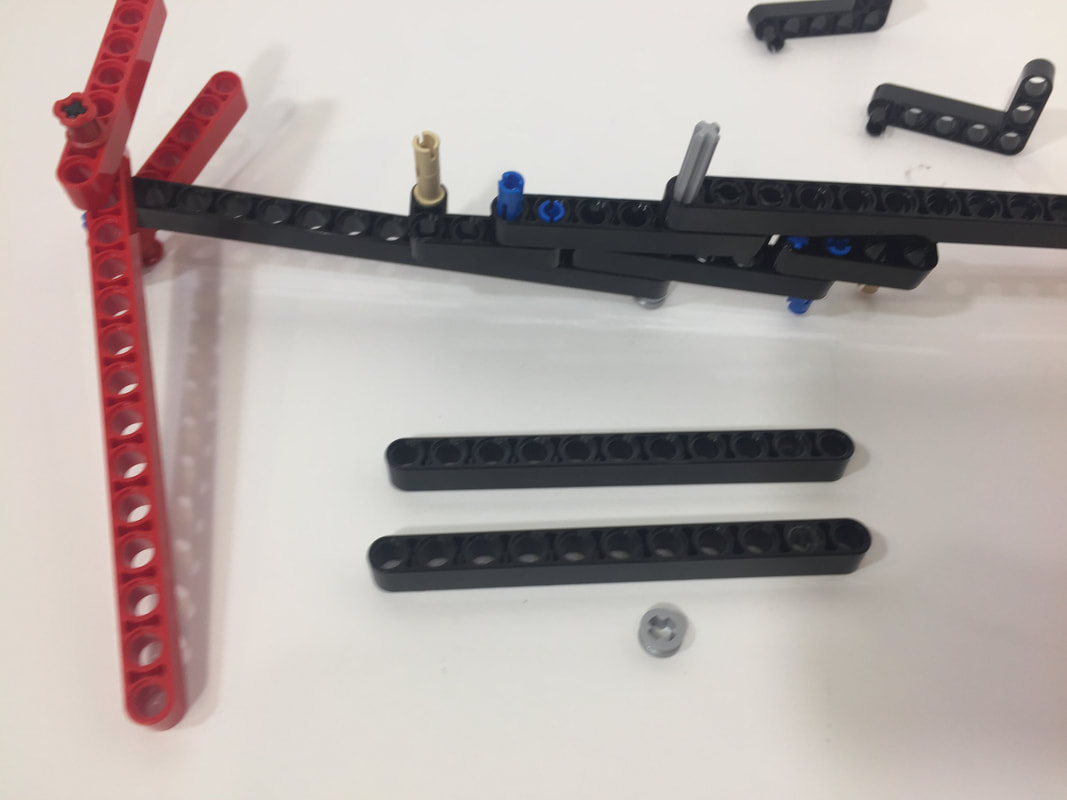
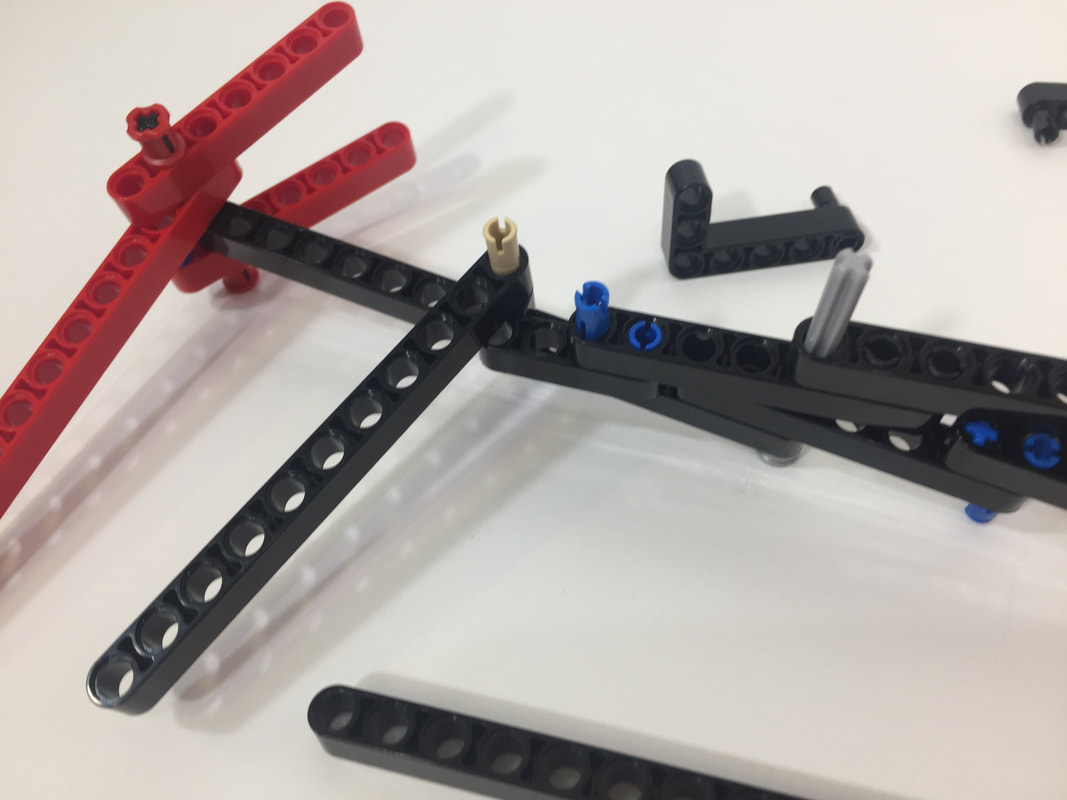
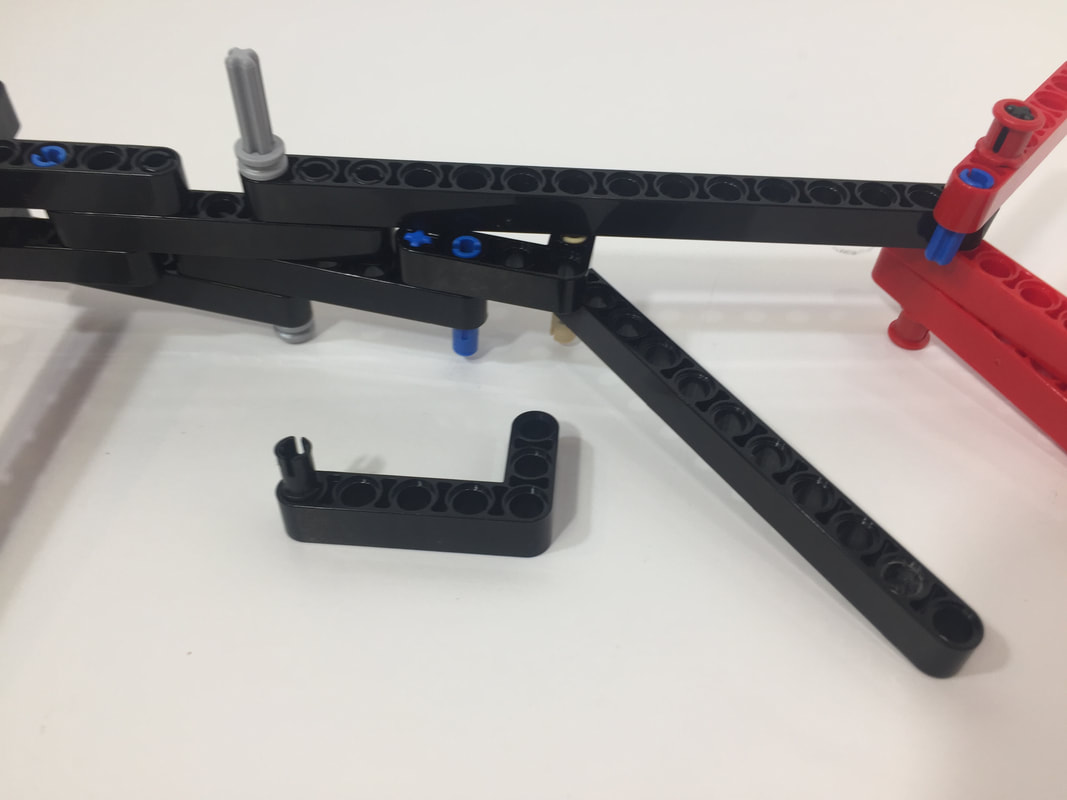
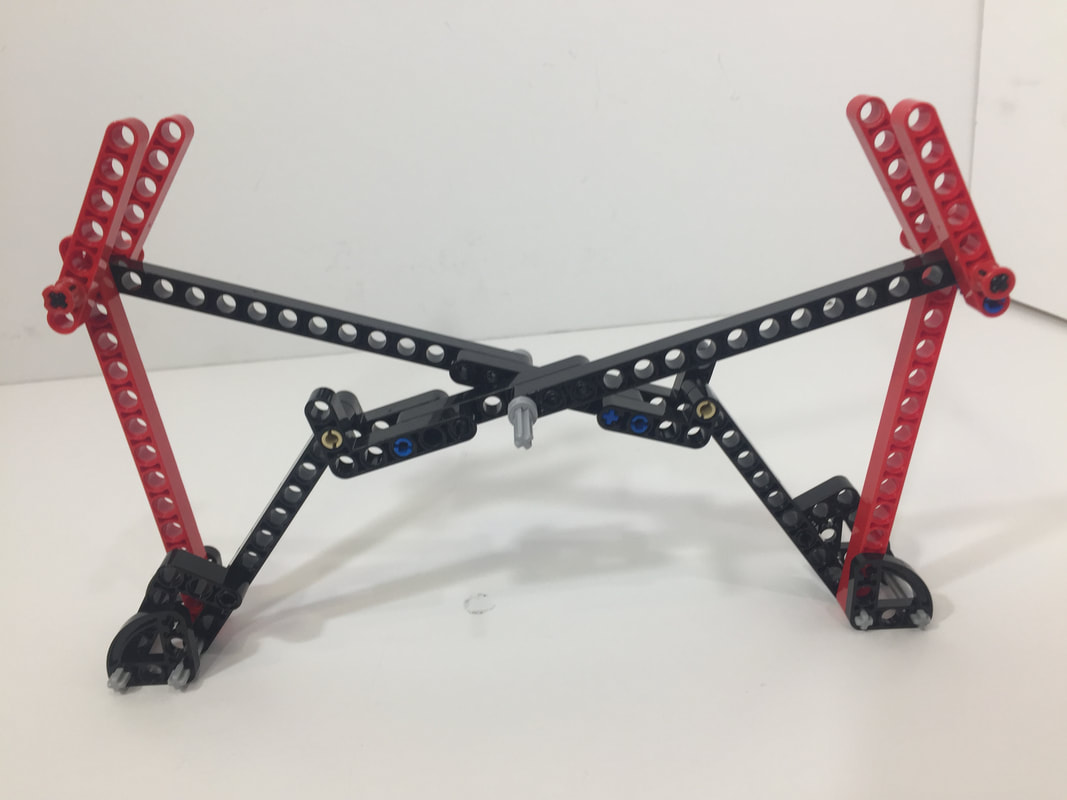
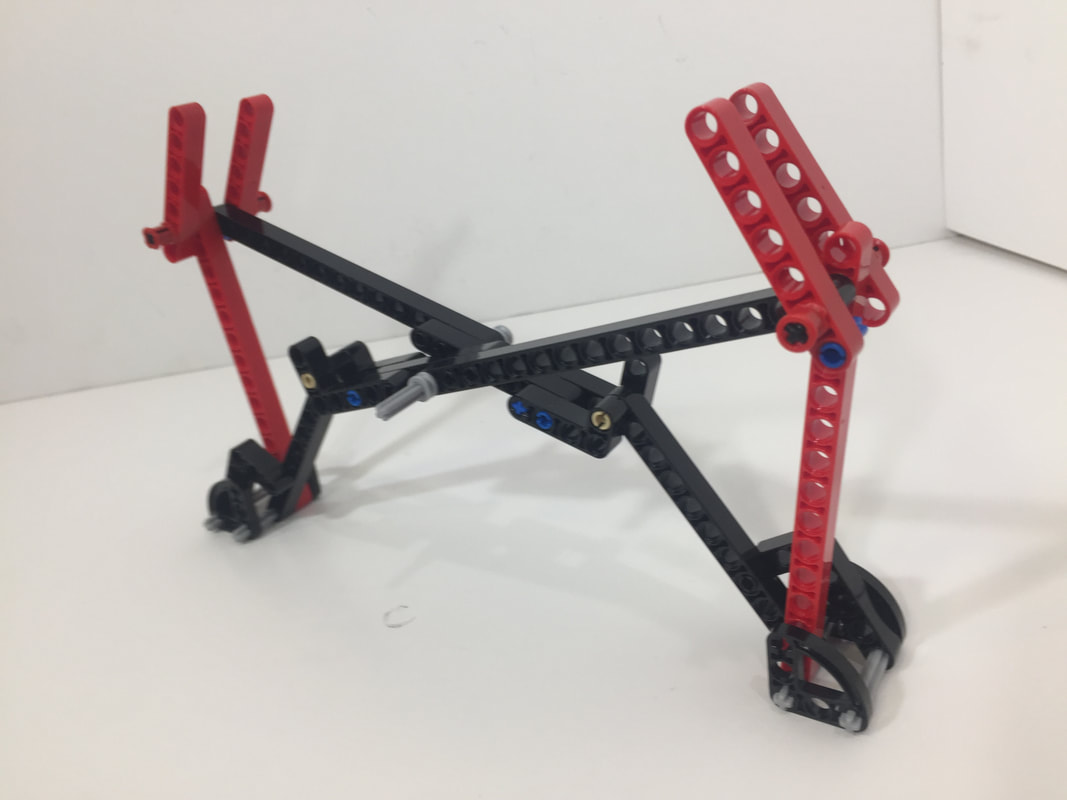
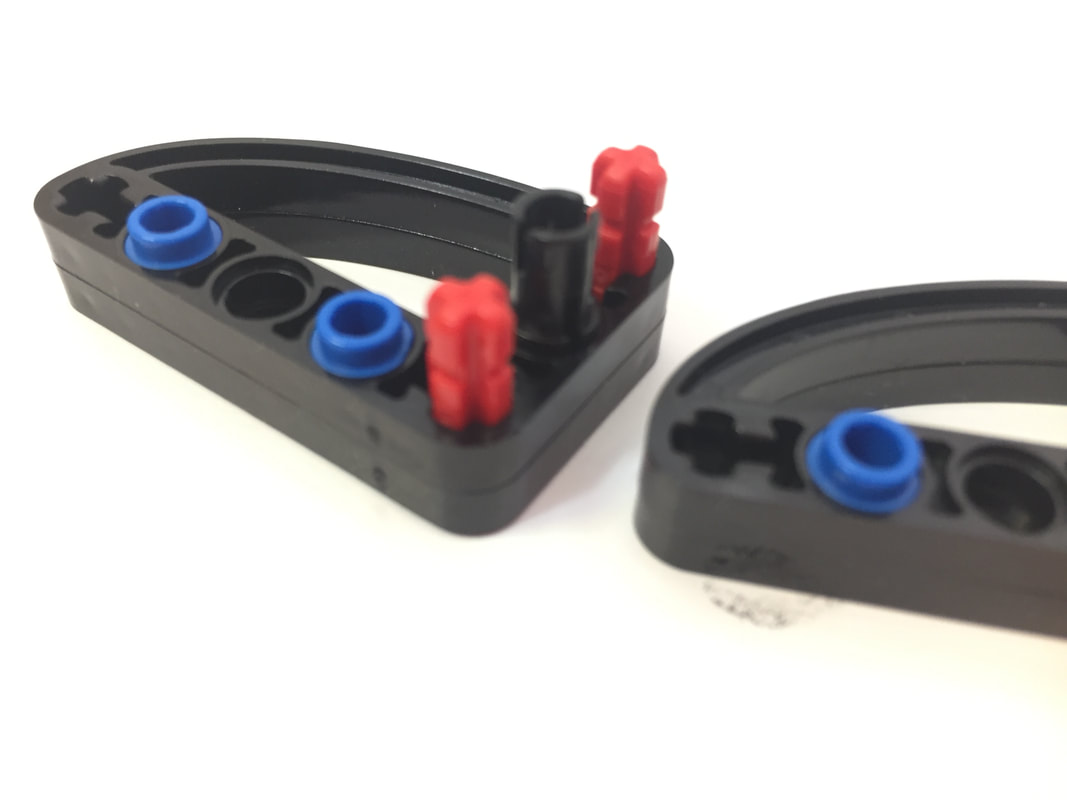
Next, connect 2 leg sections to make Strider's 10 bar linkage.
|
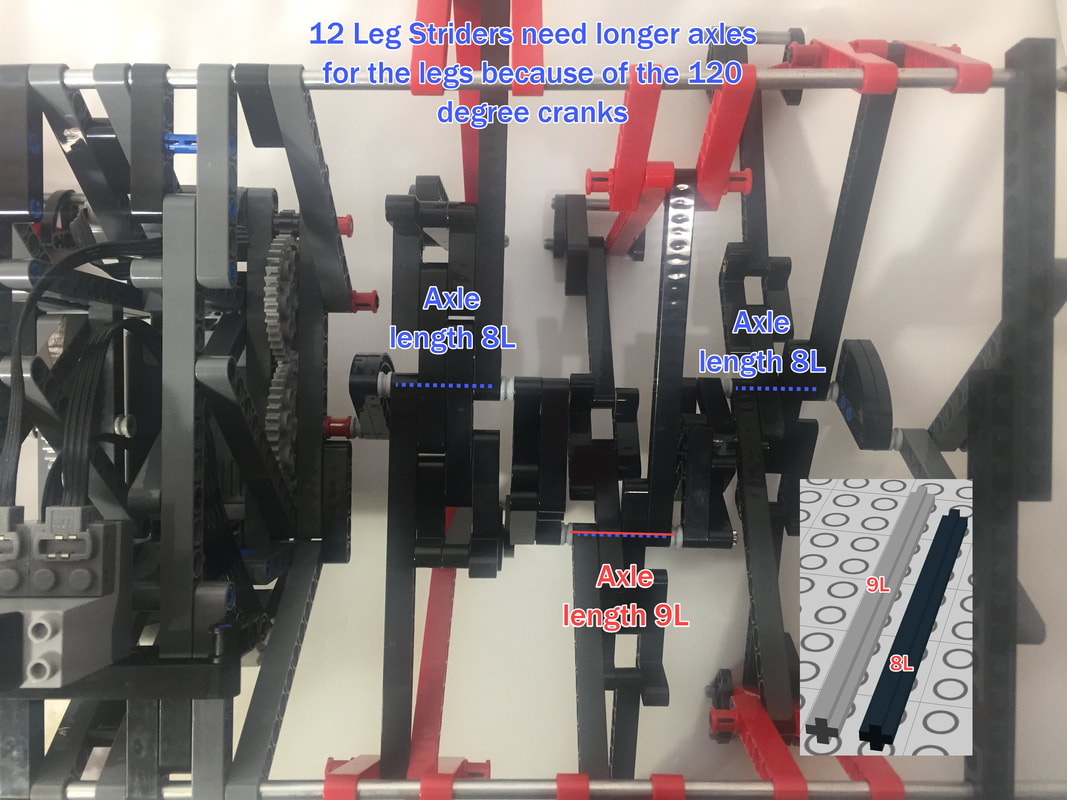
As noted above, if building a 12-legged Strider you will need to replace the above 7L axle with longer 8L and 9L axles as shown to the right (see the 120 degree crank section at the bottom of these instructions)
|

|
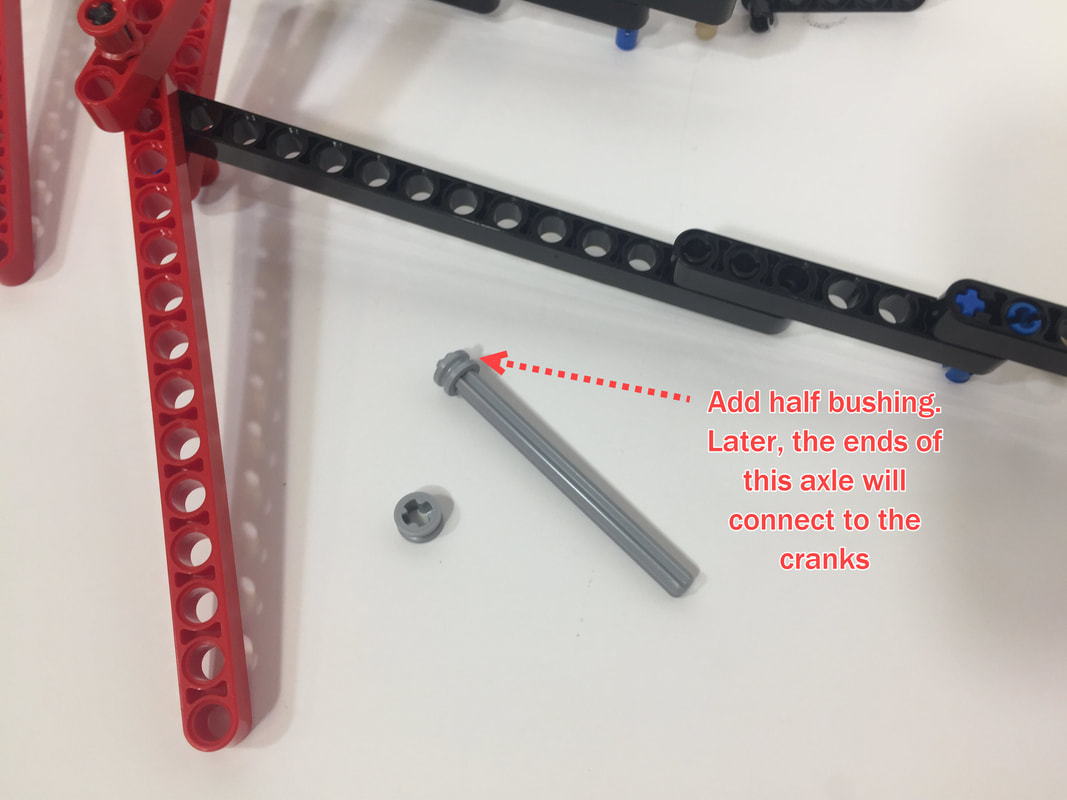

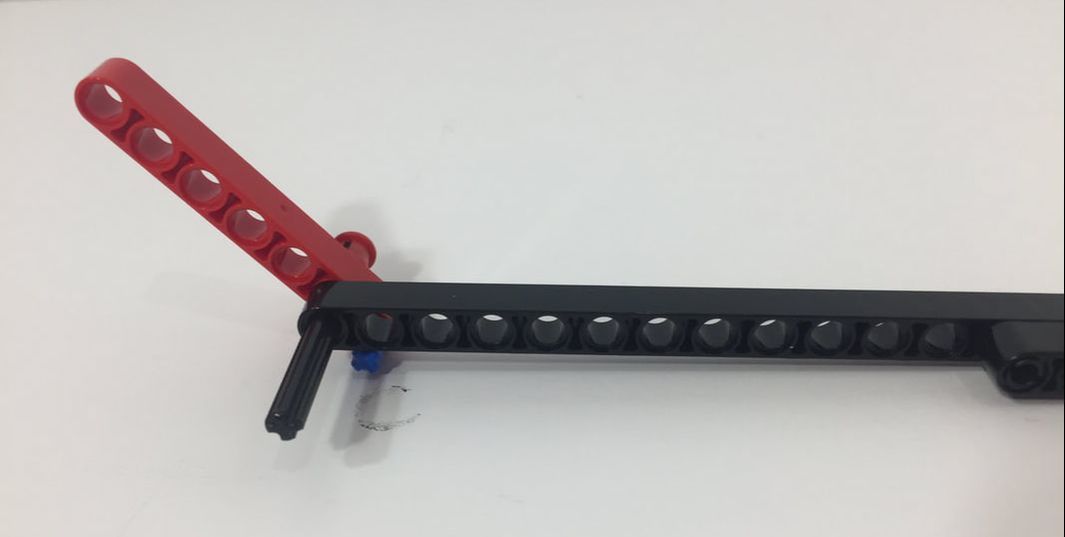
Then flip the other leg over and slide it onto to axle.
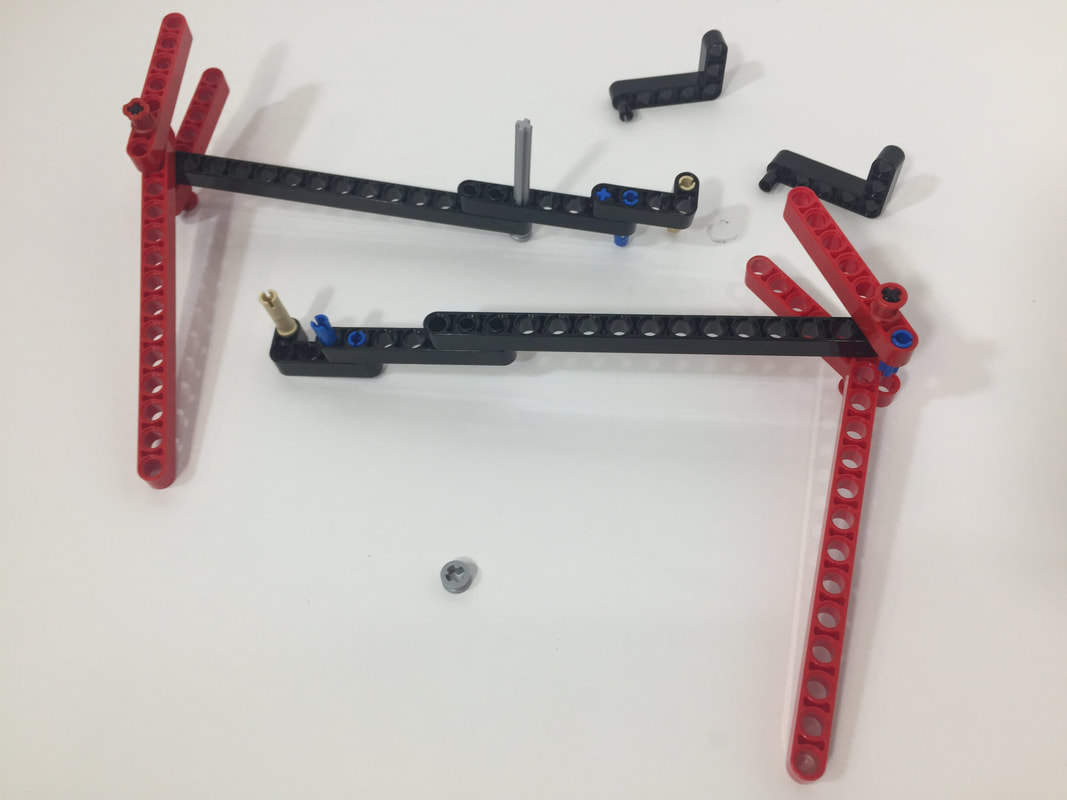
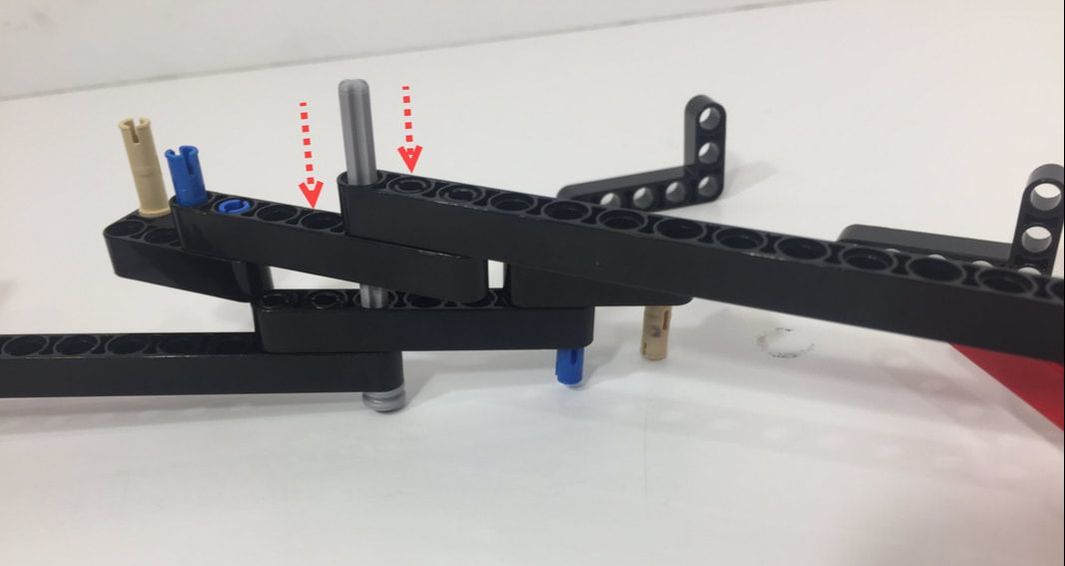
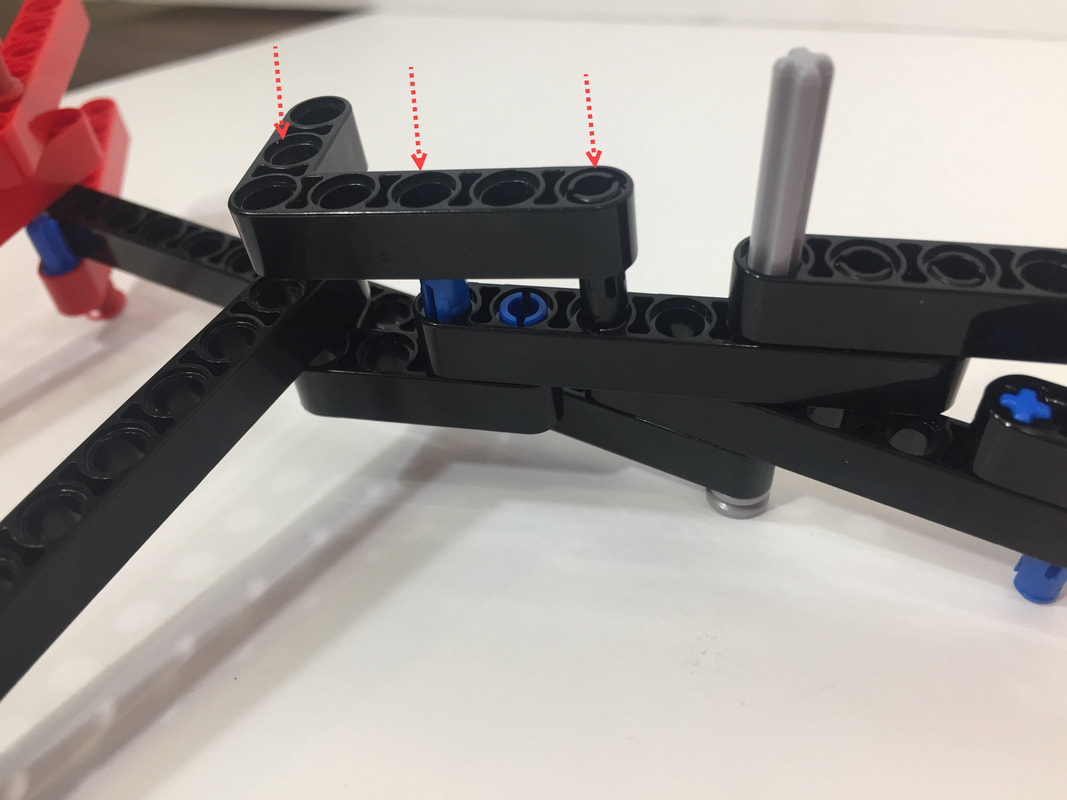
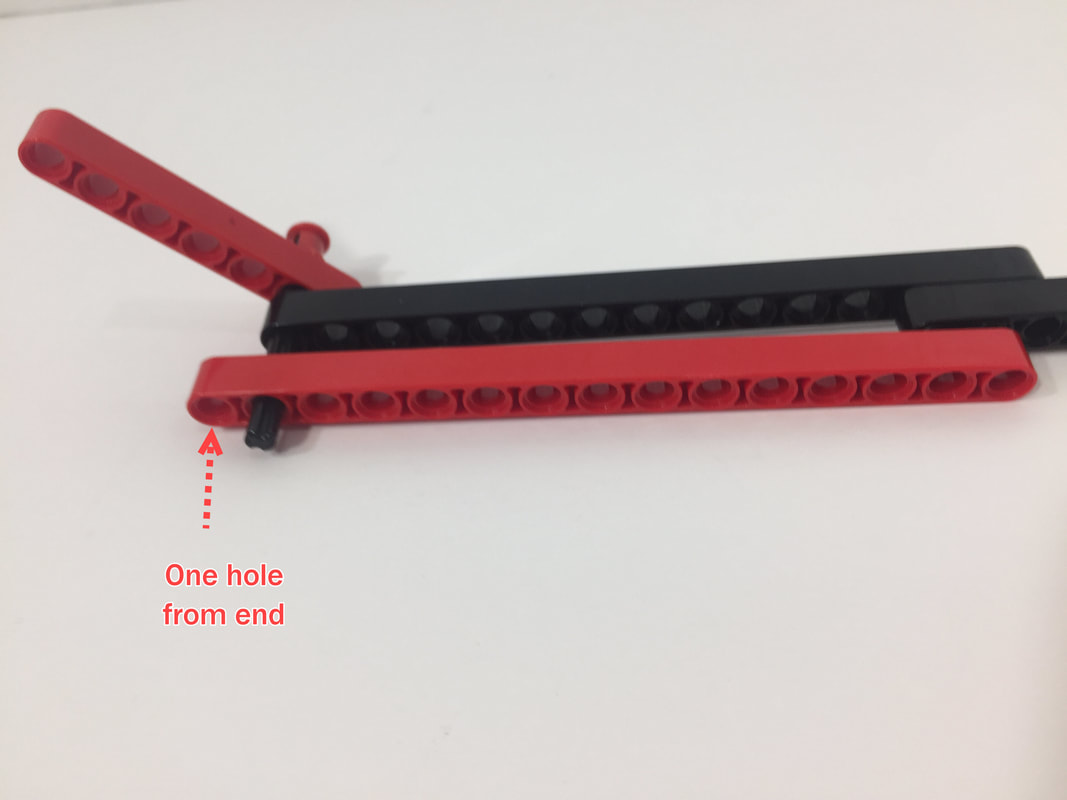
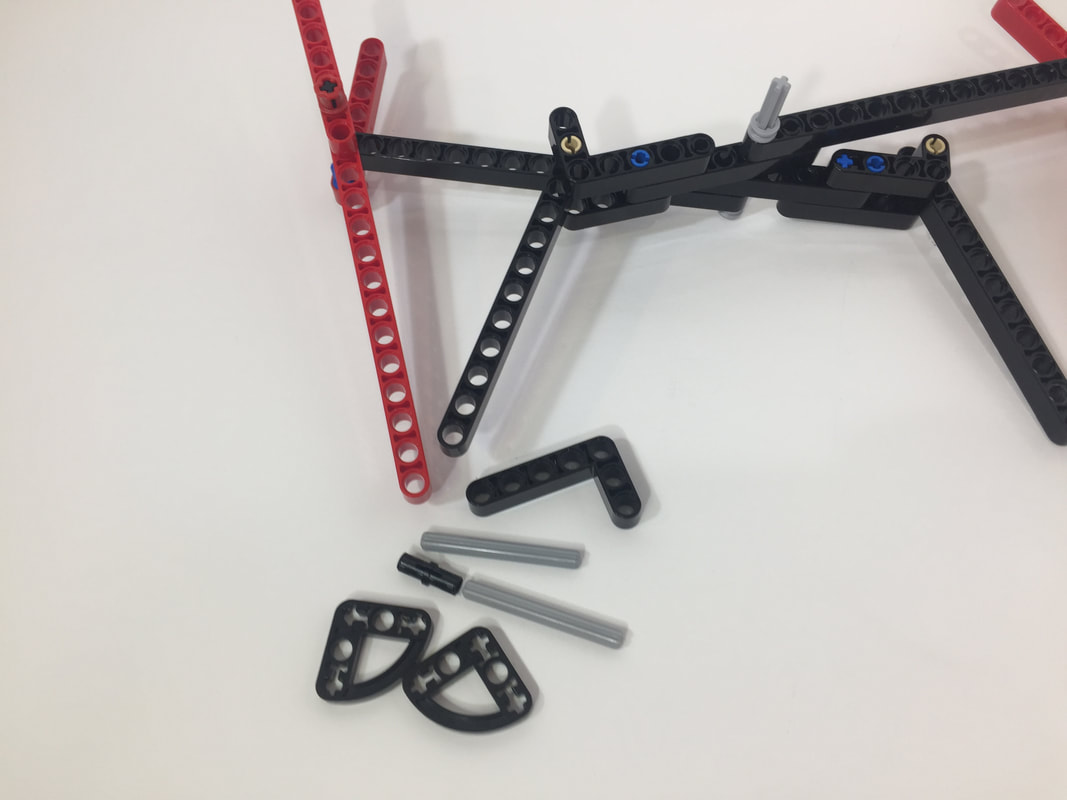
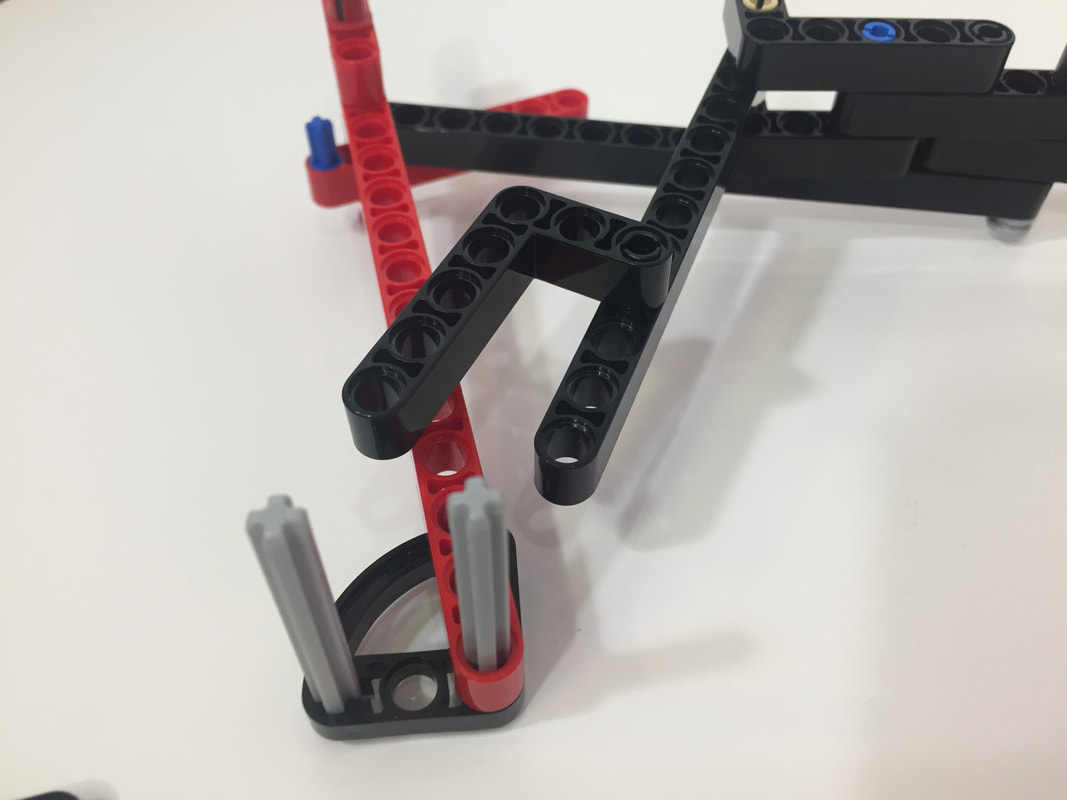
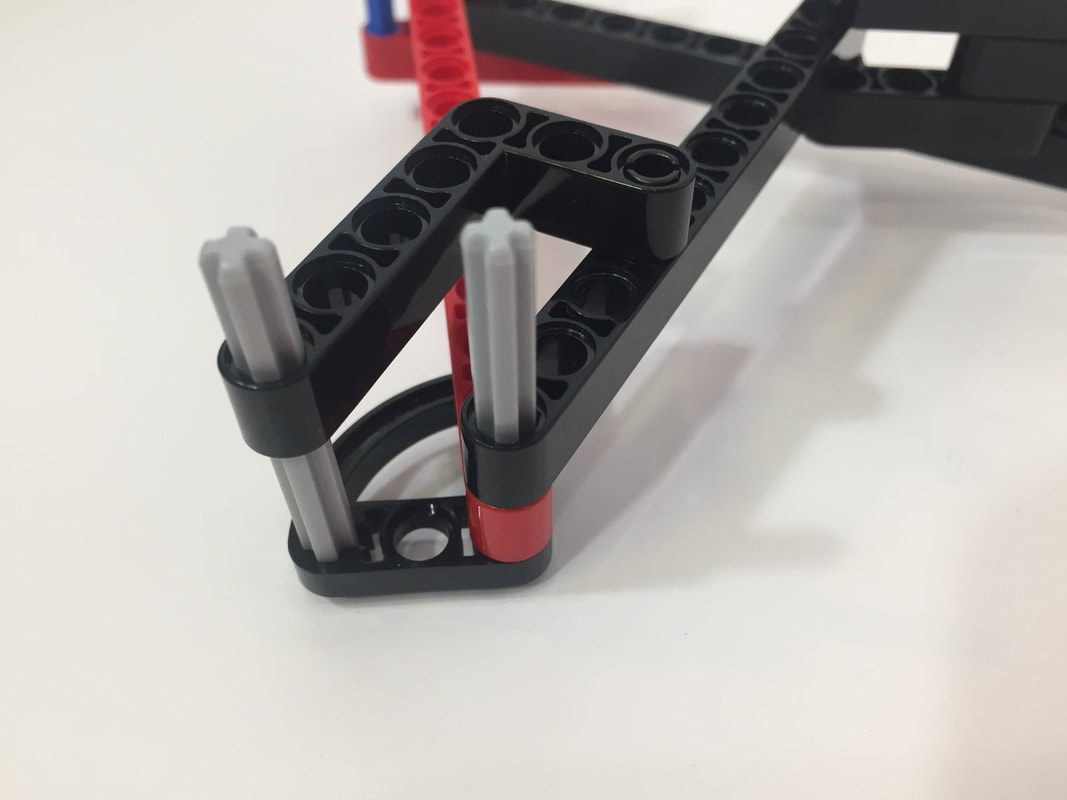
Next, add toes
First, here's a simplified longer toe of length 3 for 8-legged Striders:

Below shows how to add shorter toes of length 2 for 12-legged Striders:
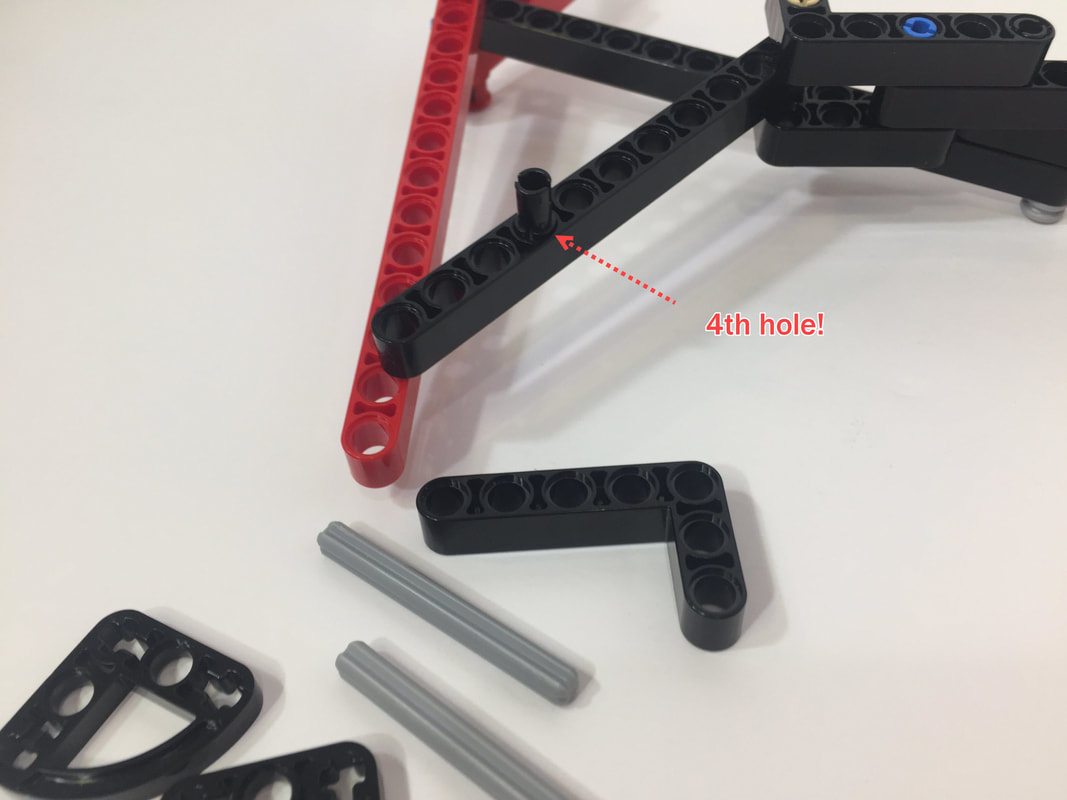
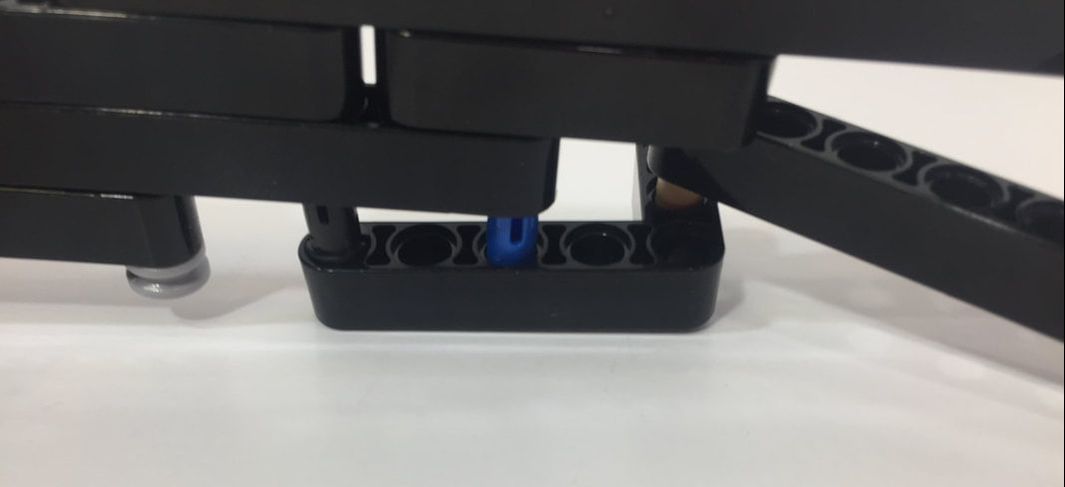
NOTE: for 8-legged Striders with toes of length 3, the above black pin goes in the 3rd hole rather than the 4th hole.
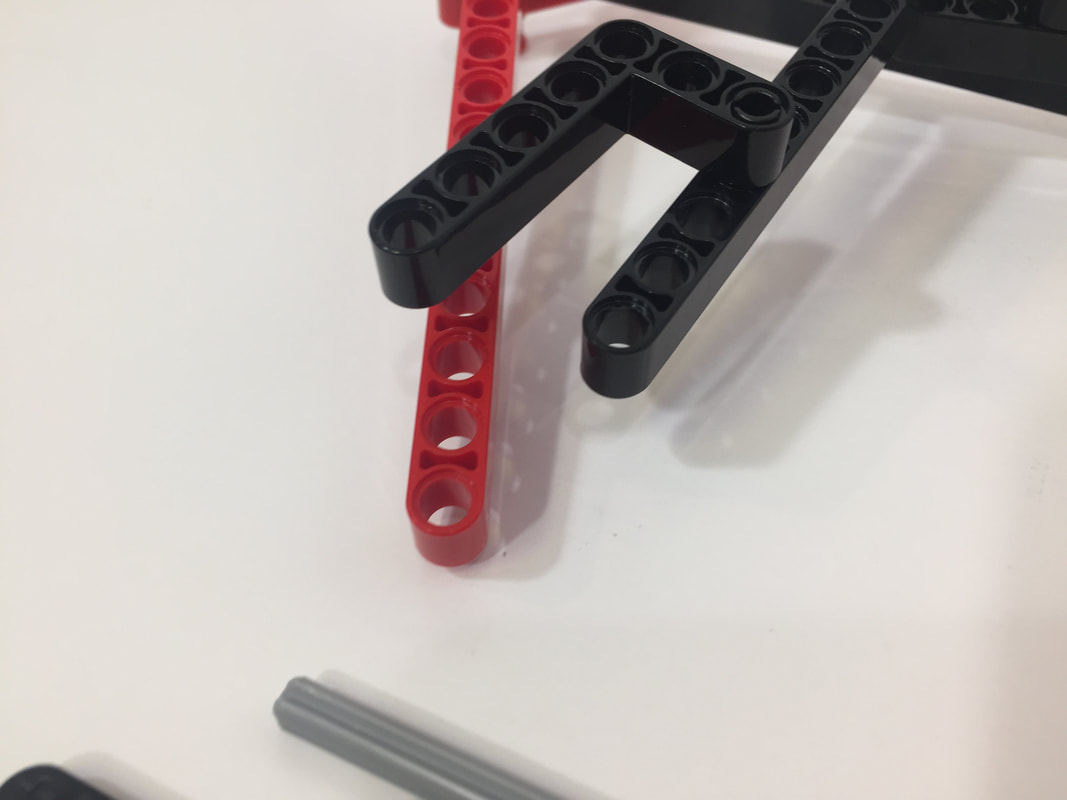
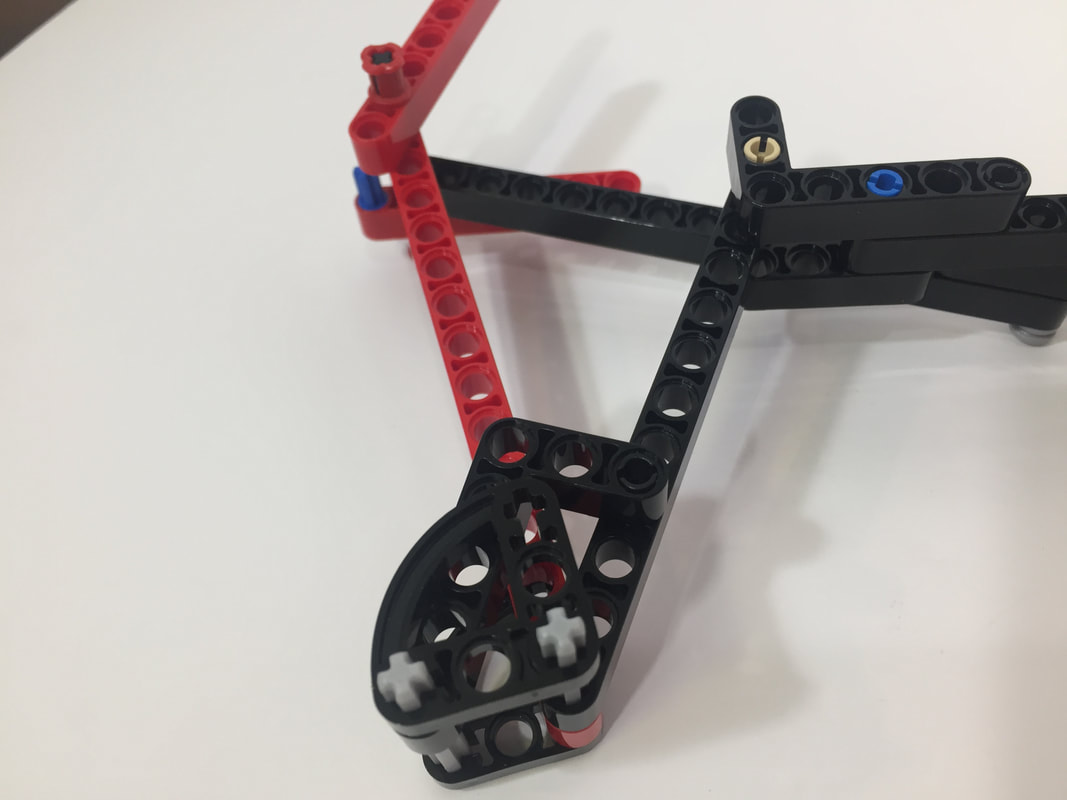
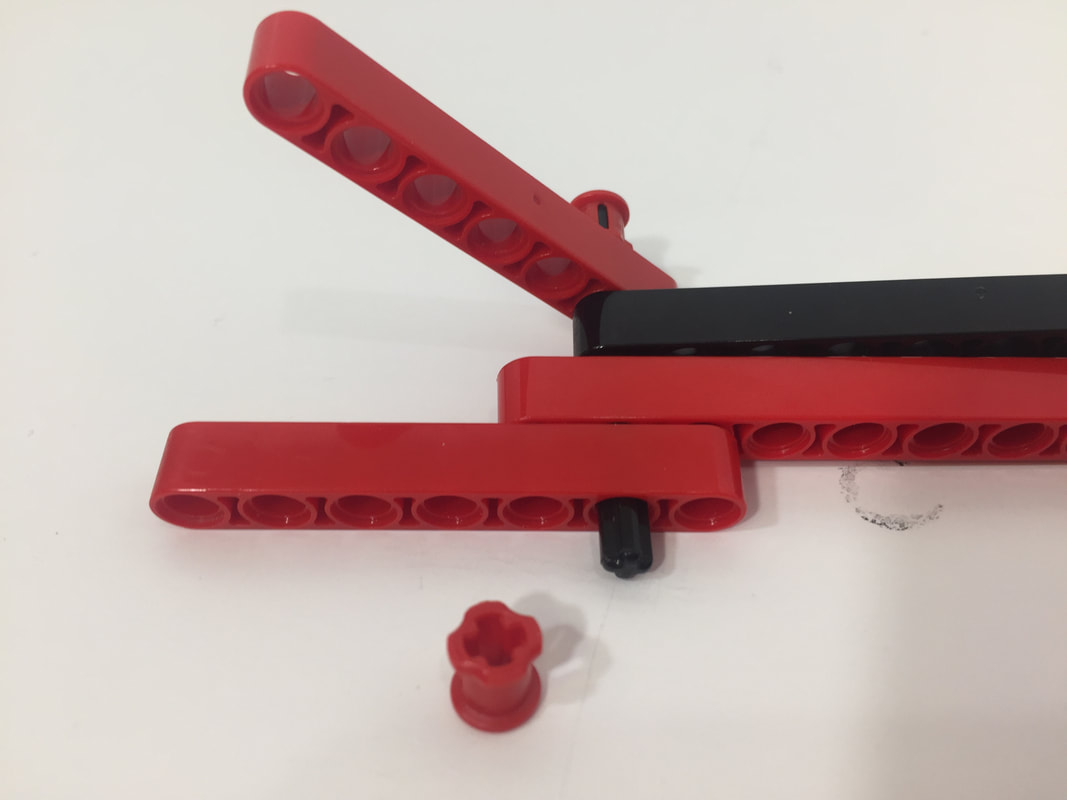
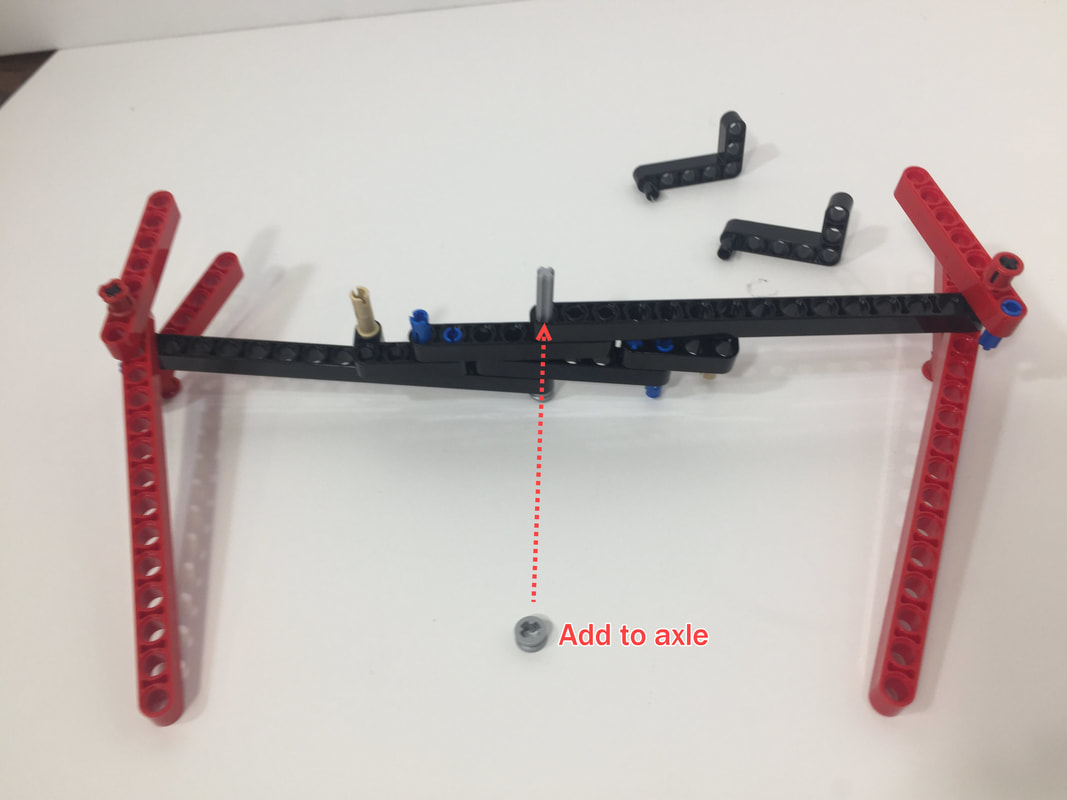
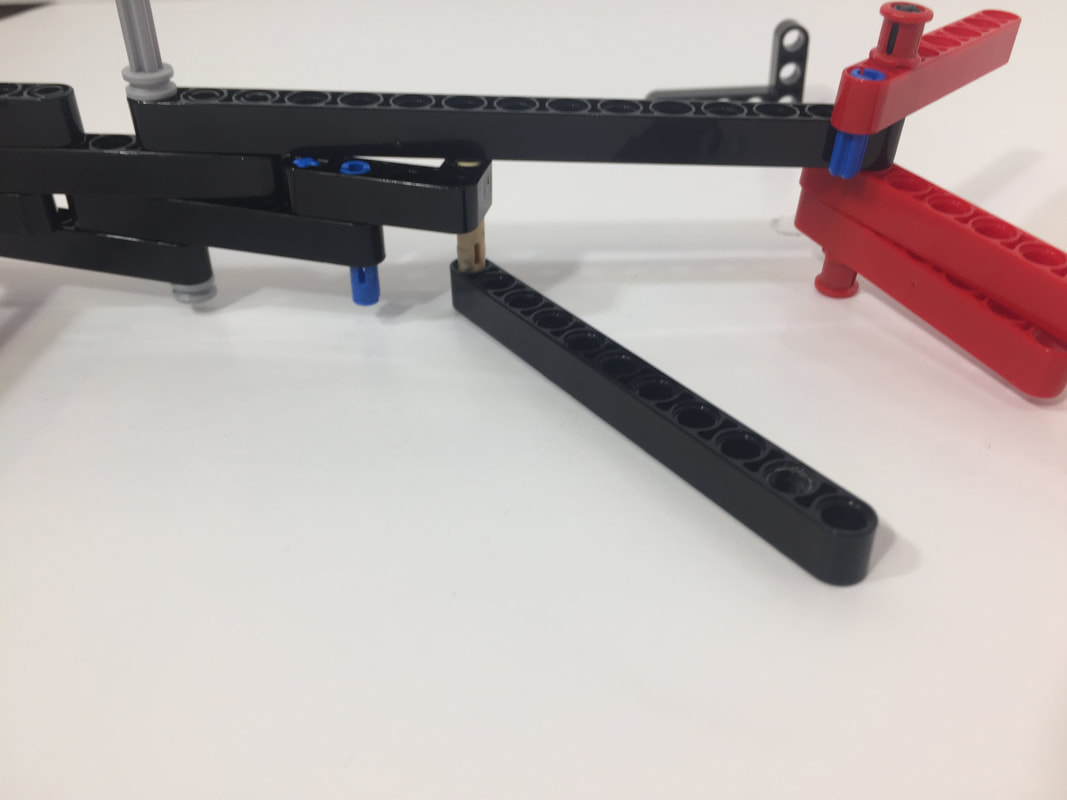
Flip the leg pair over and add a toe to the other side using the same steps

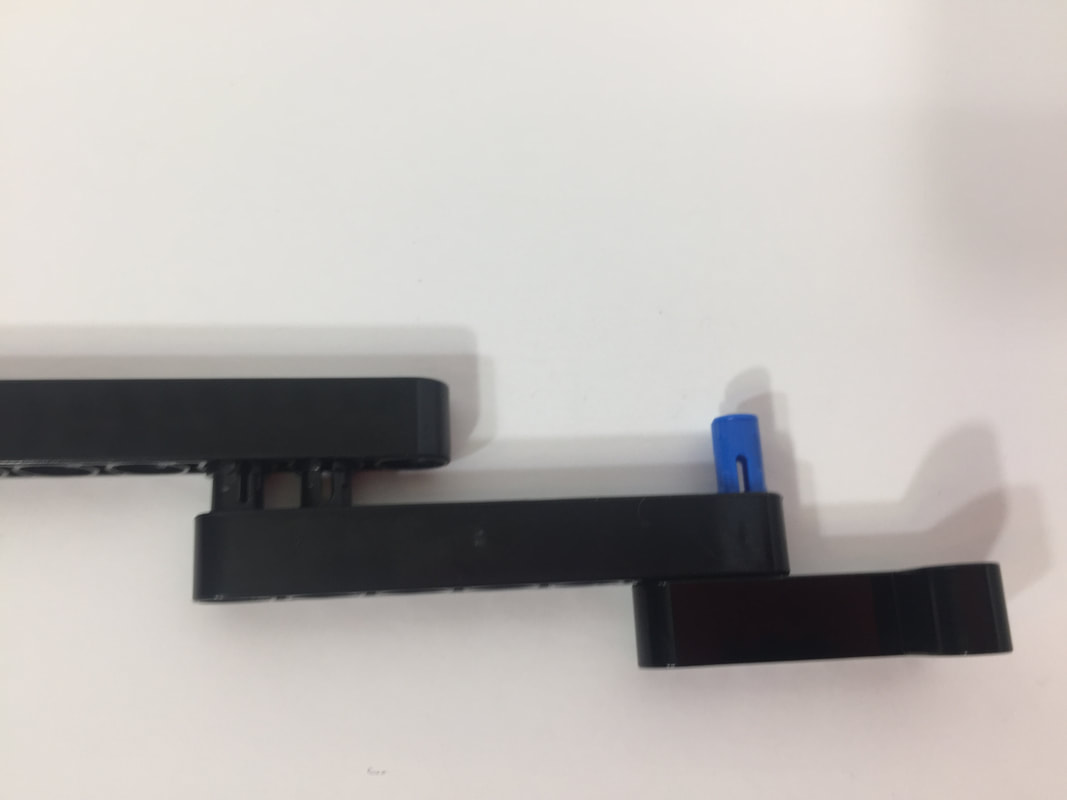
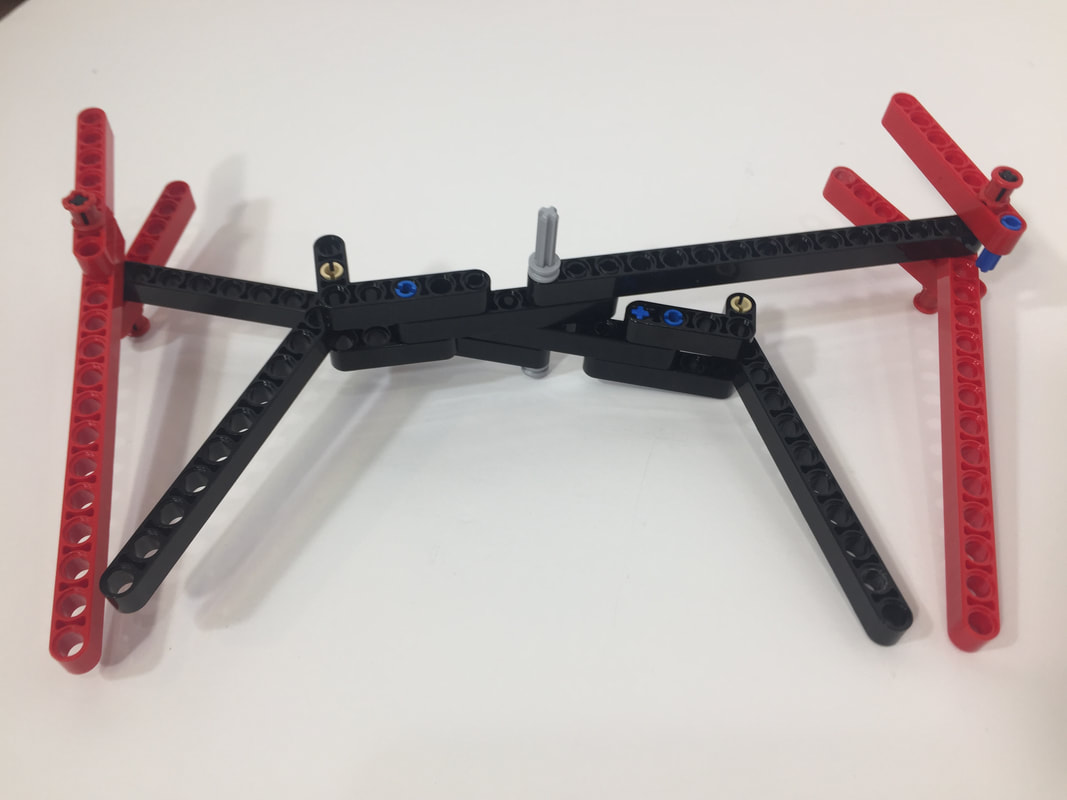
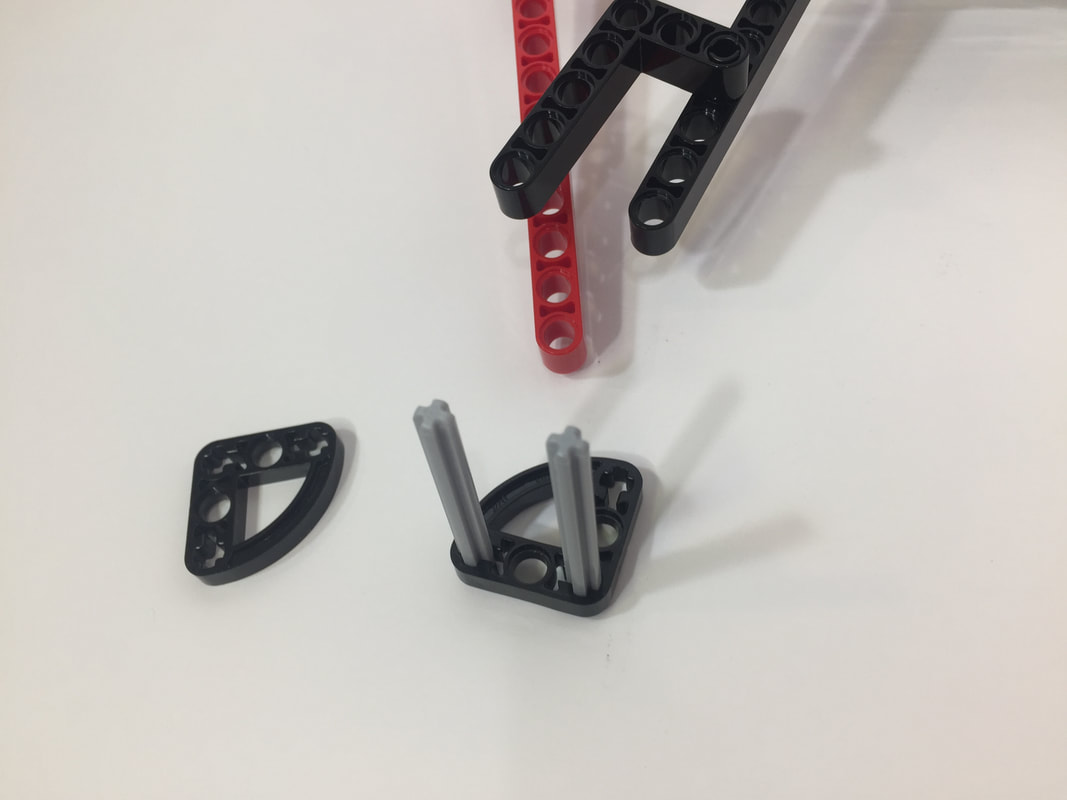
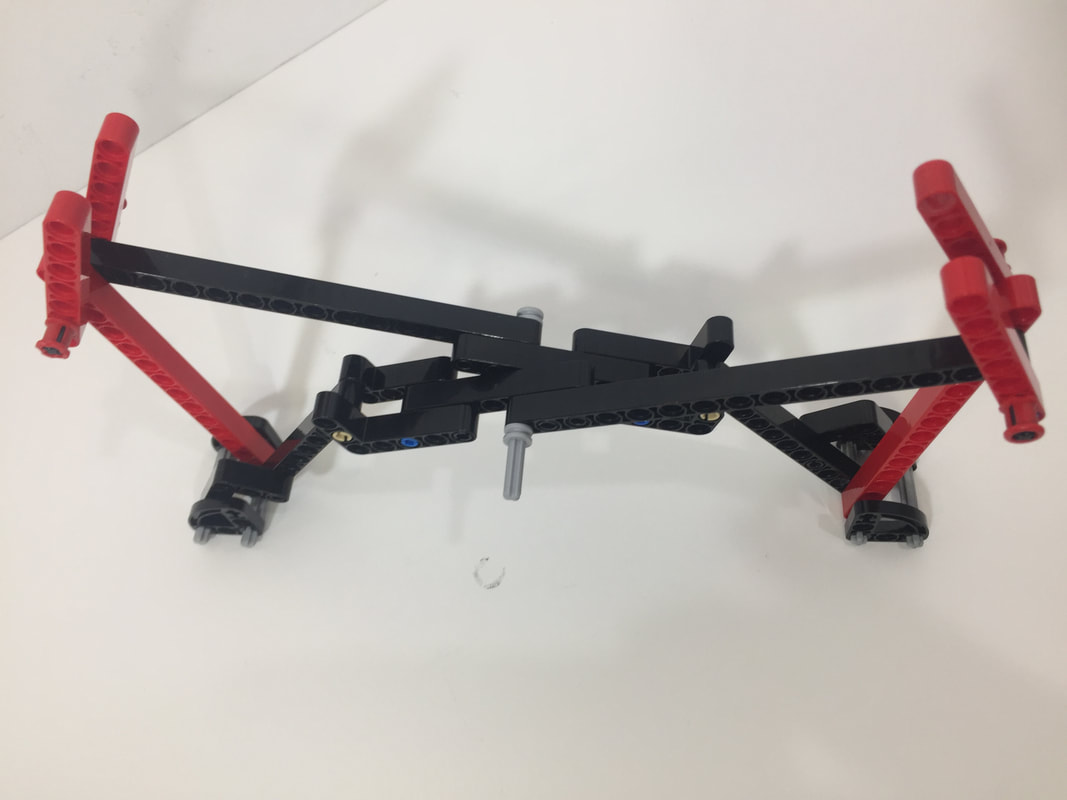
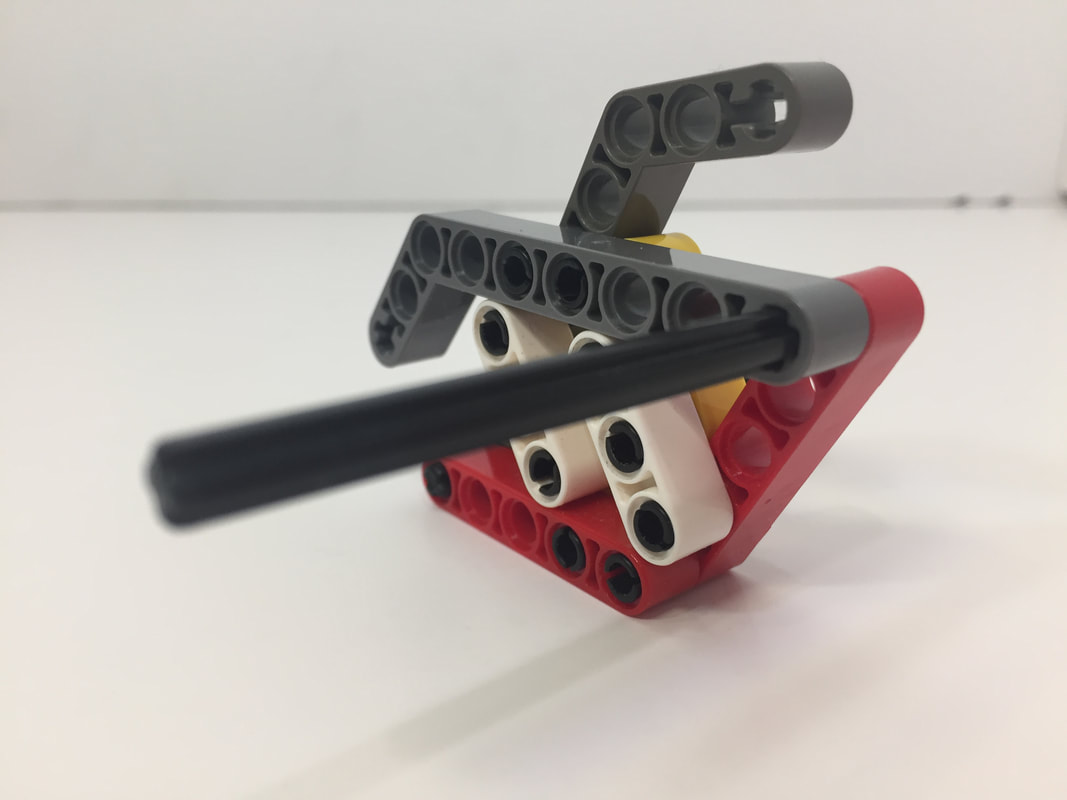
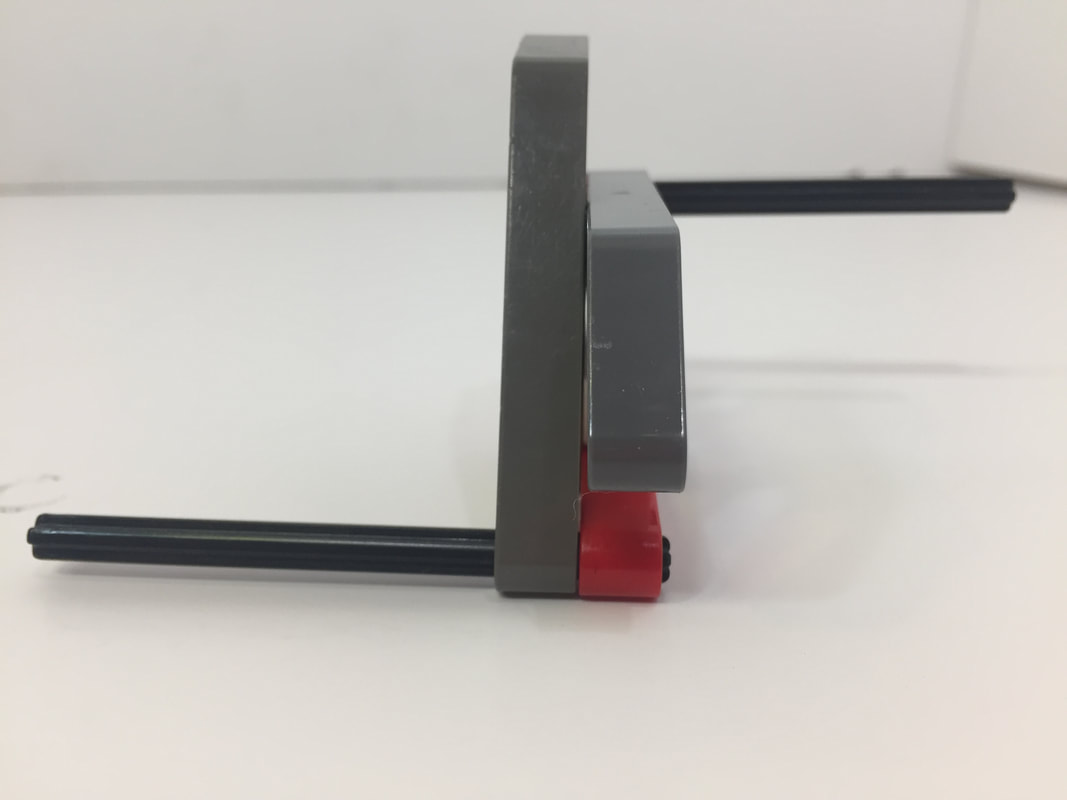
Finished with a leg pair. Below are some images from other angles
Next, make the cranks
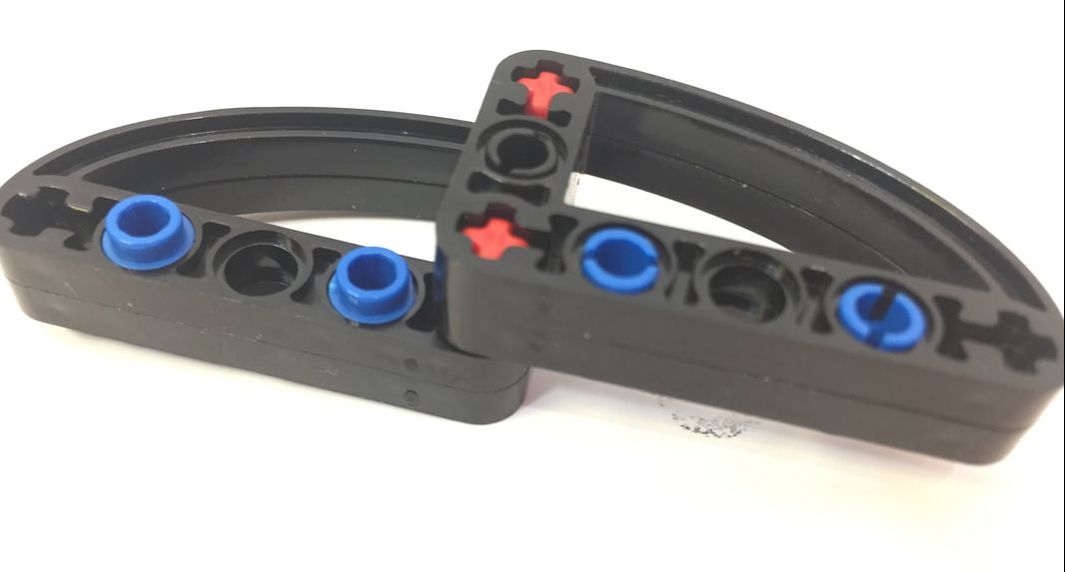
First here are the single length cranks. Four are needed - two next to the robot's frame, and two next to the outer frames.
Make four of these cranks
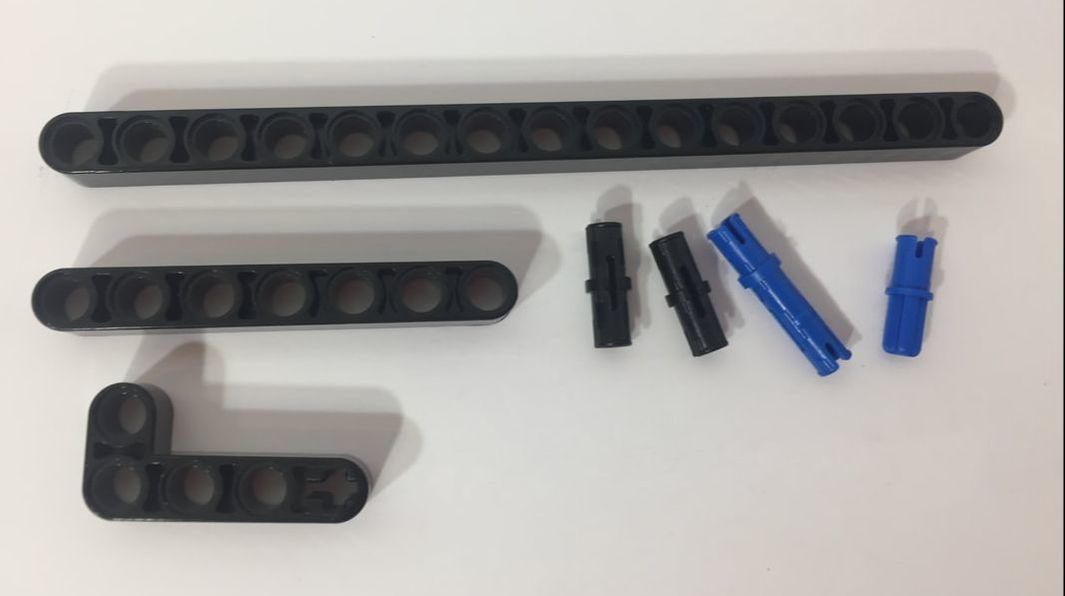
Next, make the cranks that go between leg pairs.
8 legged Striders need a double length crank between the inner and outer leg pairs to put them 180 degrees out of phase. For example, if the inner leg's crank is pointing at 12 o'clock, the outer leg's crank should point at 6 o'clock.
Make two of the following cranks for 8 leg Striders.
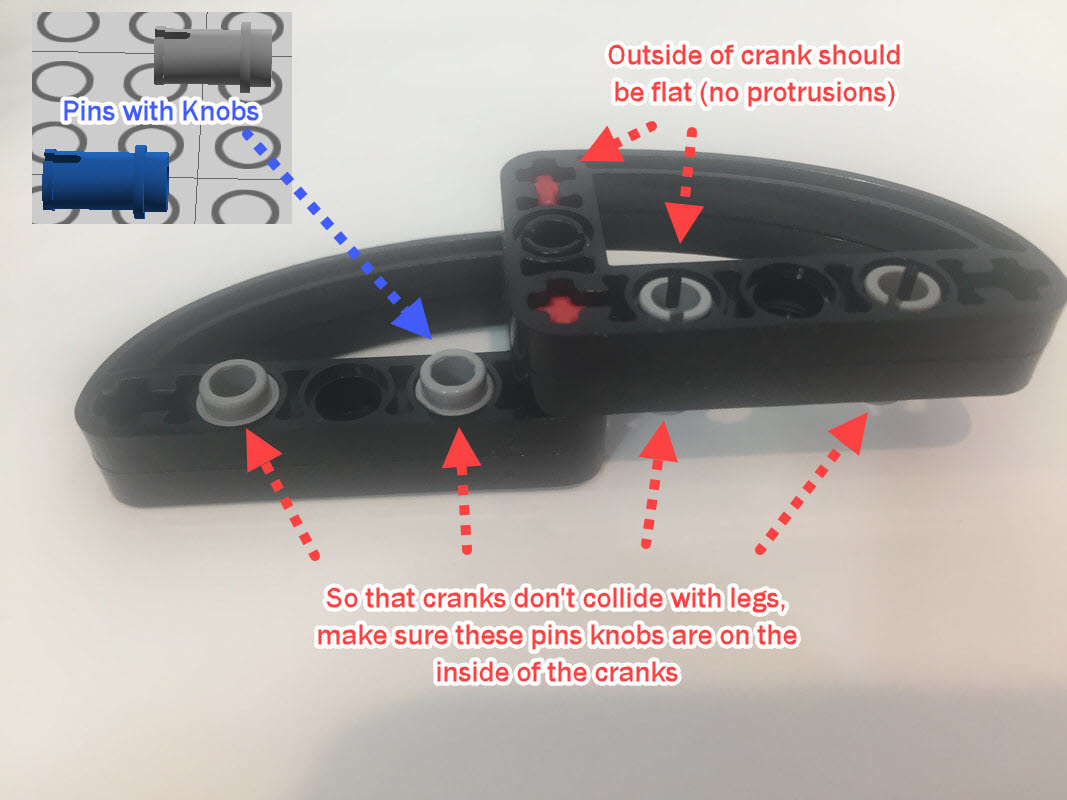
Also, build the crank like above, not like below!
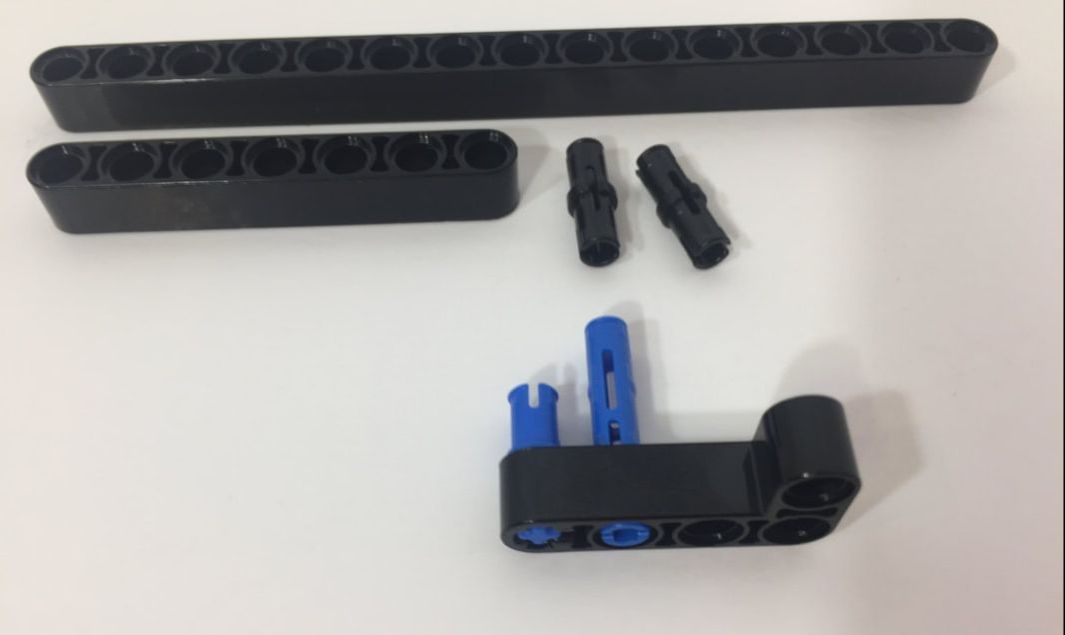
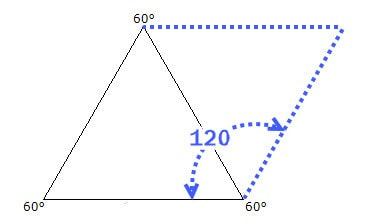
120 Degree Cranks for 12 Legged Striders
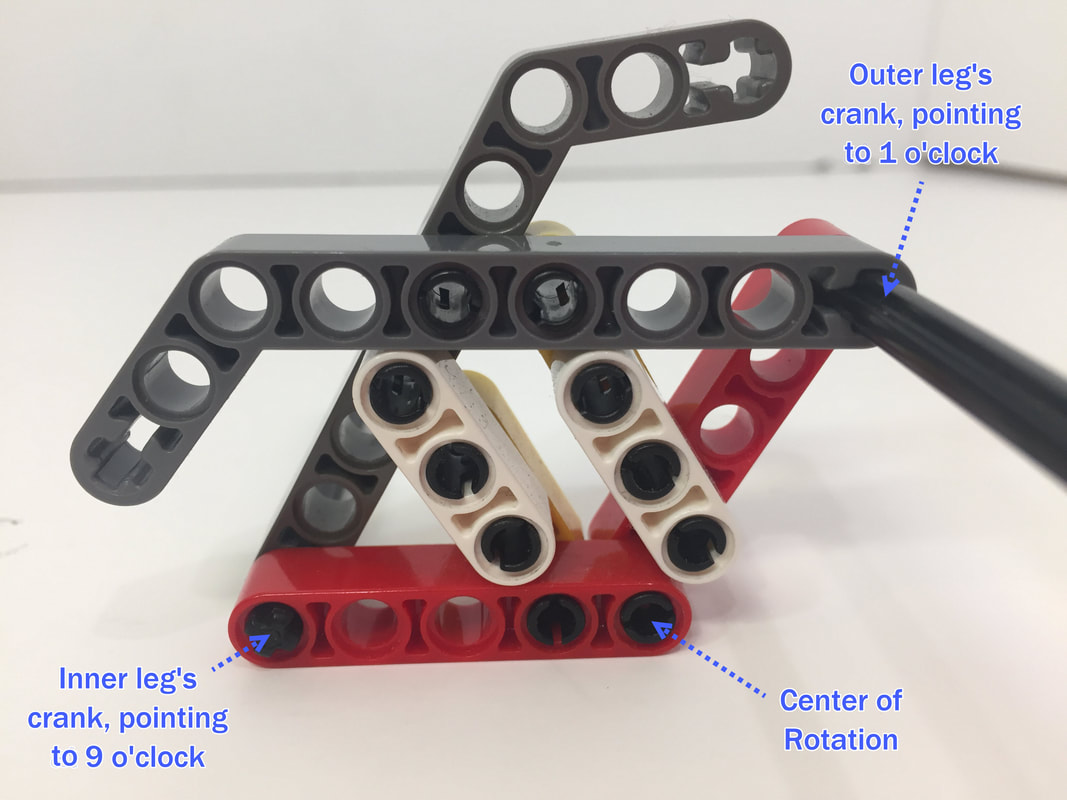
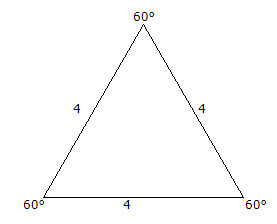
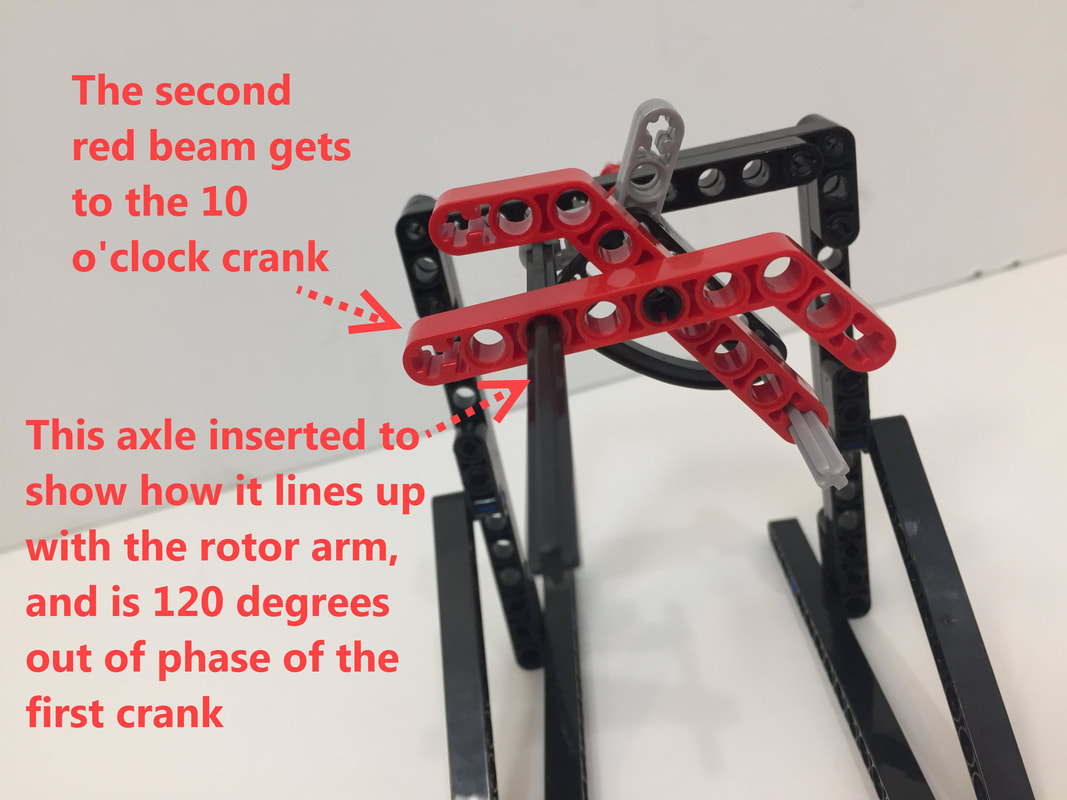
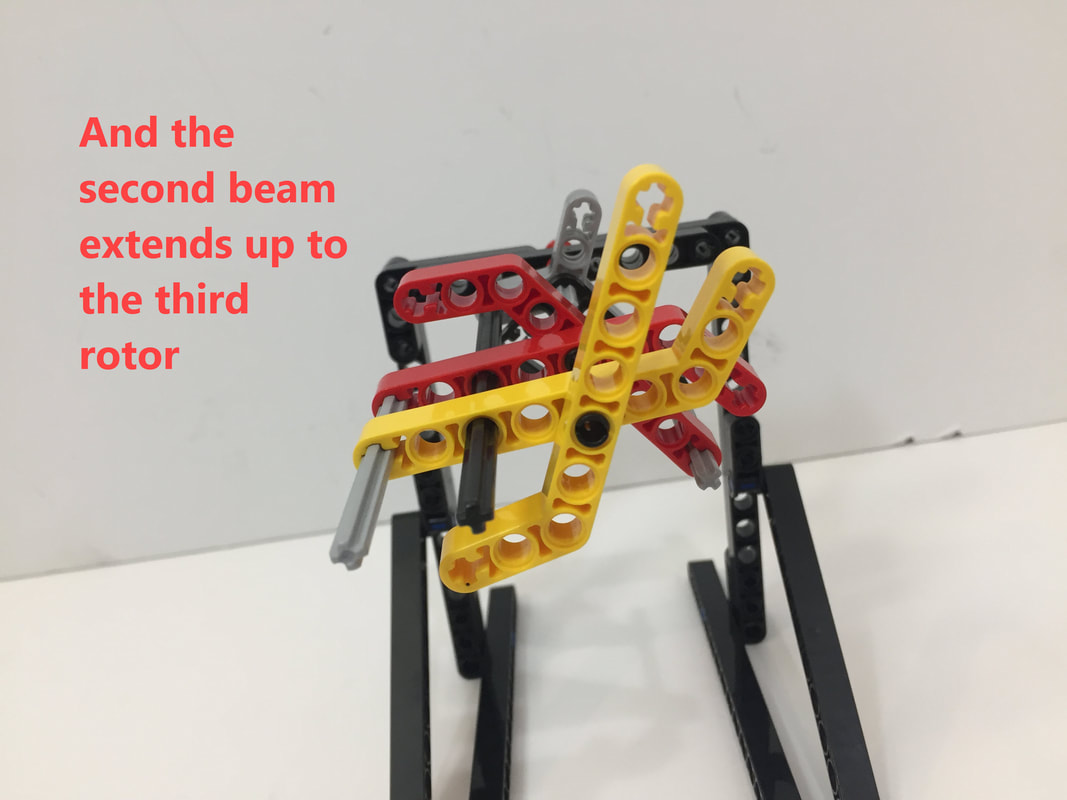
12 legged Striders need their double length cranks to be 120 degrees out of phase. For example, if the inner leg's crank is pointing to 12 o'clock, the middle leg's crank should point to 4 o'clock and the outer leg's crank should point to 8 o'clock.
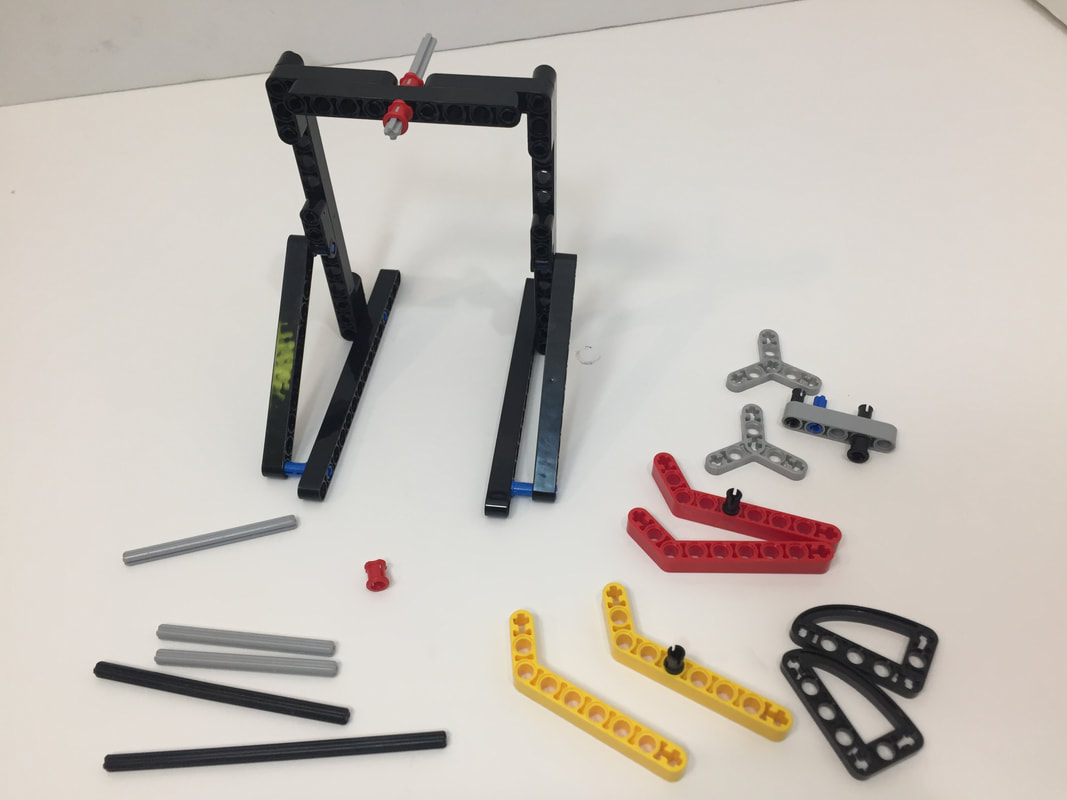
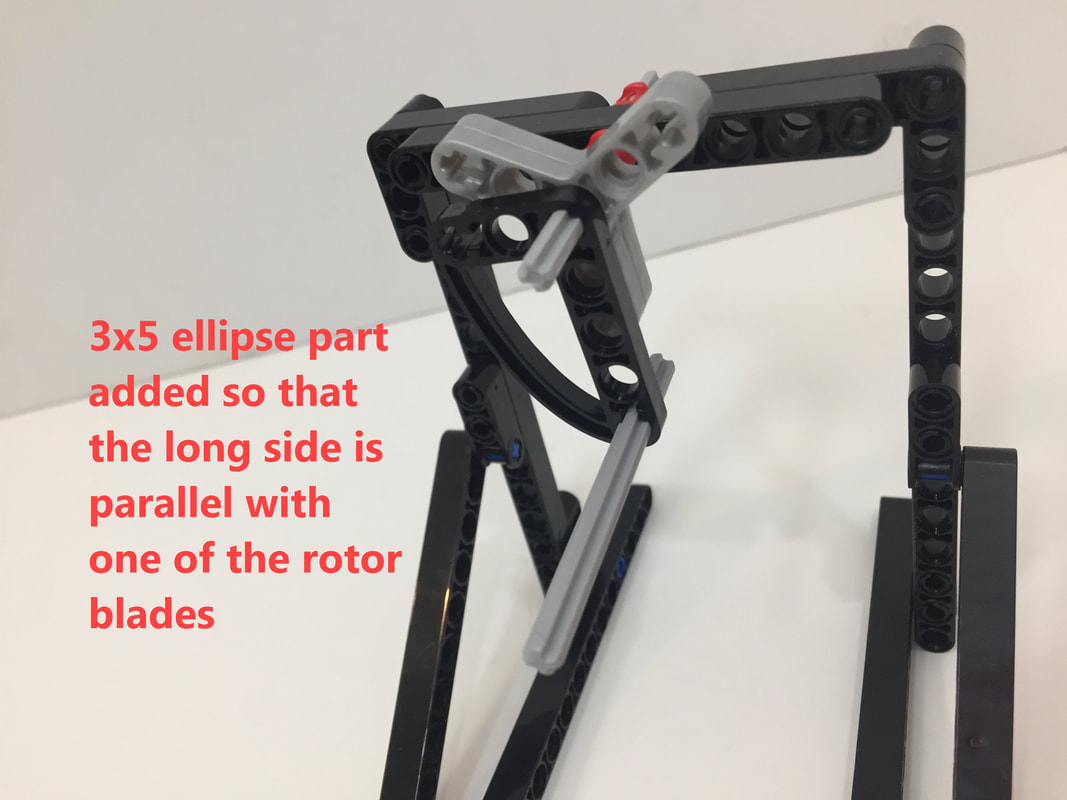
Below is one way to make them, which is described here. (we cut the ends off of the 7x3 beams with a hobby saw, but that is not necessary). Because the axles have to pass thru 2 beams in the corner of the crank, you will need to use longer axles for the legs rather than length 7 axles as shown in the above directions - we used axles of length 9 for the center legs, and axles of length 8 for the inner and outer legs.
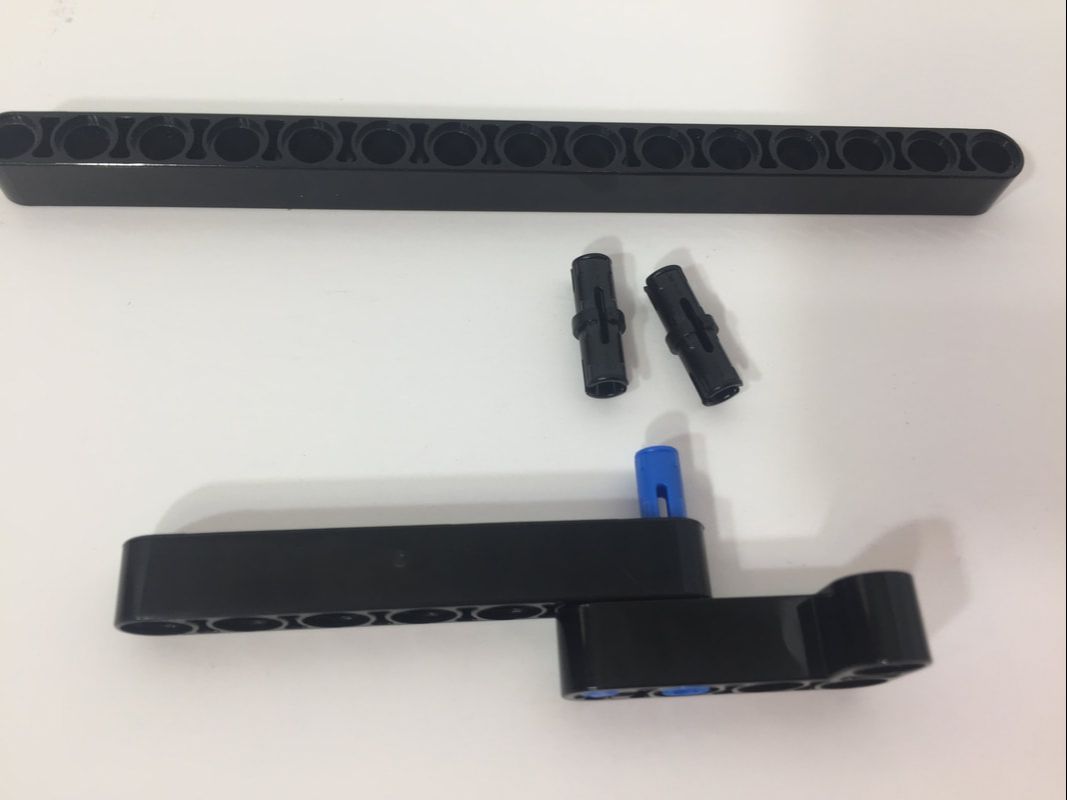
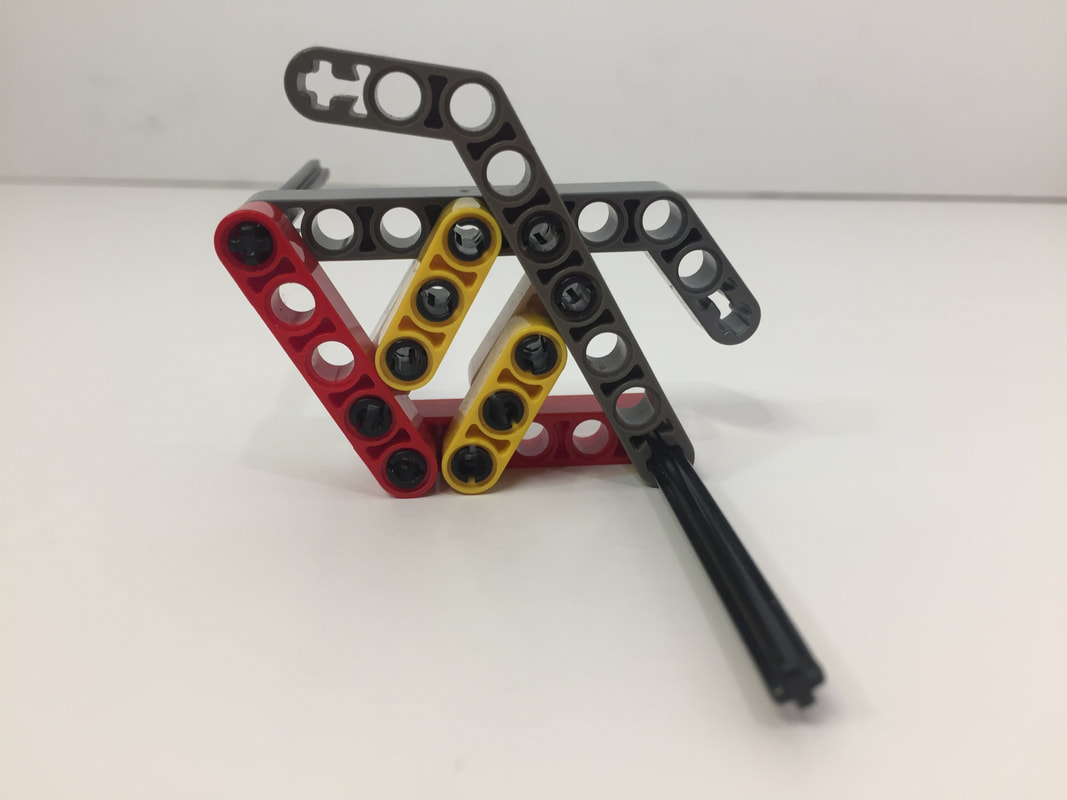
You will need to make 4 cranks, 2 for each side of the robot. You'll find the 3-hole beams are a tight fit, but the resulting crank is fairly strong. NOTE: The tight fit of the 3-hole beams increases the 120 degree angle slightly, which doesn't impact walking performance much but can be avoided by filing slightly the end of the 3 hole beams where they press against the gray beams.
|
|

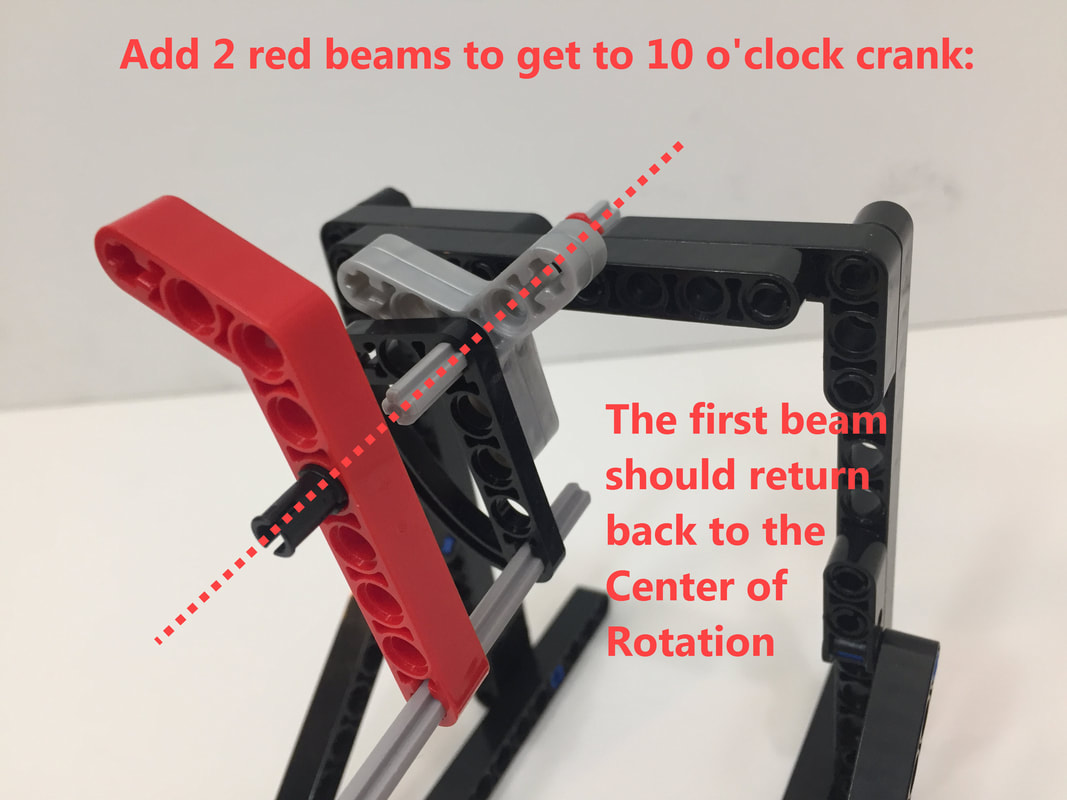
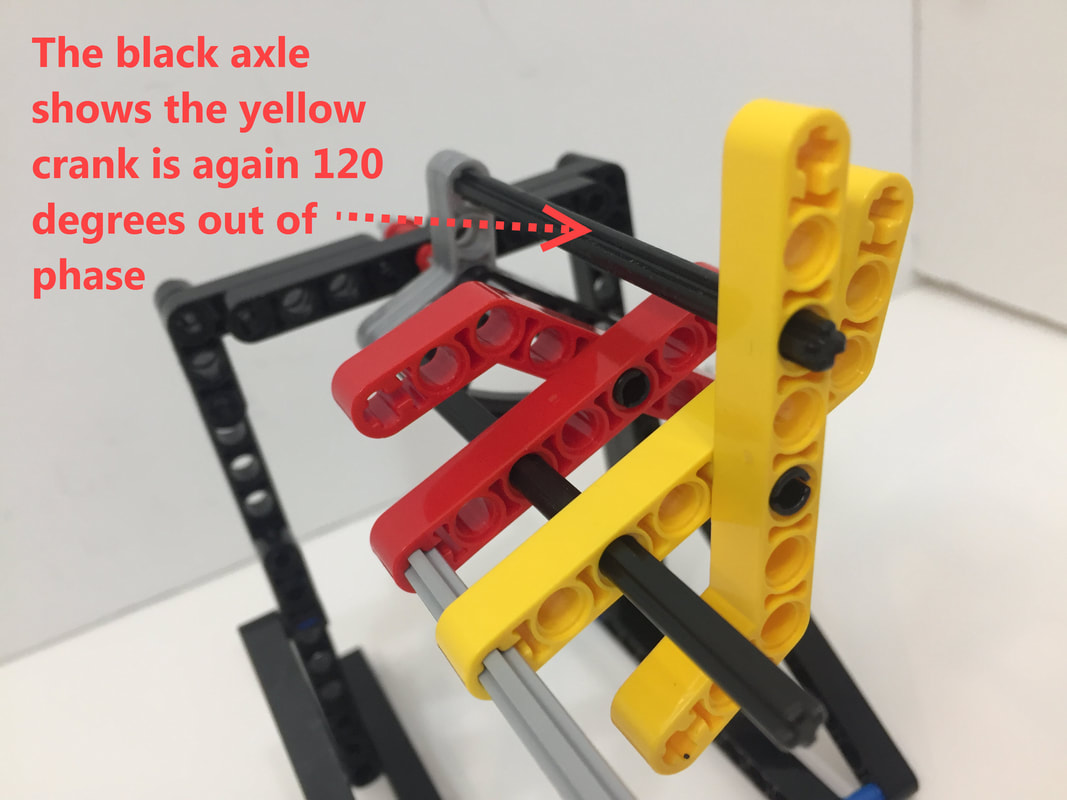
UPDATE: it's easy to add these 120 degree cranks incorrectly - a few images down shows how they should be added to ensure the three cranks will be 120 degrees out of phase.
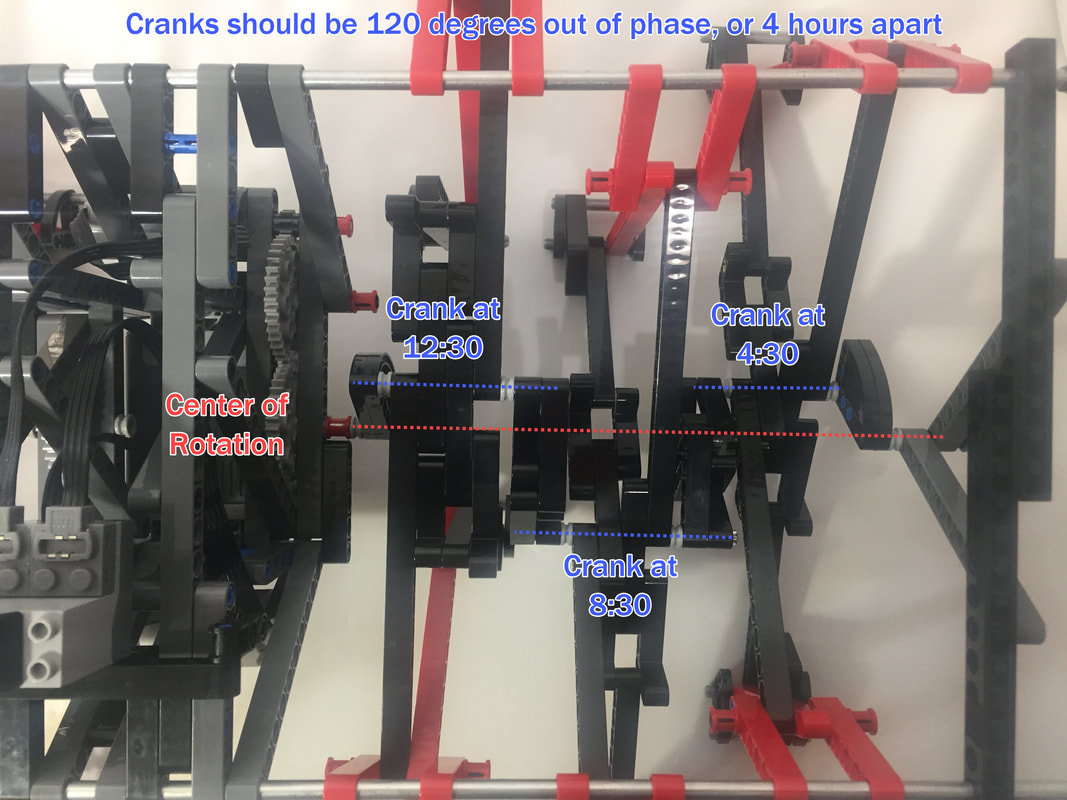
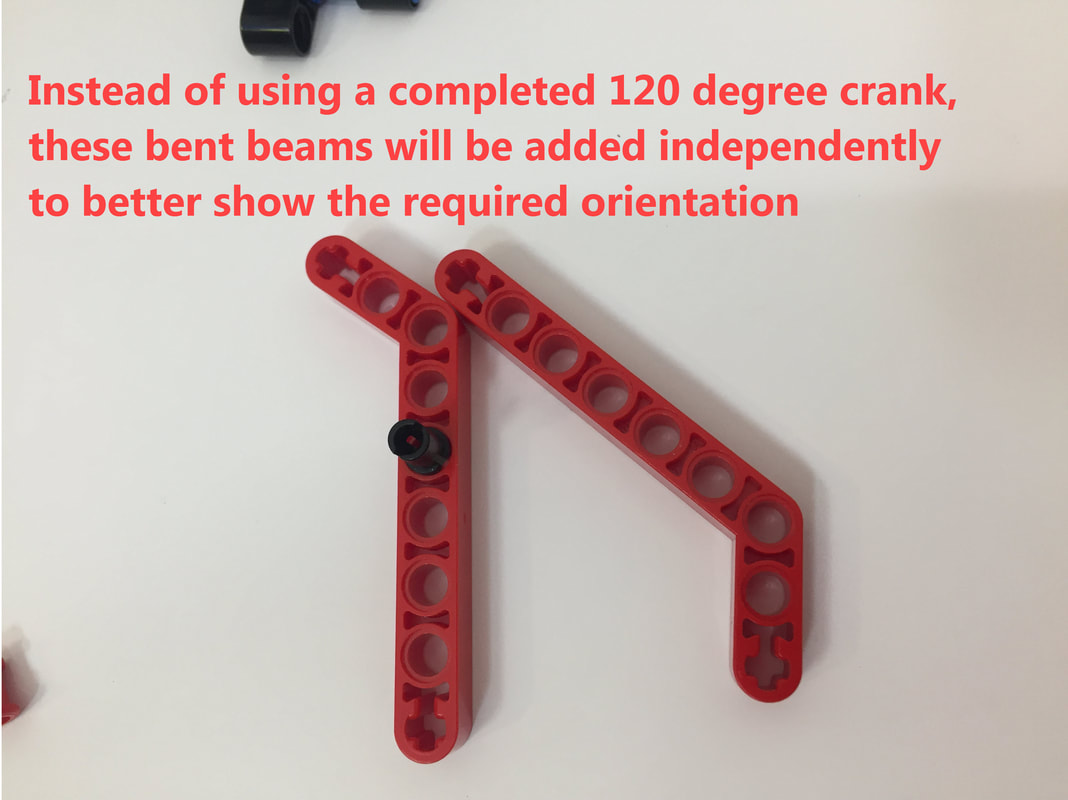
Below shows how to orient the 3x7 bent beams to ensure all three cranks are 120 degrees out of phase:
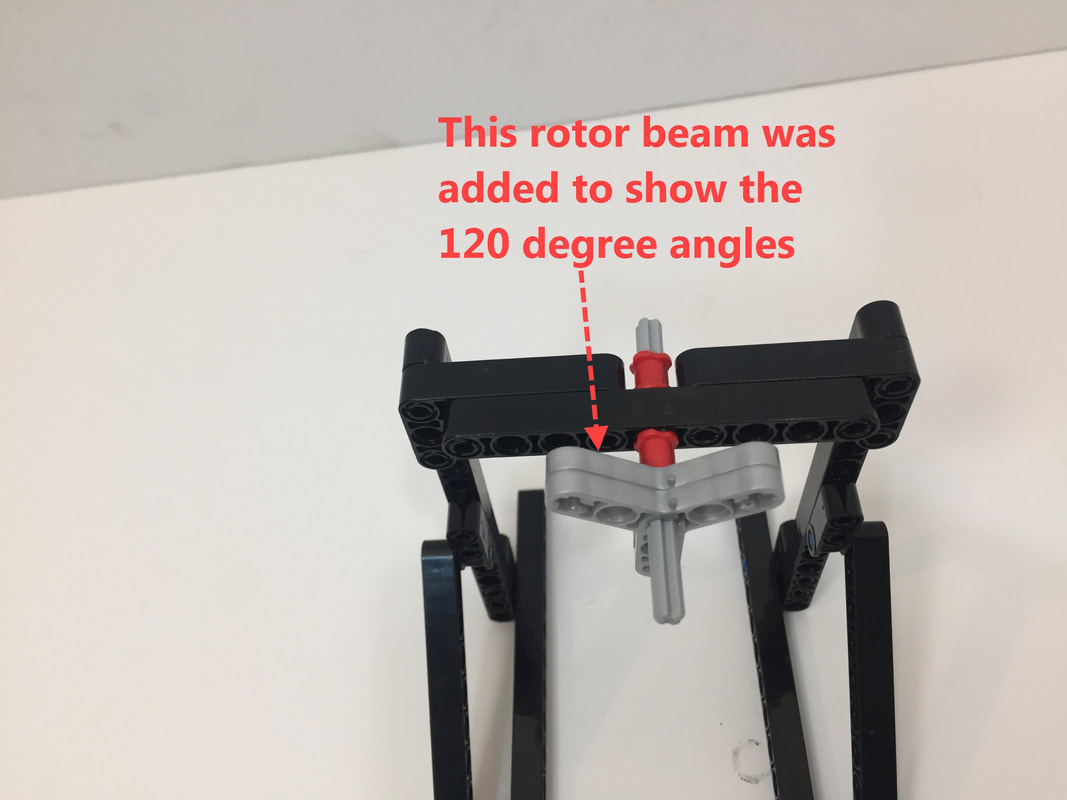
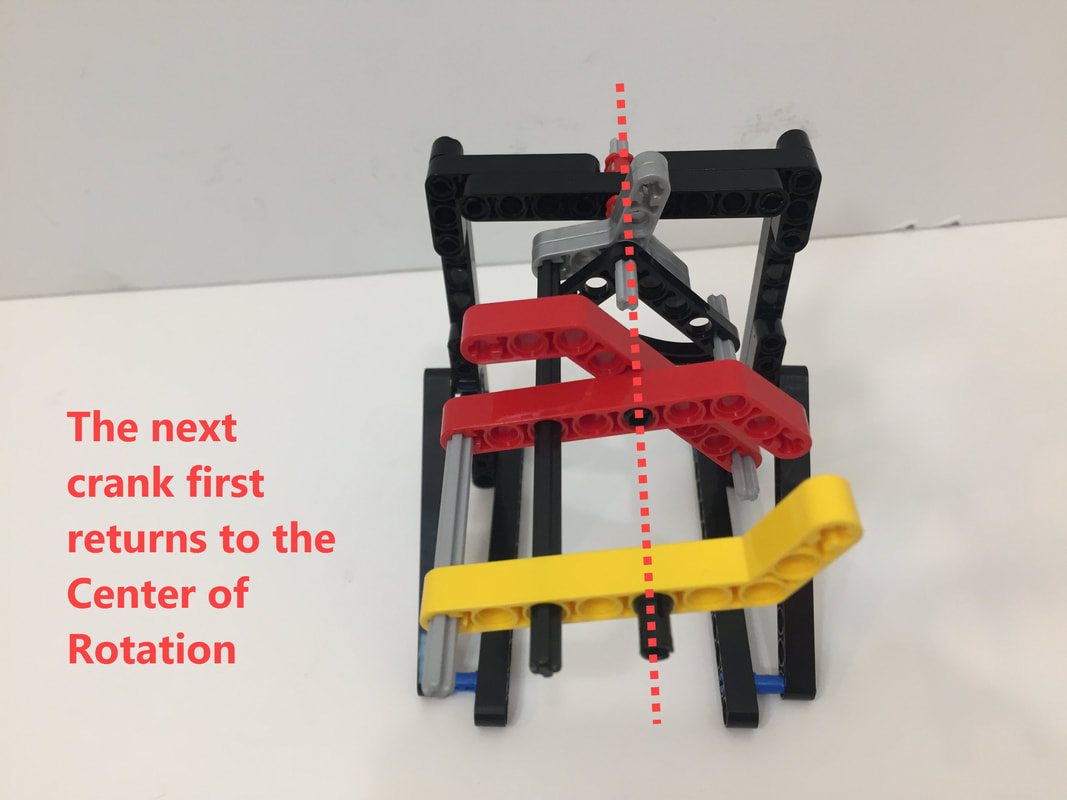
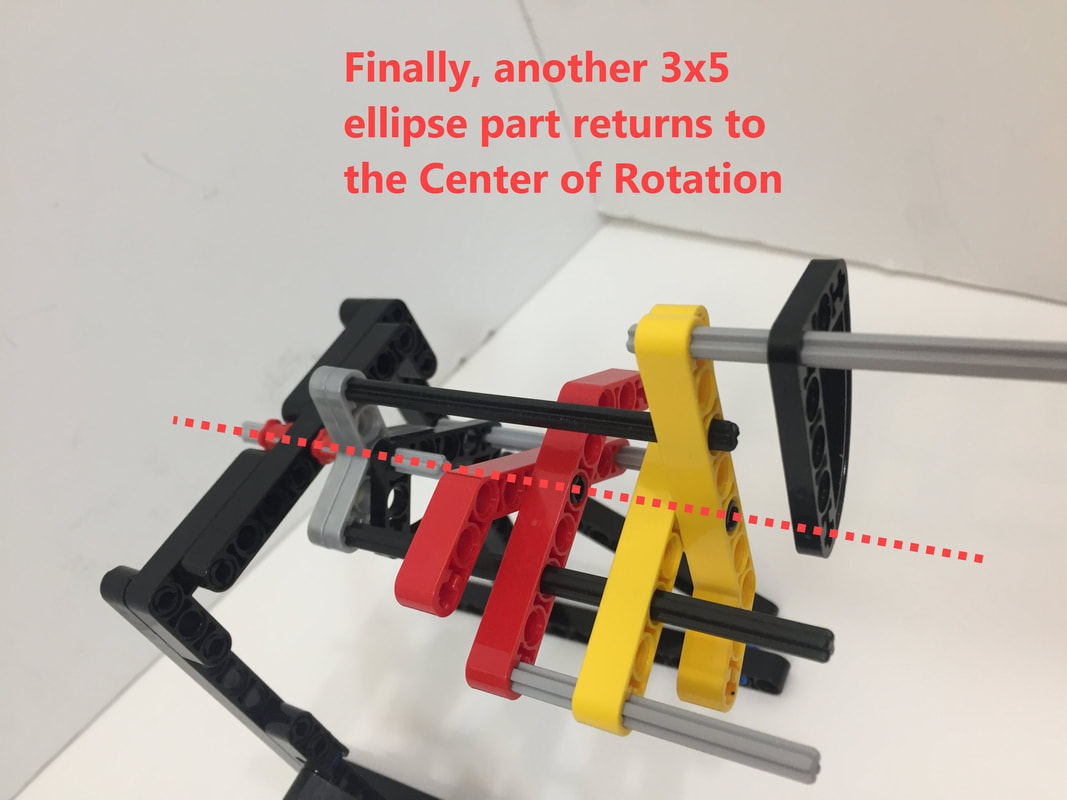
Below are a few more images of a completed crank:

Strider Ver 3
Next, see Strider Ver 3's frame instructions.