Whegs (Wheel-Legs)
Posted by Wade
Whegs combine some of the rough terrain ability of legs with the simplicity of wheels.
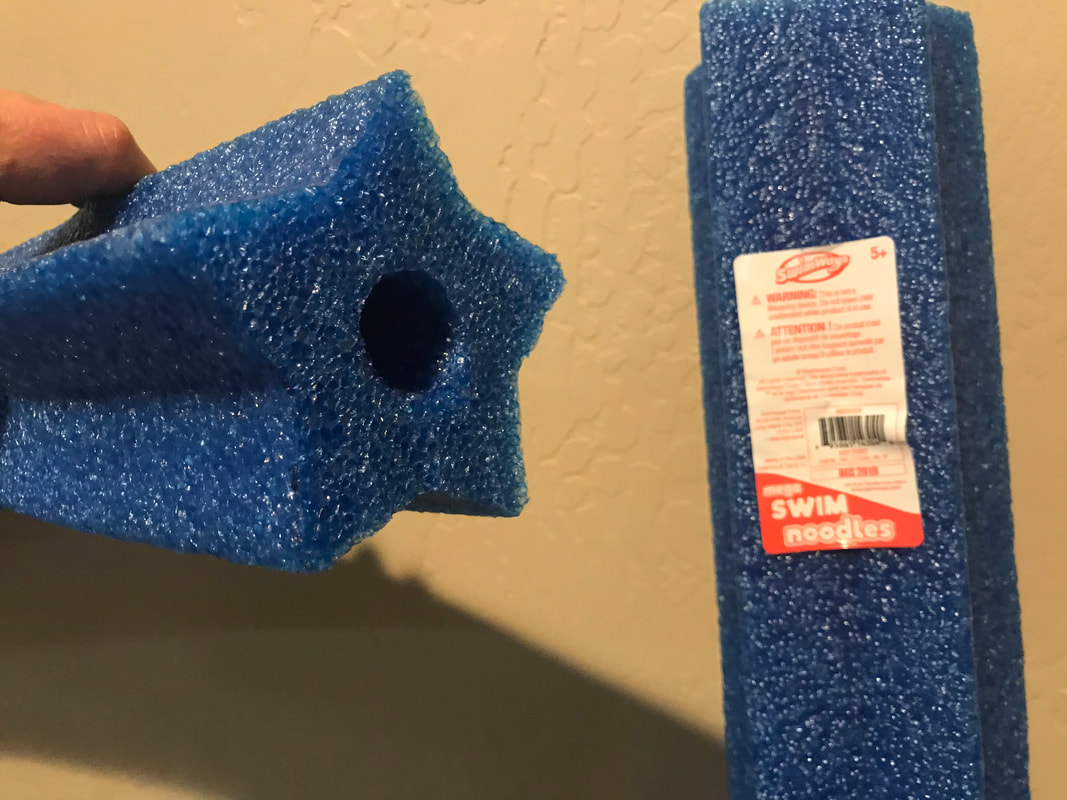
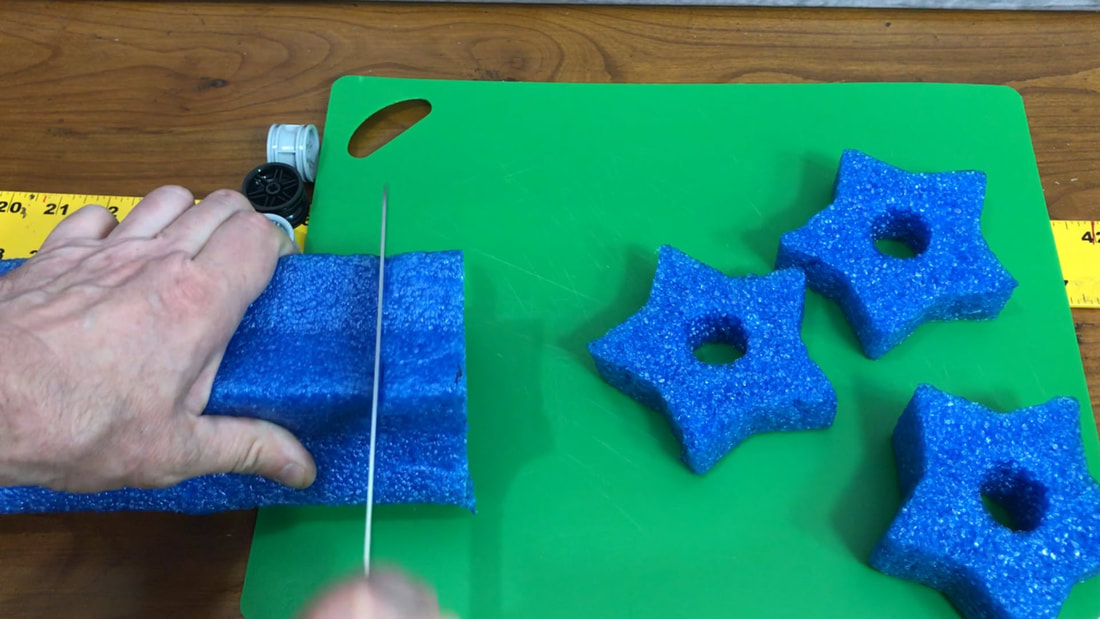
Star-shaped pool noodles make surprisingly effective whegs. Plus, they are great for camps or classrooms since a $5 swim noodle can be quickly cut into 40 whegs, enough for 5 robots.
Whegs combine some of the rough terrain ability of legs with the simplicity of wheels.
Star-shaped pool noodles make surprisingly effective whegs. Plus, they are great for camps or classrooms since a $5 swim noodle can be quickly cut into 40 whegs, enough for 5 robots.
Building Details
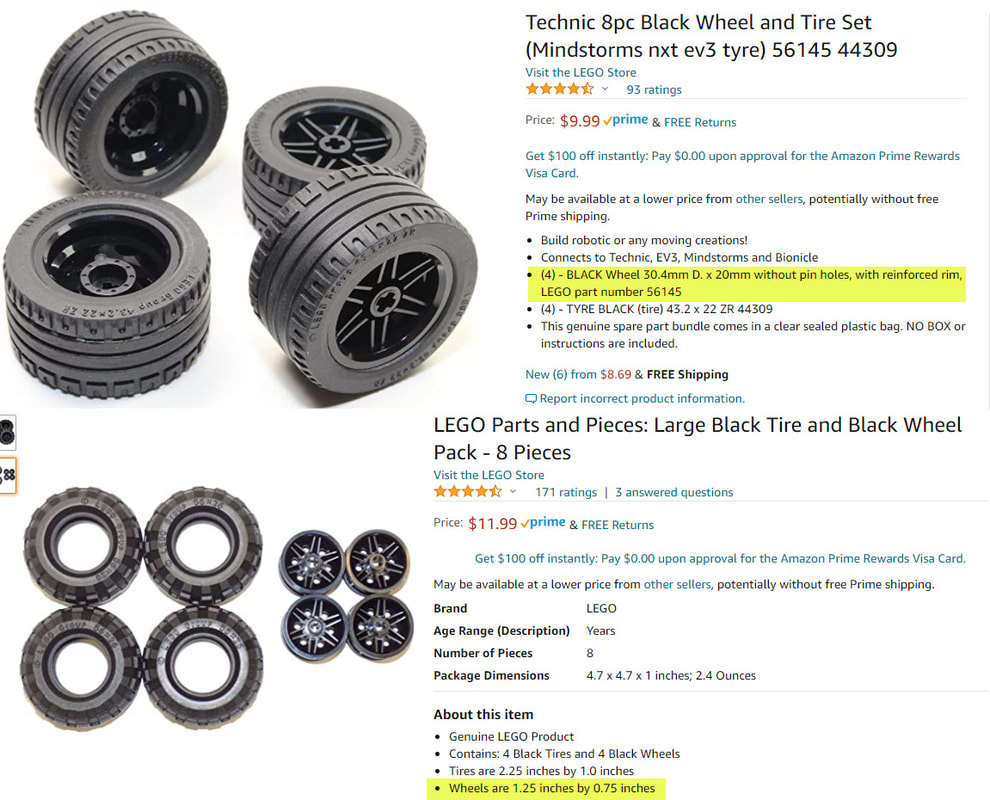
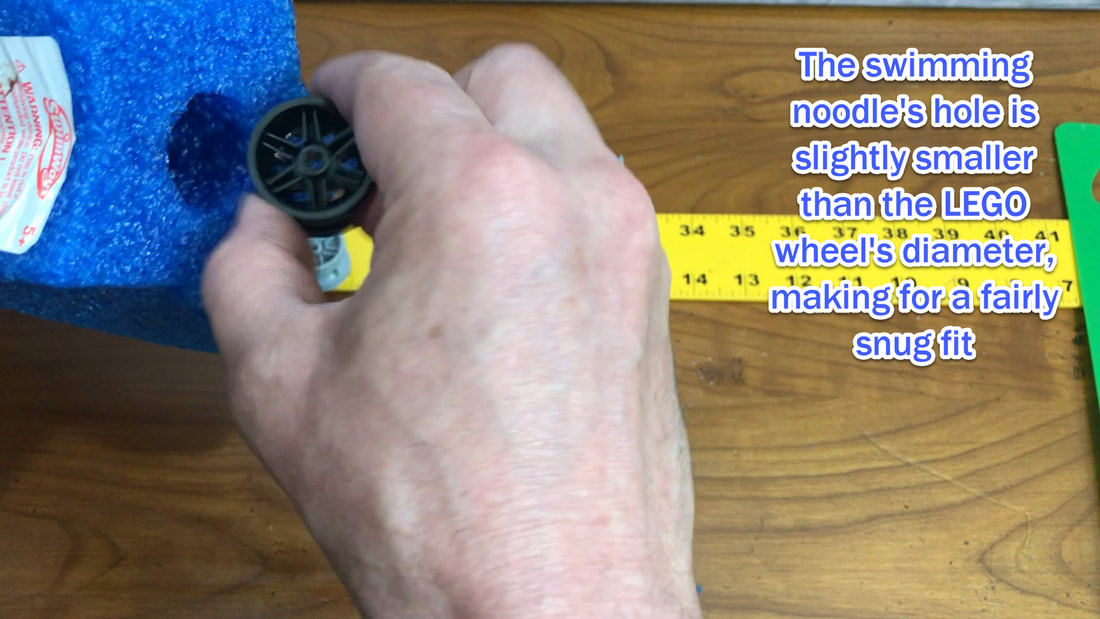
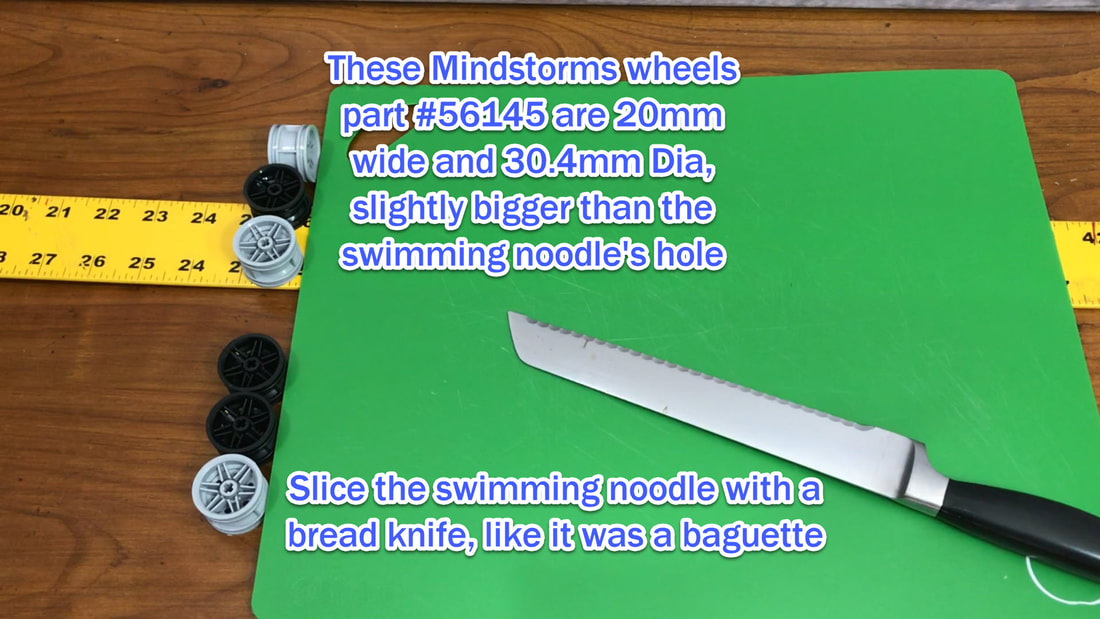
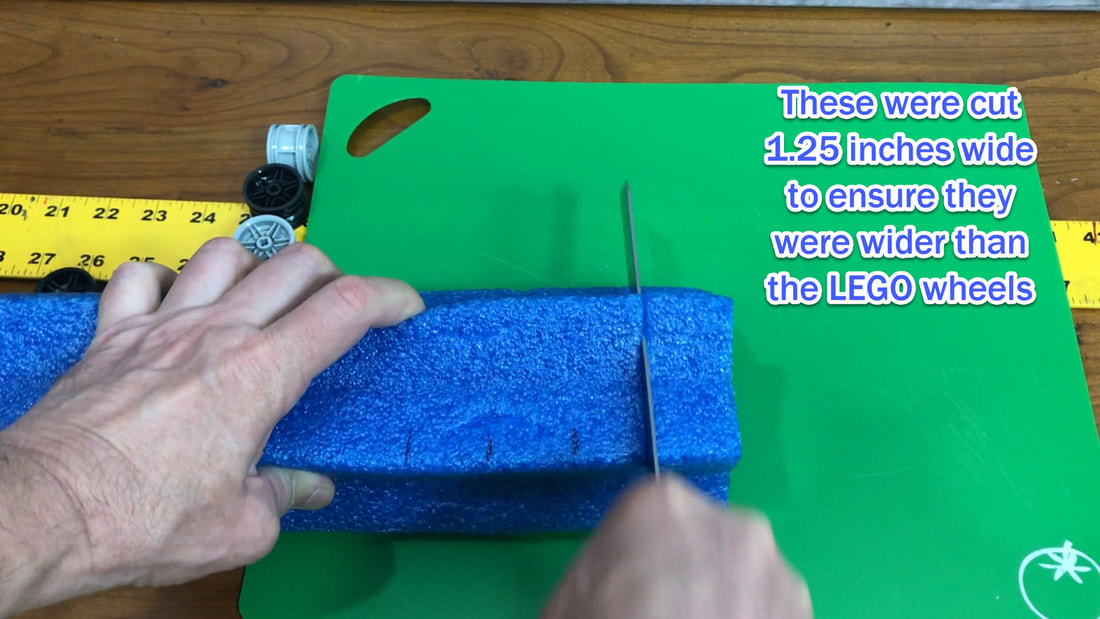
I used LEGO Technic wheels in these builds since they are commonly used in classroom settings, but any robot building medium should work similarly well with pool noodle whegs - just make sure you choose a wheel with a diameter slightly larger than the noodle's hole (1 and 1/8 inches or 28.5 mm).
|
|
|
|
|
|
Pool noodles are as easy to slice as bread, but be sure to draw lines on the noodles to make straighter cuts. Also, you may want to vary the width of your whegs depending on your application. For example, powdery snow or water can benefit from wider whegs, maybe 2.5 inches wide (with one wheel inside on the side closest to the robot frame so that the axle can reach it). For a "standard" wheg width, I cut them 1.25 inches wide, or about 0.5 inches wider than the LEGO wheels.
|

|
|
|
|
|
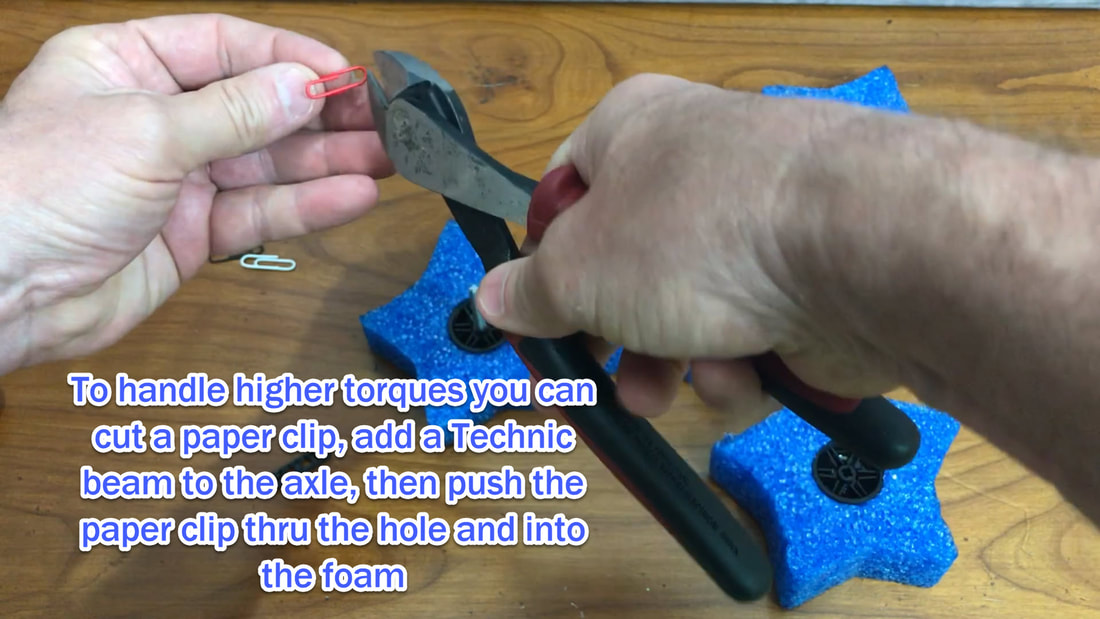
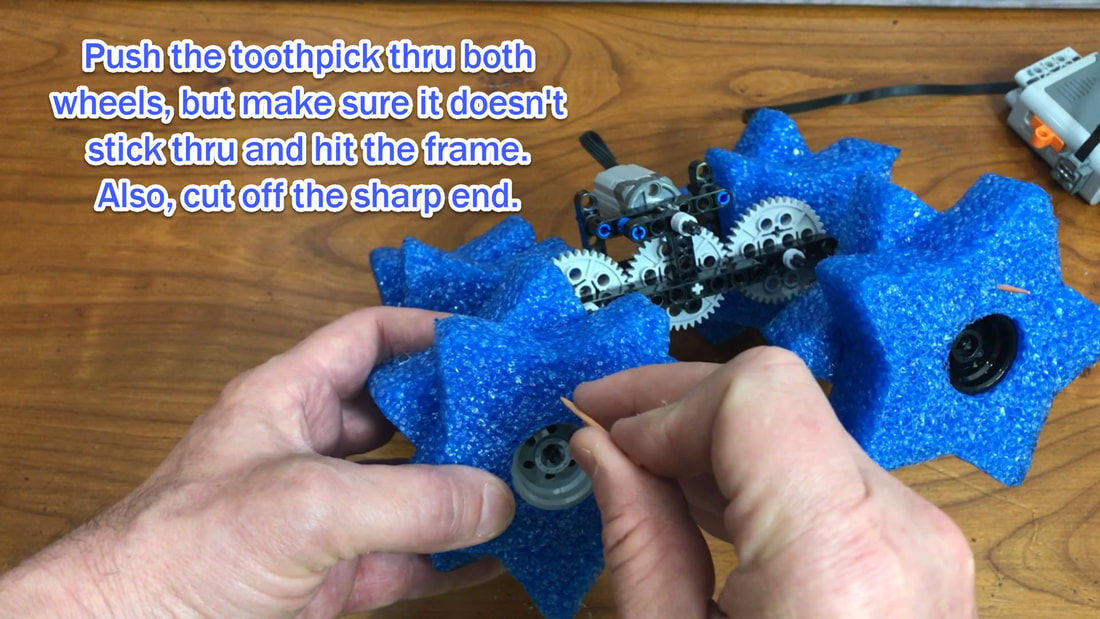
LEGO's Mindstorms wheels have a snug enough fit to handle the motor's torque without slipping much, but if your whegs slip too easily on your wheels then you can:
- add a 4-hole liftarm to your axle (LEGO part # 32449)
- cut a paperclip in half
- and push it thru the LEGO hole and into the noodle's foam.
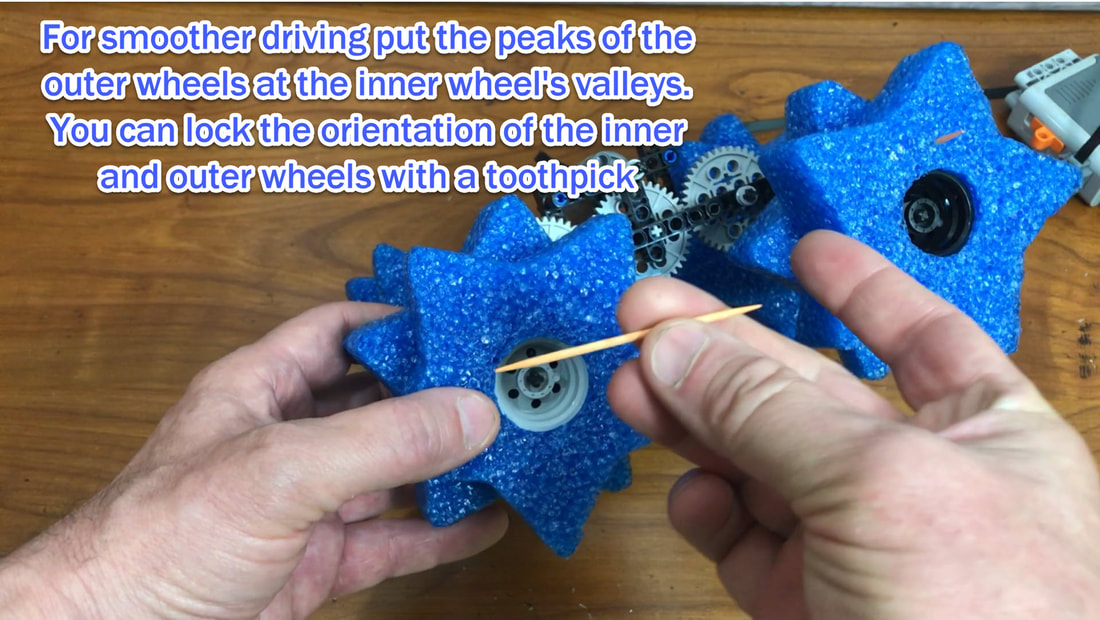
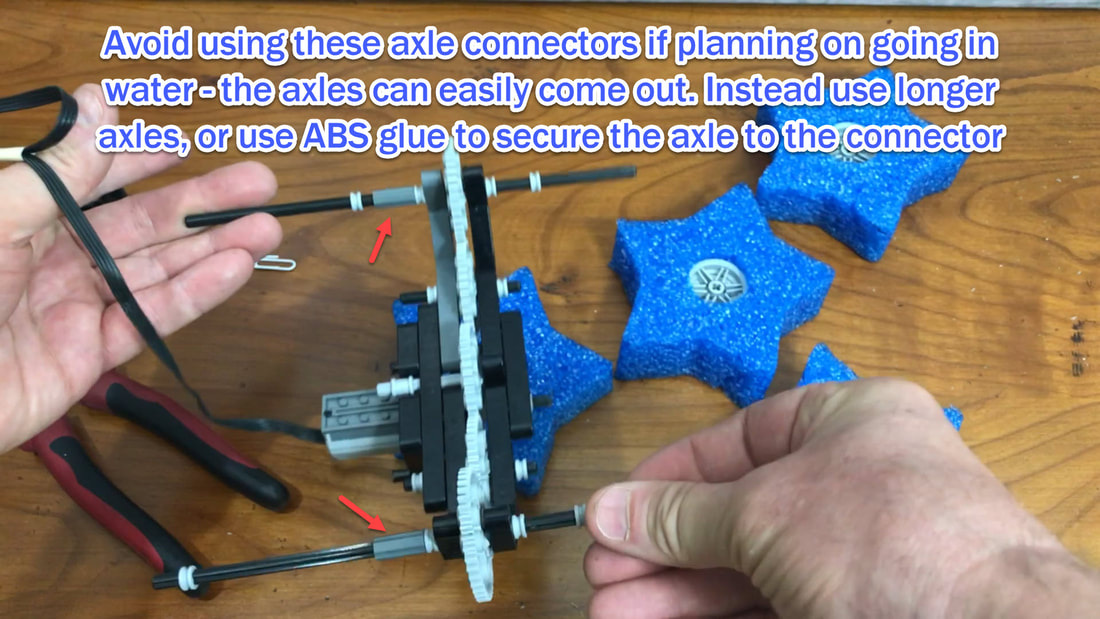
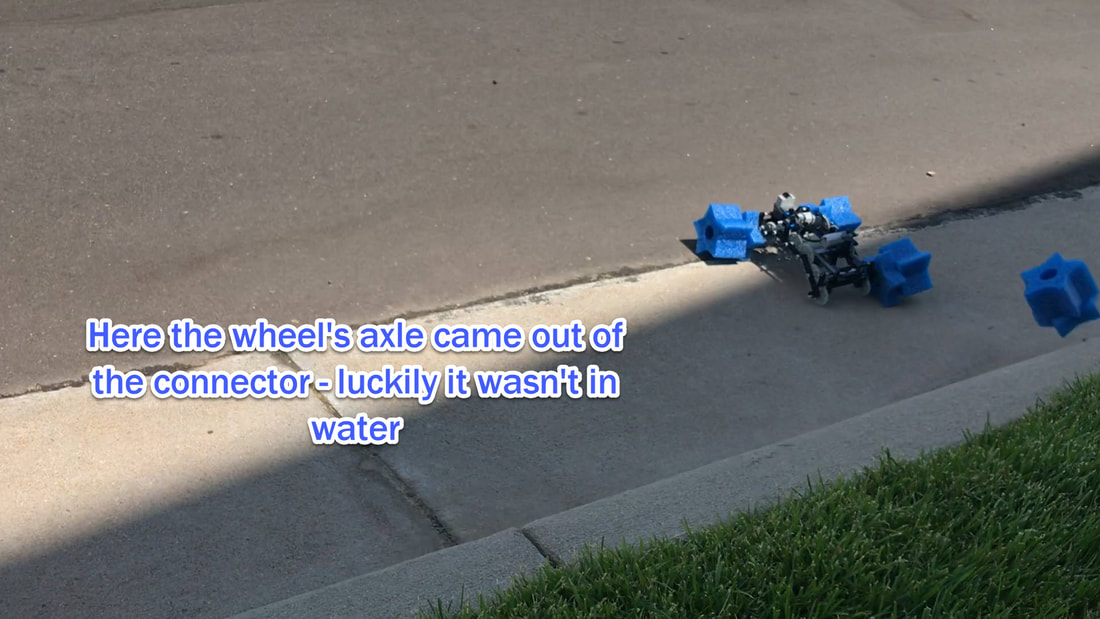
Note: each wheg will need it's own wheel, and if operating in water be sure to use either long axles that extend from the inside of the robot's frame to the outer wheel, or if joining 2 shorter axles then glue the axle connection using ABS cement found in any hardware store - you don't want your whegs falling off if the robot is in water!
|
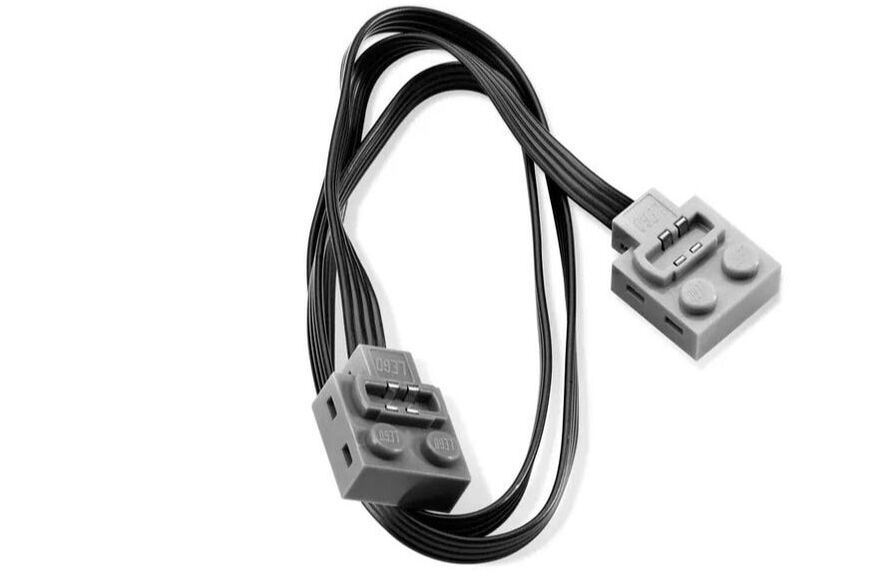
LEGO part # 8871
|
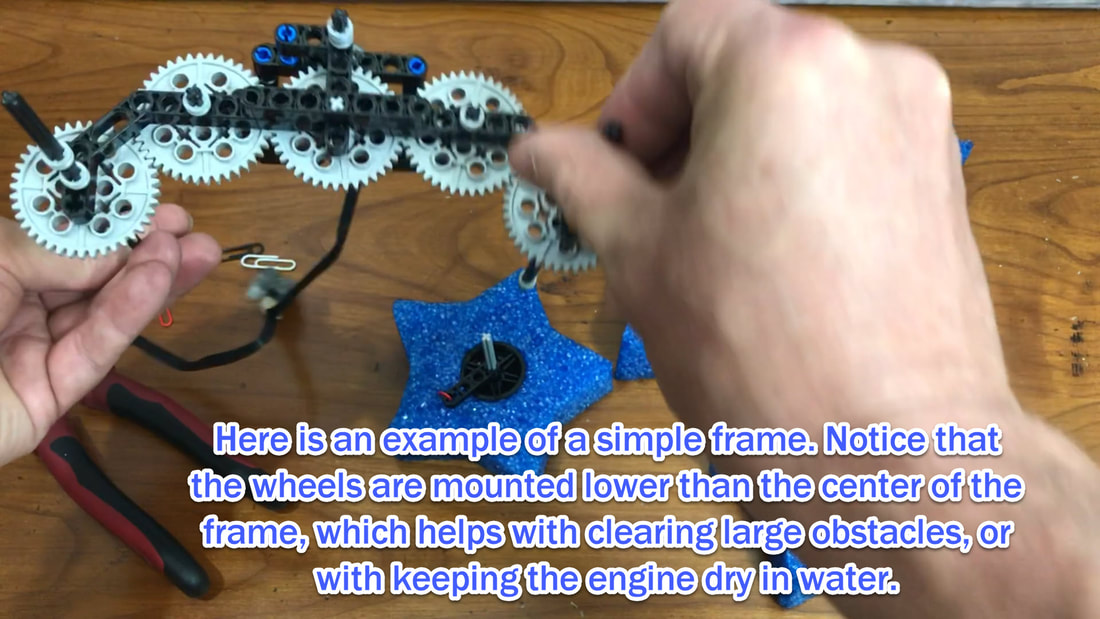
These whegs should work on many variations of vehicle or robot frames. A few suggestions:
1. use a long enough wheel base so that the robot doesn't tend to flip backward, but not so long that it tends to get stuck astride obstacles (like logs)
2. To better clear tall obstacles, or to keep the motor dry in water, mount your whegs lower than the motor's mounting.
3. In the case of LEGO's motors you will likely want to gear down the motor to a slower speed with higher torque. In my case I used LEGO's power functions M motors (medium), part #8883, geared down by 5:1 by pairing a 40 tooth gear (part #3649) with an 8 tooth gear. (part #3647)
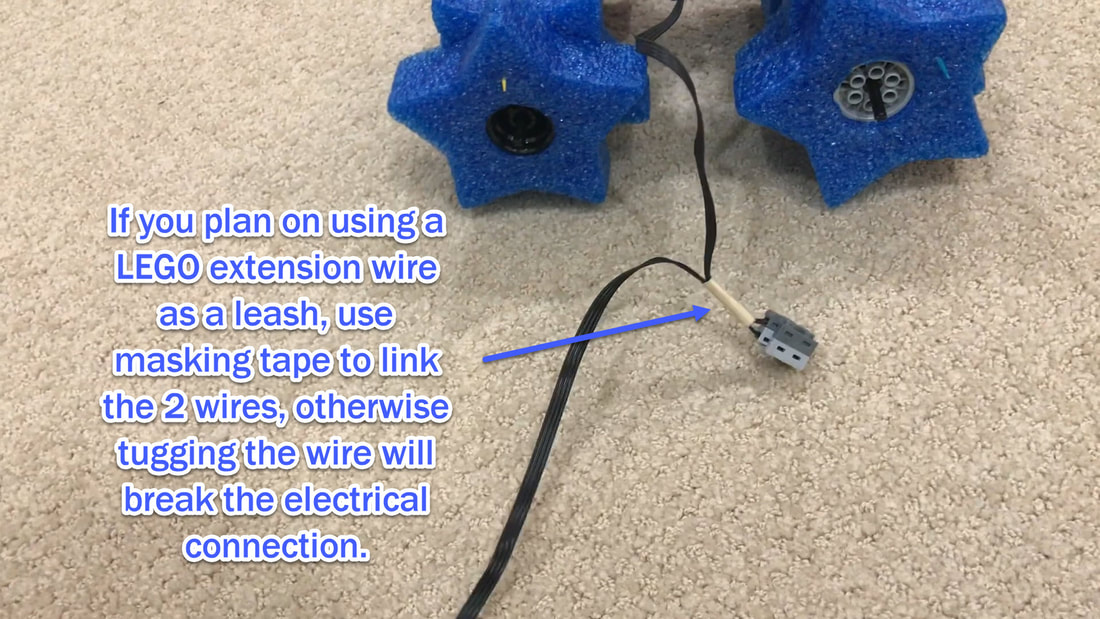
4. If you don't have enough remote controllers, you can use LEGO's extension wires (part #8871) as a leash to steer the robot - just be sure to use masking tape to secure the two wires together, otherwise tugging on the extension wire can easily break its connection to its plastic brick. Also, be sure to add a "tail" to the back of the robot, which the wire can be wrapped around as shown in the above "snowbot" video. This will provide the leverage required to tug and steer the robot, while also helping to prevent the wire from getting tangled in the rotating whegs.
1. use a long enough wheel base so that the robot doesn't tend to flip backward, but not so long that it tends to get stuck astride obstacles (like logs)
2. To better clear tall obstacles, or to keep the motor dry in water, mount your whegs lower than the motor's mounting.
3. In the case of LEGO's motors you will likely want to gear down the motor to a slower speed with higher torque. In my case I used LEGO's power functions M motors (medium), part #8883, geared down by 5:1 by pairing a 40 tooth gear (part #3649) with an 8 tooth gear. (part #3647)
4. If you don't have enough remote controllers, you can use LEGO's extension wires (part #8871) as a leash to steer the robot - just be sure to use masking tape to secure the two wires together, otherwise tugging on the extension wire can easily break its connection to its plastic brick. Also, be sure to add a "tail" to the back of the robot, which the wire can be wrapped around as shown in the above "snowbot" video. This will provide the leverage required to tug and steer the robot, while also helping to prevent the wire from getting tangled in the rotating whegs.