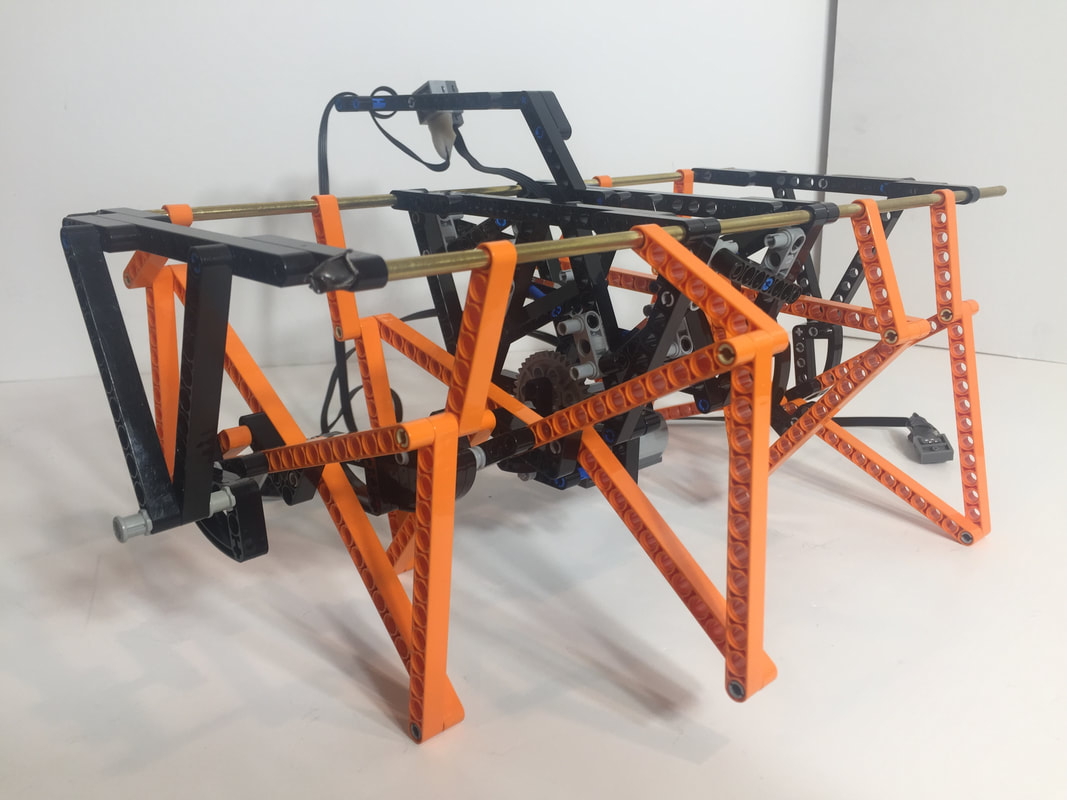
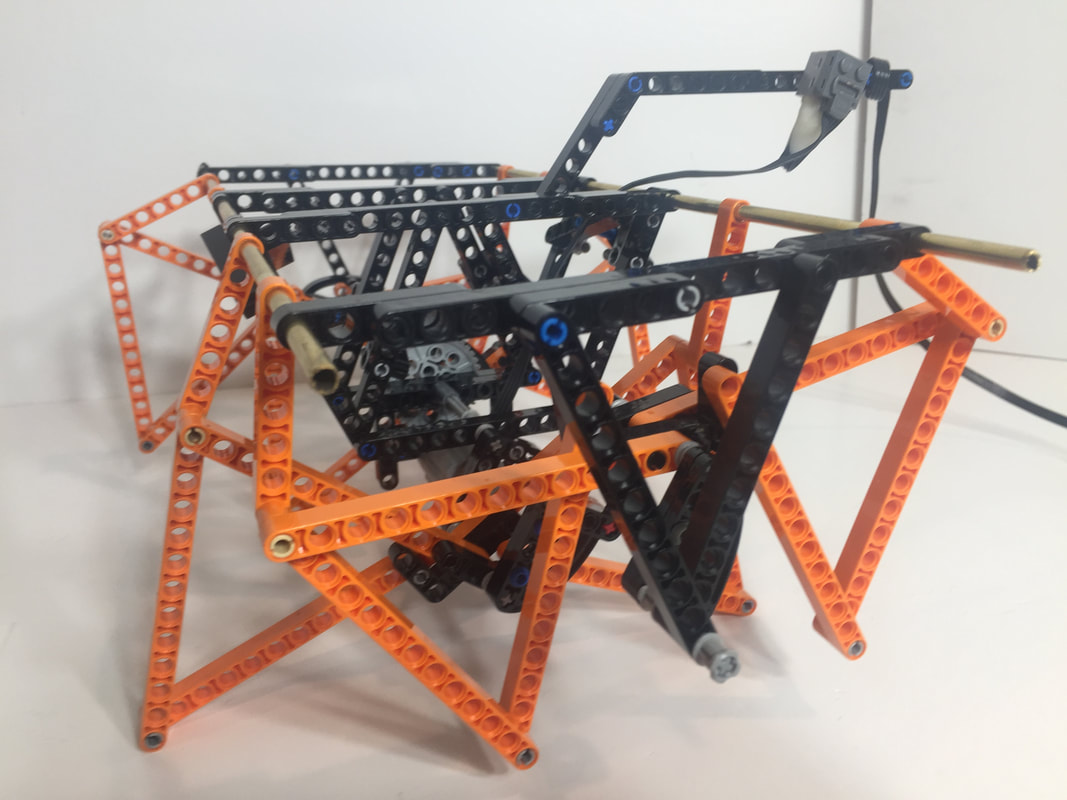
Strider Ver 2
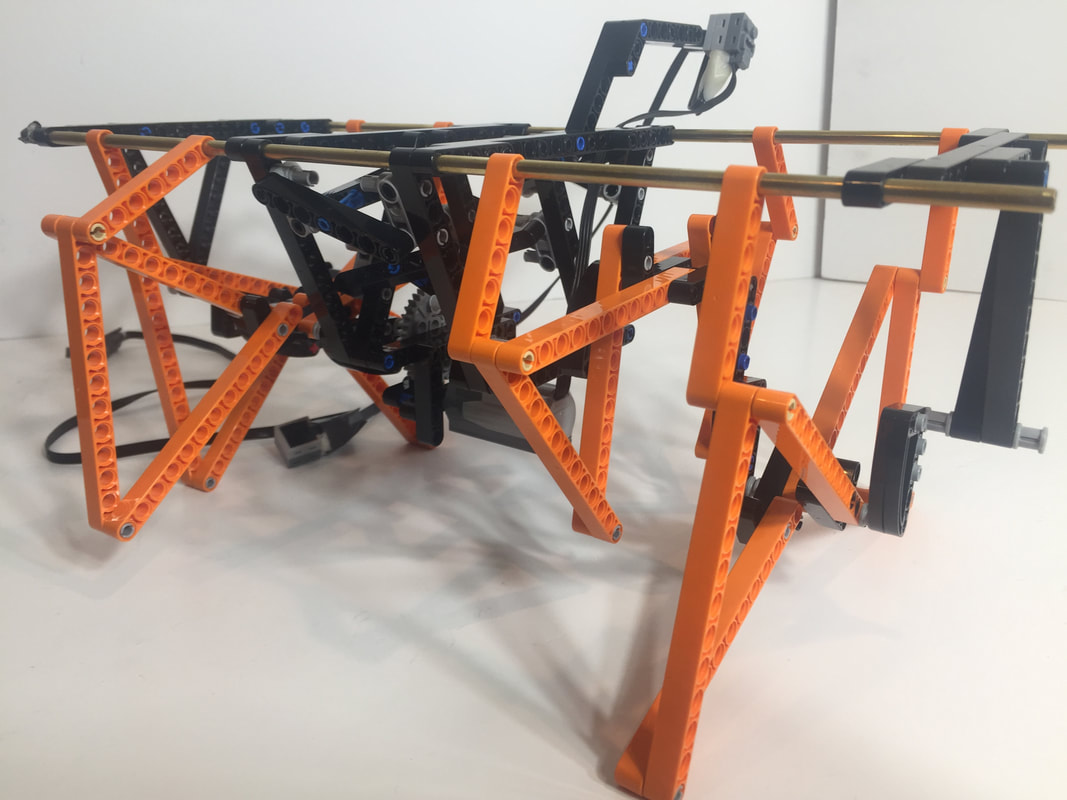
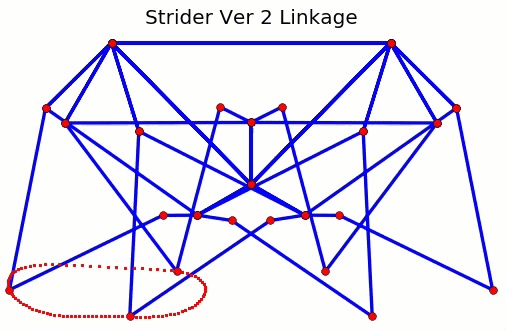
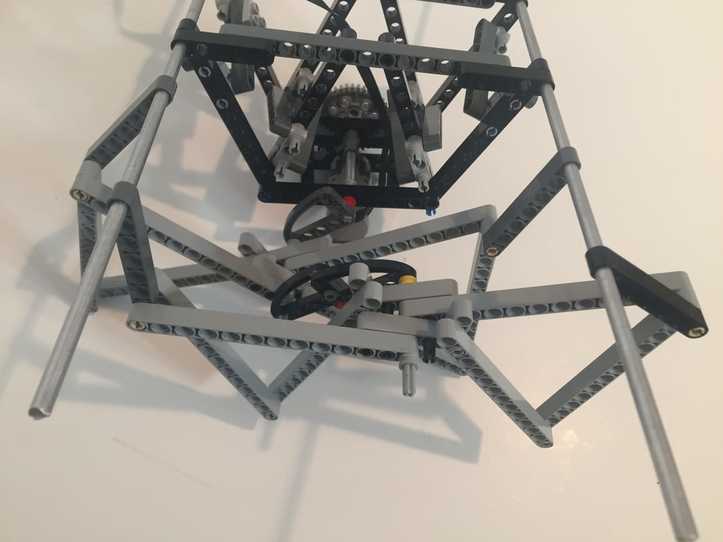
Linkage: To increase step-height, Strider's linkage pairs two 4-bar linkages into a combined 10-bar linkage with front and back legs, such that the rear leg lifts the front foot, and vice versa You can find more details on Strider's linkage here.
In addition to this wired Strider Ver 2, I've also posted instructions for an RC Strider Ver 2 with the battery box on board.
In addition to this wired Strider Ver 2, I've also posted instructions for an RC Strider Ver 2 with the battery box on board.
|
Build Difficulty: Easy. Strider's linkage is relatively simple for a mechanical walker, but it still requires care to build.
Strider's Characteristics:
1. 8 Legs powered by one motor
2. Walks well on smooth terrain, but not on rugged terrain.
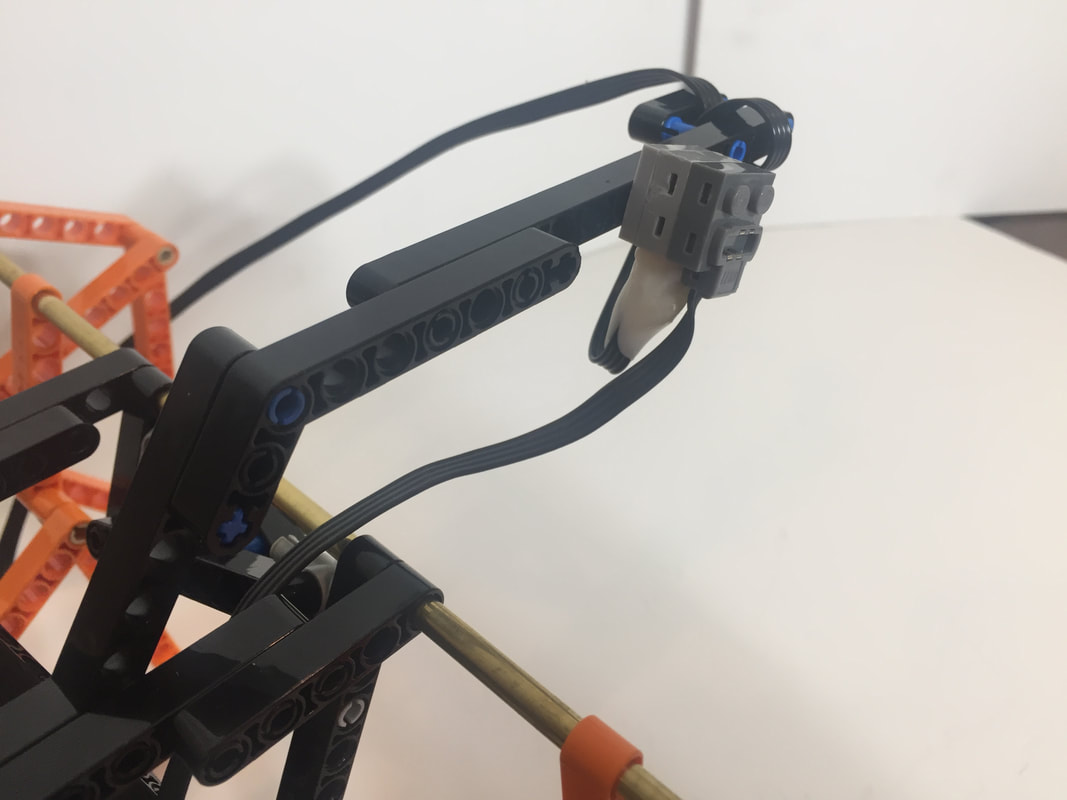
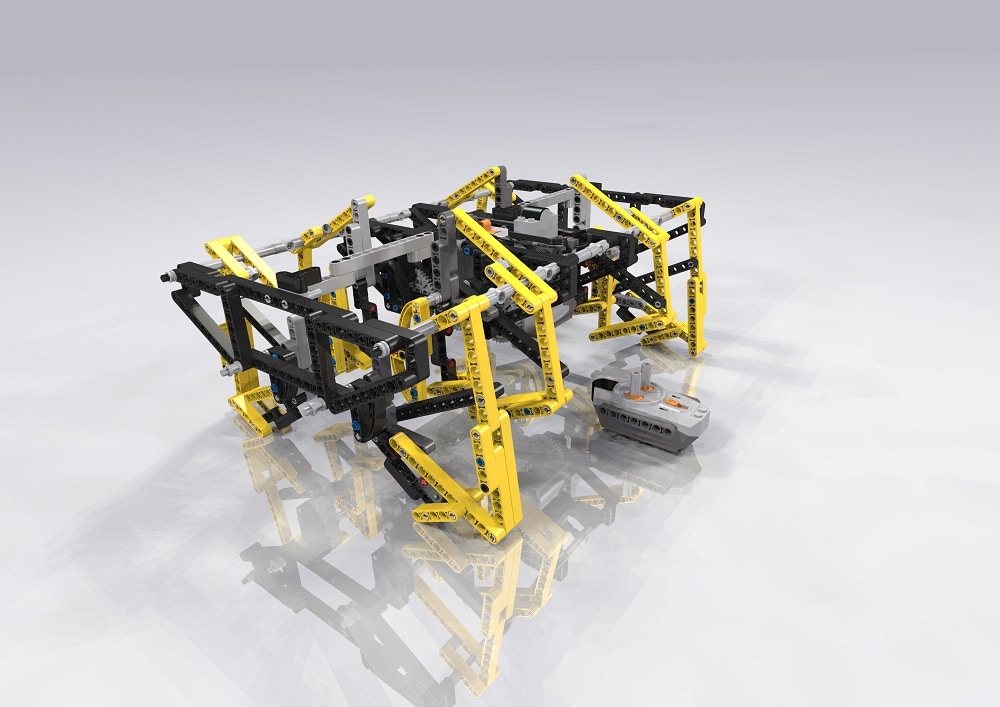
3. Steerable? No, but it can be somewhat steered by tugging on the motor's extension wire like it were a leash - see a couple pictures further down. For tank-style steering consider building Strider Ver 3 - below is an example:
Strider Ver 3
If you want to build a Mindstorms version of Strider, again consider building Strider Ver 3 - below is an example.
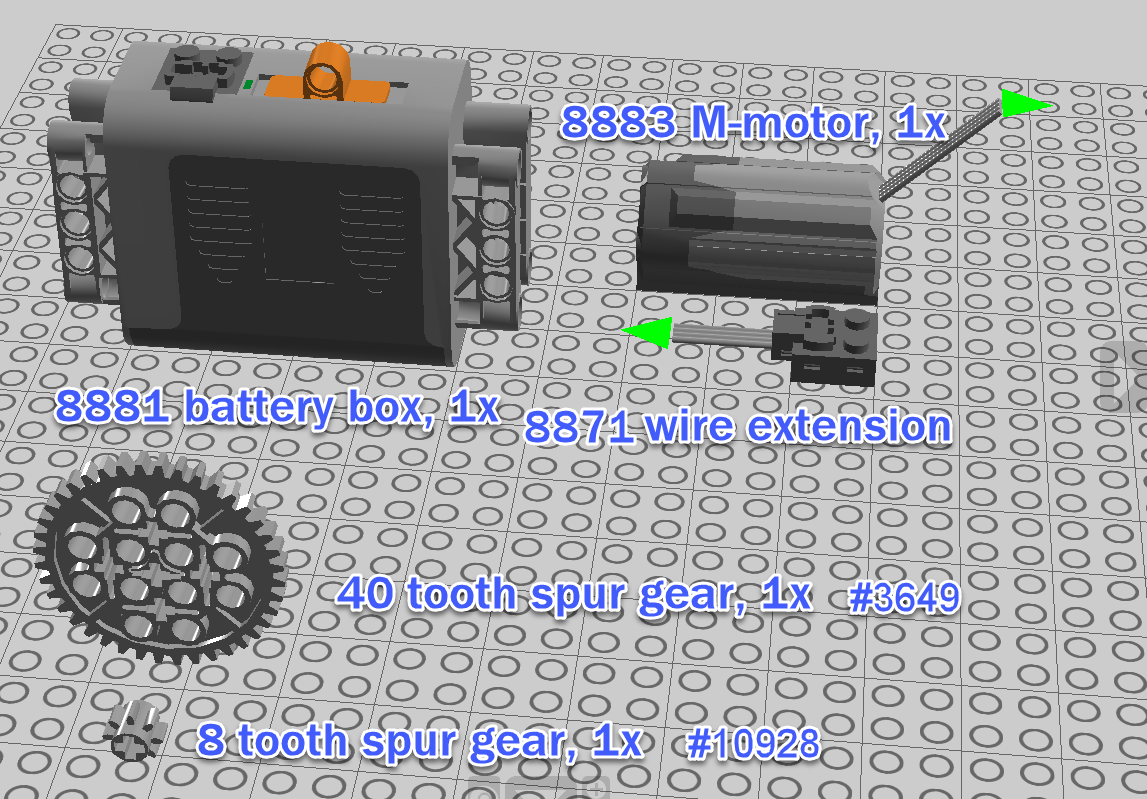
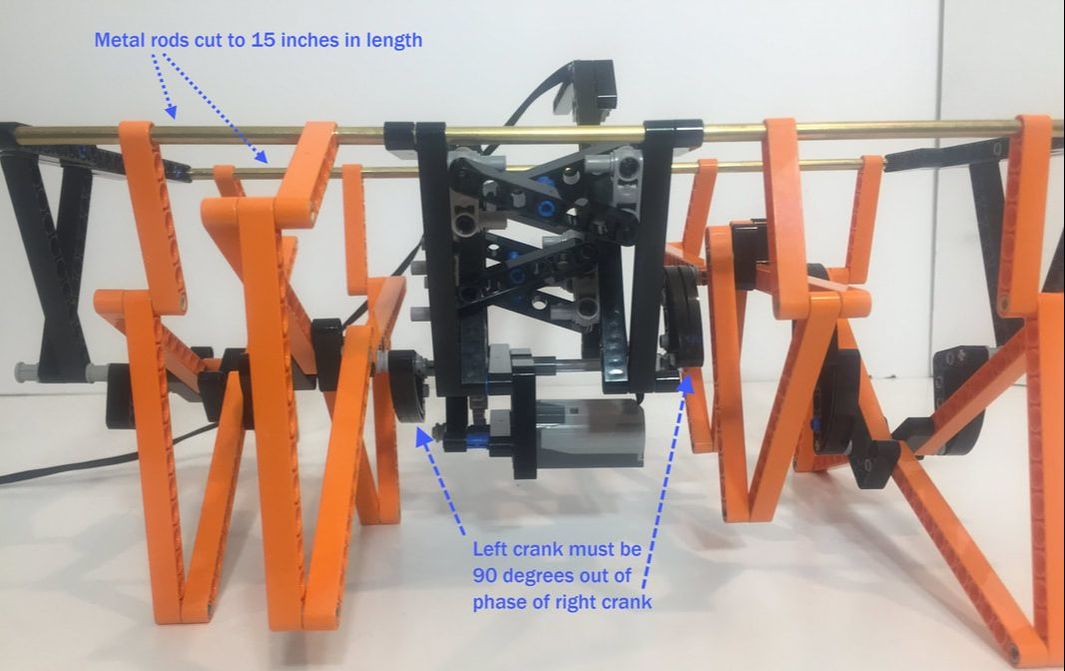
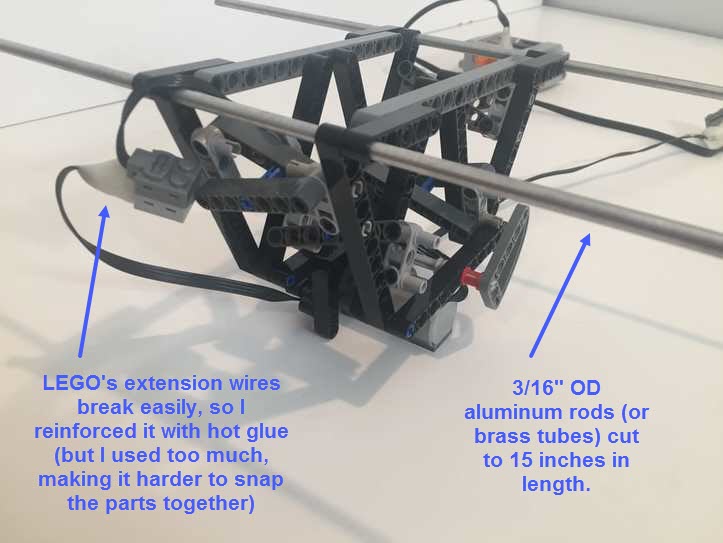
Parts Used: In addition to the Technic beams, pins, gears, etc., this build uses LEGO's 8883 M-Motor, 8881 battery box, and an 8871 extension wire. The RC version also uses LEGO's Power Functions IR RX 8884 remote receiver which I controlled with a 8885 IR remote. Also, to stiffen the robot I used 3/16" OD aluminum rods (or brass tubes) cut to 15 inches in length for the leg's long connections to the frame rather than LEGO's plastic axles.
You can find a LEGO part list further down.
I purchased the plastic LEGO parts from Bricklink
I purchased the motors, controllers and battery box from Amazon
I purchased the 3/16 inch OD metal support rods from my local hardware store
If you've never used Bricklink, an easy way to browse for parts is by going to a larger store. Here's a list of stores in the USA.
And below is an example search in a store for Technic beams.
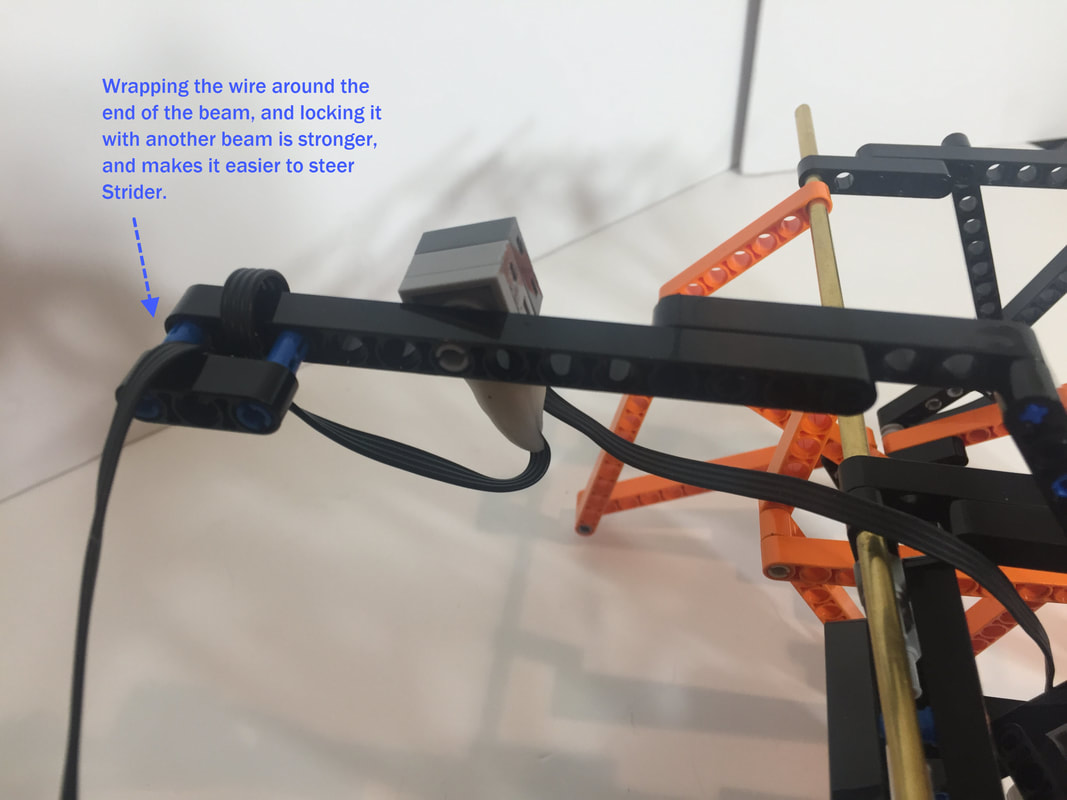
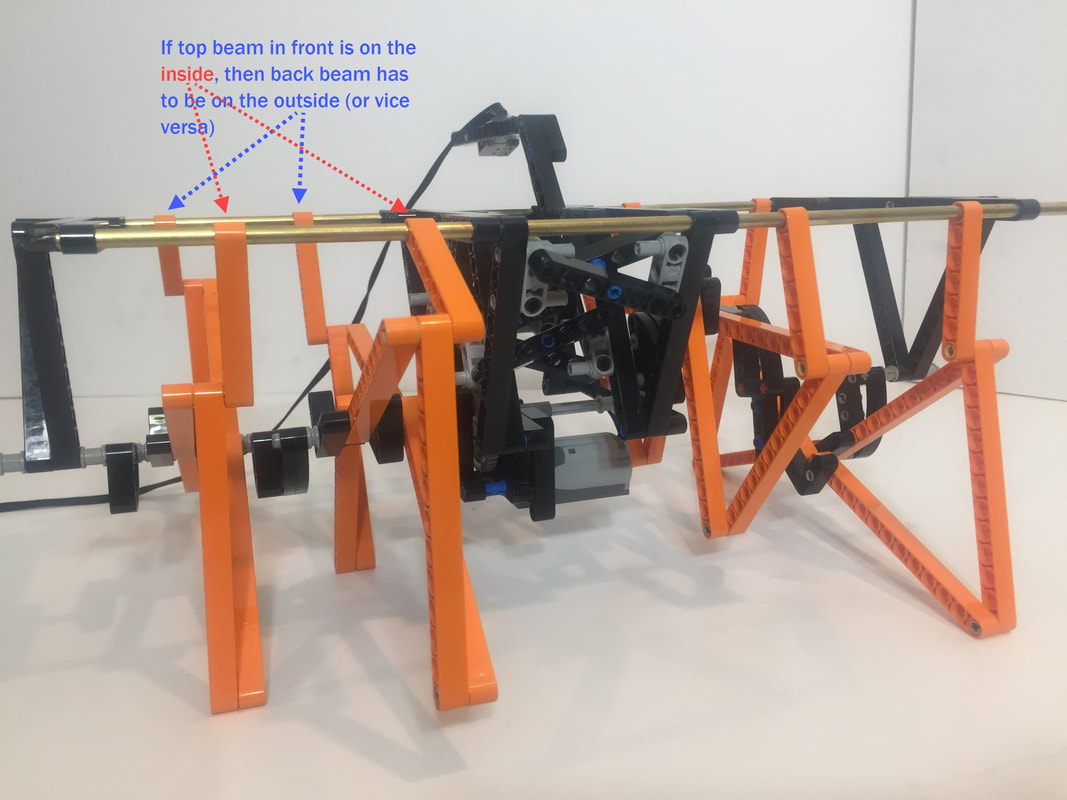
UPDATE: Strider Ver 2 can be sort of steered by treating the extension wire like a "leash" and tugging it to the side (if it's attached like below with a long beam to give it leverage to steer - also, the long beam that the wire attaches to helps to prevent the wire from getting tangled in the rotating legs or cranks). However, if too much sideways pressure is put on Strider when steering it on surfaces with a lot of friction (like thick carpeting), then the leg's pins near the crank can pull out, as described in this post about TrotBot Ver 1.
UPDATE: Strider Ver 2 can be sort of steered by treating the extension wire like a "leash" and tugging it to the side (if it's attached like below with a long beam to give it leverage to steer - also, the long beam that the wire attaches to helps to prevent the wire from getting tangled in the rotating legs or cranks). However, if too much sideways pressure is put on Strider when steering it on surfaces with a lot of friction (like thick carpeting), then the leg's pins near the crank can pull out, as described in this post about TrotBot Ver 1.

|
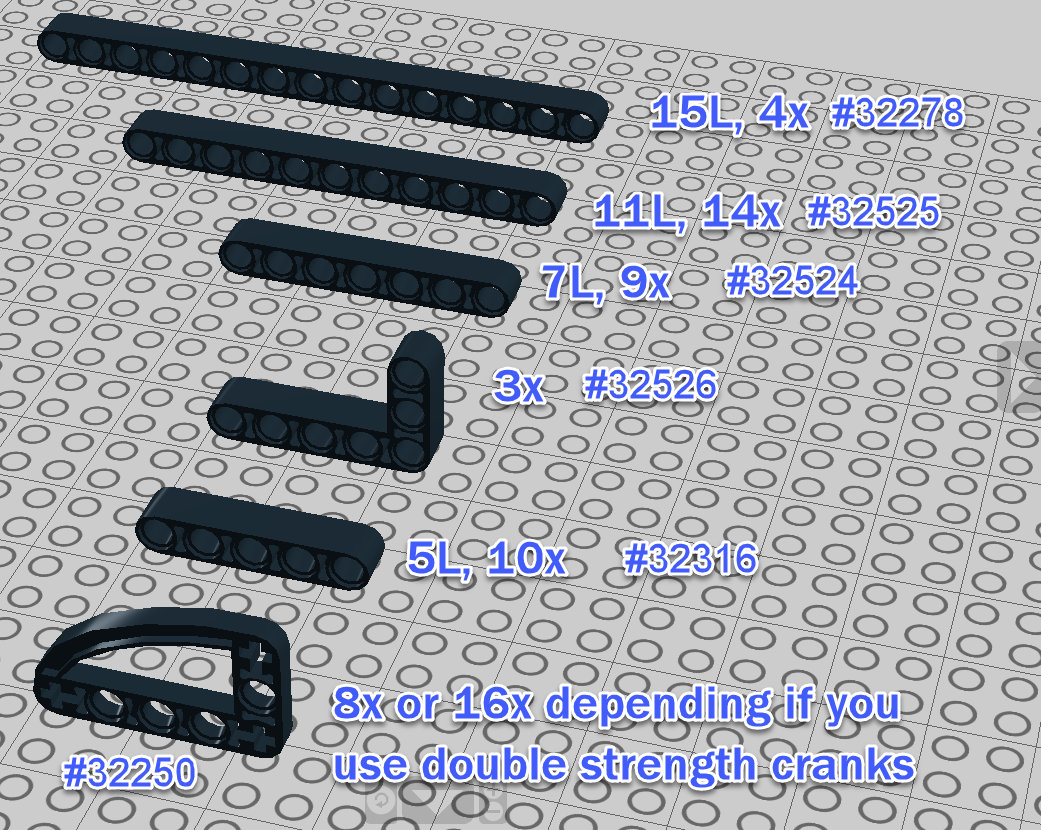
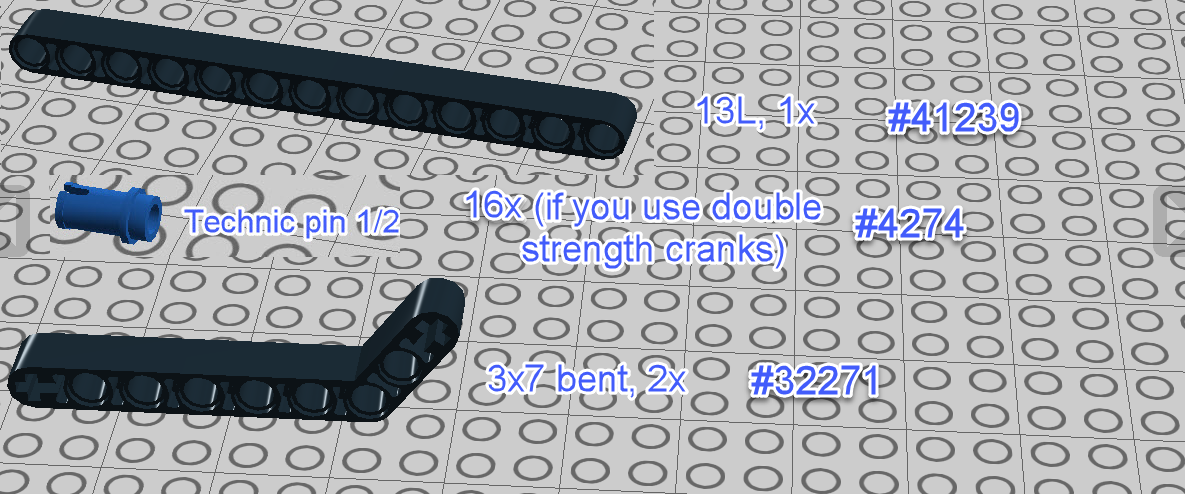
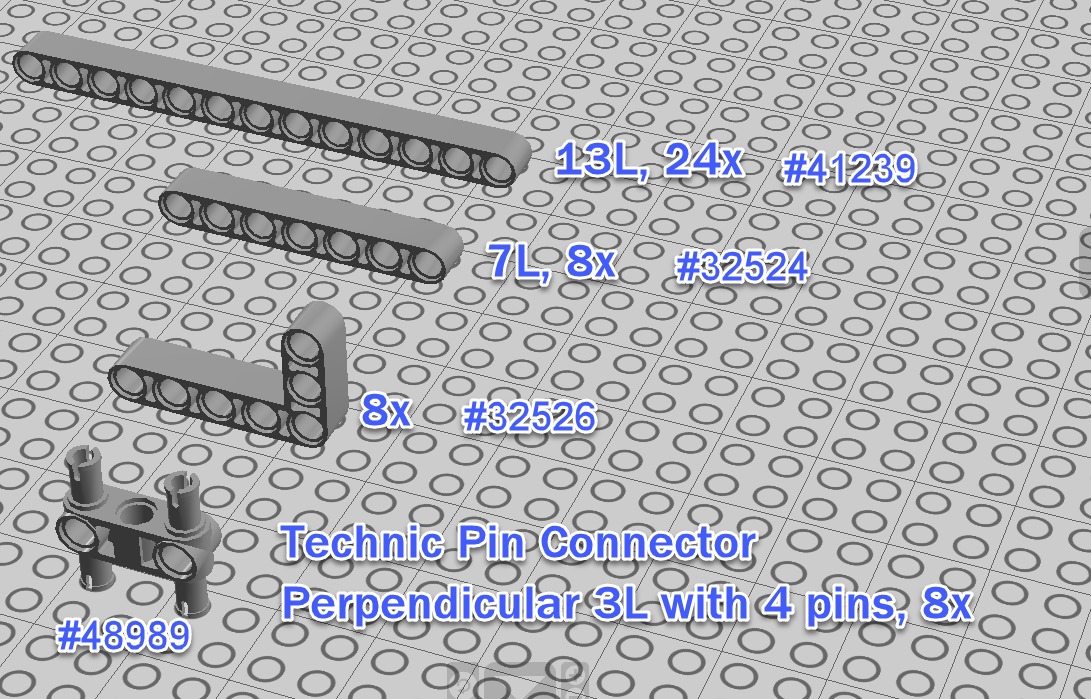
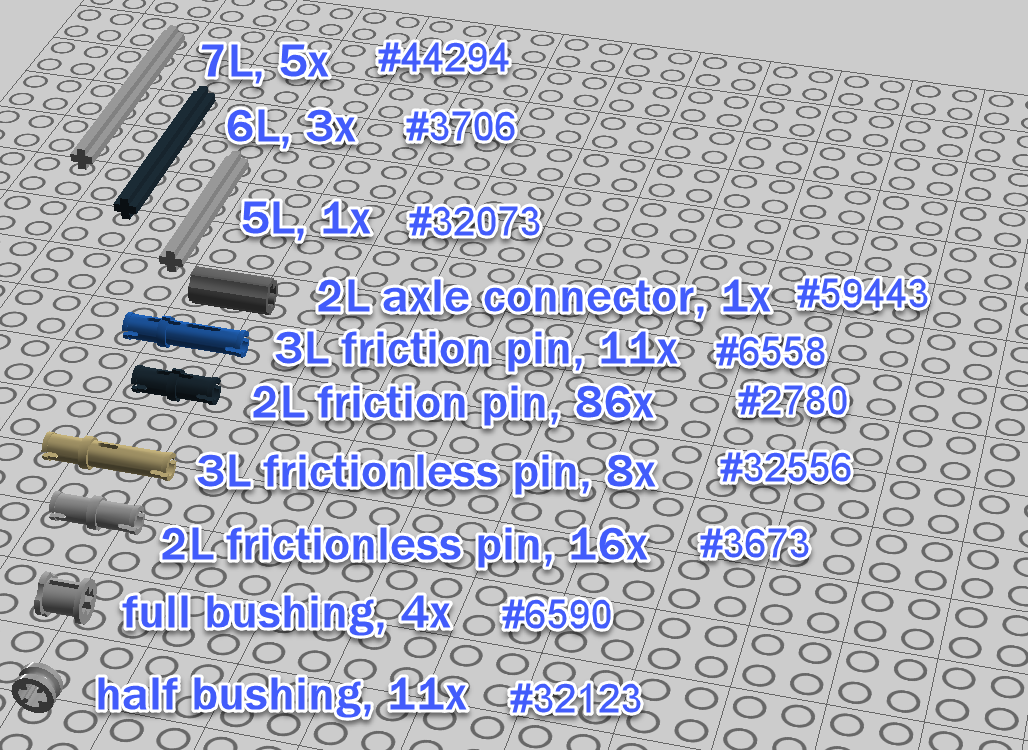
LEGO Part List:
The part list can be downloaded here, or you can view the images below. If I made any mistakes please email me at [email protected] |
| ||
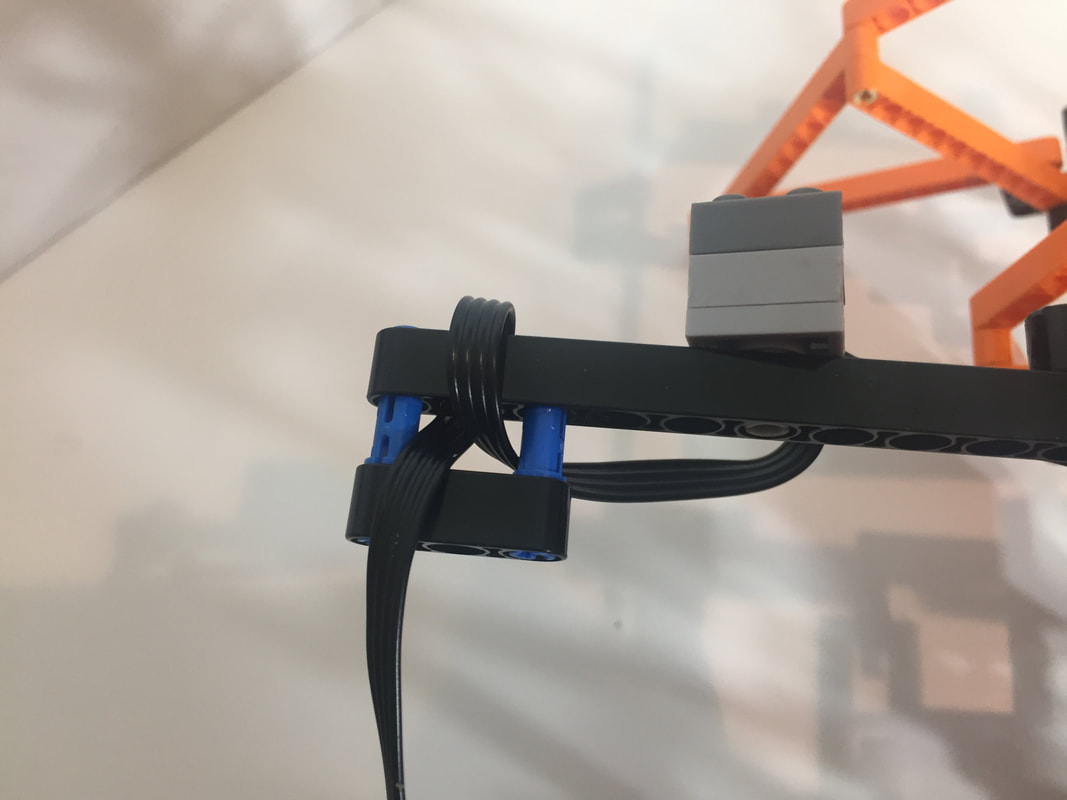
The below beams are for attaching the motor's wire to the frame.
To add some color to Strider I replaced the below 13-hole and 7-hole gray beams with orange beams.
|
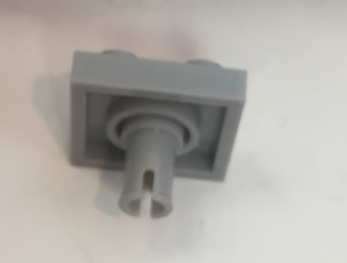
Also, one of the parts pictured to the right, for anchoring the motor's wire to the frame:
|
|
Build Option: A version of Catweazel's LEGO alternative to TrotBot's aluminum rods should also work well for Strider, and there is plenty of open space between the legs at the top to add structure.
Catweazel's LEGO alternative to the aluminium rods.
Trouble Shooting a Finished Strider
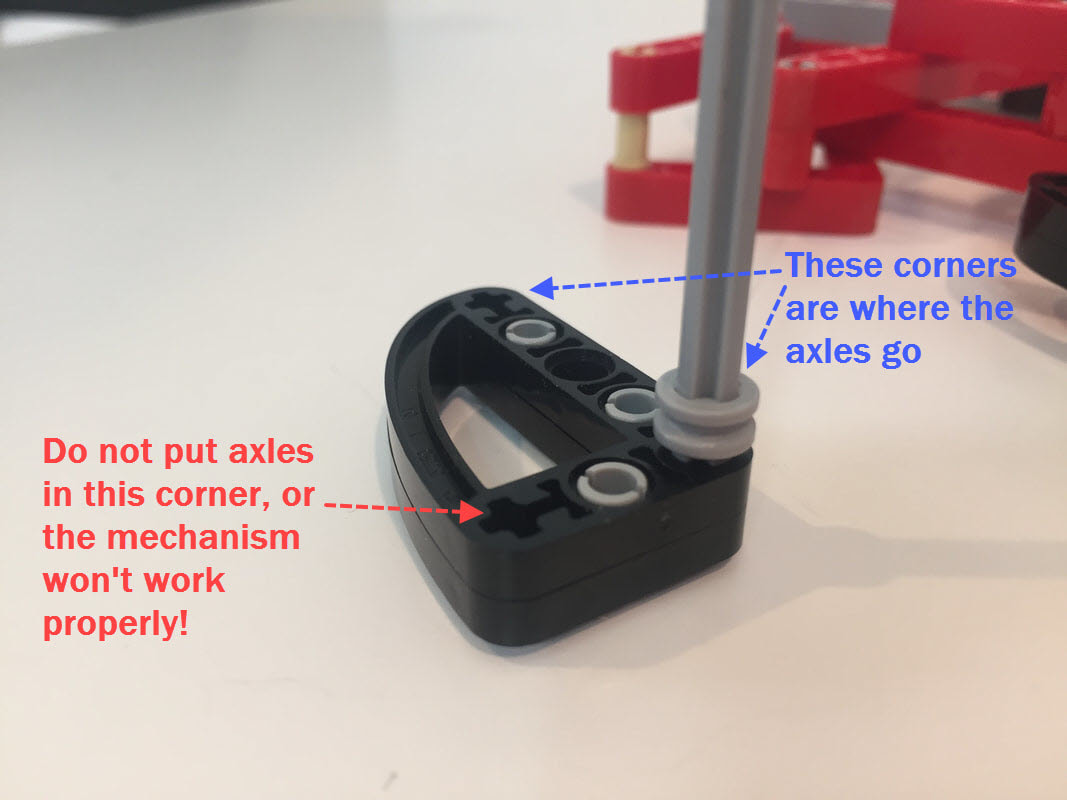
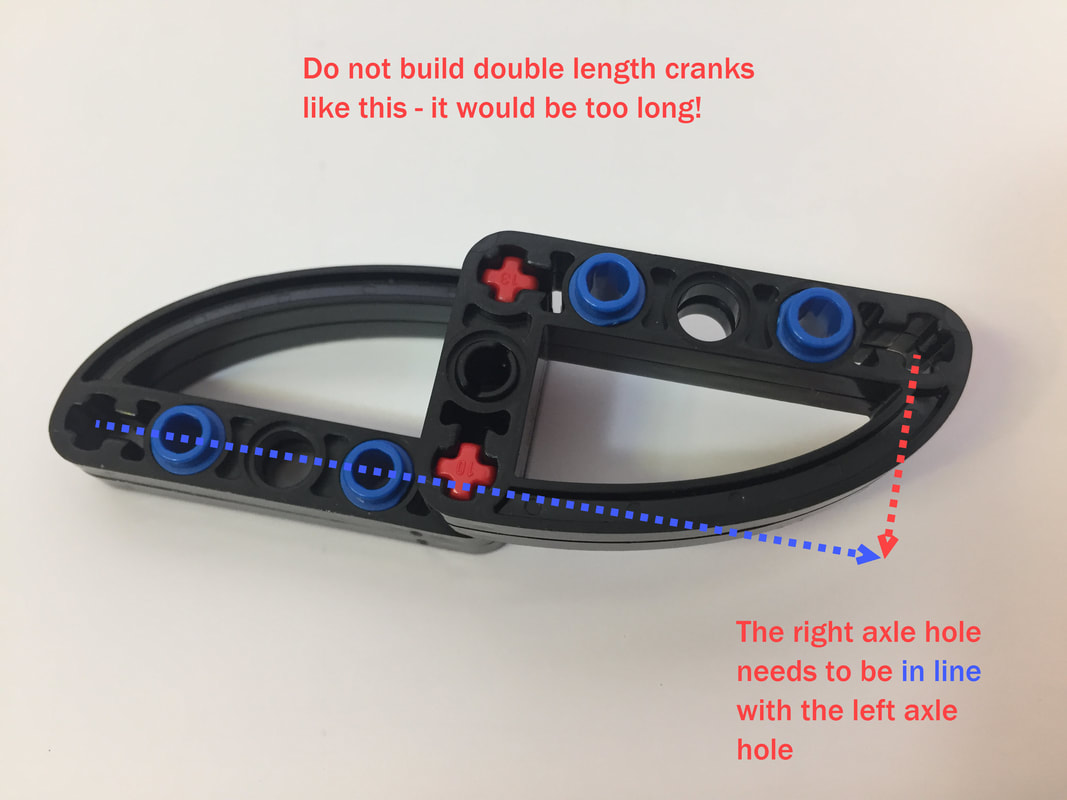
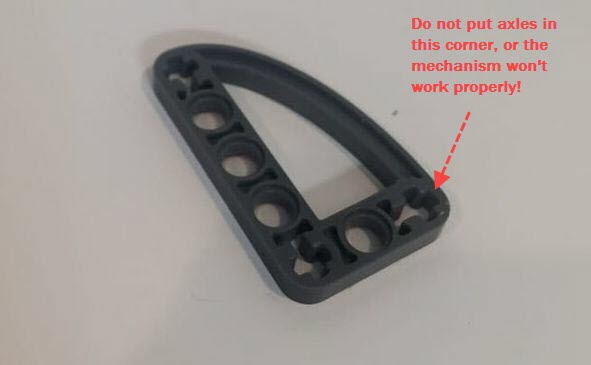
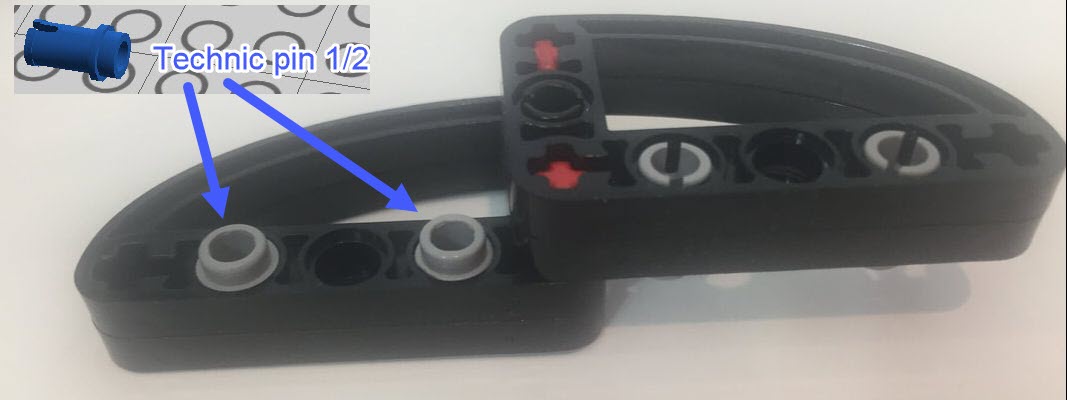
A finished Strider should be able to walk by taking the motor's axle out and simply pushing it. Also, with the motor disengaged you should be able to rotate the legs easily by turning the crank by hand. If you feel resistance, then look carefully at the legs to see if any look asymmetrical or skewed. An easy mistake to make is to put the axles thru the wrong corner of the 3x5 cam part below:
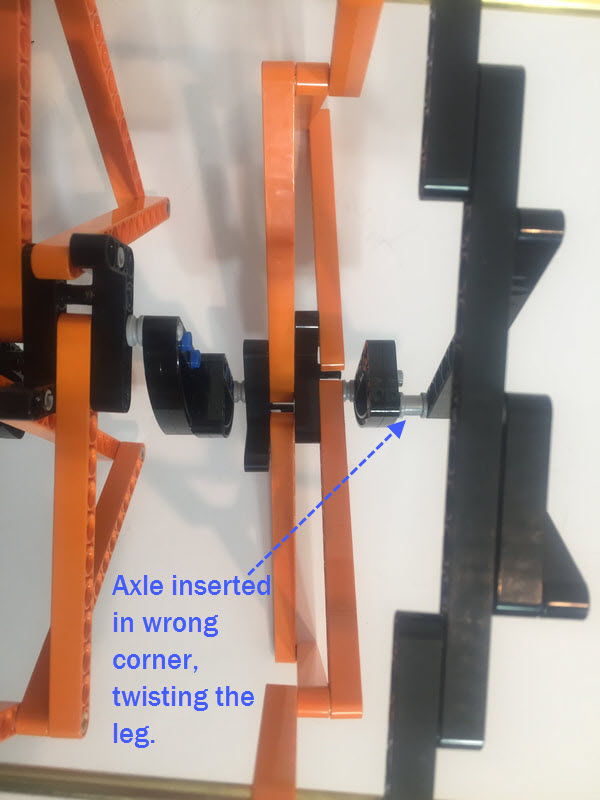
If you make this mistake, it can be easy to miss. Below is an example:
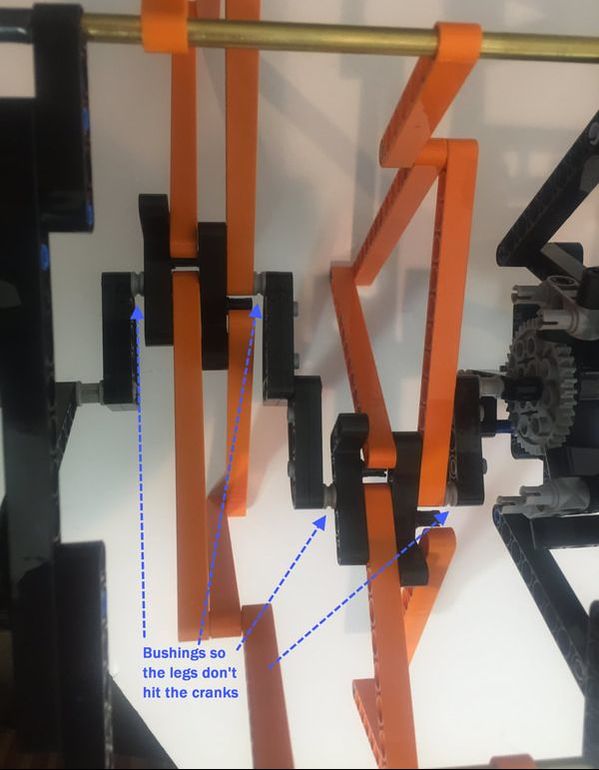
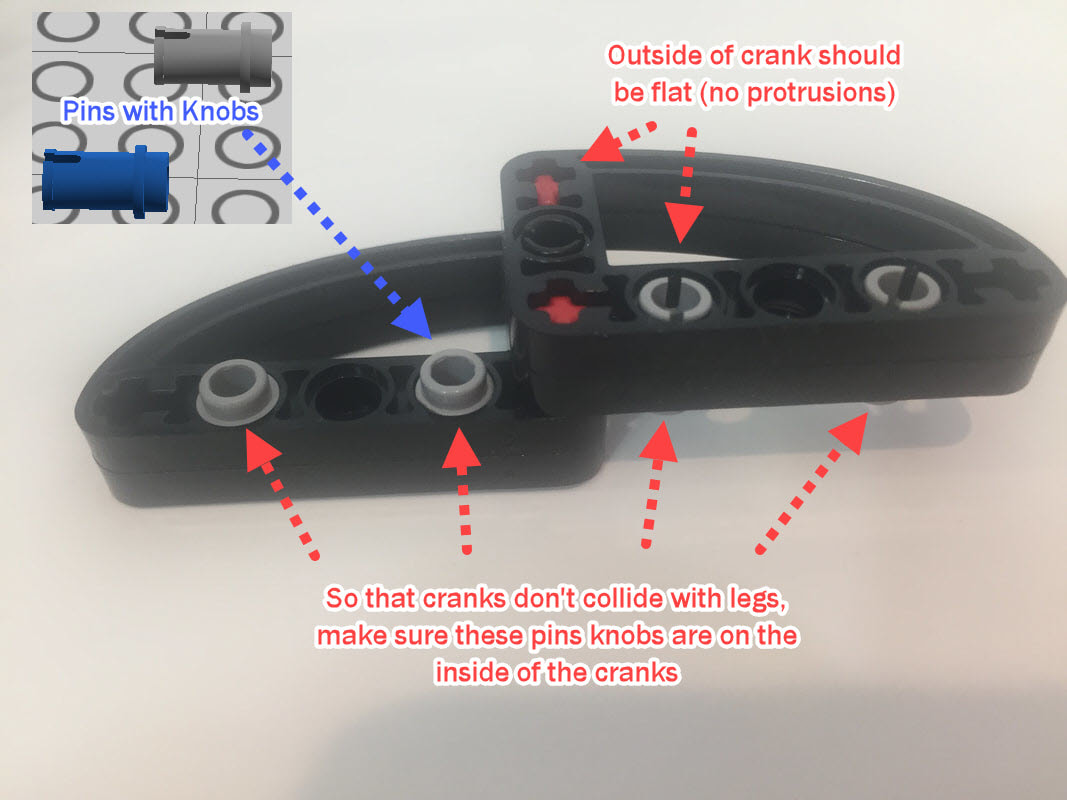
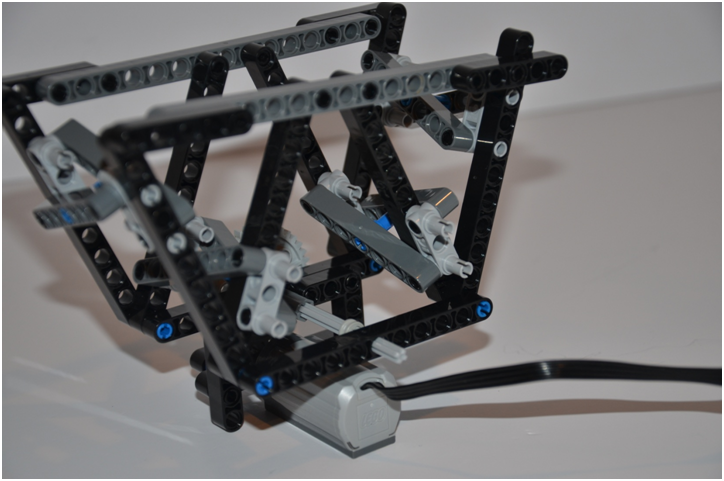
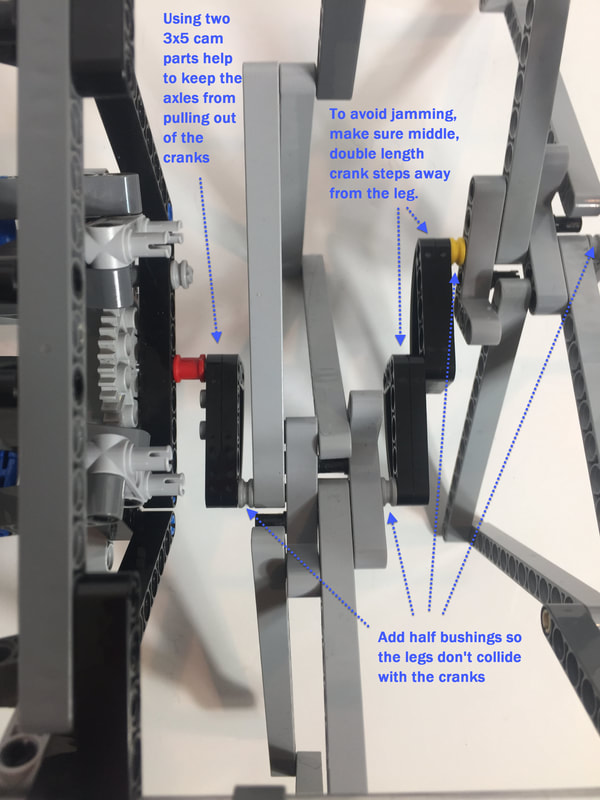
If your legs collide with the frame or cranks when rotating, then rotate the legs by hand (by turning a large gear) and look carefully at your build to see where the collisions are occurring. Perhaps you are missing some of the bushings highlighted below, or perhaps your double length crank has knobs protruding out.
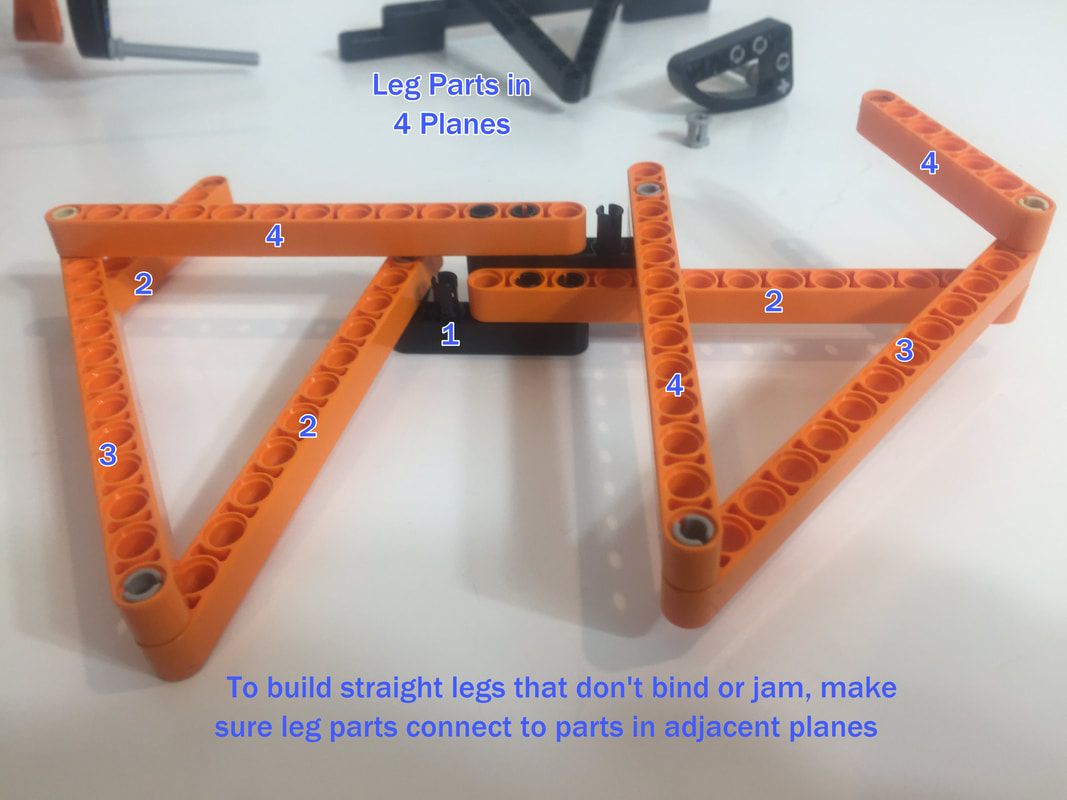
If leg parts aren't connected to parts in the adjacent plane the linkage can be twisted, which will cause the leg joints to bind. If your legs don't rotate easily, make sure your legs aren't twisted and that each part is in its correct plane as pictured below.
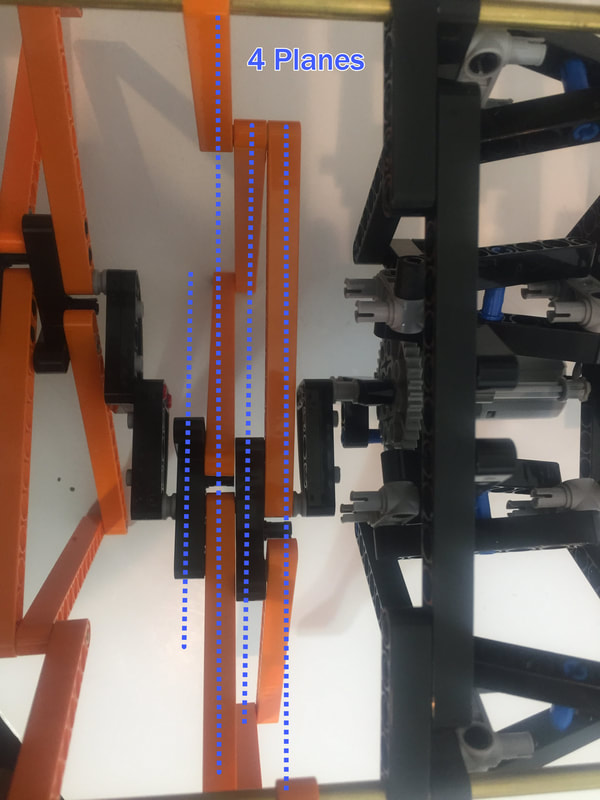
To Build Straight Legs that don't Bind or Jam, Make Sure Leg Parts Connect to Parts in Adjacent Planes
How to Build
General Comments:
1. Be sure to use frictionless pins for movable joints!
2. Take care to space each bar properly, with the bar's joint on the correct side, and with the use of bushings on axles as necessary. If the parts collide the linkage can lock up and gears will grind, and you will find it is much easier to get your leg spacing correct before assembling the entire walker than it is to fix the legs in a fully assembled walker!
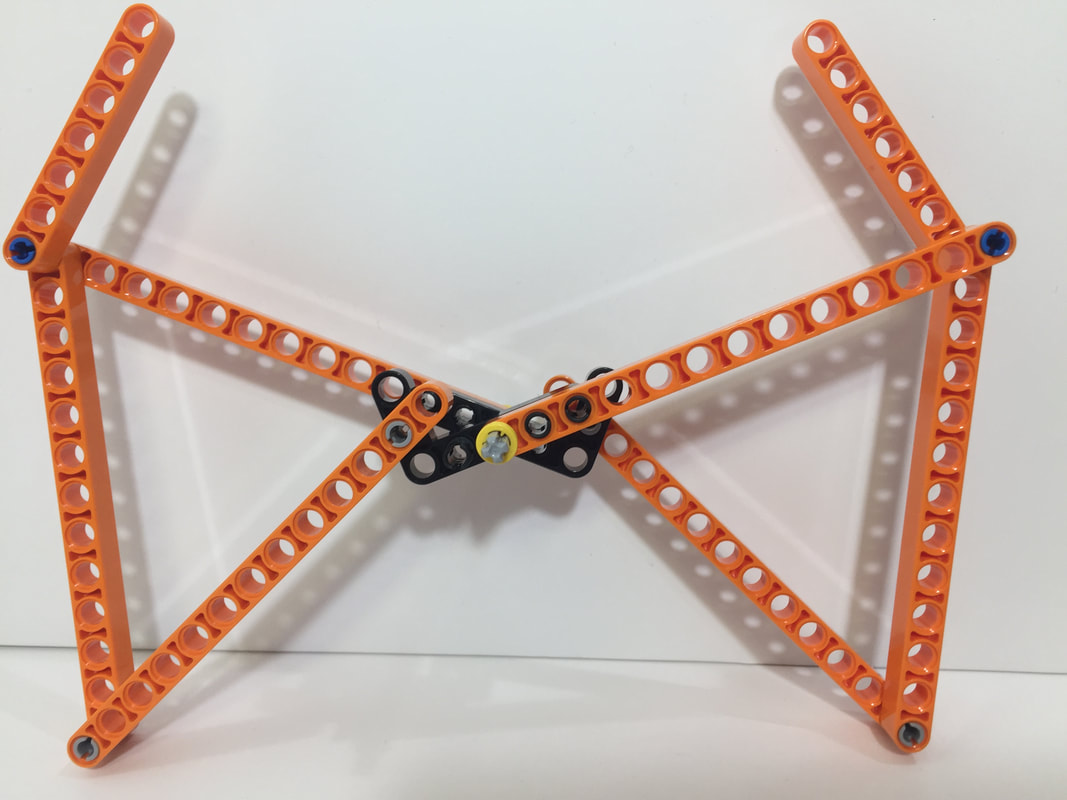
I'll first show some pictures of Strider with the orange legs, since the color makes it a little easier to see some of the parts.
How to Build
General Comments:
1. Be sure to use frictionless pins for movable joints!
2. Take care to space each bar properly, with the bar's joint on the correct side, and with the use of bushings on axles as necessary. If the parts collide the linkage can lock up and gears will grind, and you will find it is much easier to get your leg spacing correct before assembling the entire walker than it is to fix the legs in a fully assembled walker!
I'll first show some pictures of Strider with the orange legs, since the color makes it a little easier to see some of the parts.
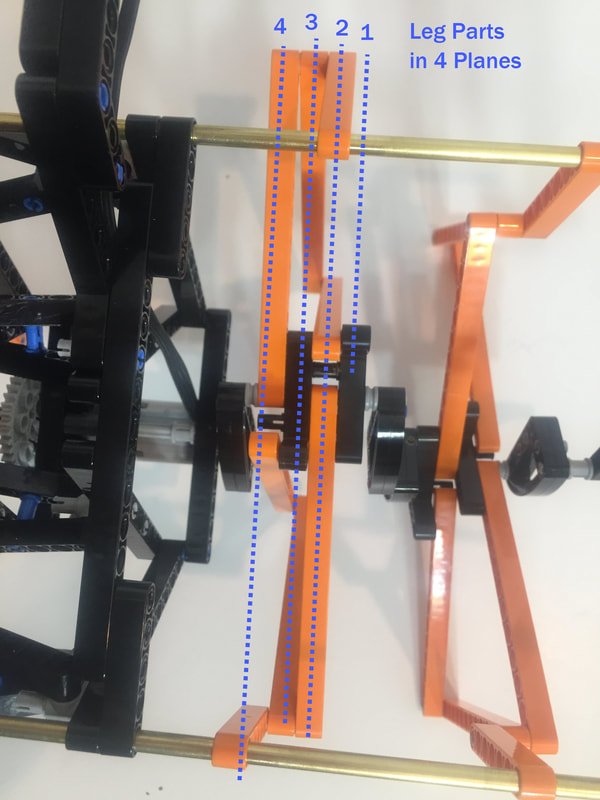
To build straight legs that don't bind or jam, make sure leg parts connect to parts in adjacent planes
"Dead points" are described in this post.

Instructions
The following instructions used gray beams for the legs, not orange beams like above.
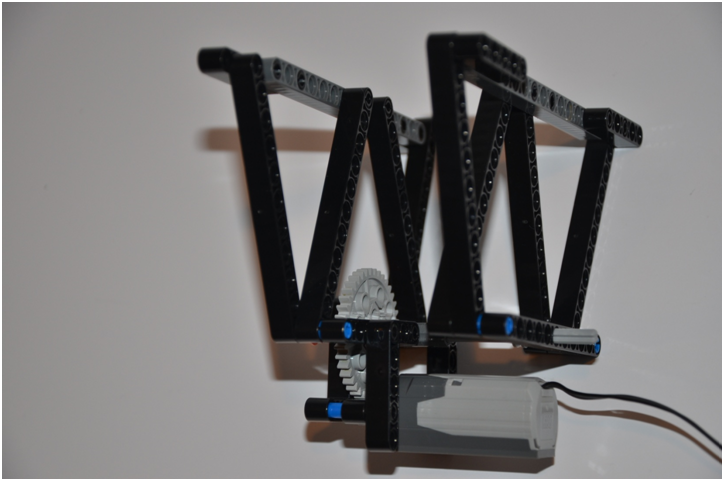
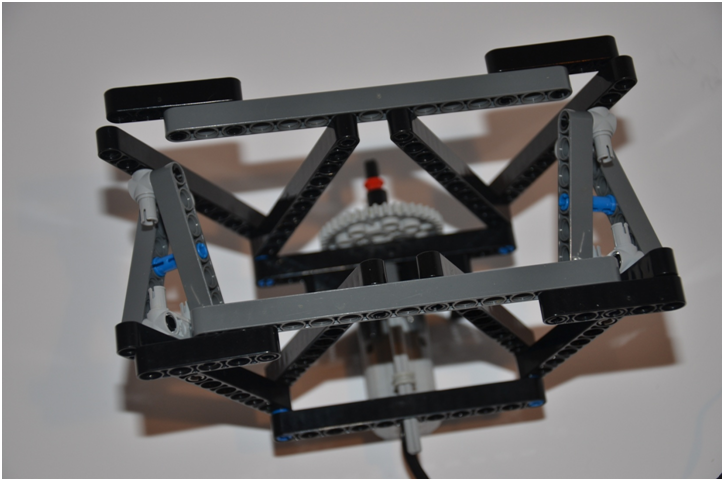
I started this build with the frame. Even light-weight walkers like Strider stress frames more than wheeled vehicles, so when building walkers strive to utilize triangles to make strong and light-weight frames that resist bending forces.

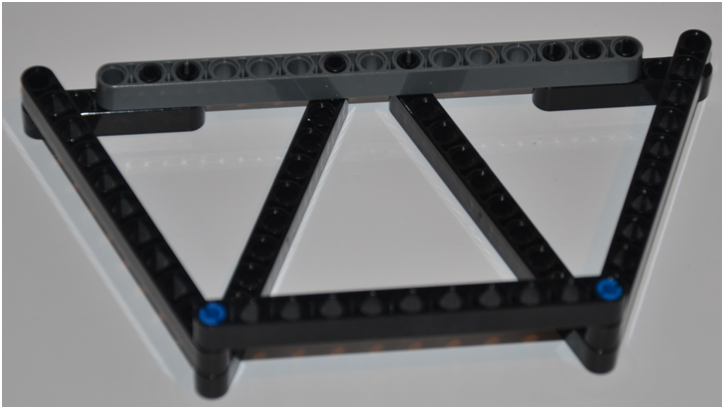
Notice there are no pins connecting the upper corner diagonals to the top bar. These connections will eventually be made with the metal support rods.
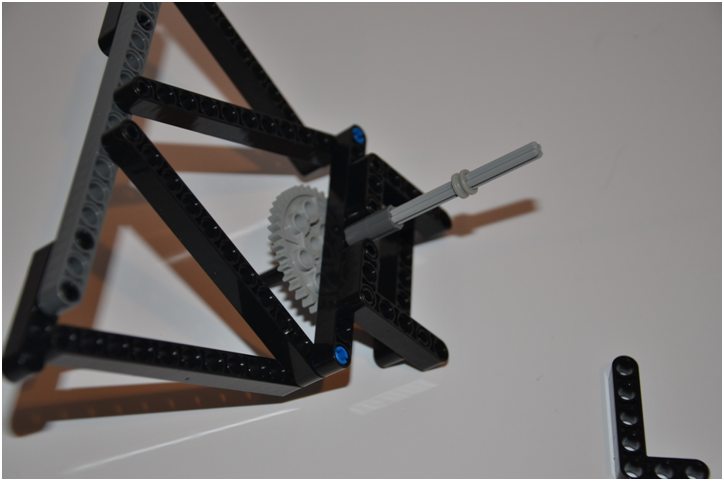
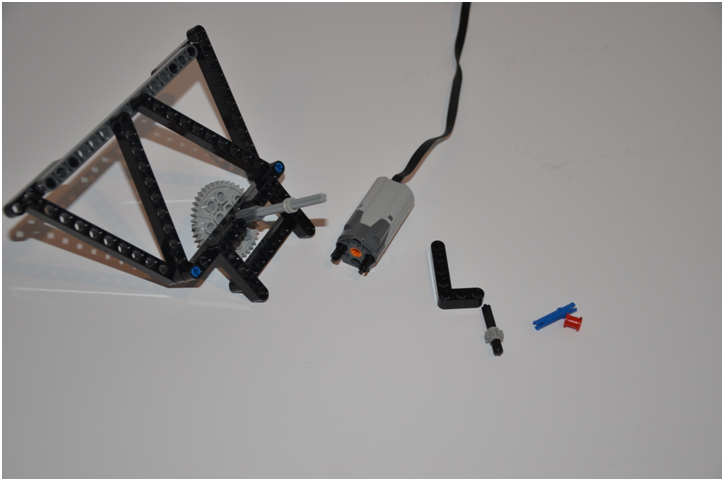
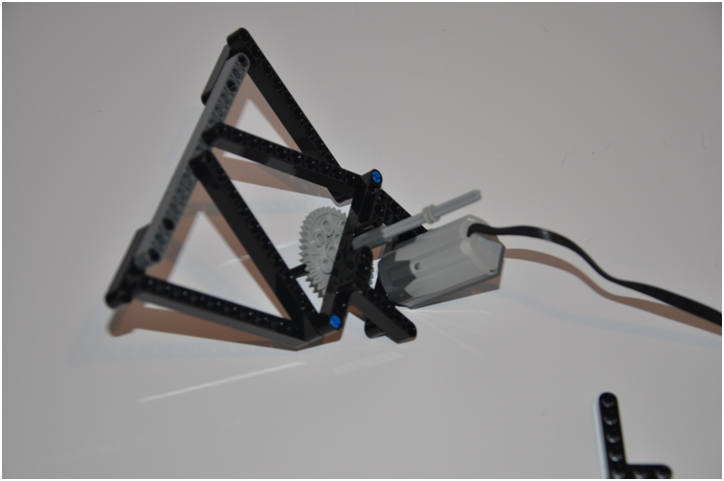
The lower and more centered the motor is mounted, the better the walker's performance will be.

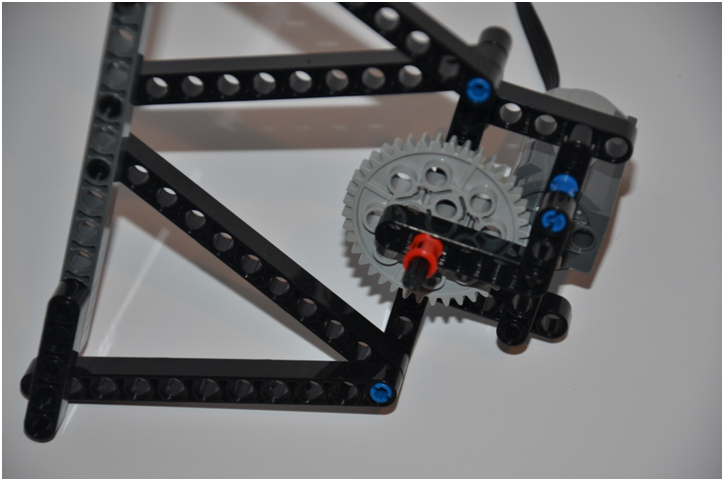
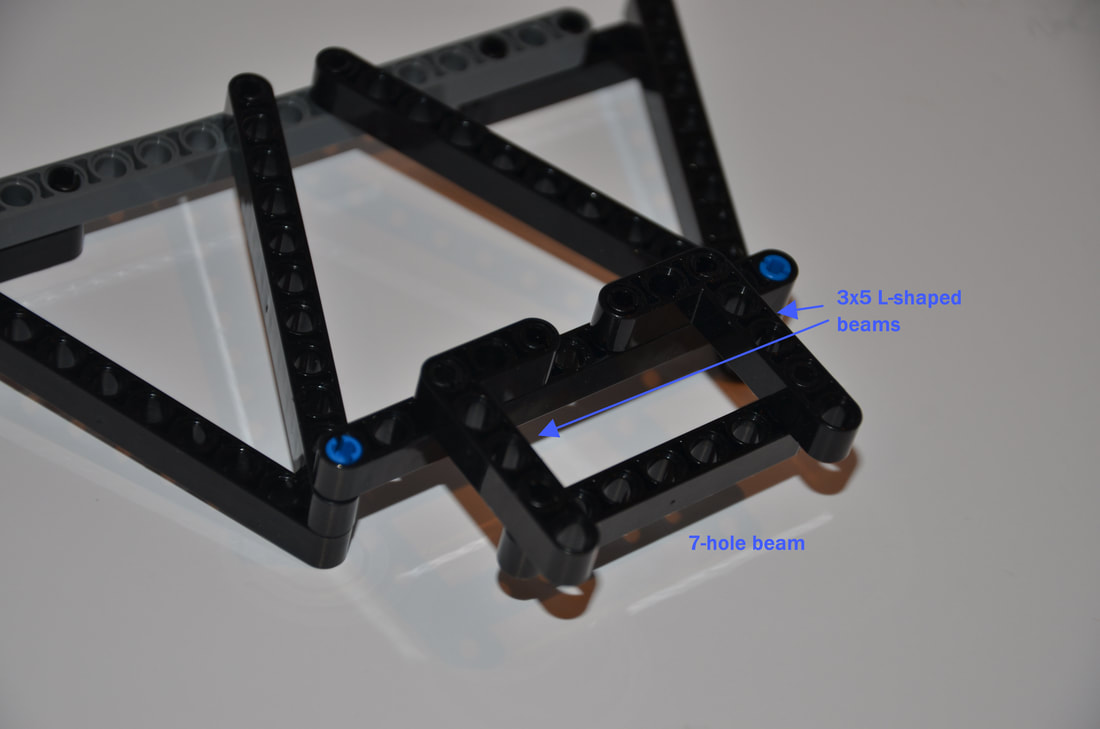
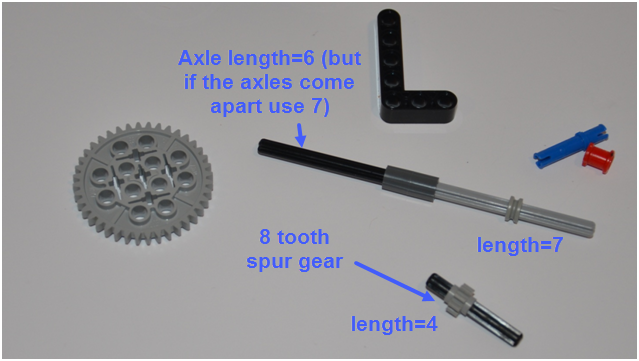
To prevent the gears from slipping and grinding lock the large gear's axle to the small gear's axle with a 3x5 L-shaped part.
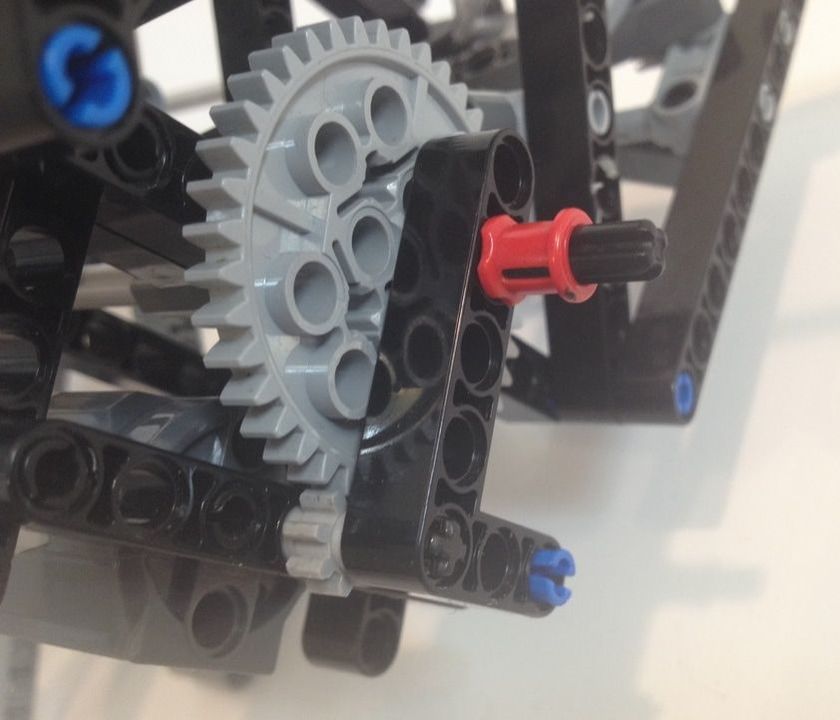

Crank's are subjected to a lot of stress. The triangular shape of these 3x5 quarter ellipse parts help to prevent the cranks from bending.
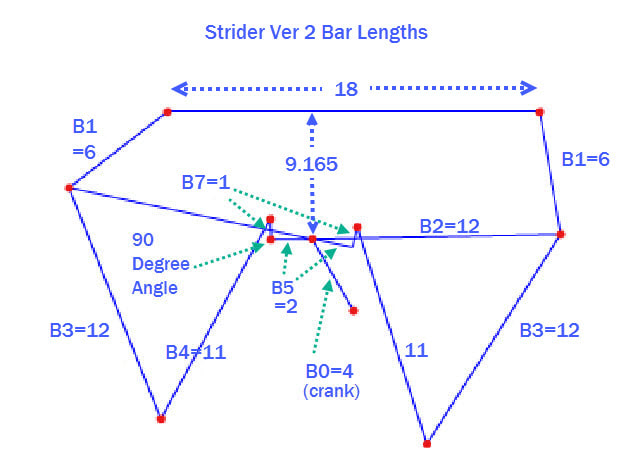
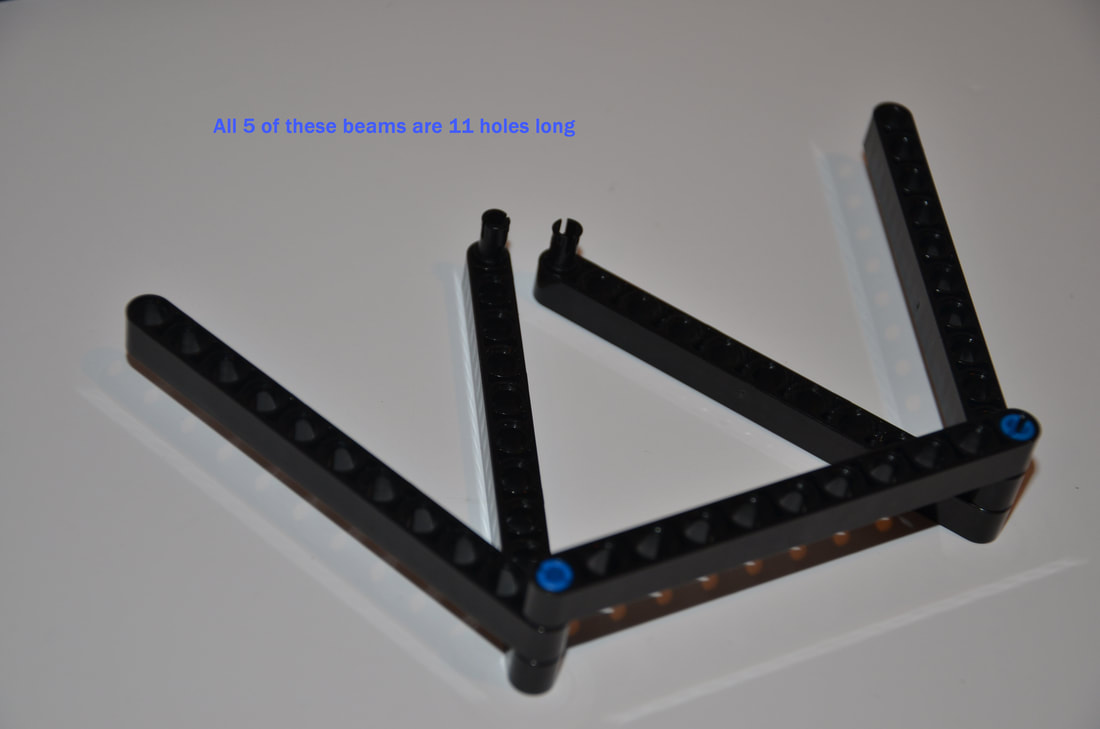
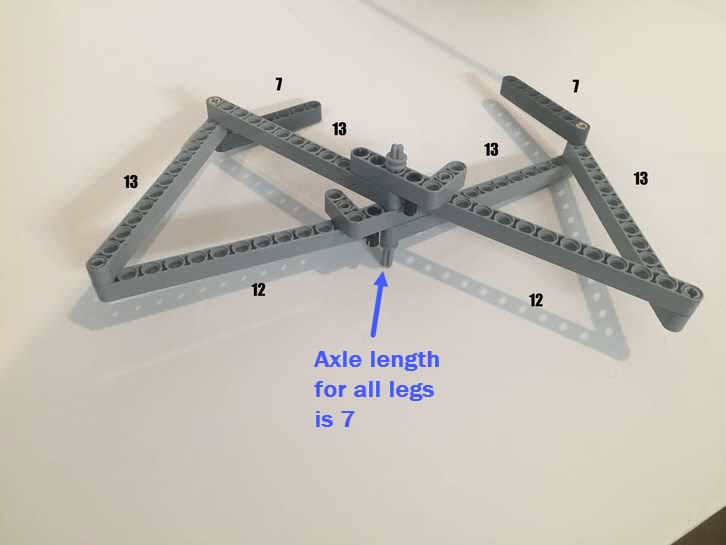
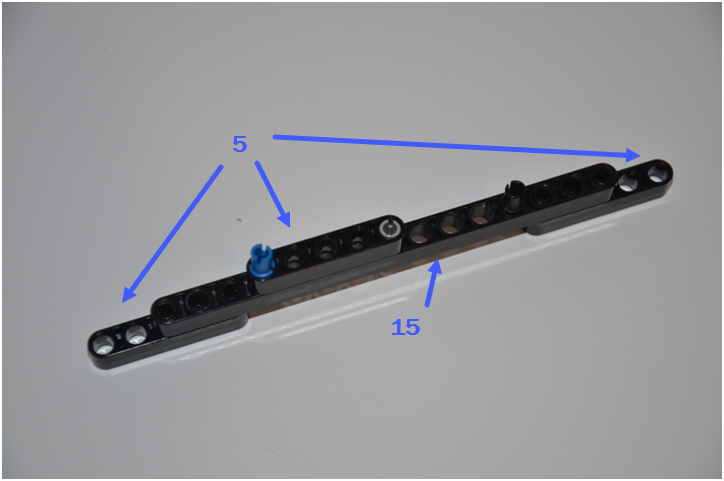
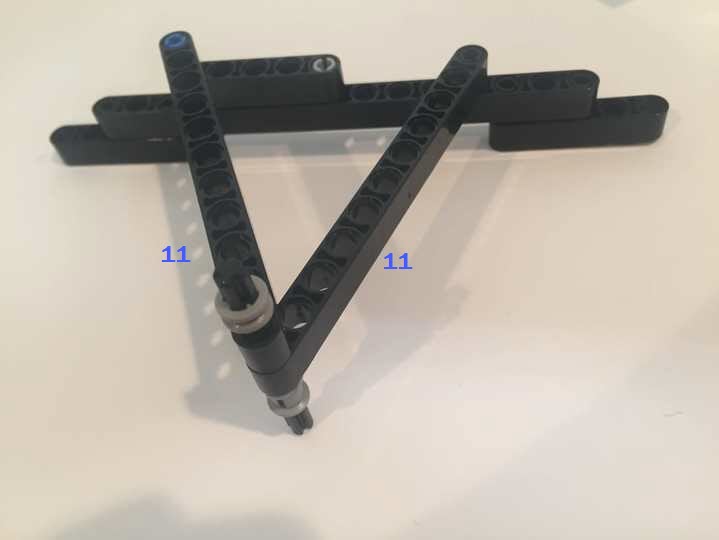
Below are the bar lengths of Strider's legs. The beams labeled "12" are 13 hole beams connected one hole from the end. There are closer images further down.
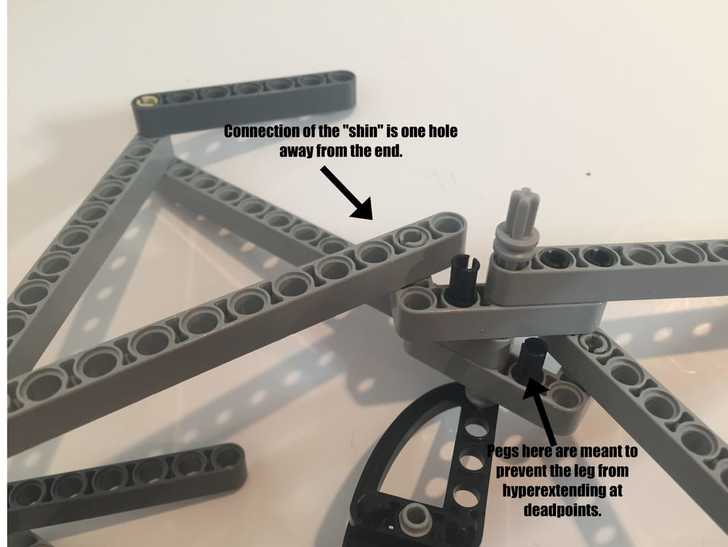
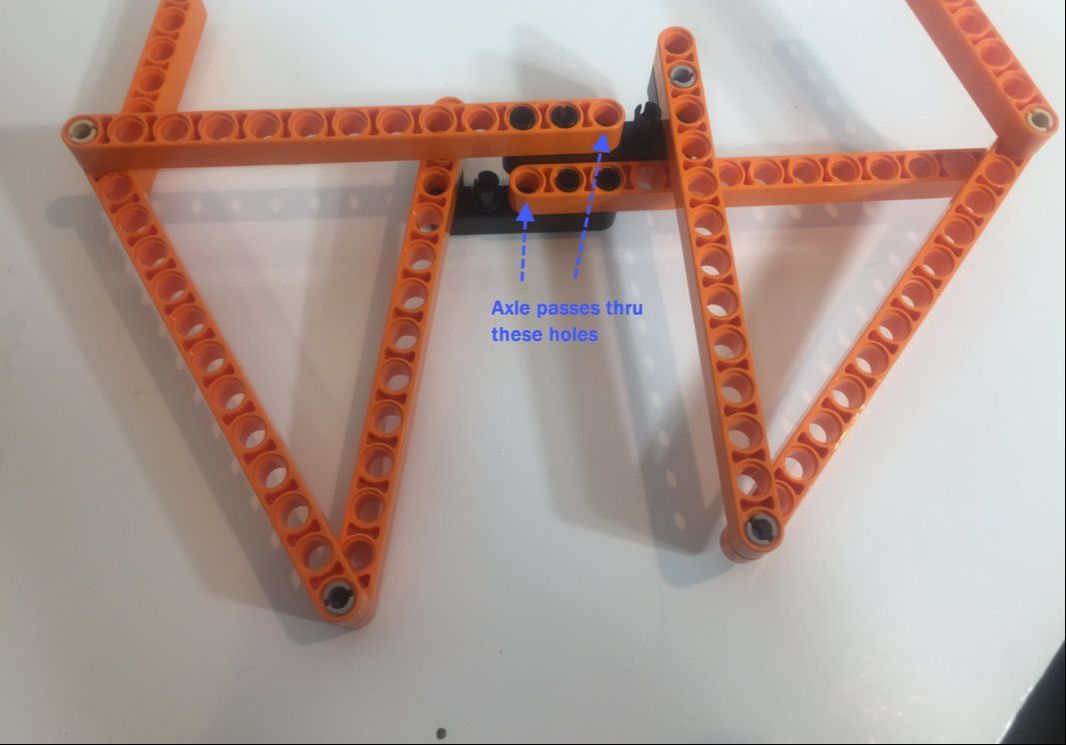
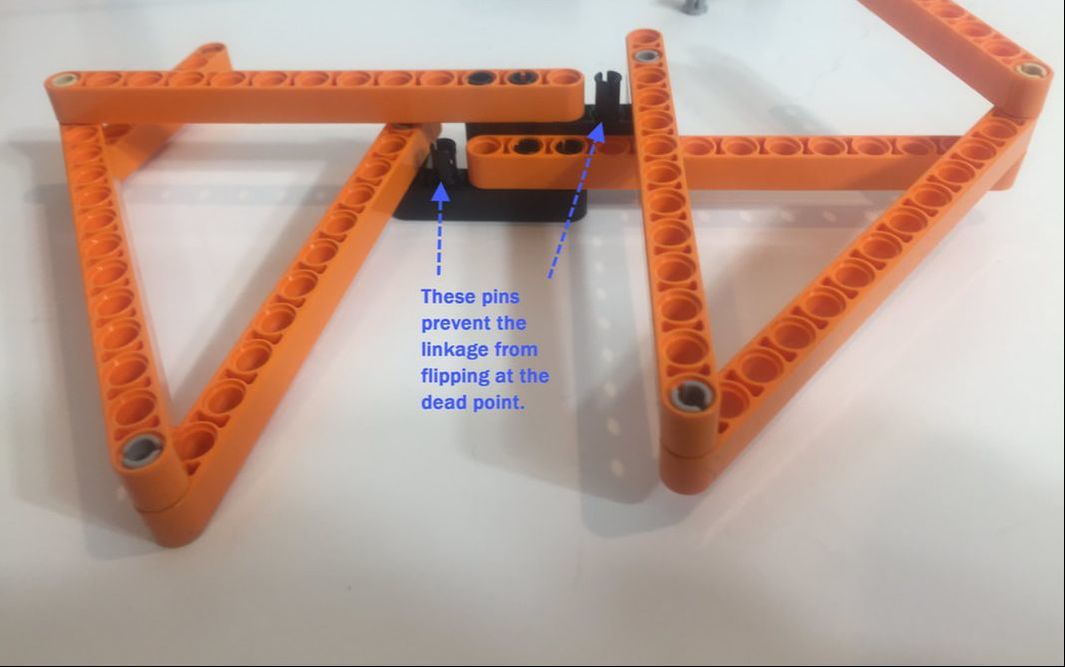
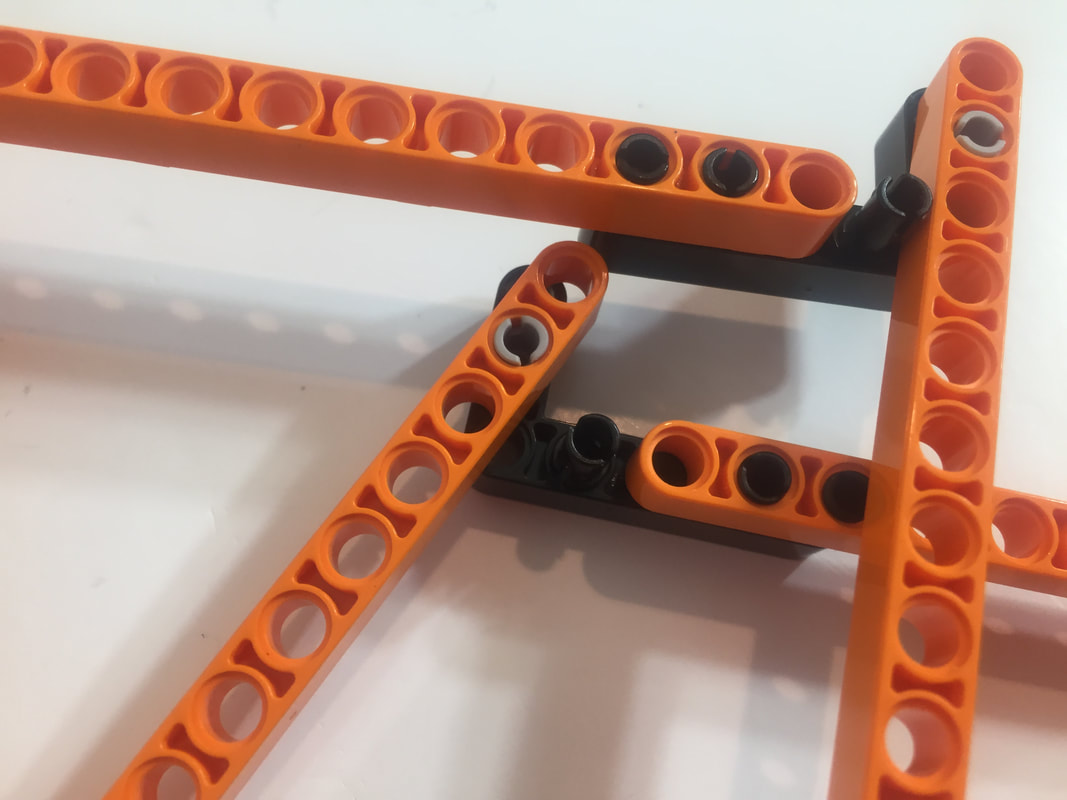
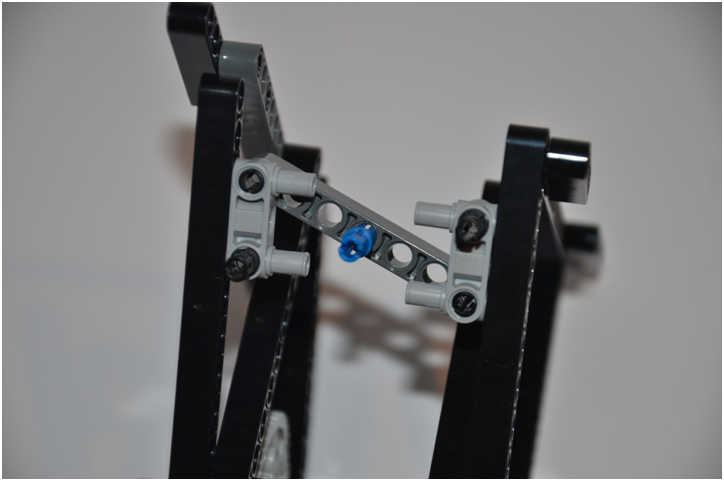
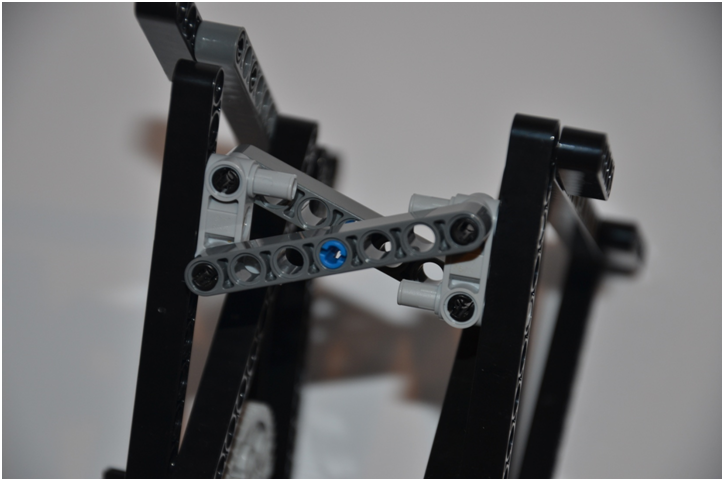
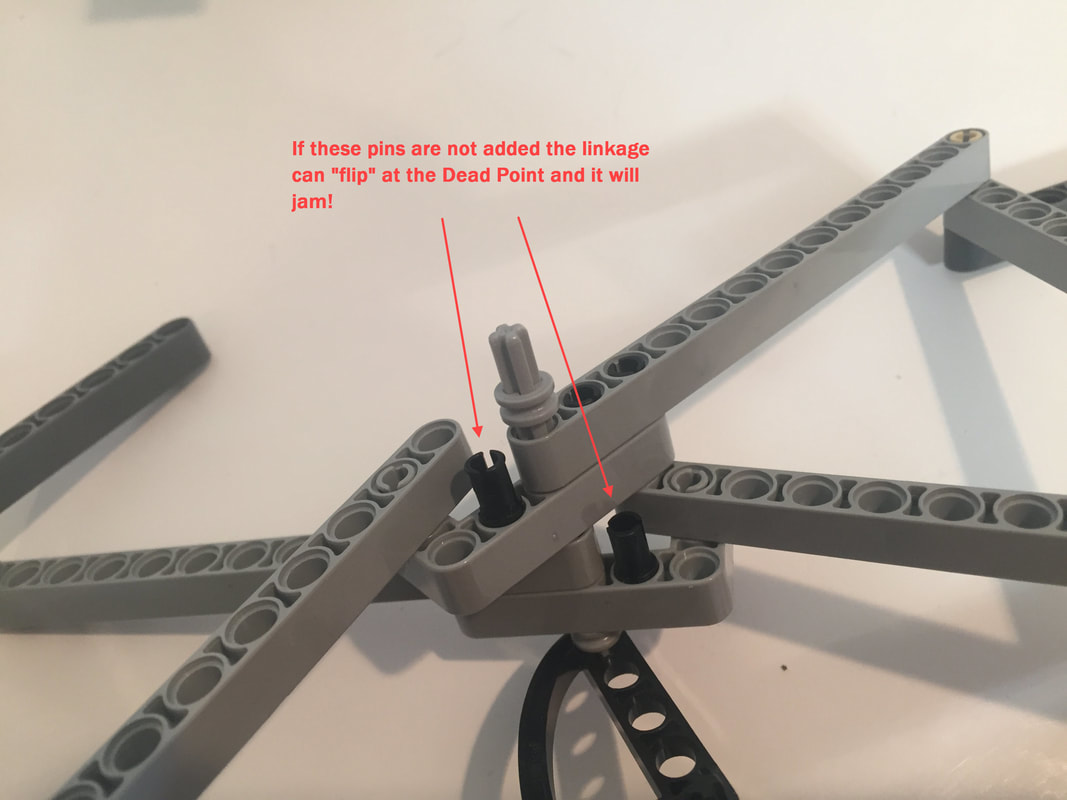
IMPORTANT: The black pins noted in this pic block Strider's legs from hyper-extending due to the linkage's Dead Point
Below is another image of pins needed to avoid flipping at the linkage's Dead Point
This double length crank is subjected to about twice the stress, so I cheated and glued these two cranks together with plastic modeler's cement so they wouldn't come apart when kids were playing with them at the Maker Faire. A sturdier option using 4 of the 3x5 cams is shown below.
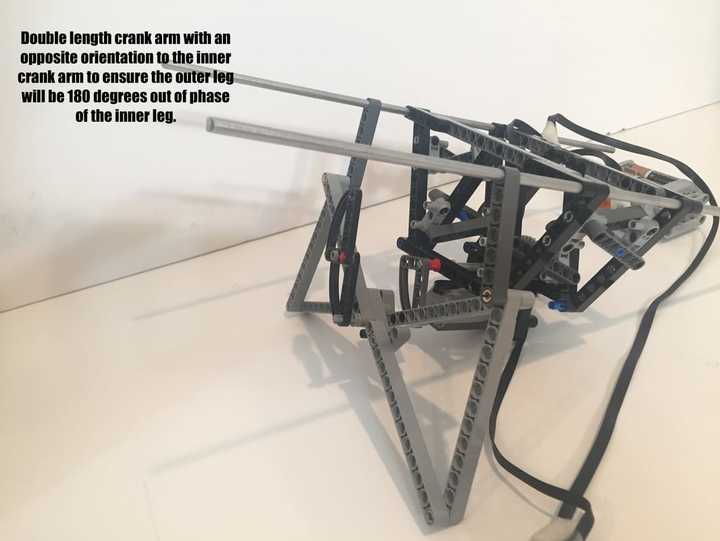
Below, Strider uses pairs of 3x5 cams as cranks, which hold the axles more securely. Notice the half-bushing comments - they are the key to preventing the linkage from jamming!
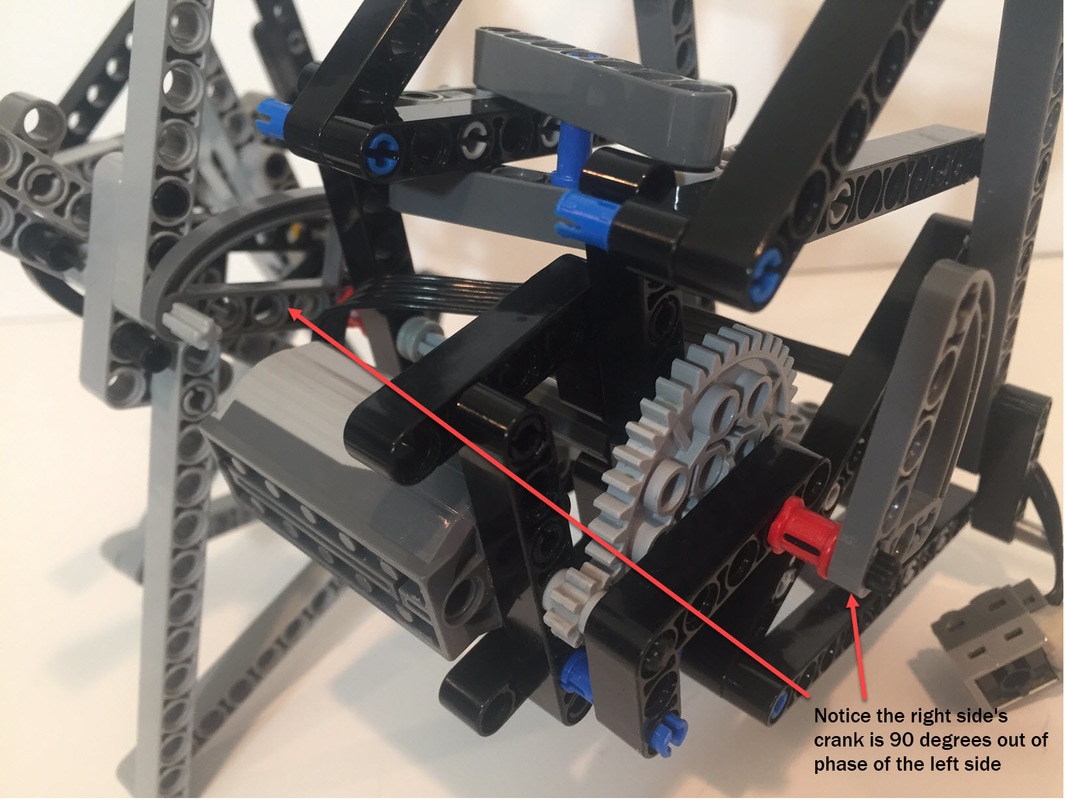
Notice the crank for the outer legs is 180 degrees out of phase of the inner legs, which maximizes foot-contact at each corner of the robot, as can be seen in this sim:
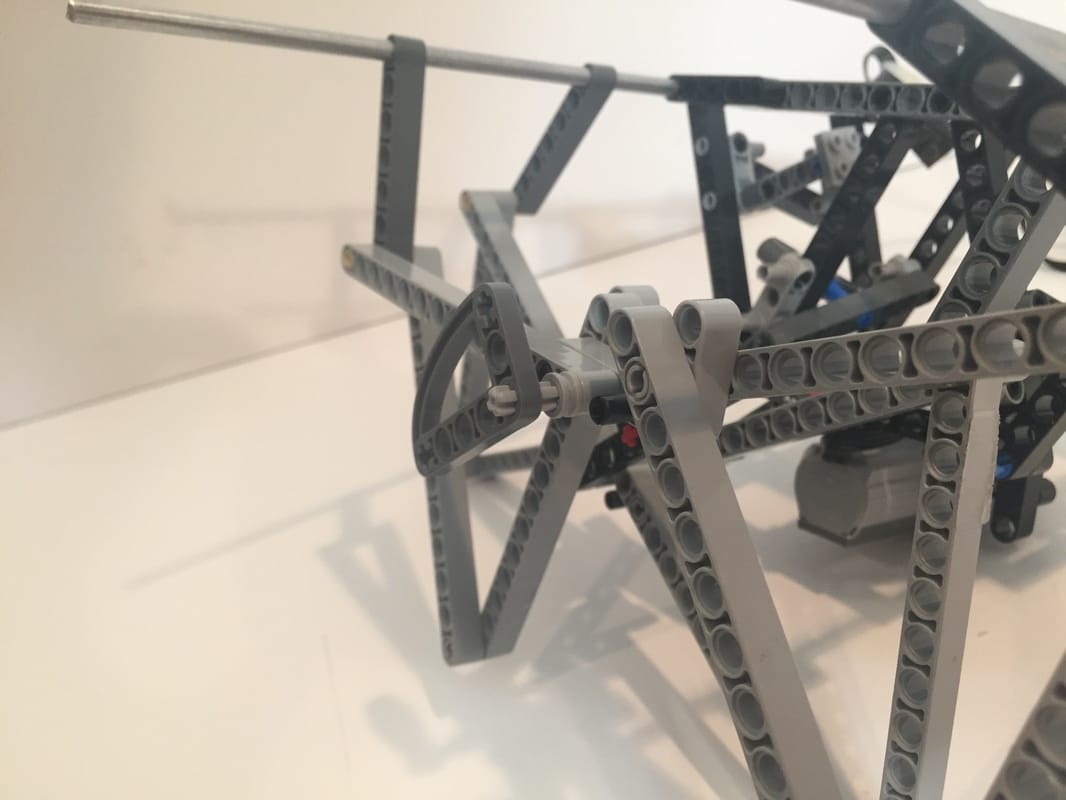
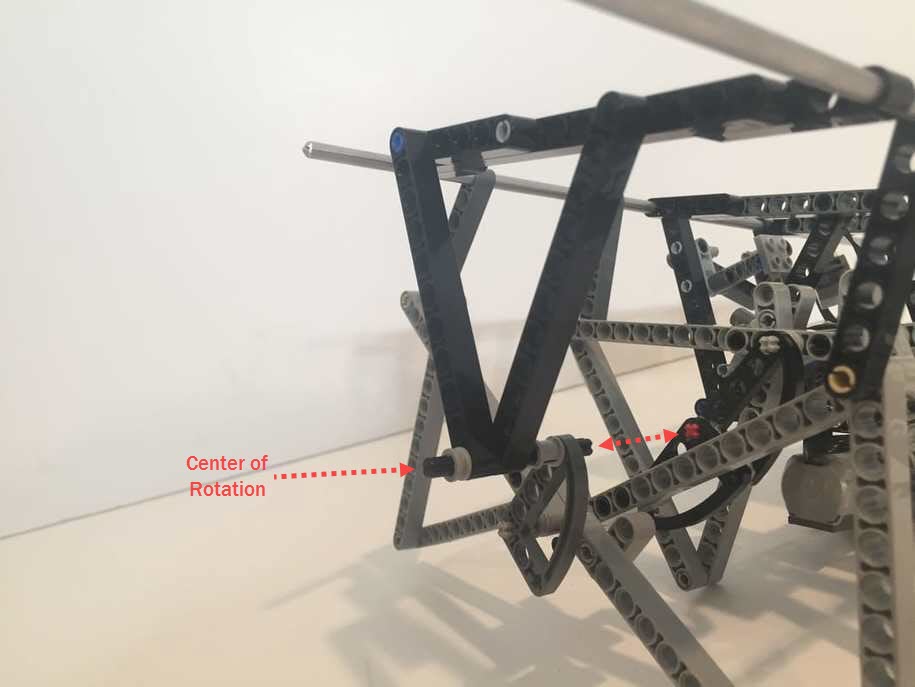
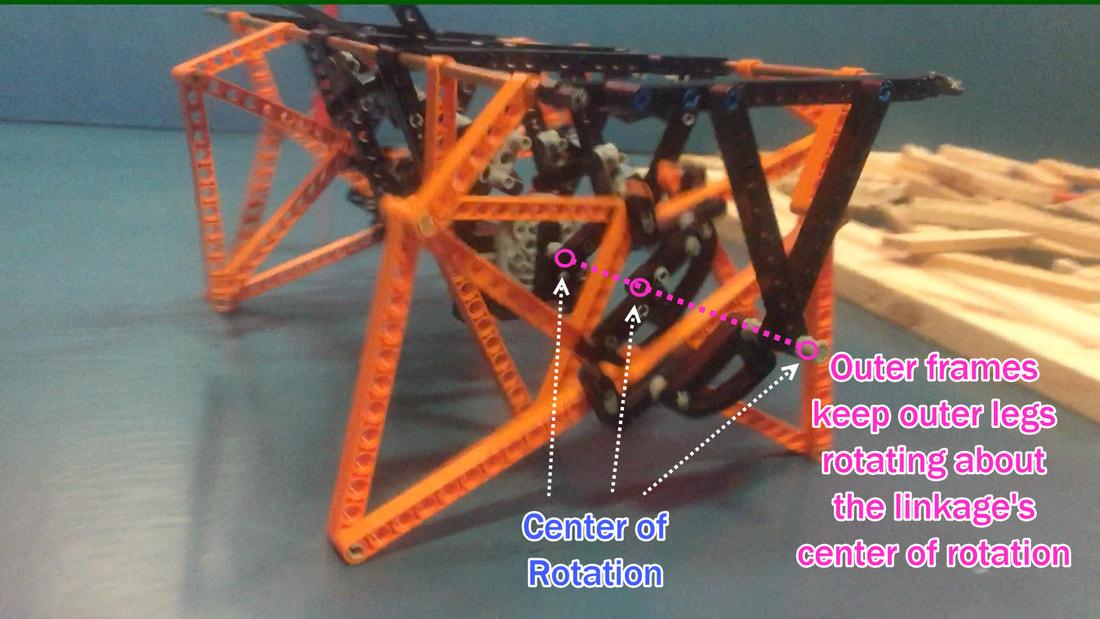
These outer frame triangles help to match the axle's center of rotation to the inner frame's, and also keep the support rods at the correct distance from the axle so that the linkage moves as designed.
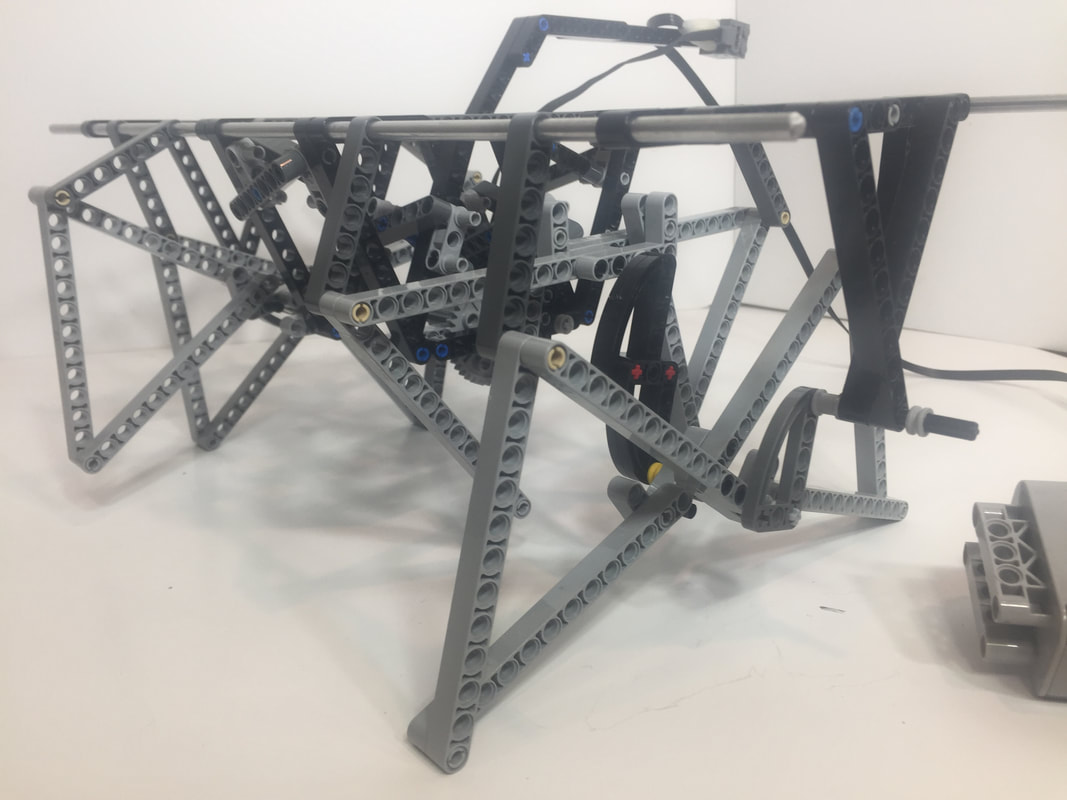
Here's a video of this build with gray legs. The batteries were nearly dead, so it walks slowly.