Hexapod TrotBot
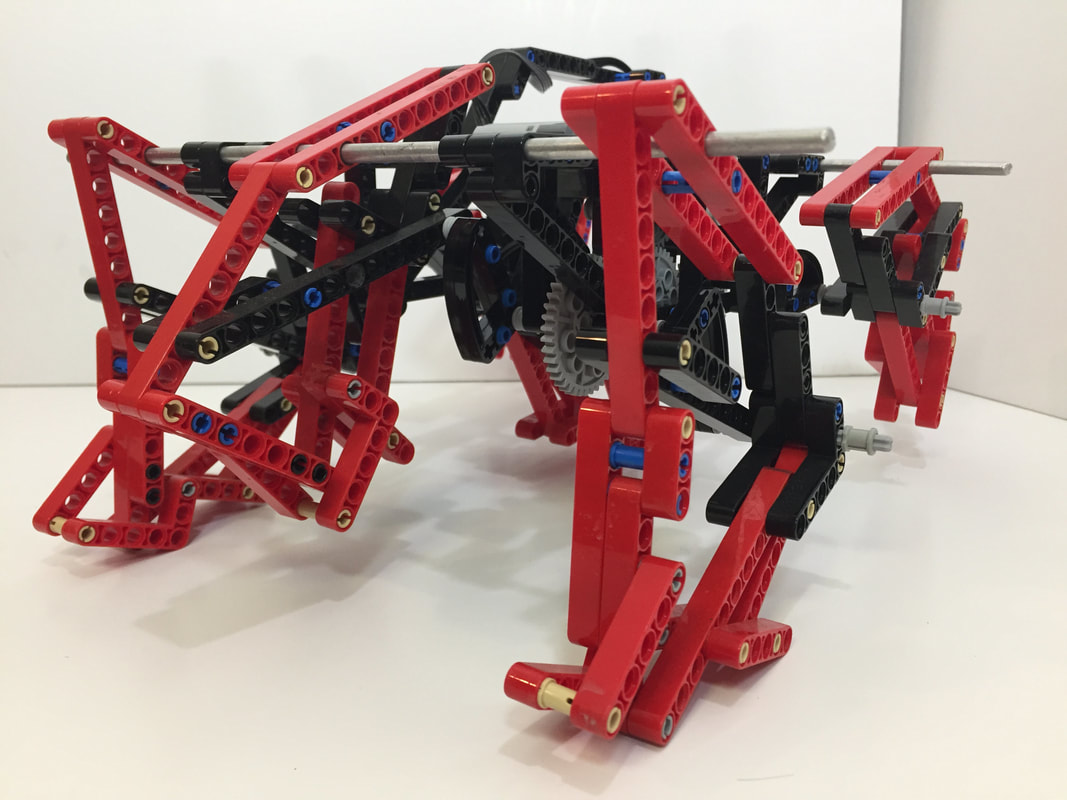
This 6-leg version of TrotBot has a tripod gait, is easier to build, and the parts cost about half of a standard TrotBot.
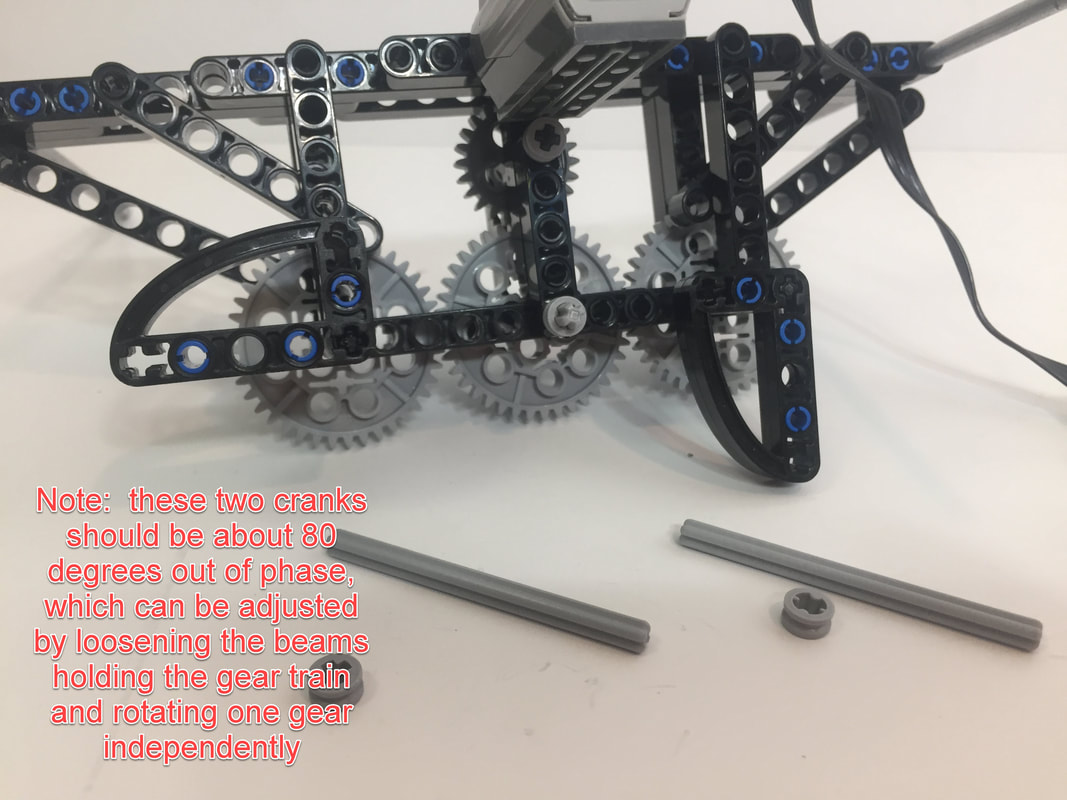
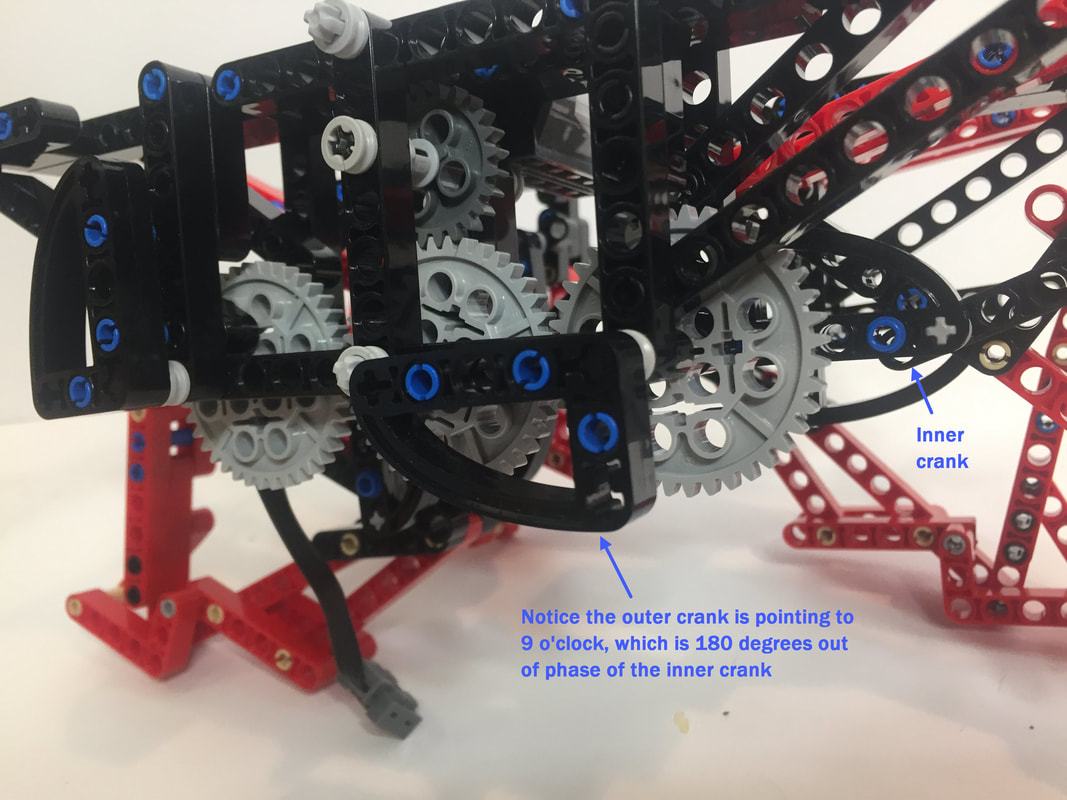
The tripod gait required changing of the timing of the front and rear legs, which is described in this blog post.
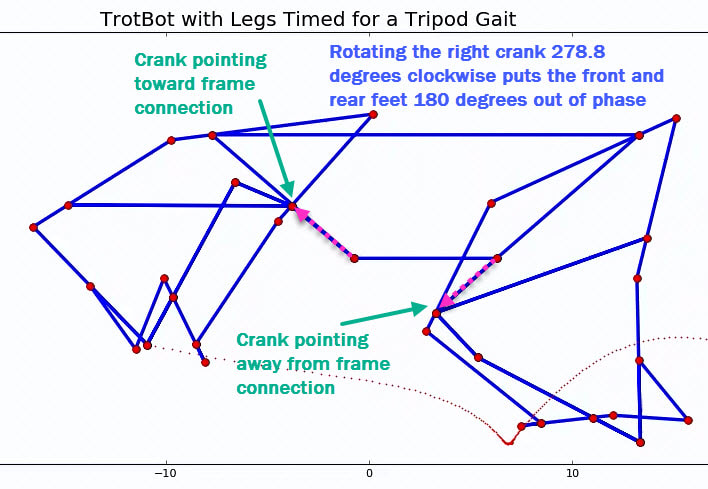
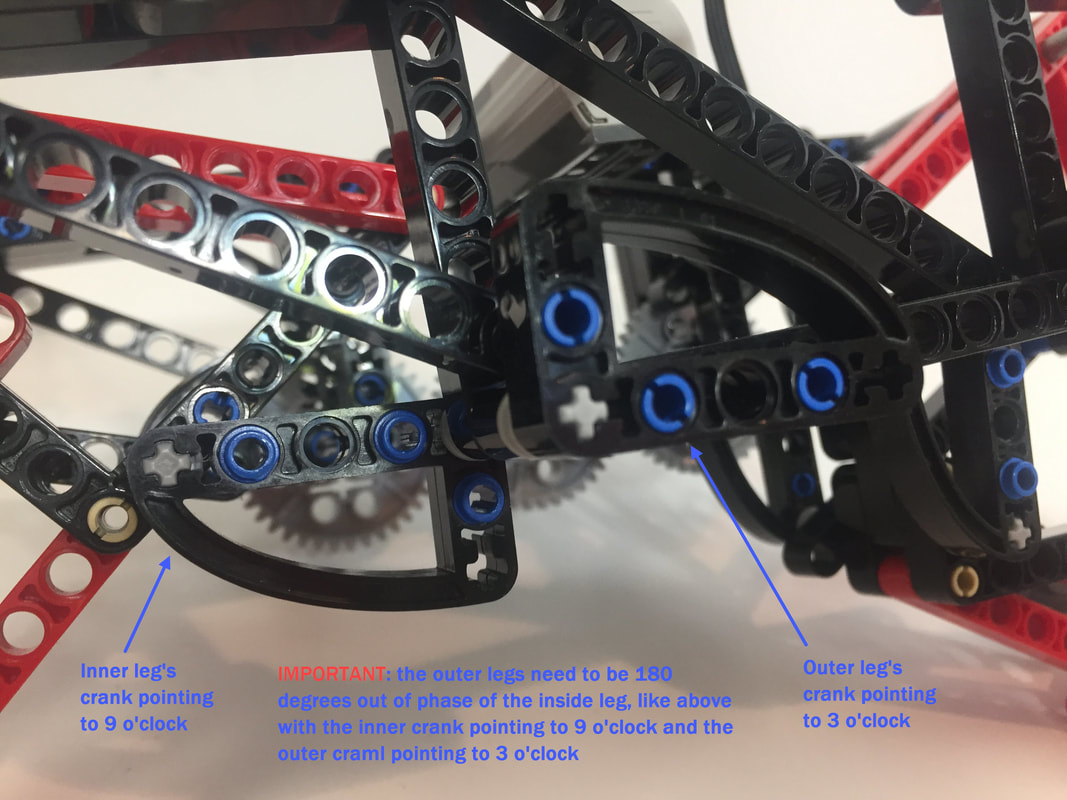
In other words, the front and rear cranks should be about 80 degrees out of phase
Below is a simulation of the tripod gait's timing:
|
UPDATE: Here are some simplified instructions for building TrotBot's leg mechanism. This leg will work for all 6 legs of Hexapod TrotBot, but make sure to flip the back leg around so TrotBot's "knee" is always pointing away from the center of the robot. |
Simplified Instructions for Building TrotBot's Leg Mechanism
|
Let's build it!
Overview
Linkage: TrotBot uses the linkage developed by Team TrotBot
Build Difficulty: Hard, but it's easier to build and the parts are less expensive than an 8-leg TrotBot.
Hexapod Trobot's Characteristics:
1. 6 Legs with a tripod gait
2. Its legs require both a "heel" and retractable toes.
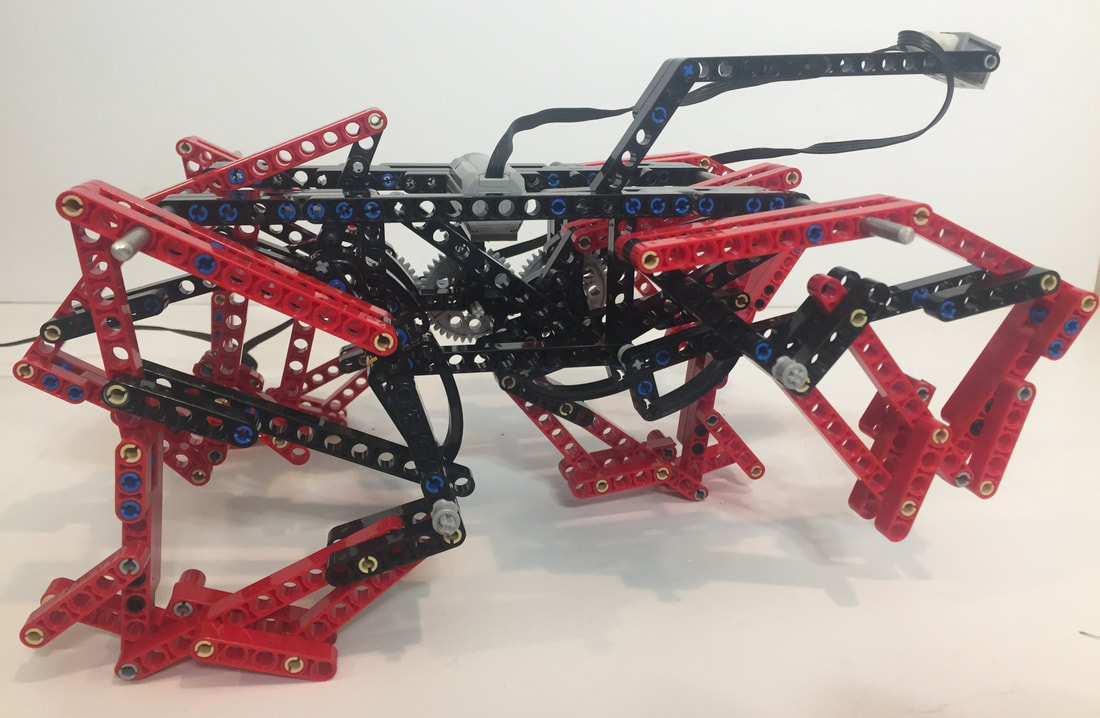
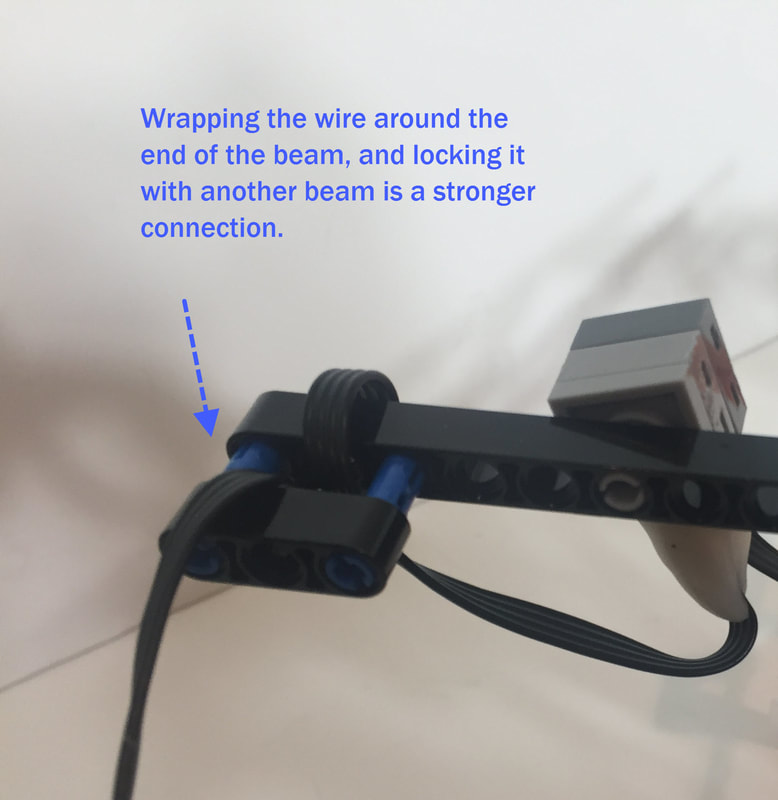
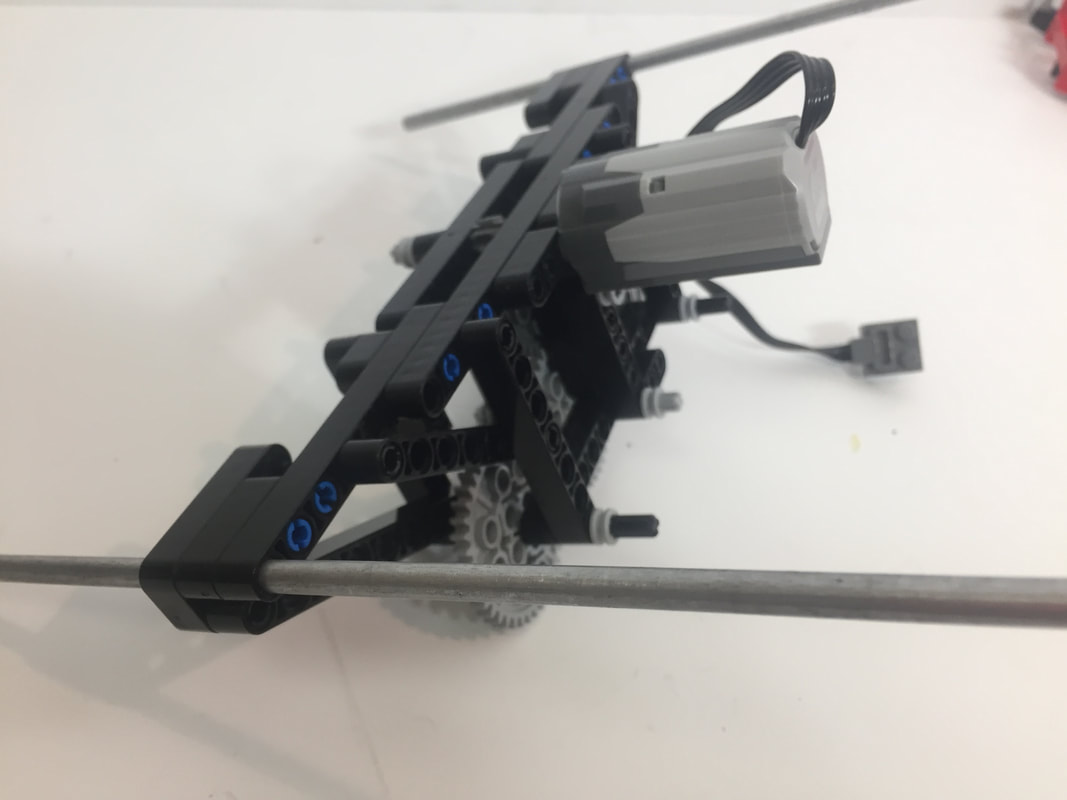
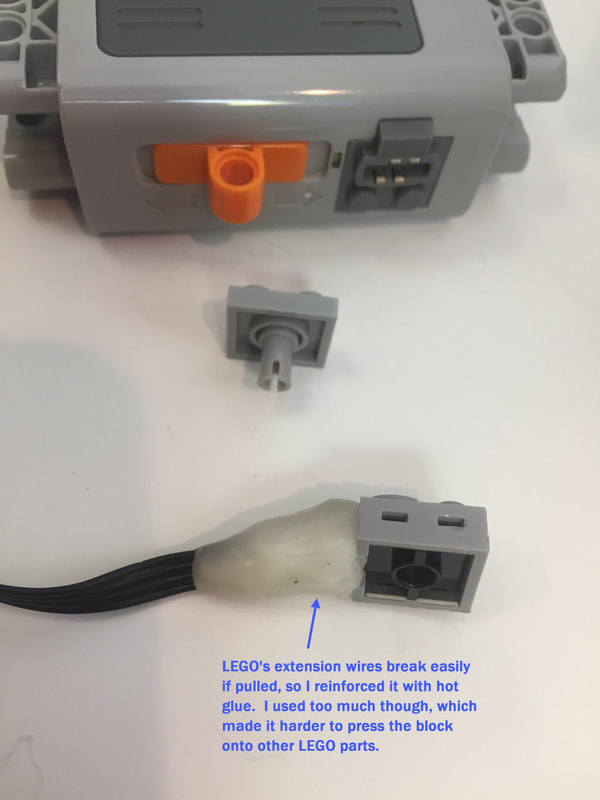
3. Steerable? No, this light weight TrotBot only has one motor, and for it to be balanced like a tripod the two outside front feet and the center back foot need to be in contact with the ground, or vice versa, so it cannot be turned tank-style like an 8-legged TrotBot can. But, you can kind of steer it by treating the extension wire like a "leash" and tugging it sideways to turn like I did in the above video if it's attached like below with a long beam to give it leverage to steer -plus, the long beam that the wire attaches to helps to prevent the wire from getting tangled in the rotating legs or cranks. Also, you should wrap the wire around a beam like in the picture below because LEGO's extension wires break easily.
Hexapod Trobot's Characteristics:
1. 6 Legs with a tripod gait
2. Its legs require both a "heel" and retractable toes.
3. Steerable? No, this light weight TrotBot only has one motor, and for it to be balanced like a tripod the two outside front feet and the center back foot need to be in contact with the ground, or vice versa, so it cannot be turned tank-style like an 8-legged TrotBot can. But, you can kind of steer it by treating the extension wire like a "leash" and tugging it sideways to turn like I did in the above video if it's attached like below with a long beam to give it leverage to steer -plus, the long beam that the wire attaches to helps to prevent the wire from getting tangled in the rotating legs or cranks. Also, you should wrap the wire around a beam like in the picture below because LEGO's extension wires break easily.
|
|
Trouble Shooting a Finished TrotBot
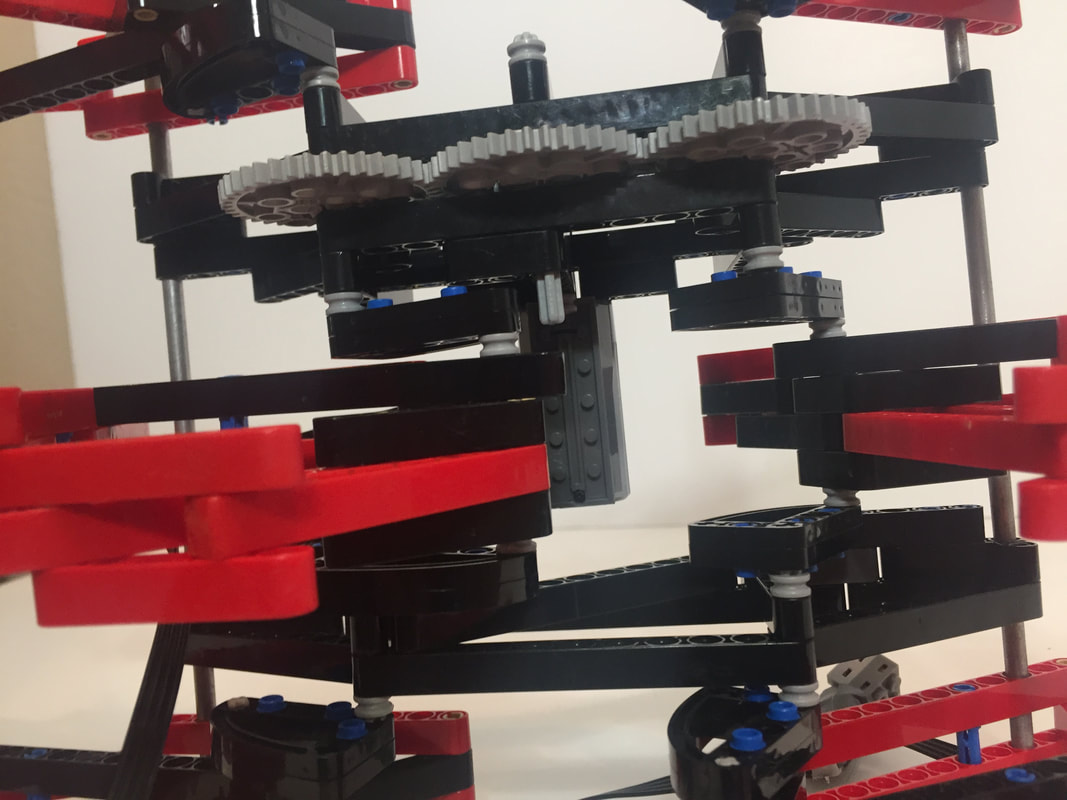
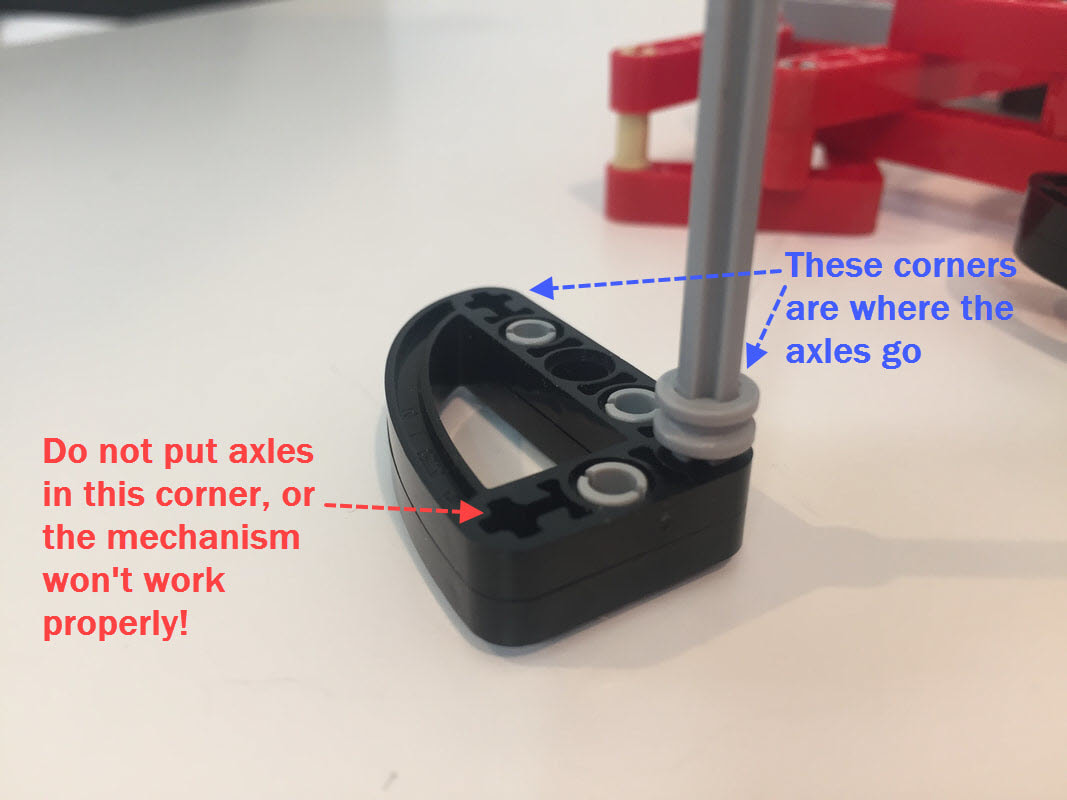
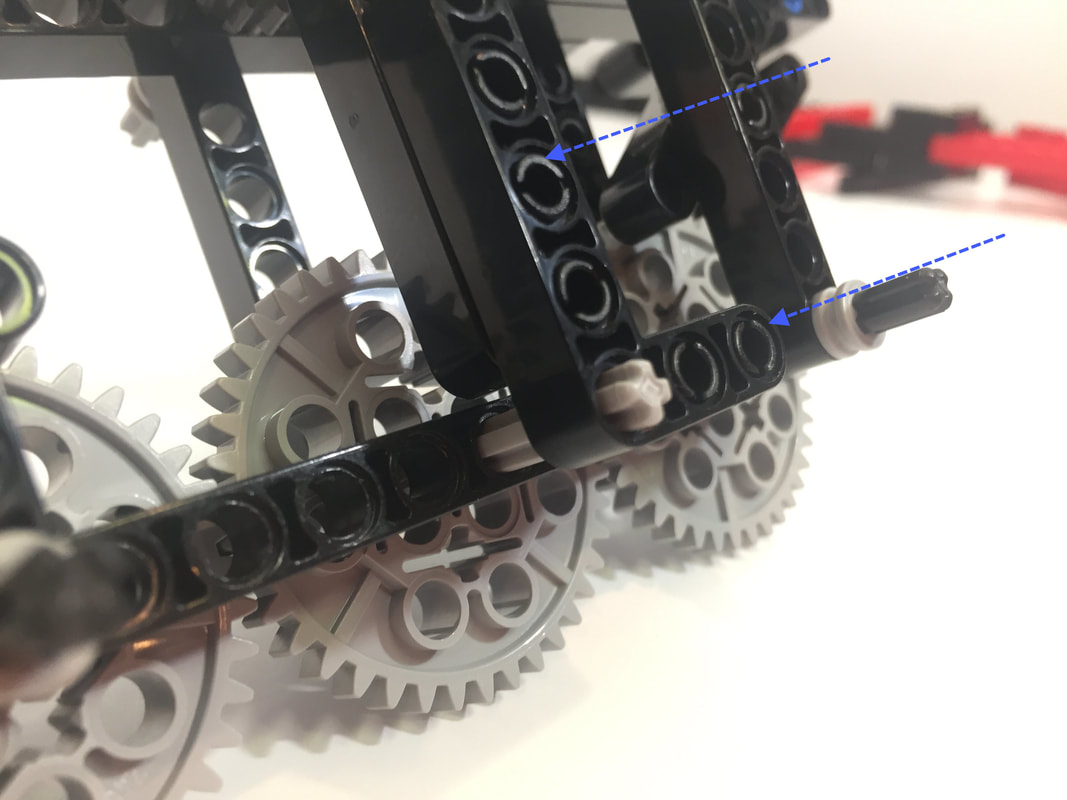
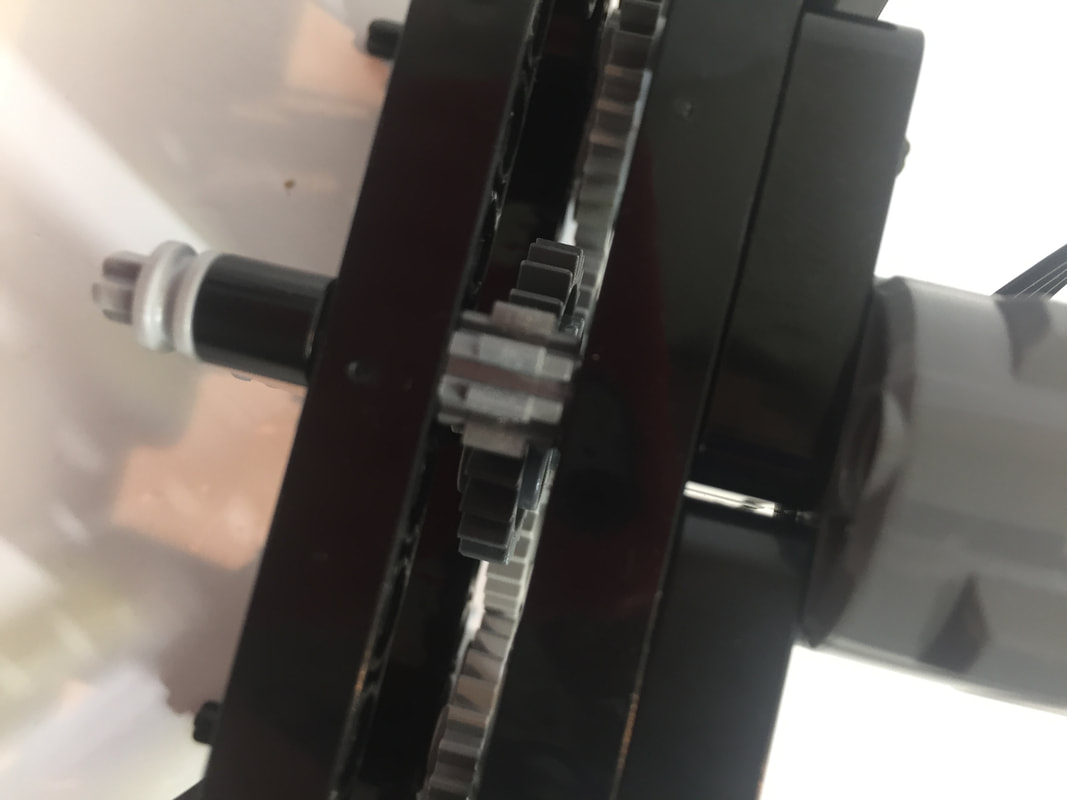
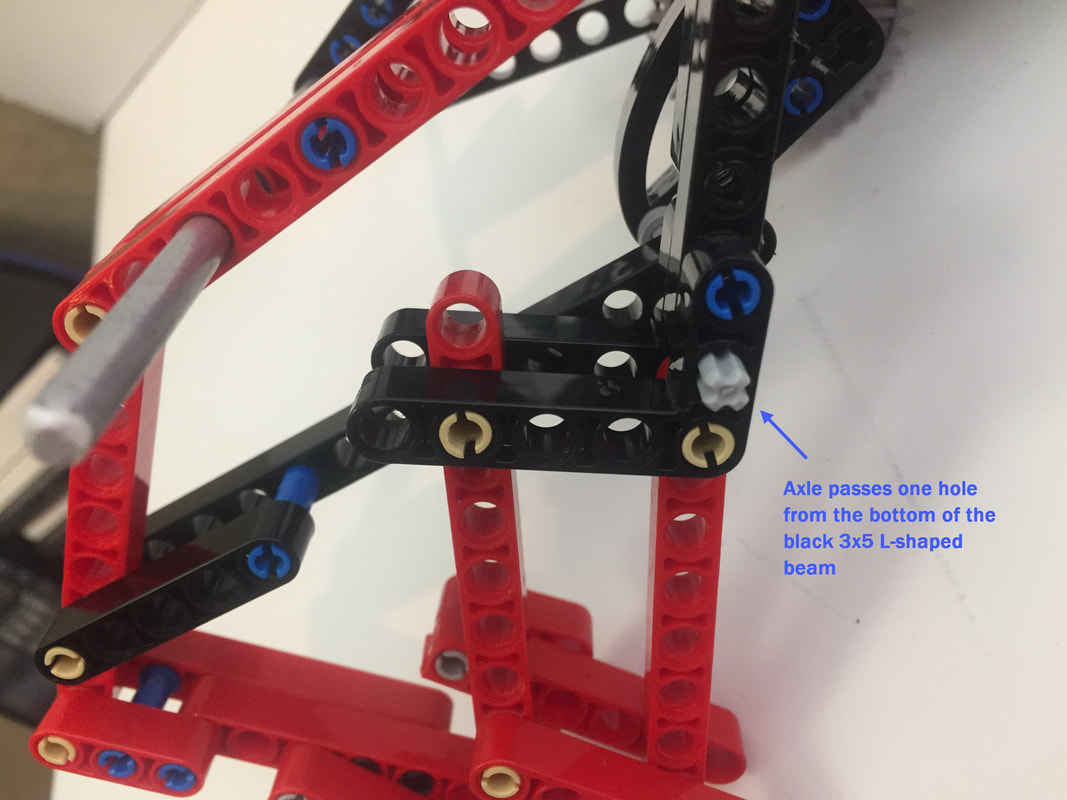
A finished TrotBot's legs should be easy to rotate by hand with the motors disengaged. If you feel resistance, then look carefully at the legs to see if any look asymmetrical or skewed. Also, an easy mistake to make is to put the axles thru the wrong hole of the 3x5 cam part below. If the legs aren't working properly, check your cranks.
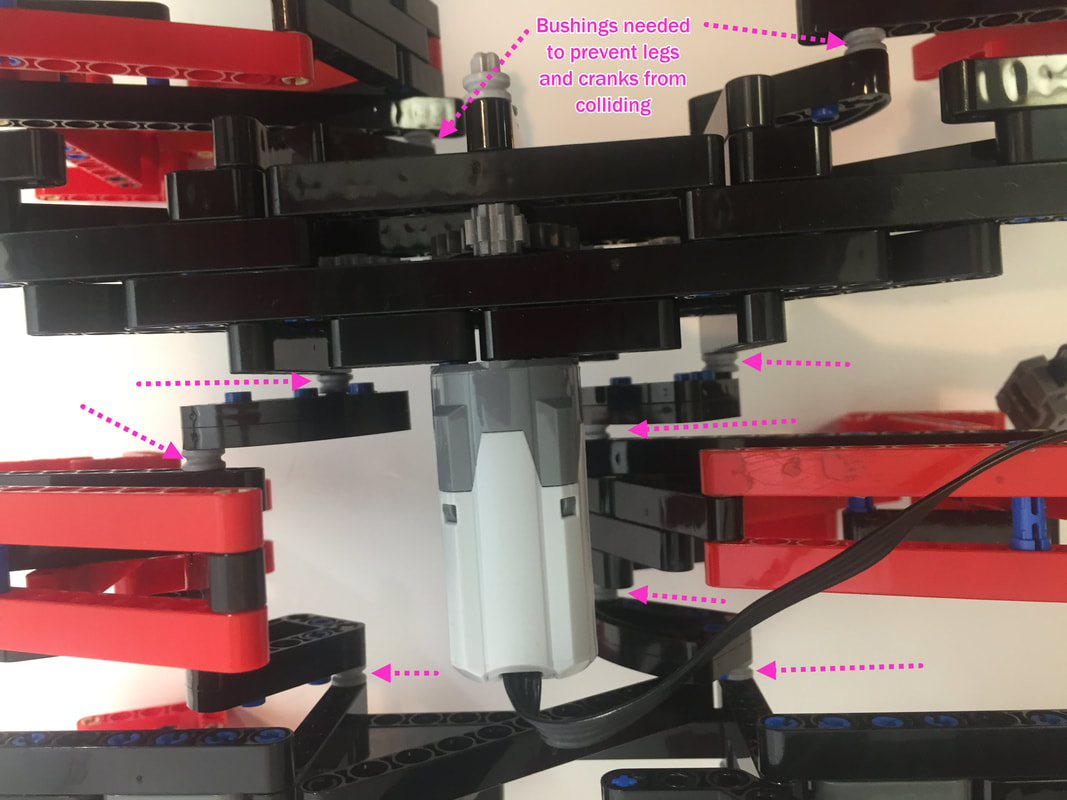
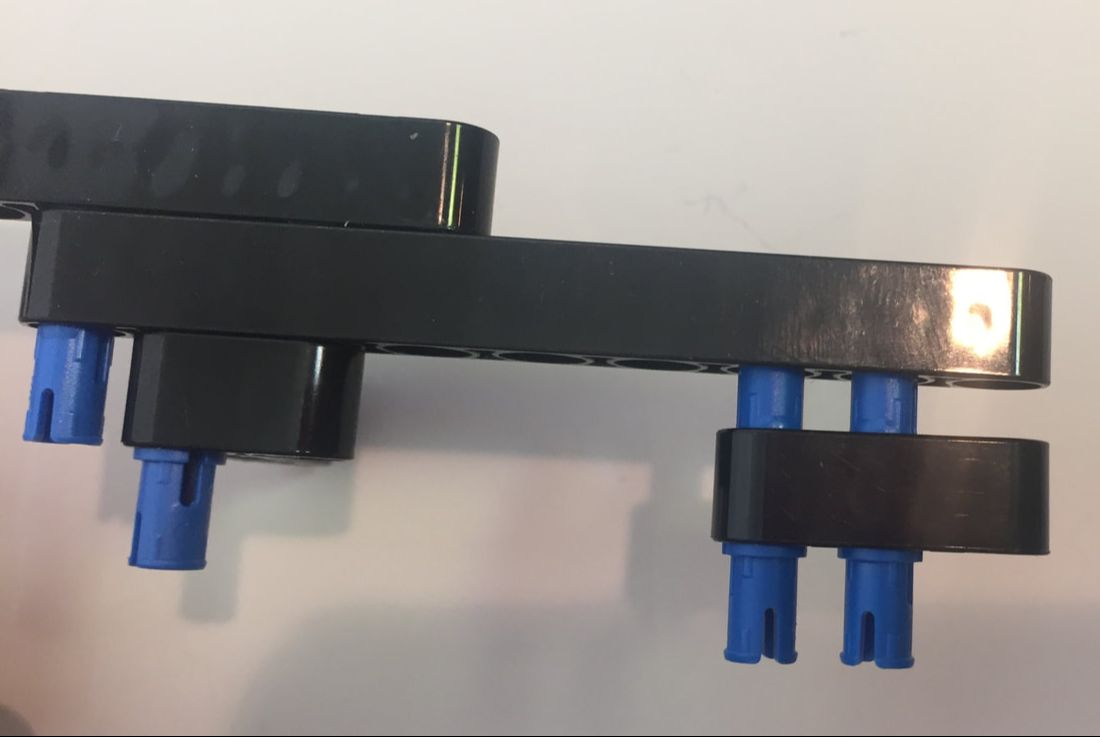
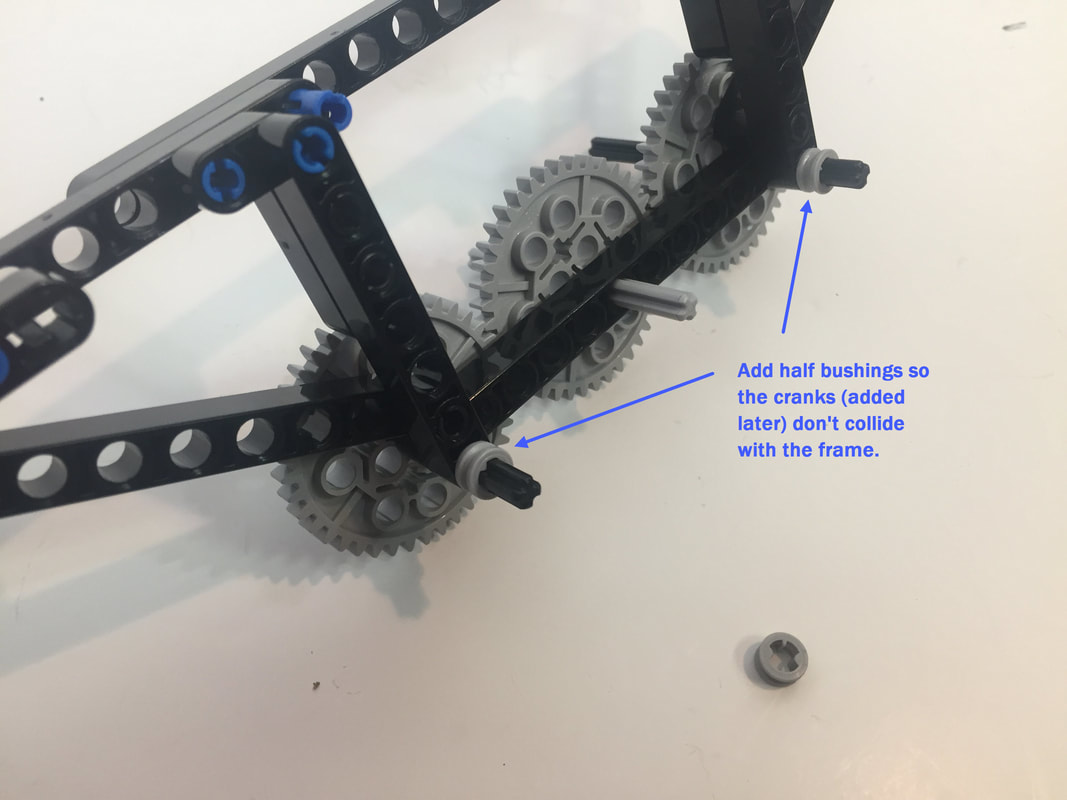
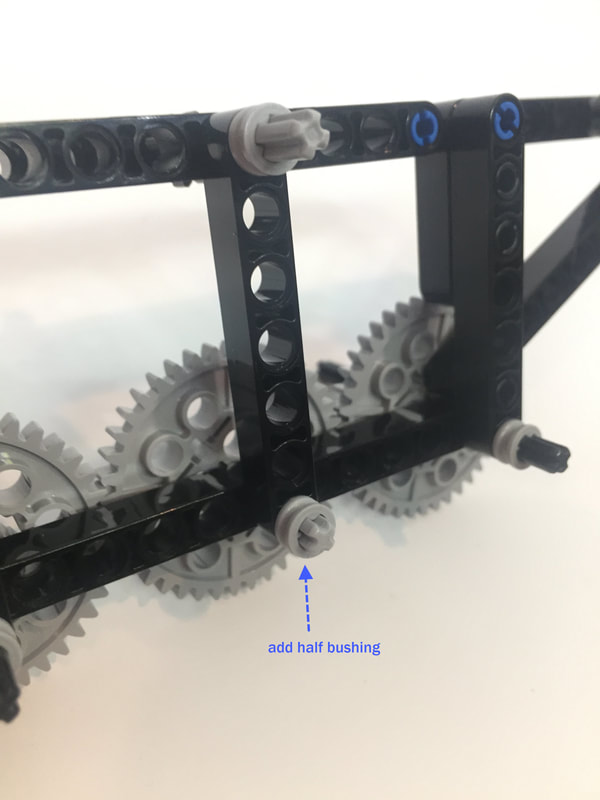
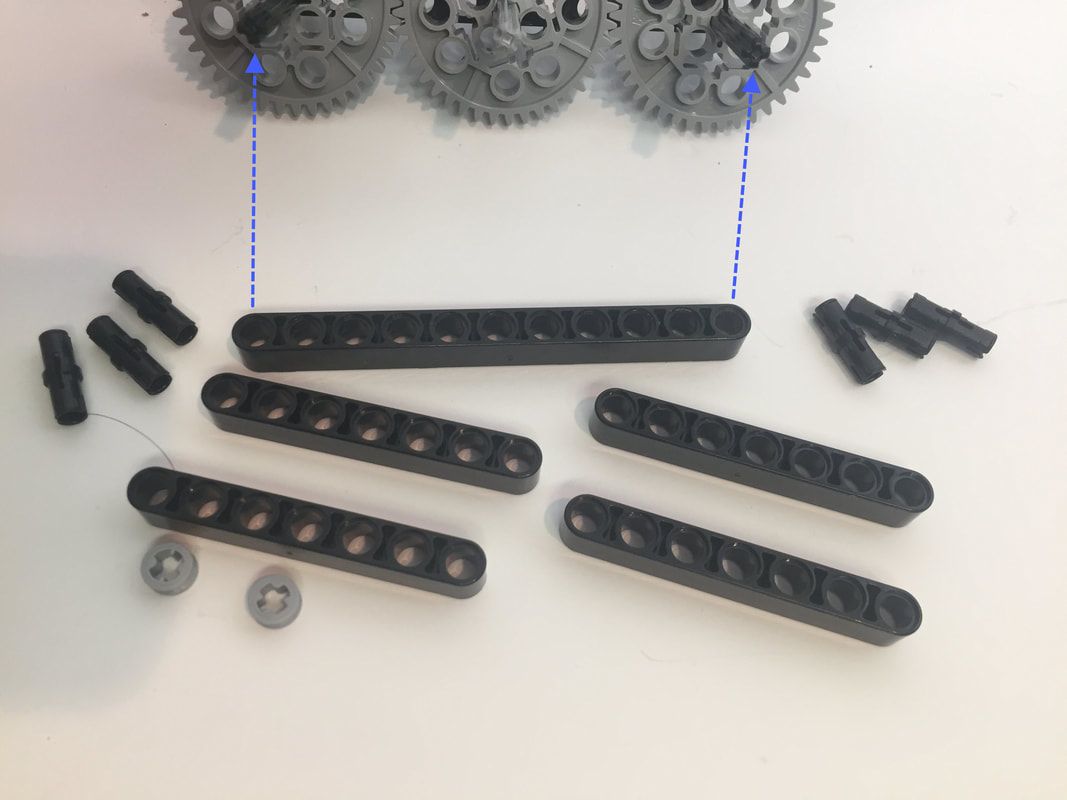
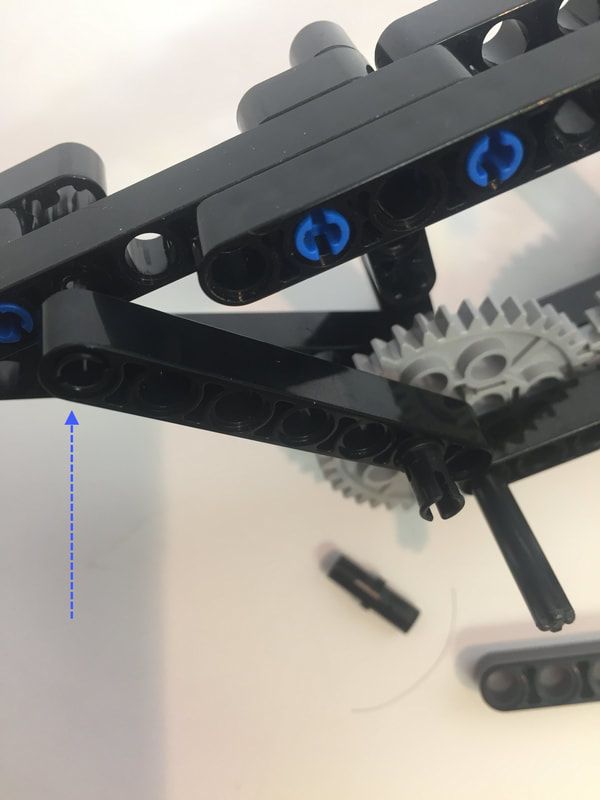
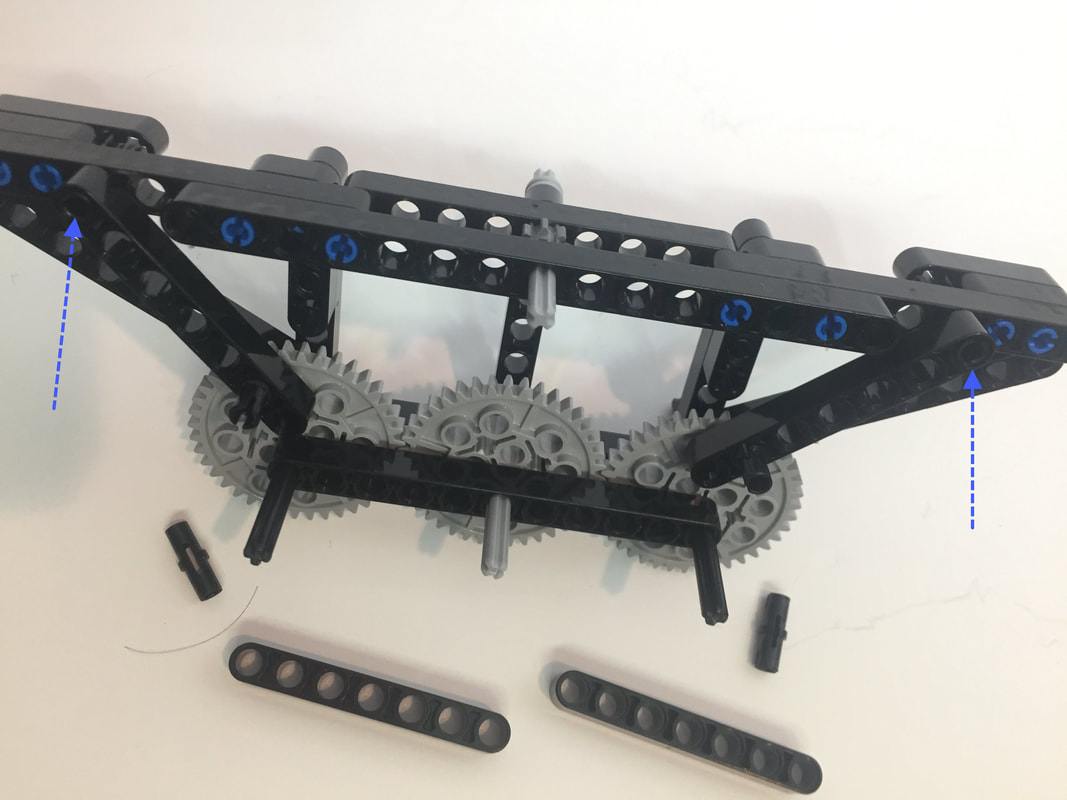
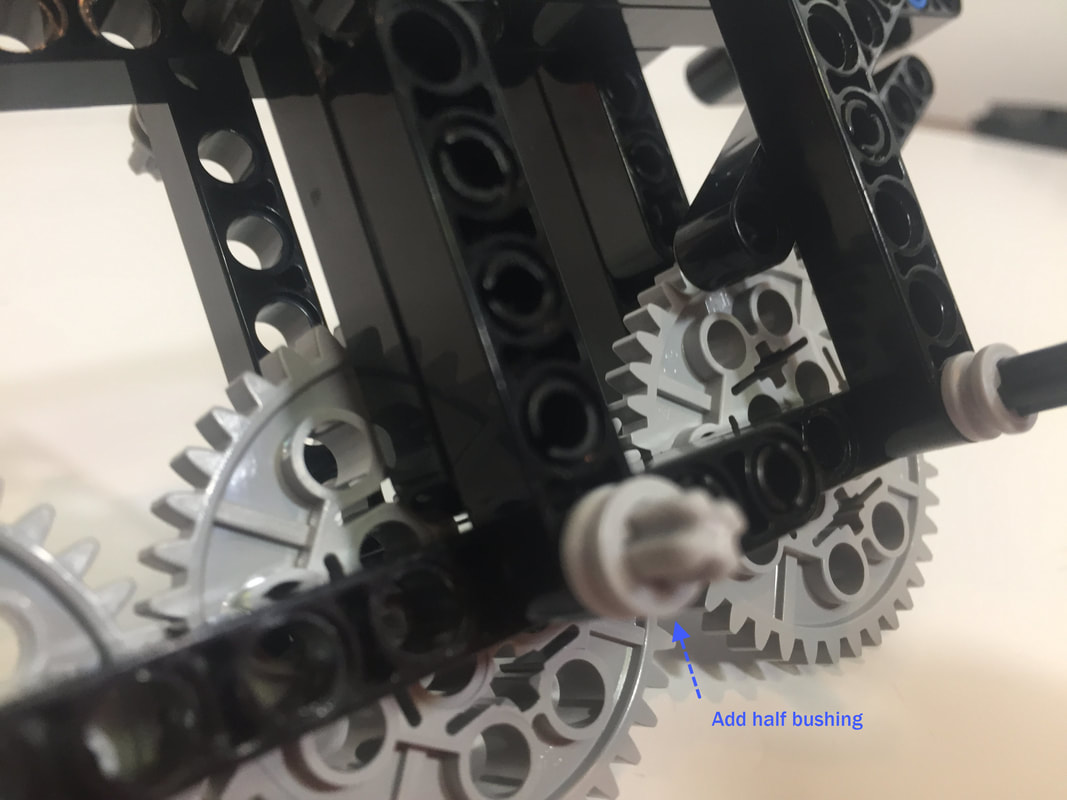
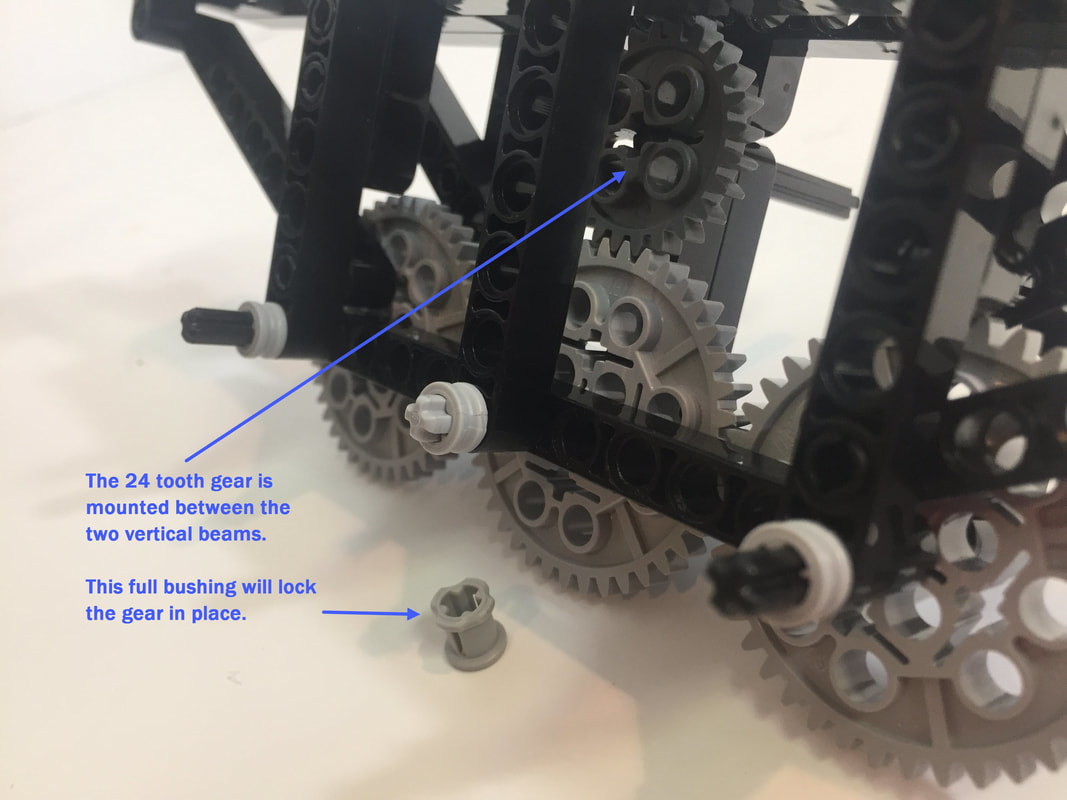
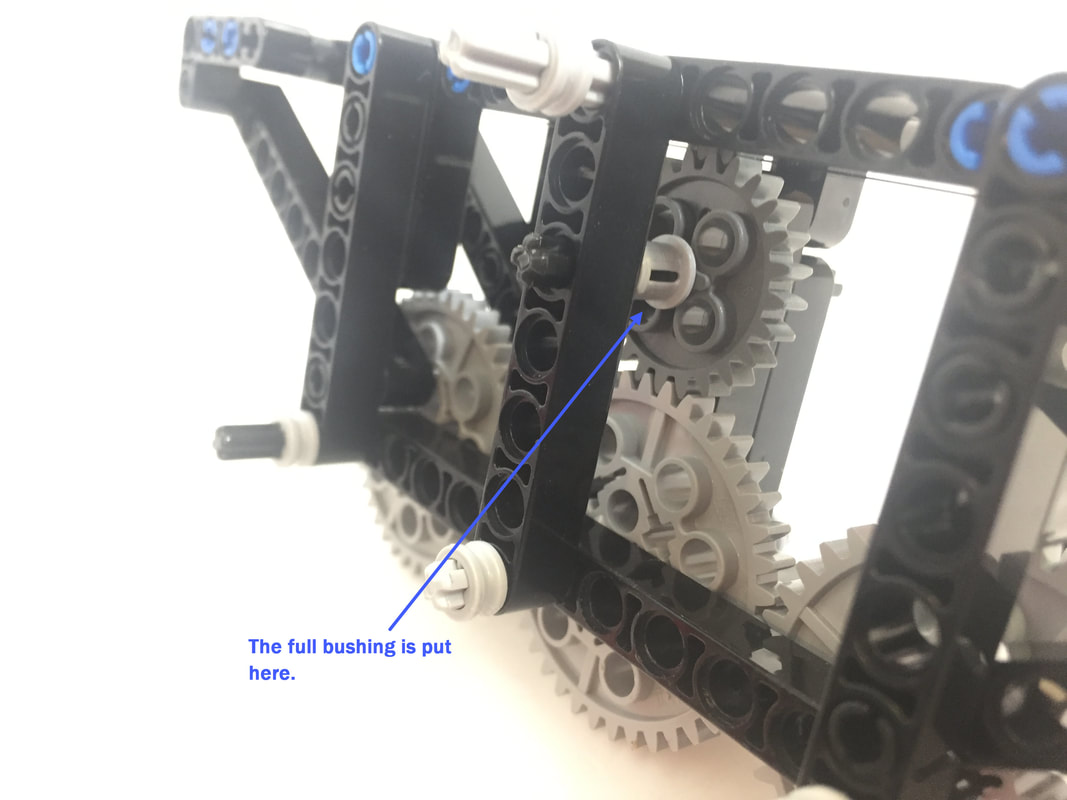
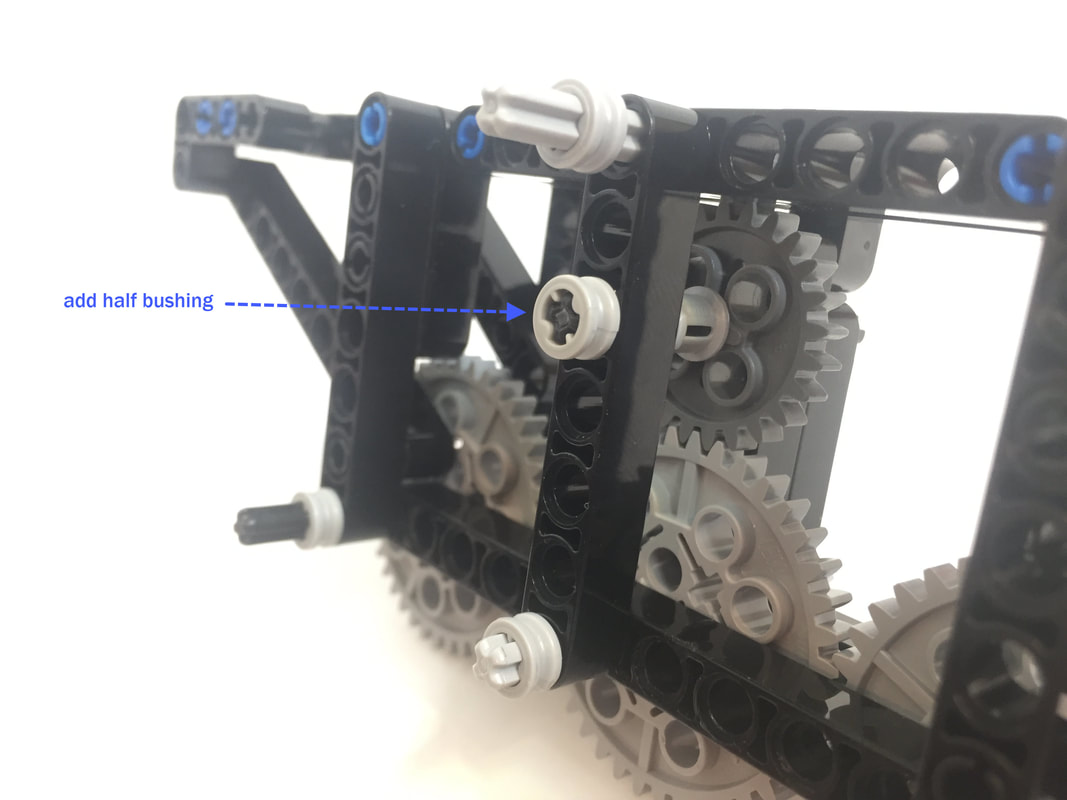
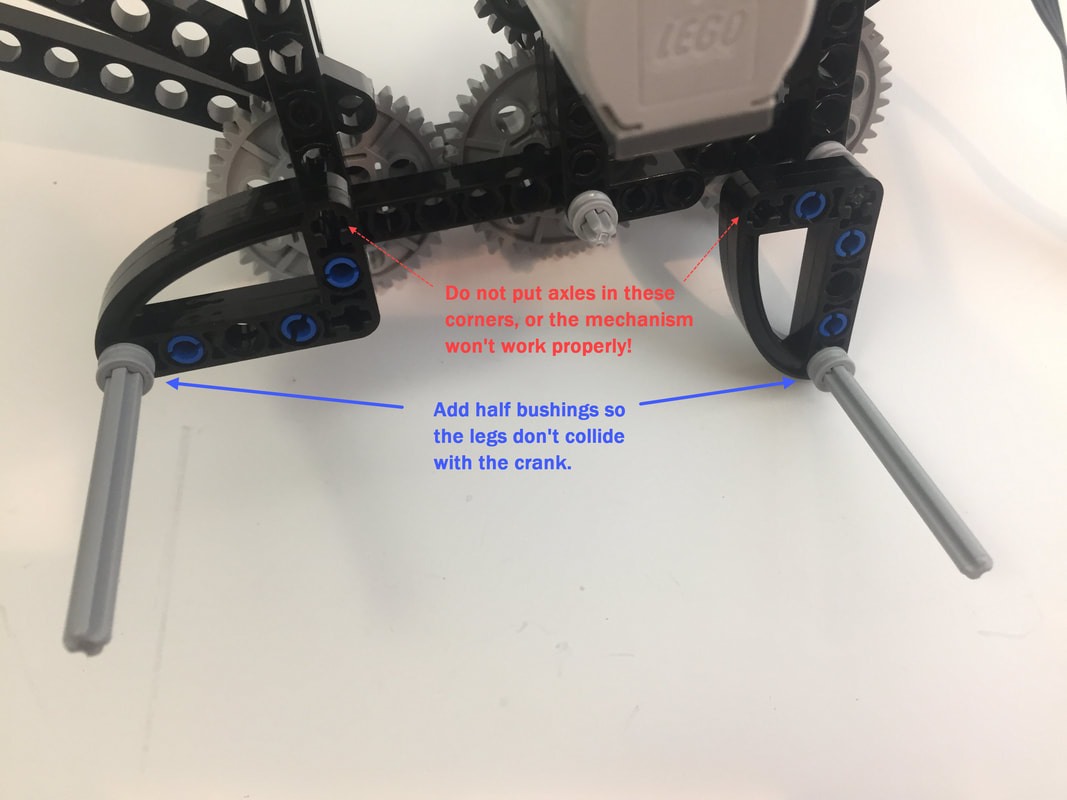
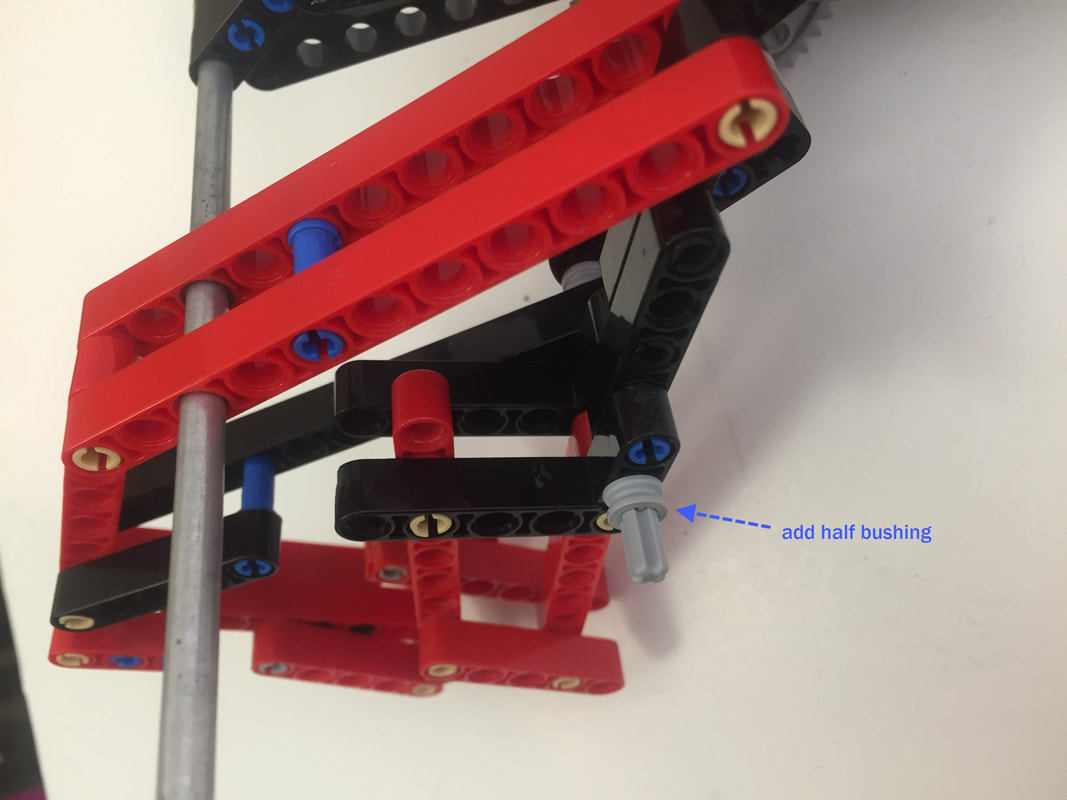
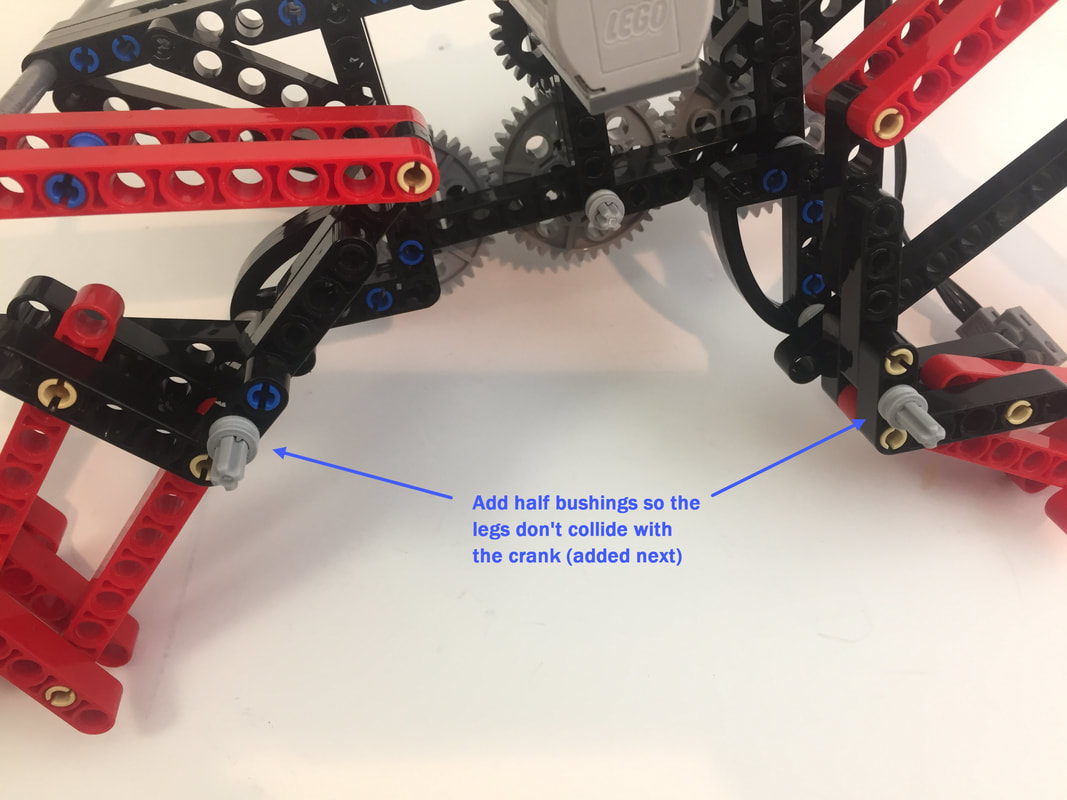
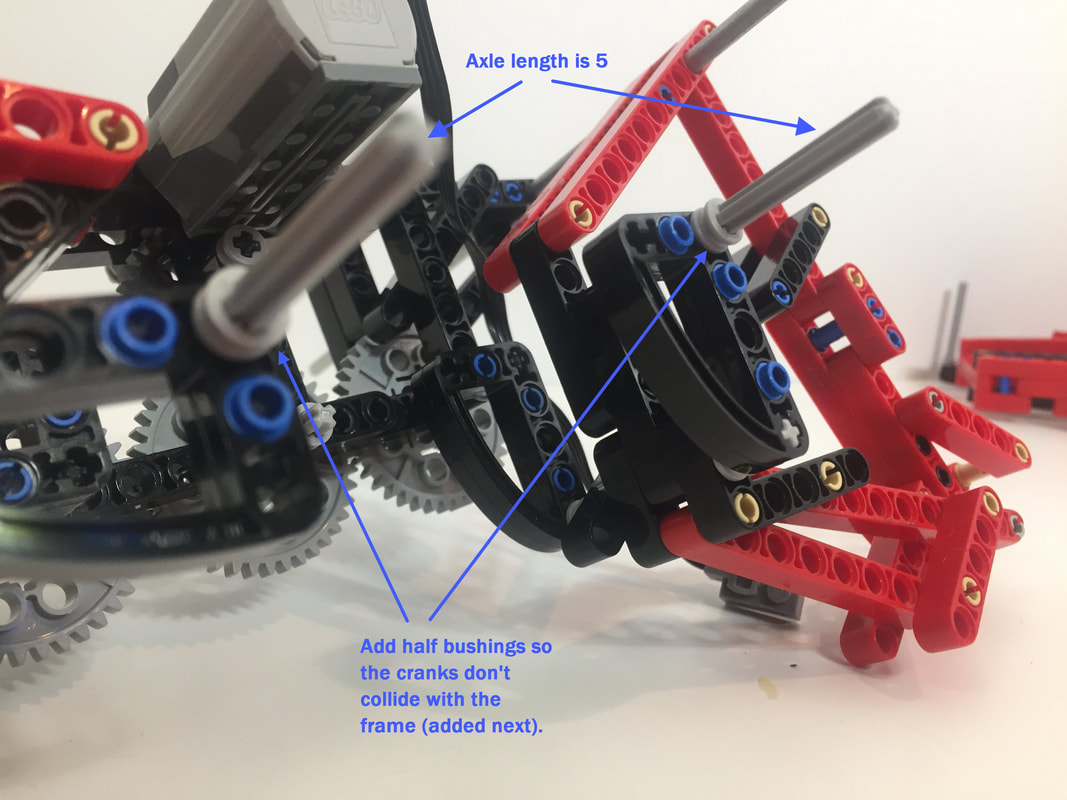
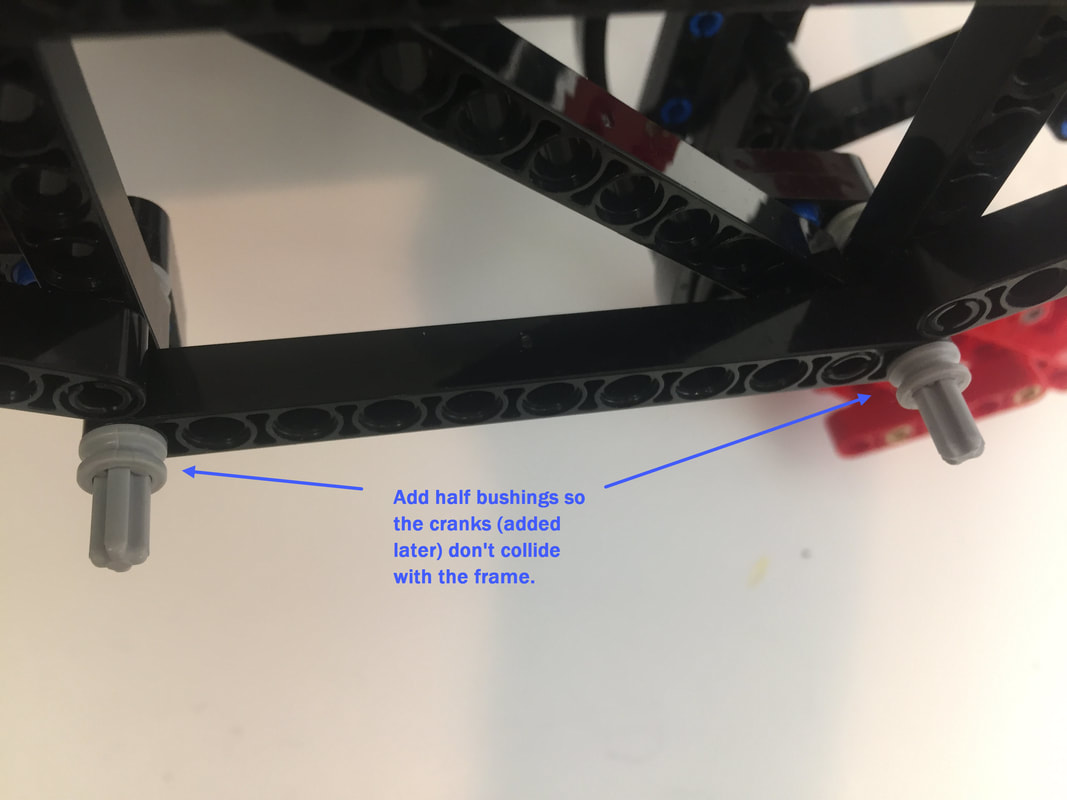
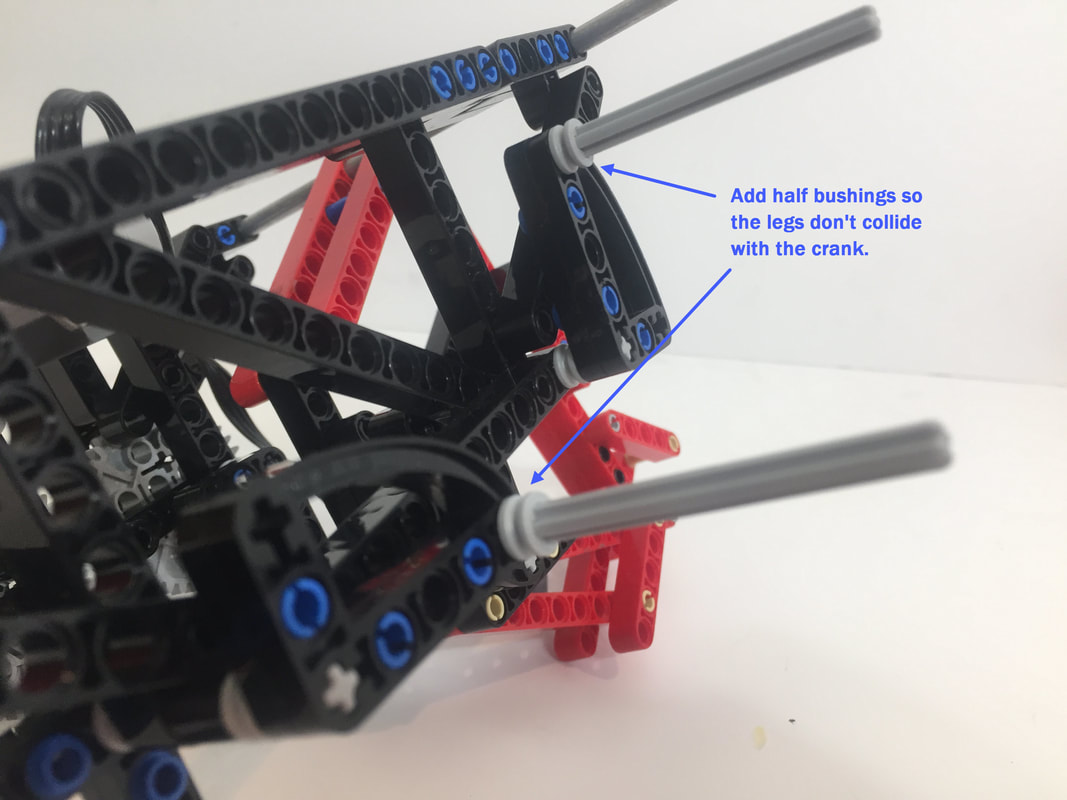
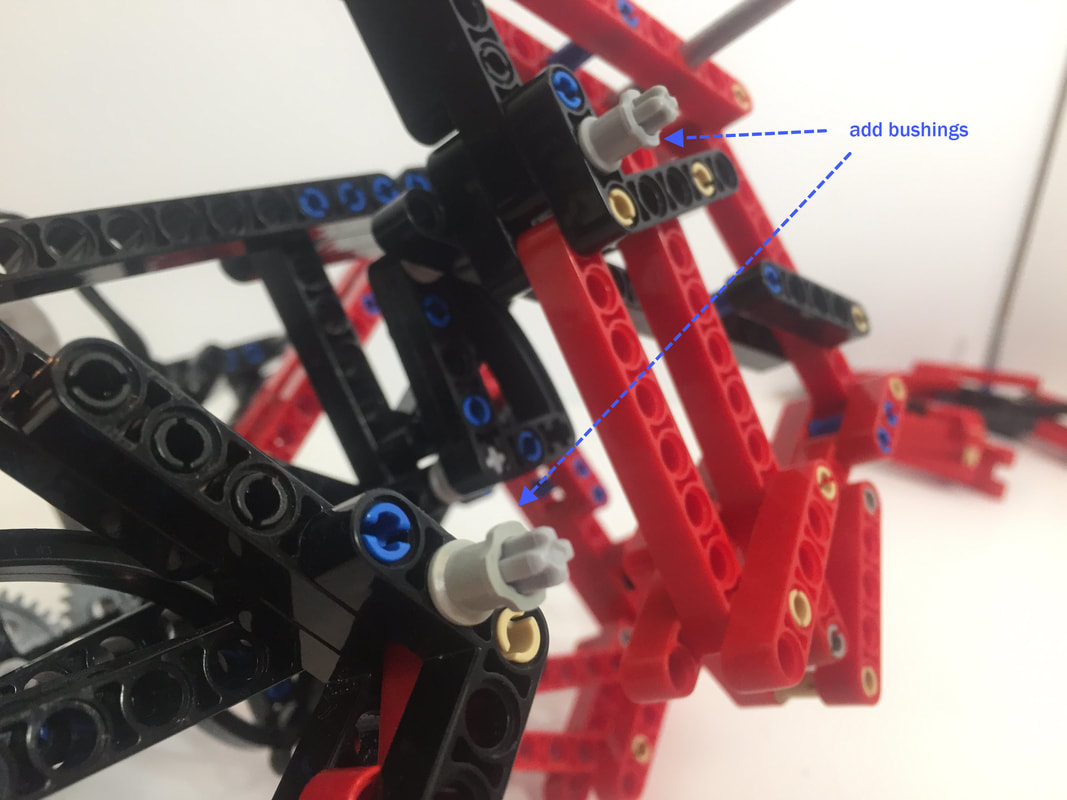
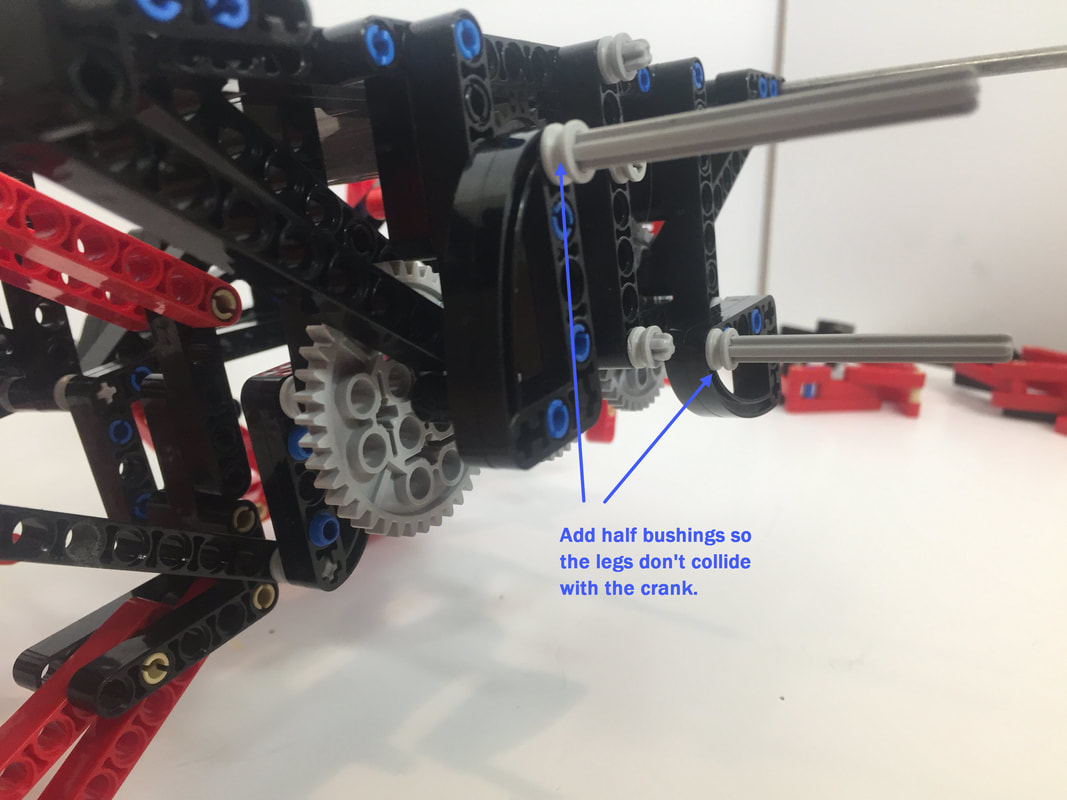
If your legs collide with the frame or cranks when rotating, then rotate the legs by hand (by turning a large gear) and look carefully at your build to see where the collisions are occurring. Perhaps you are missing some of the bushings highlighted below.
If your legs collide with the frame or cranks when rotating, then rotate the legs by hand (by turning a large gear) and look carefully at your build to see where the collisions are occurring. Perhaps you are missing some of the bushings highlighted below.
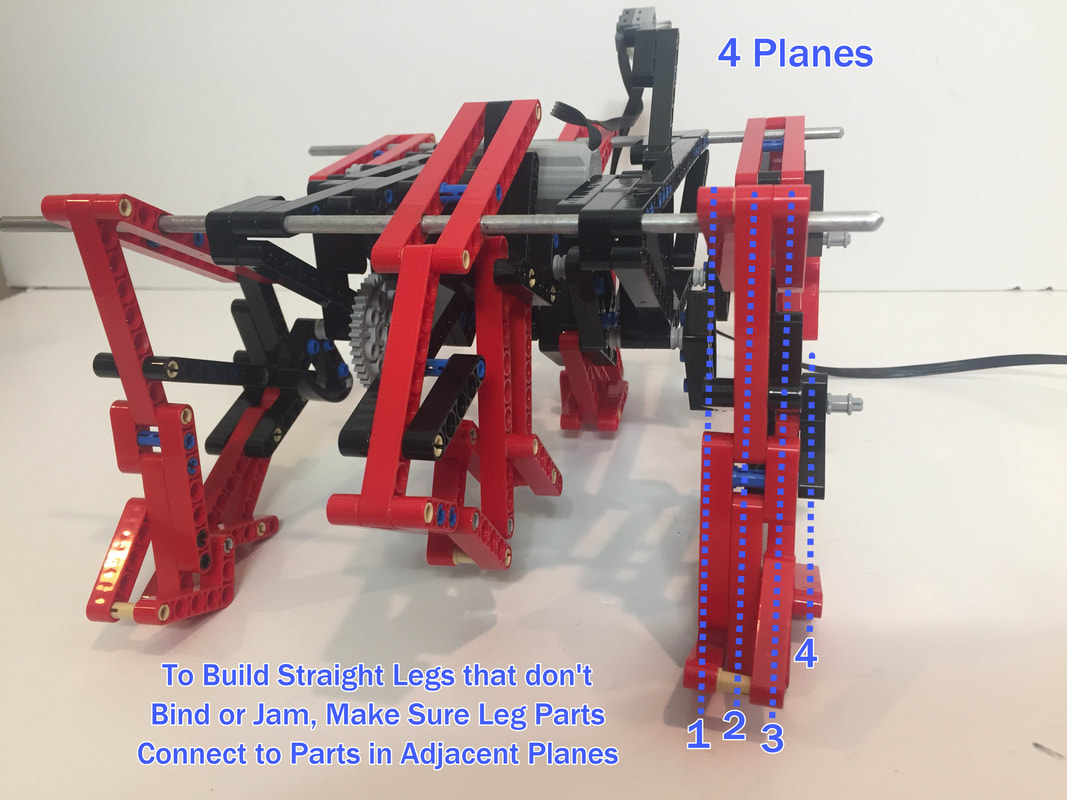
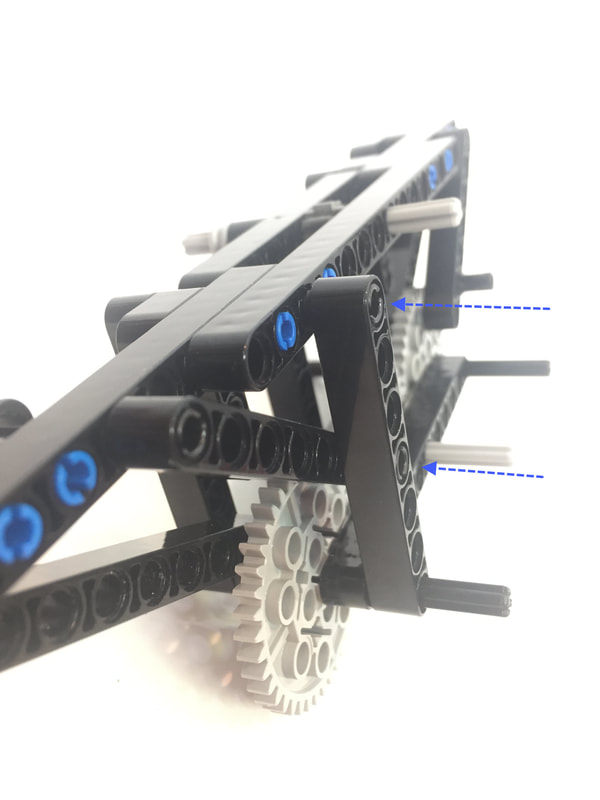
If leg parts aren't connected to parts in the adjacent plane the leg won't be straight, which will cause the leg joints to bind. If you can't rotate your legs easily with the motors disengaged, then make sure your legs aren't twisted and that each part is in its correct plane as pictured below.
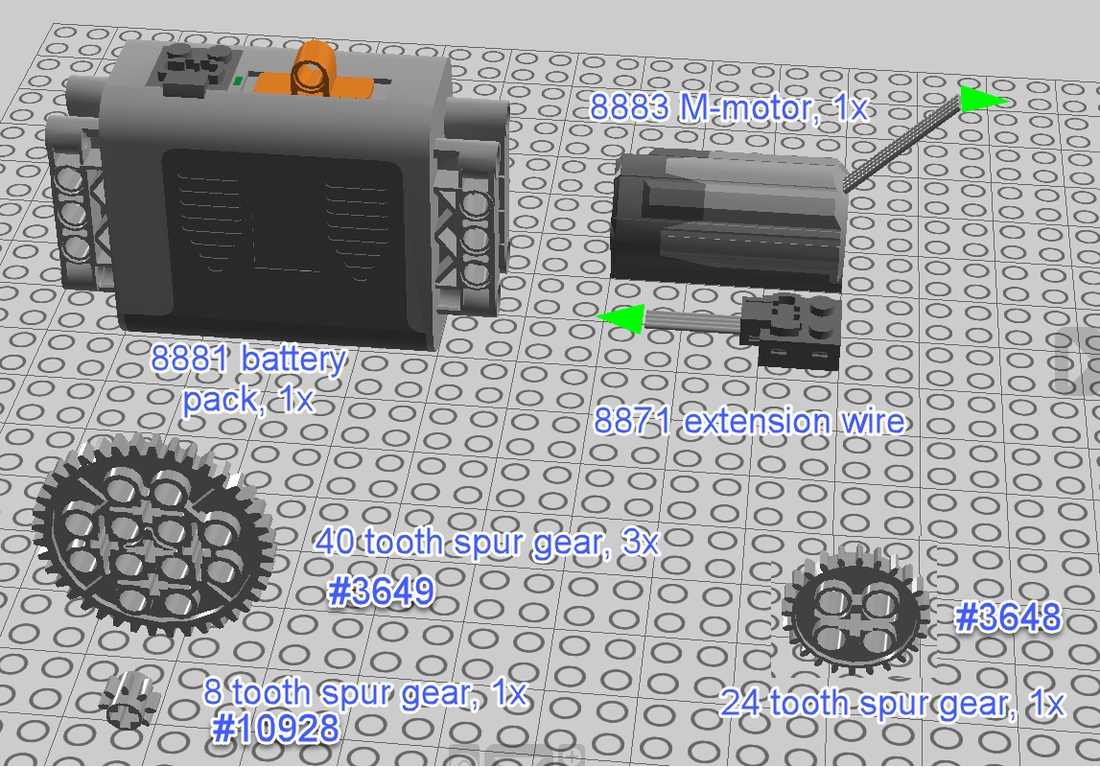
Parts Used: In addition to the Technic beams, pins, gears, etc., this build uses one LEGO 8883 medium motor, a 8881 Battery Pack, and a 8871 extension wire (20 in). Also, to better bear the robot's weight I used 3/16" OD aluminum rods (or brass tubes) for the leg's long connections to the frame rather than LEGO's plastic axles. However, this build is light enough that LEGO's plastic axles may work as support rods, but if they bend a lot it will change how the leg linkage moves.
We purchased the plastic LEGO parts from Bricklink
We purchased the motor, battery box, and extension wire from Amazon
We purchased the metal support rods from my local hardware store
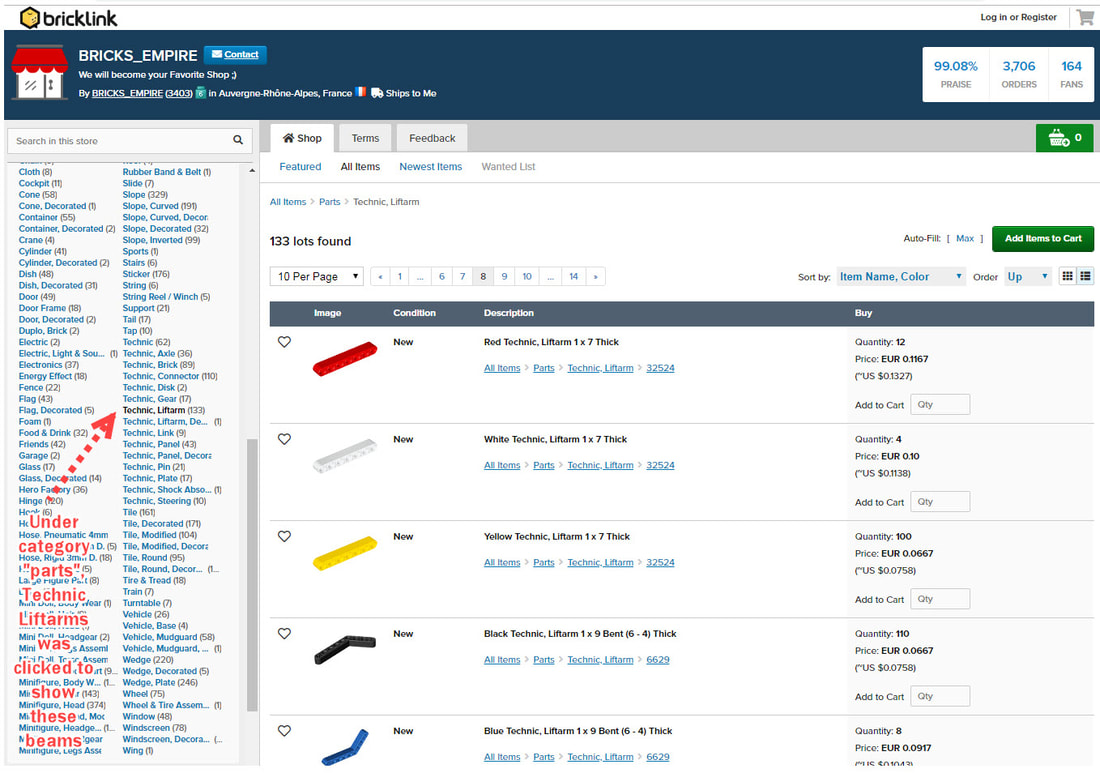
If you've never used Bricklink, an easy way to browse for parts is by going to a larger store. Here's a list of stores in the USA.
And below is an example search in a store for Technic beams.
Parts Used: In addition to the Technic beams, pins, gears, etc., this build uses one LEGO 8883 medium motor, a 8881 Battery Pack, and a 8871 extension wire (20 in). Also, to better bear the robot's weight I used 3/16" OD aluminum rods (or brass tubes) for the leg's long connections to the frame rather than LEGO's plastic axles. However, this build is light enough that LEGO's plastic axles may work as support rods, but if they bend a lot it will change how the leg linkage moves.
We purchased the plastic LEGO parts from Bricklink
We purchased the motor, battery box, and extension wire from Amazon
We purchased the metal support rods from my local hardware store
If you've never used Bricklink, an easy way to browse for parts is by going to a larger store. Here's a list of stores in the USA.
And below is an example search in a store for Technic beams.
|
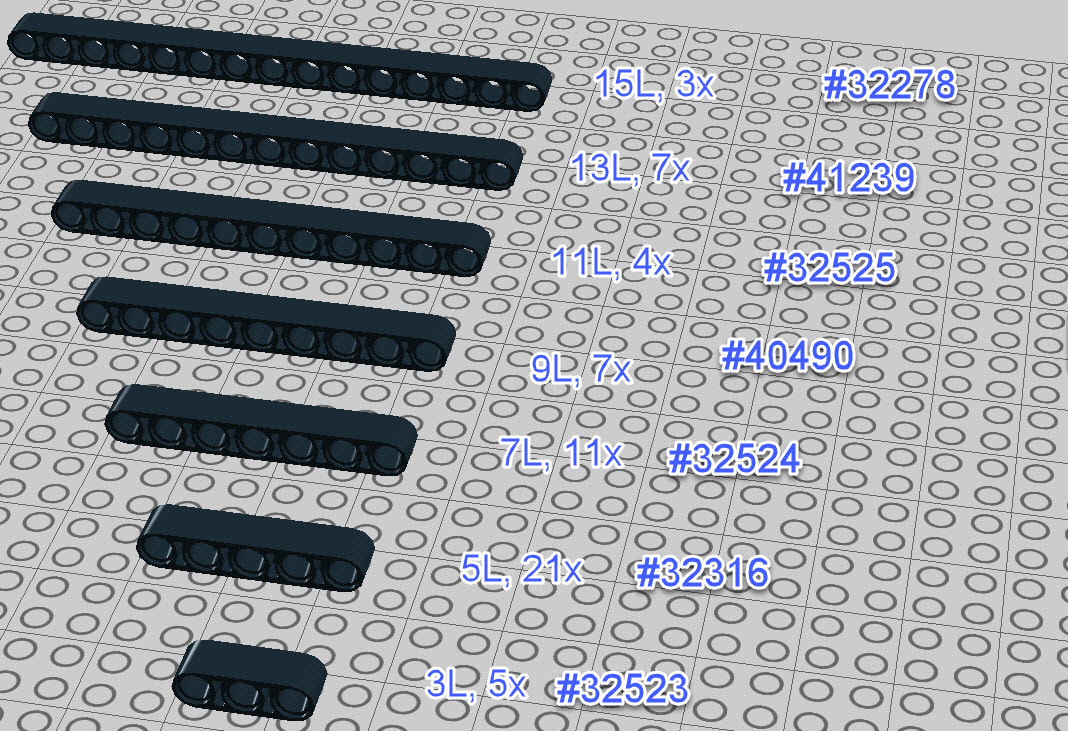
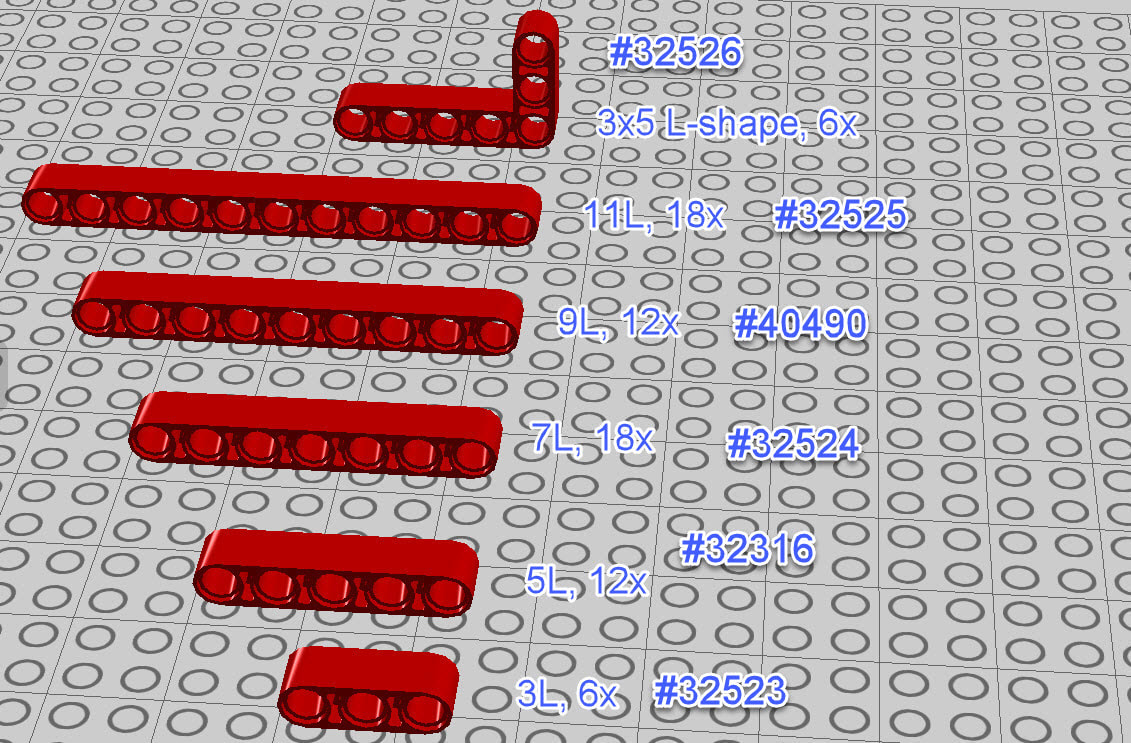
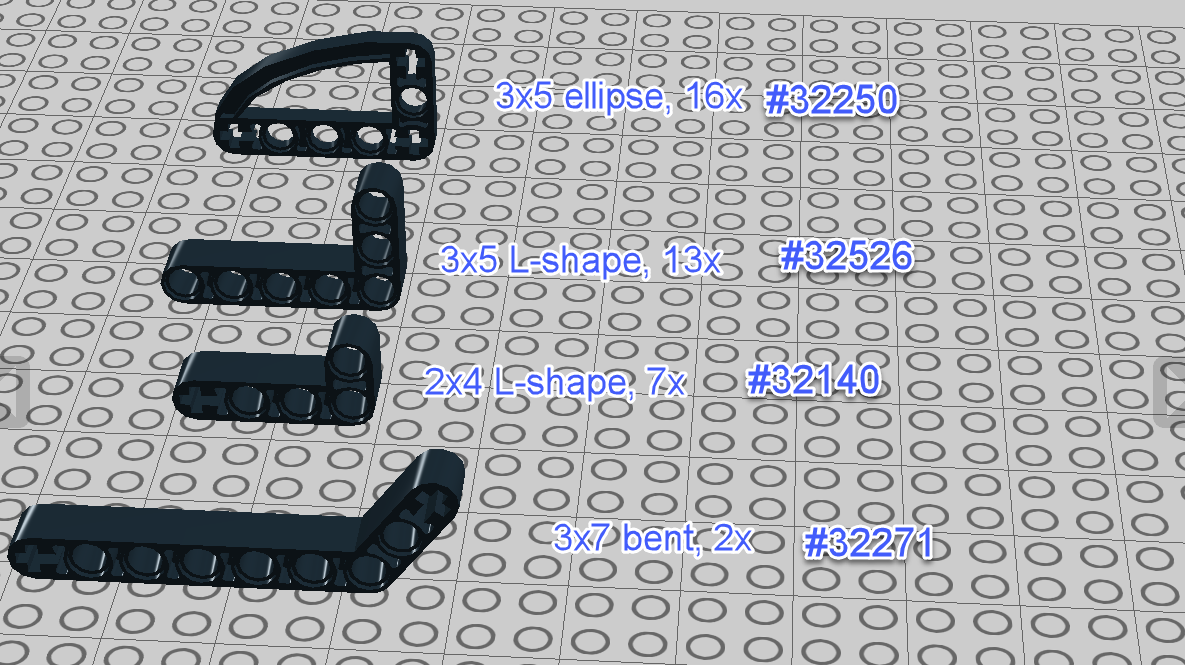
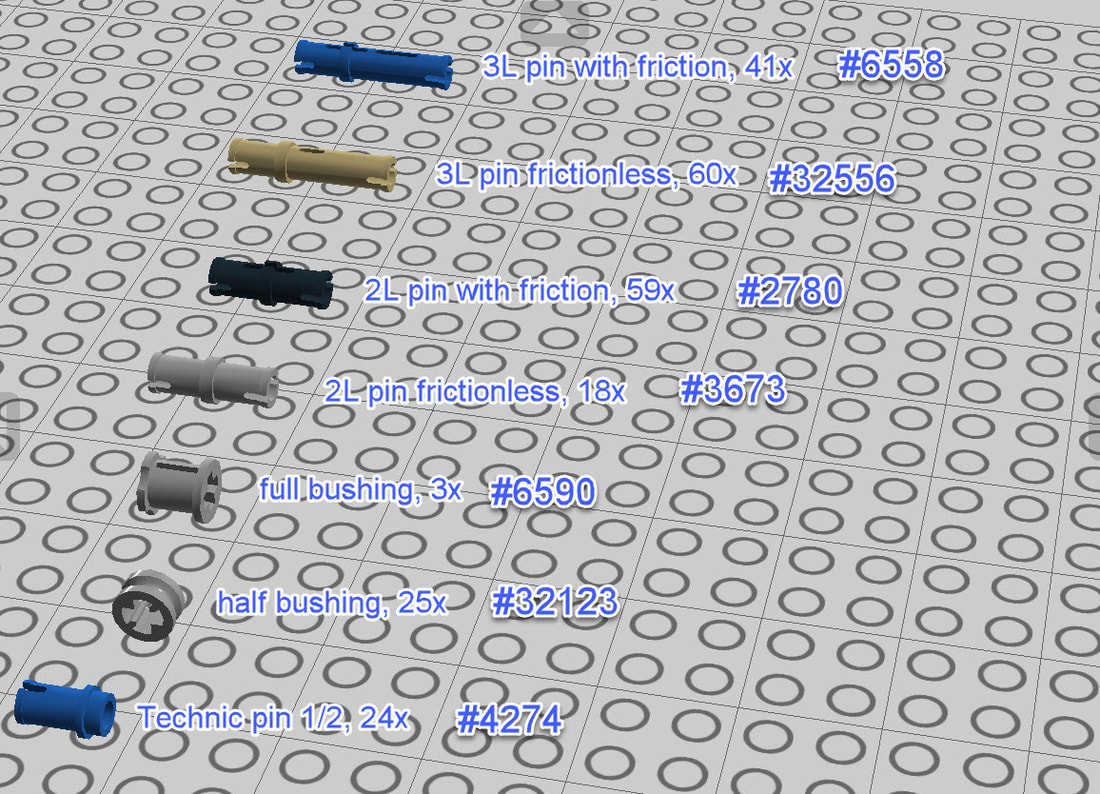
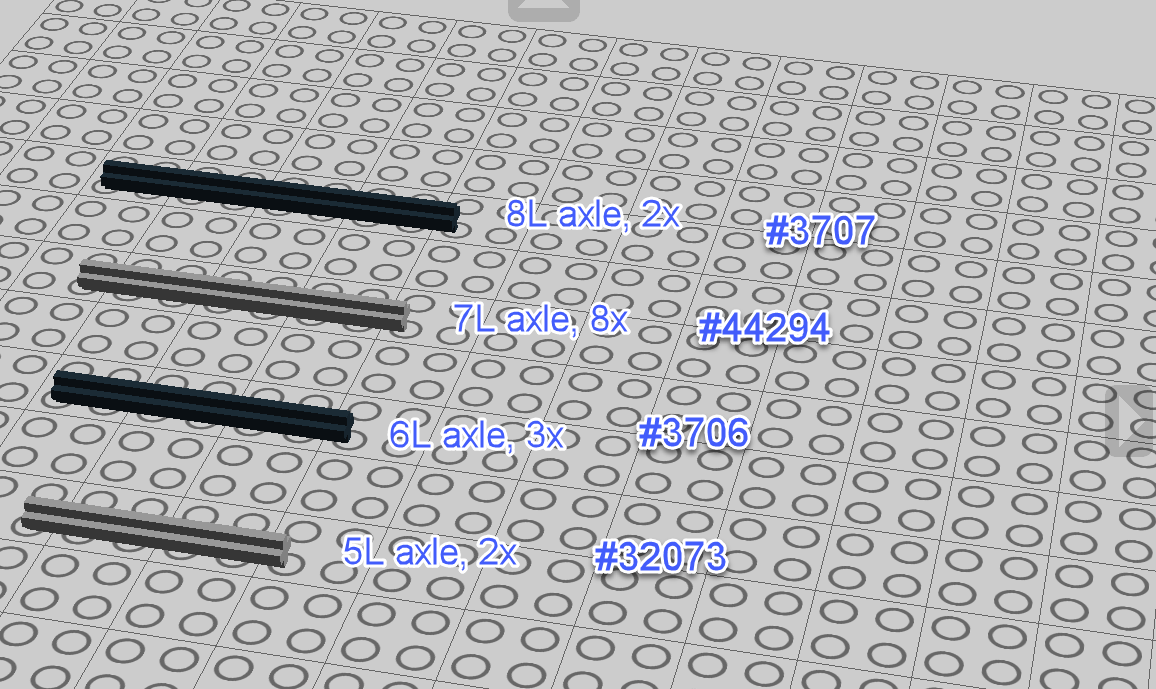
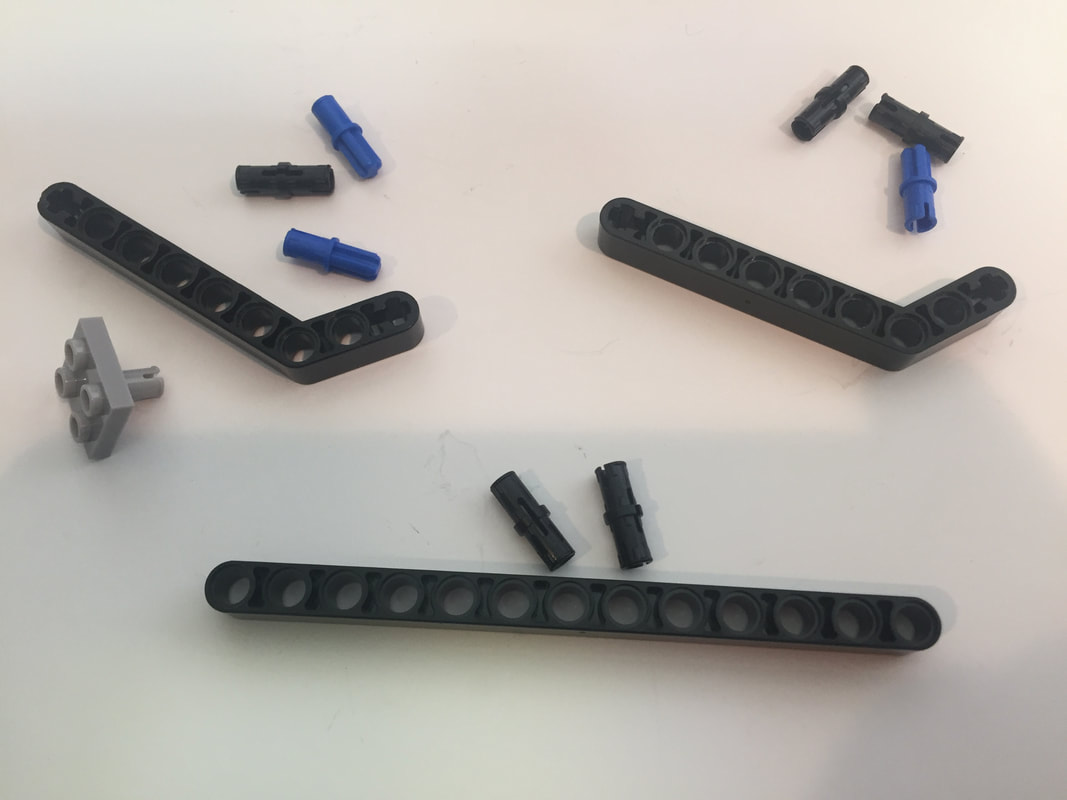
LEGO Part List:
The part list can be downloaded here, or you can view the images below. |
| ||
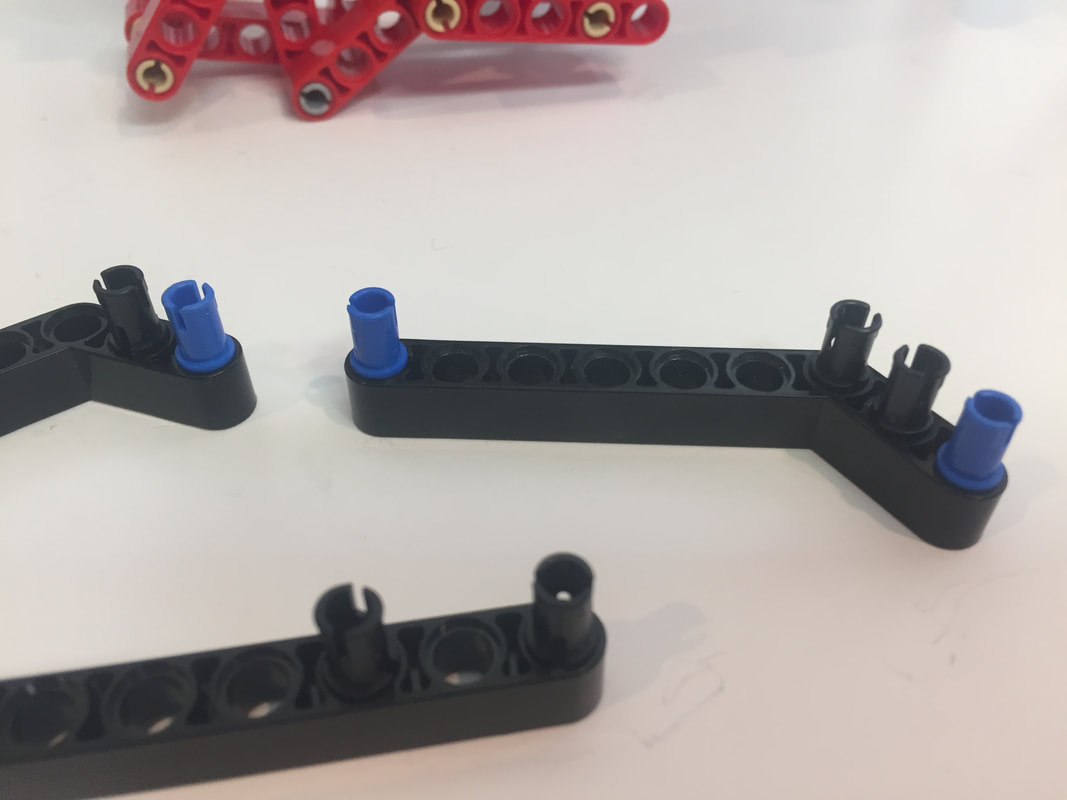
|
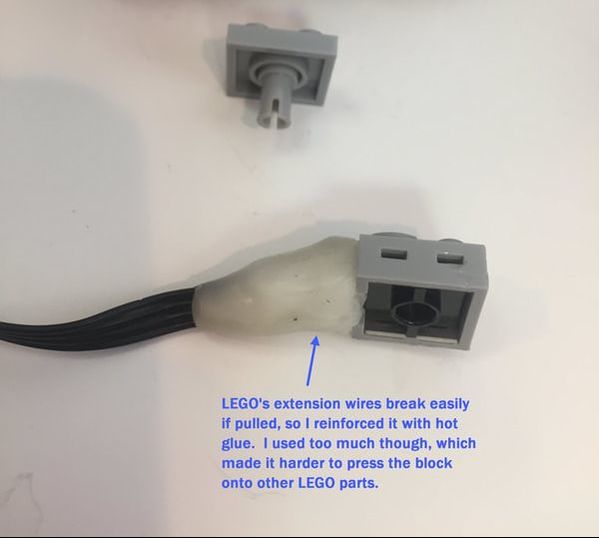
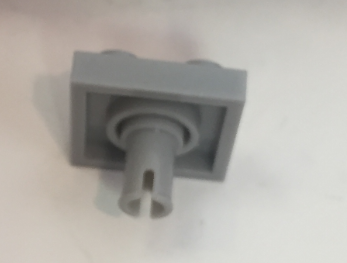
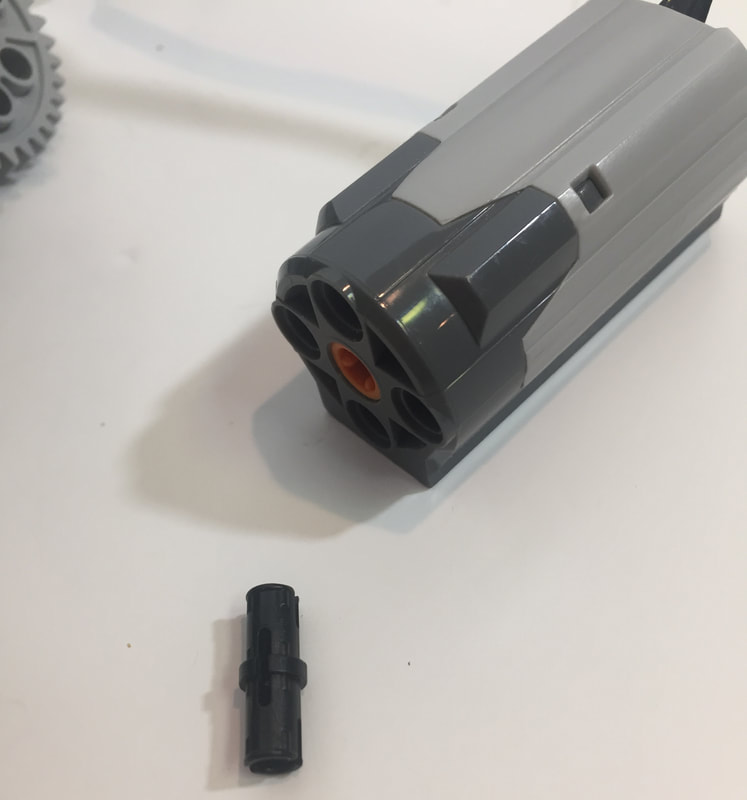
Also, one of the parts pictured to the right, for anchoring the motor's wire to the frame. |
|

Two Alumninum rods (or brass tubes) with a 3/16 inch outer diameter, and cut to 10 inches in length
How to Build
General Comments:
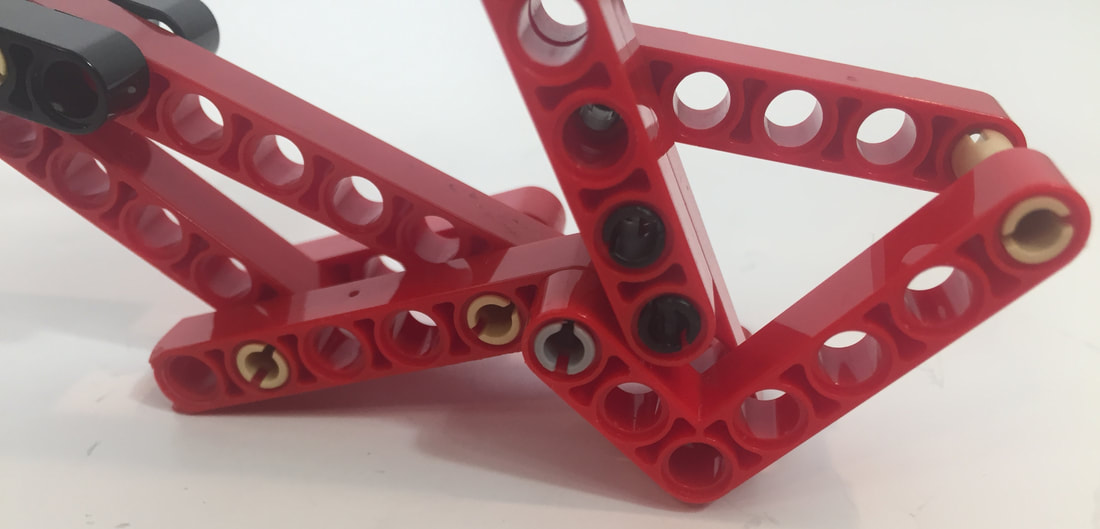
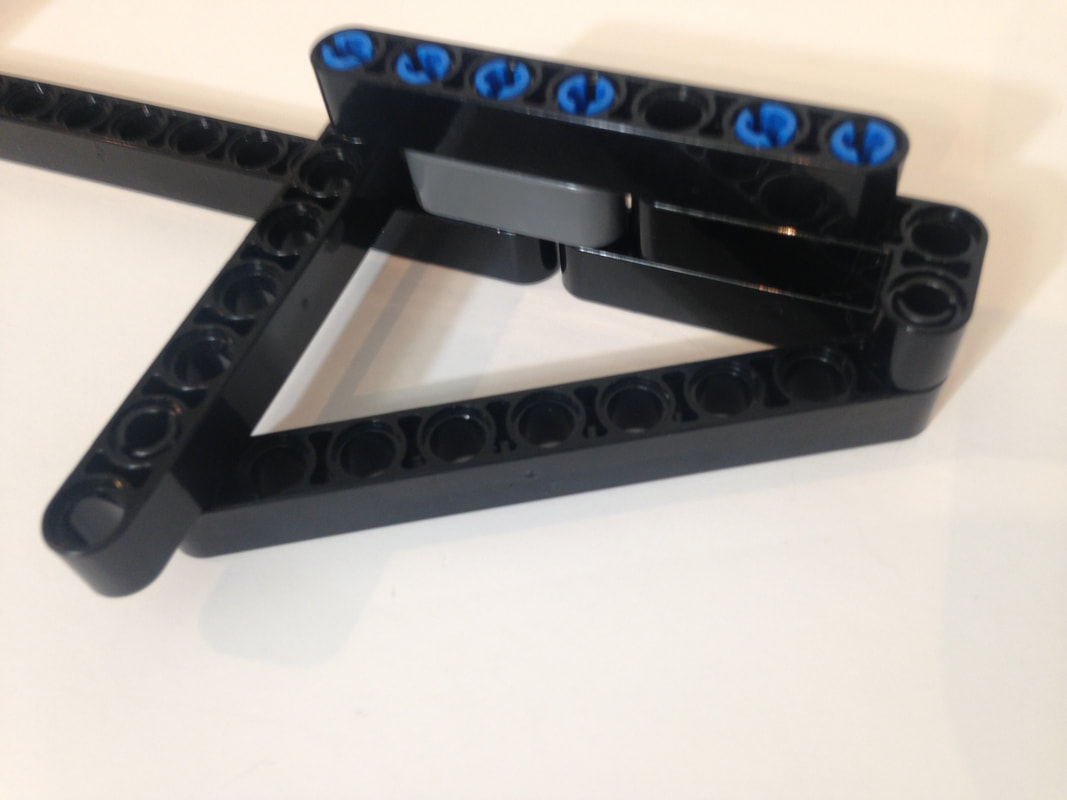
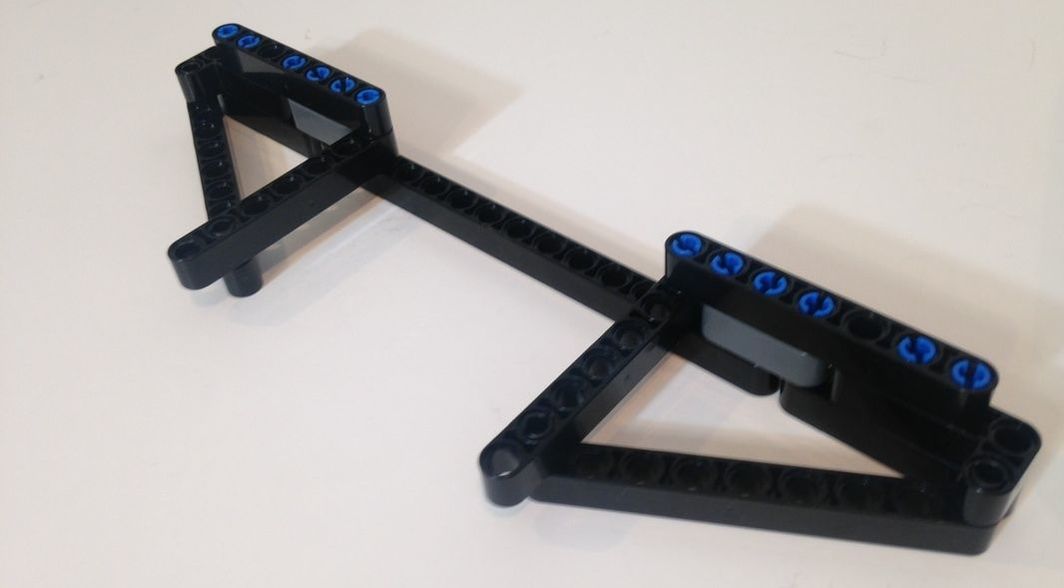
1. Walkers stress frames more than wheeled vehicles so strive to utilize triangles that resist bending forces.
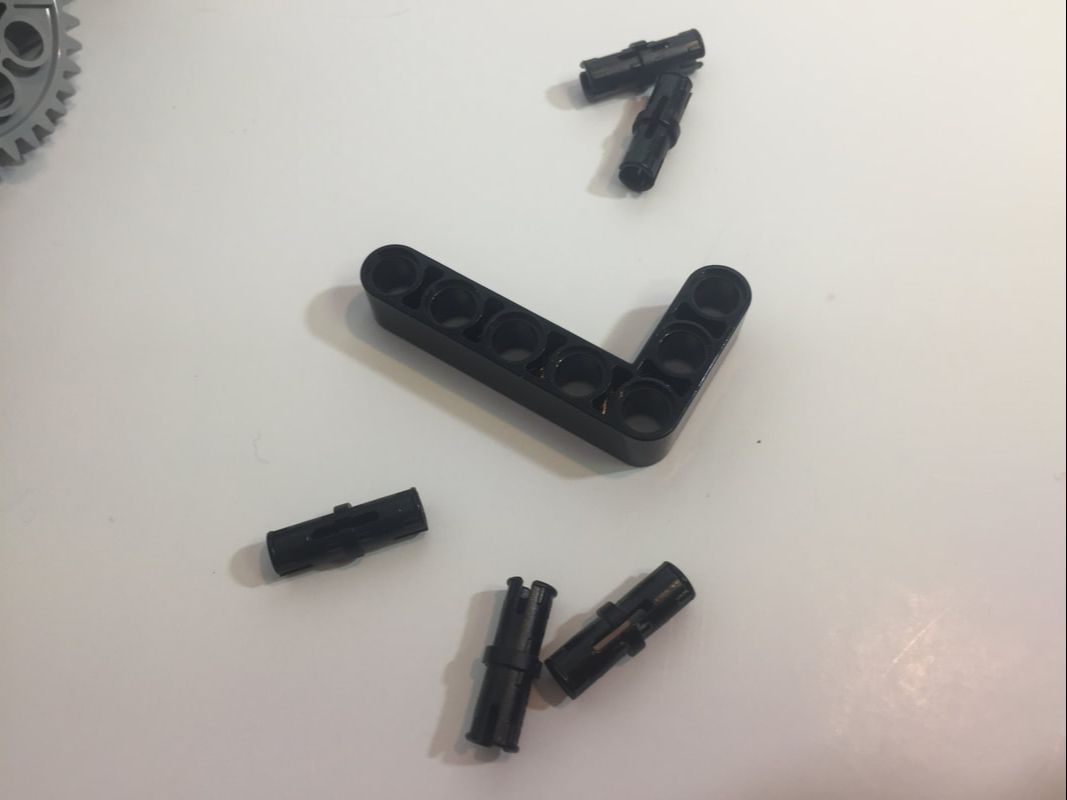
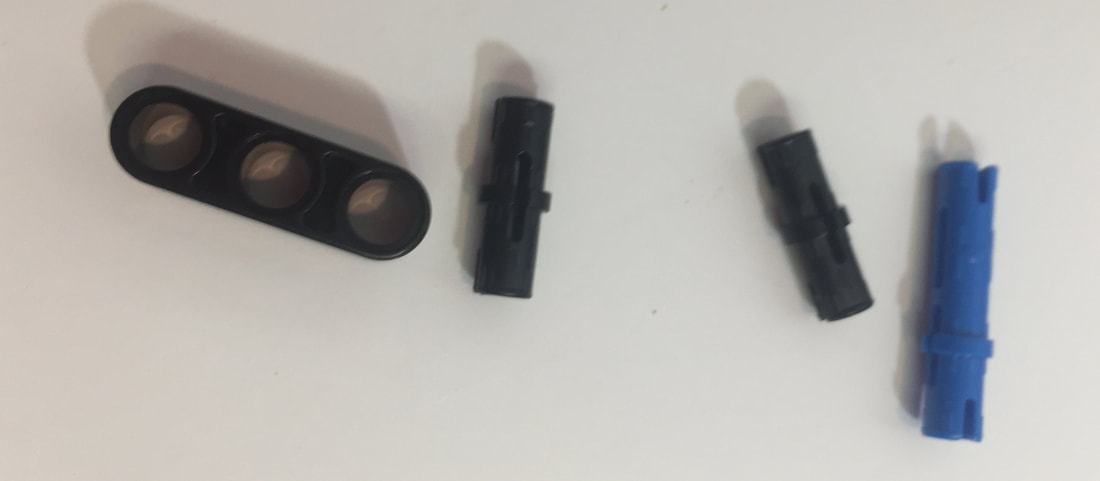
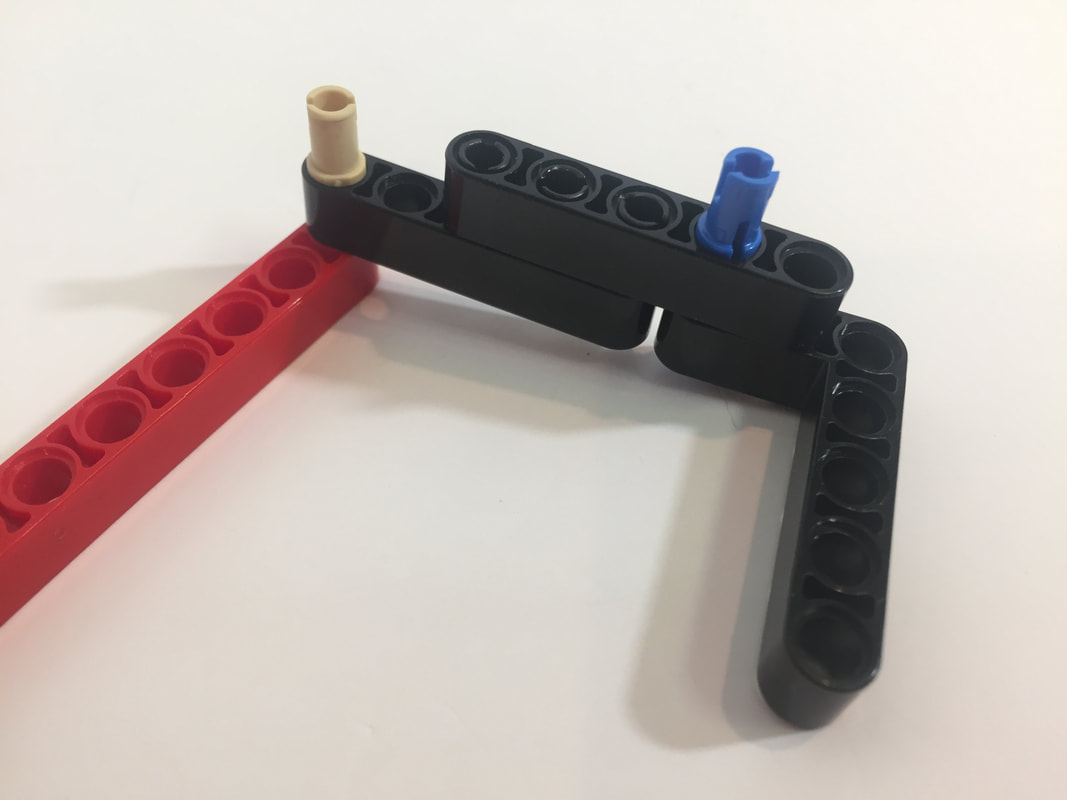
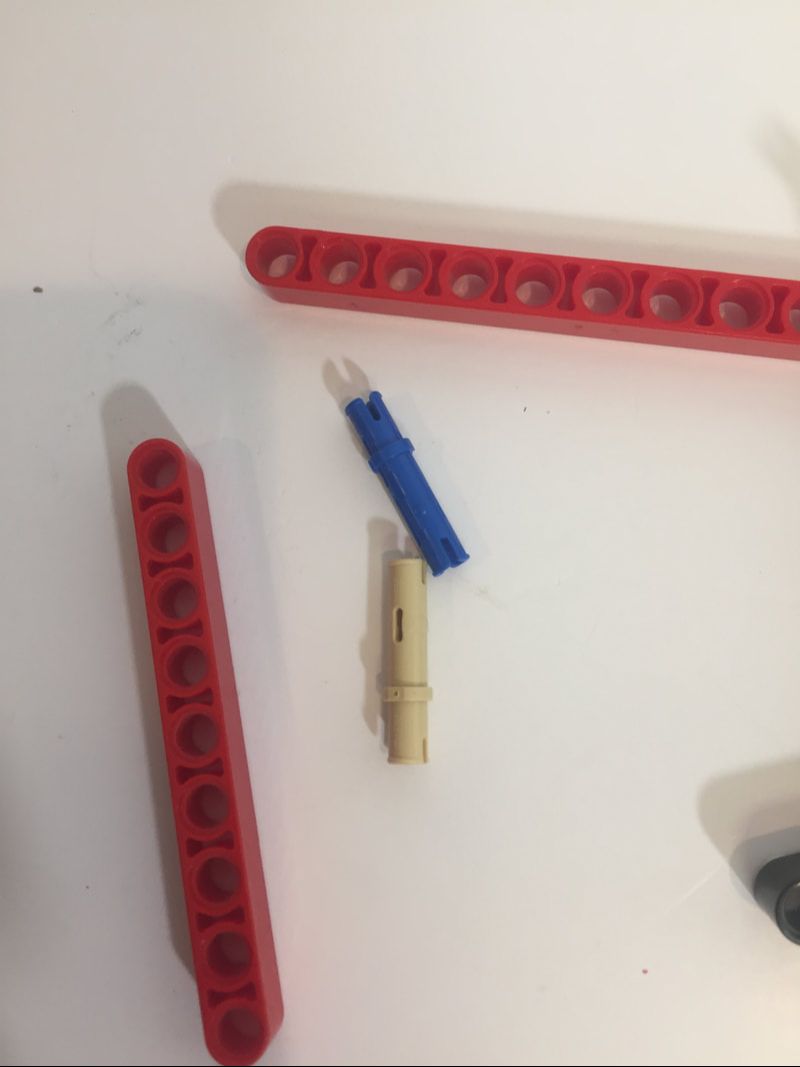
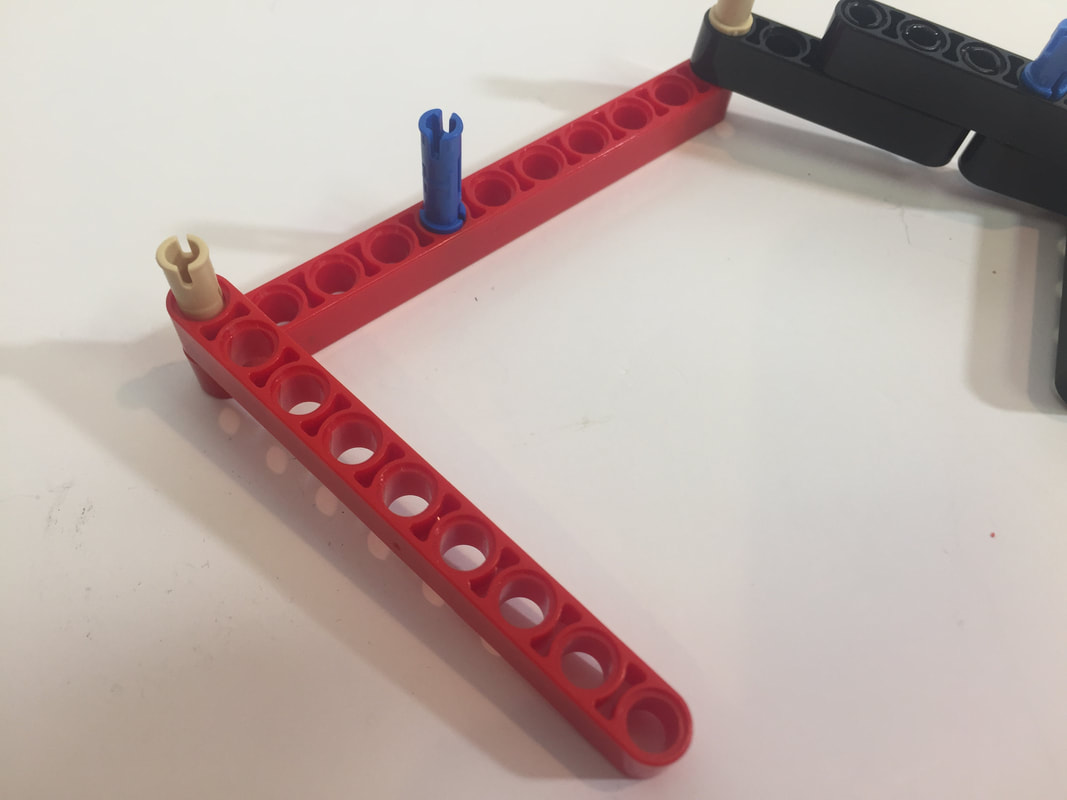
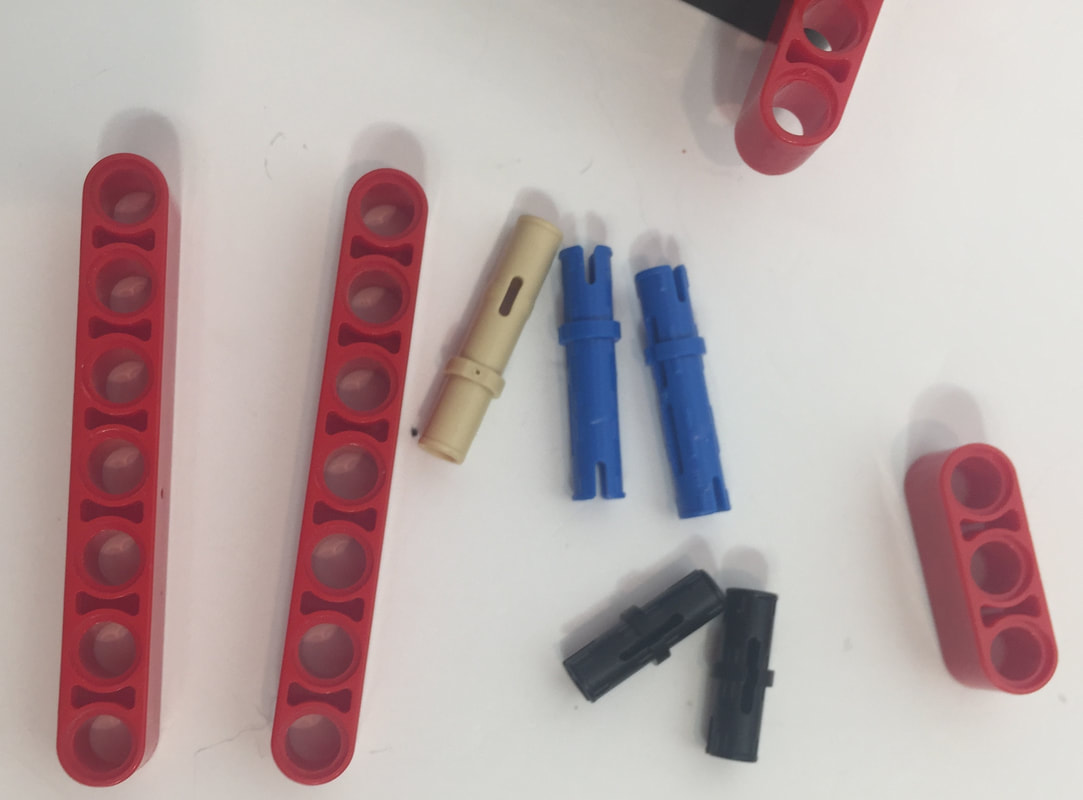
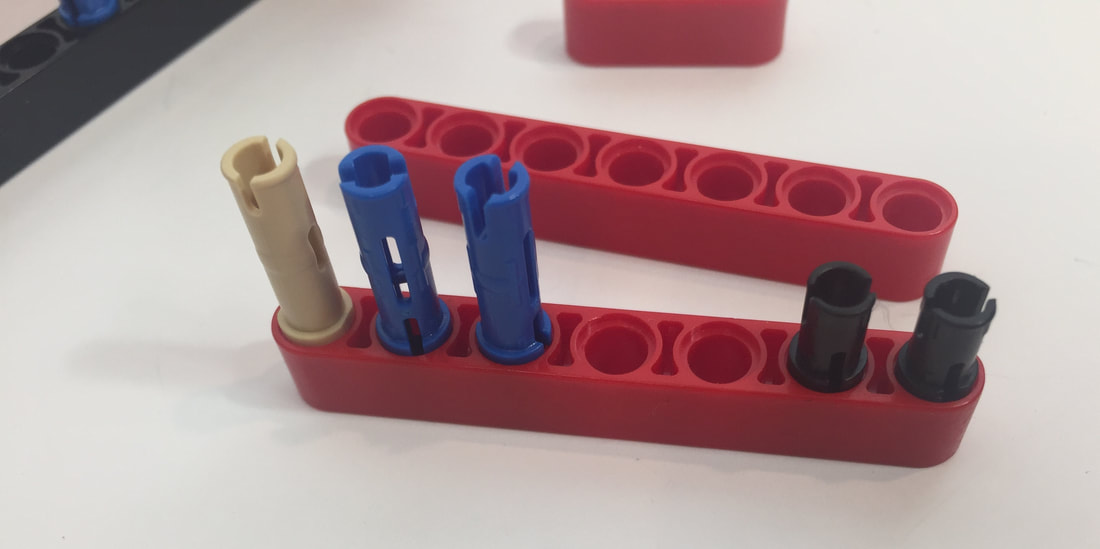
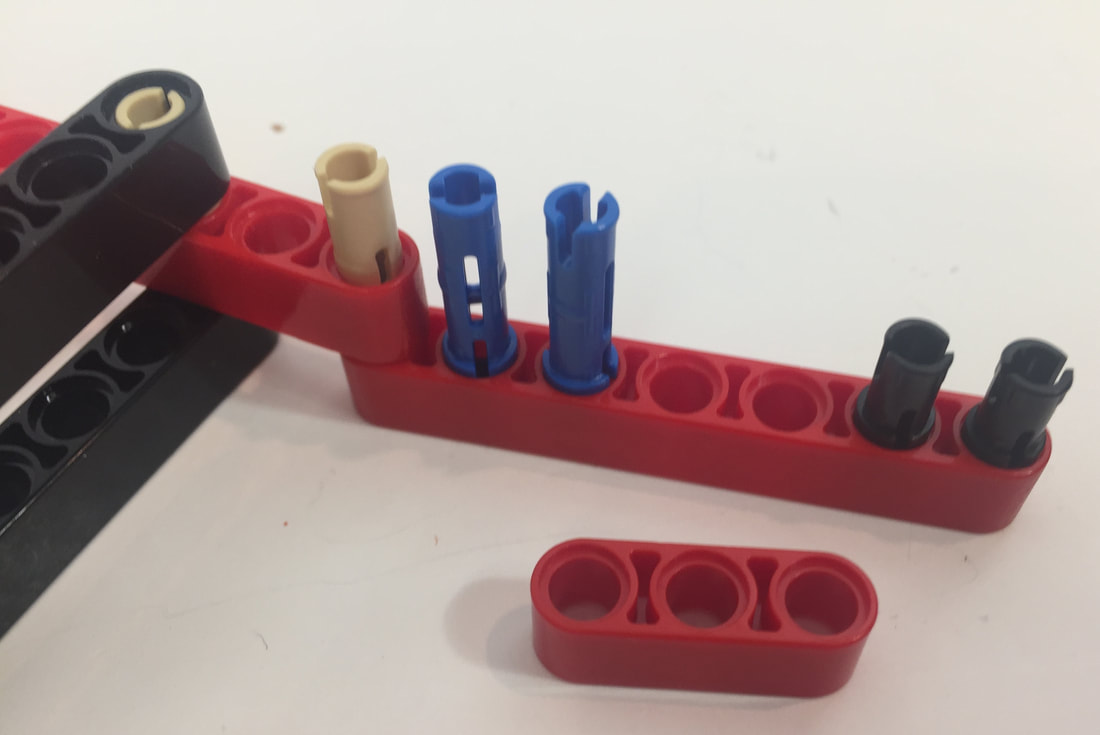
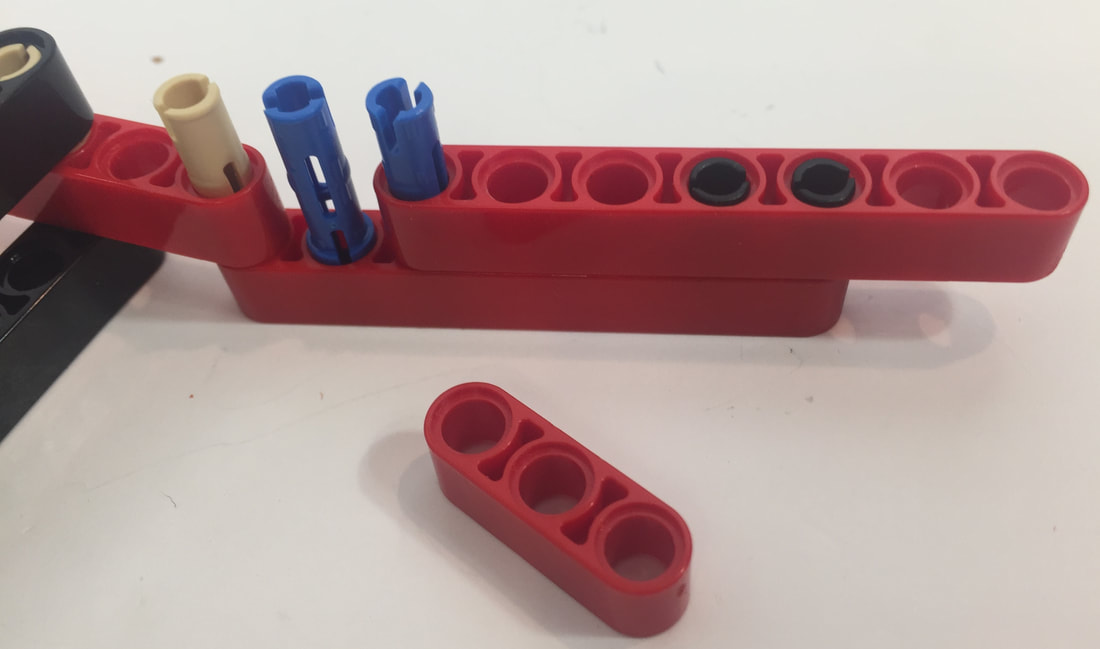
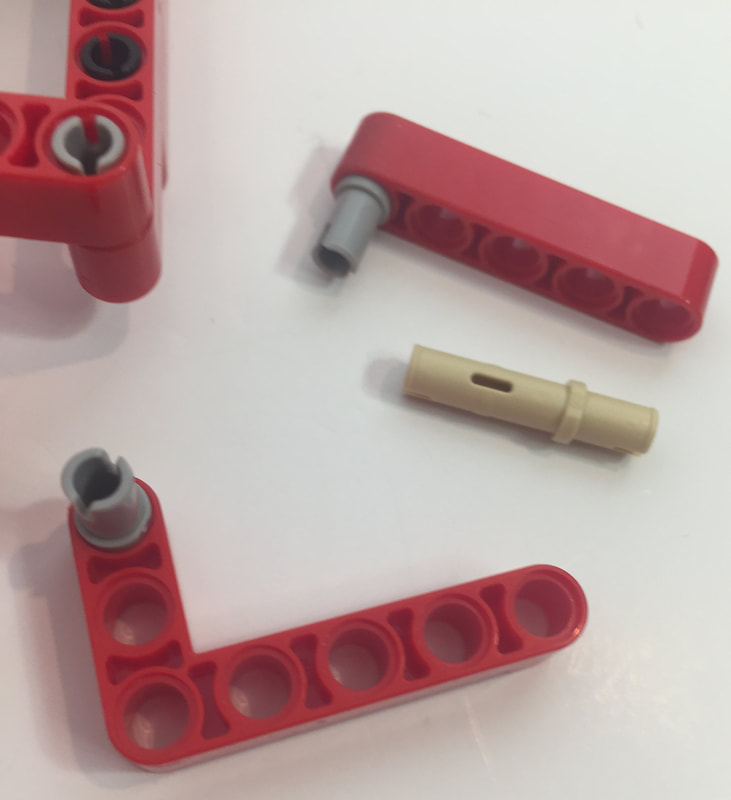
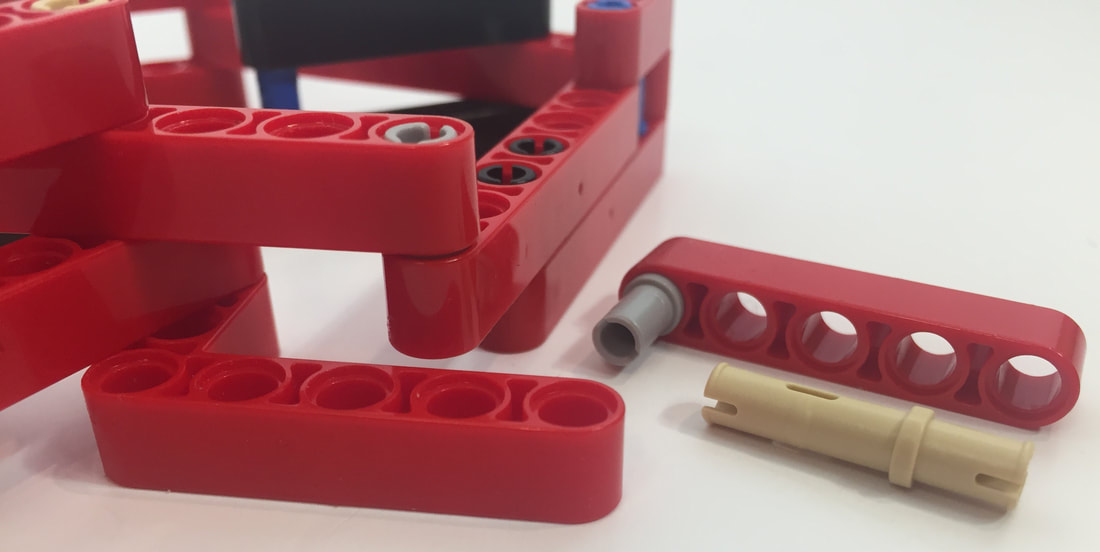
2. Be sure to use frictionless pins for movable joints!
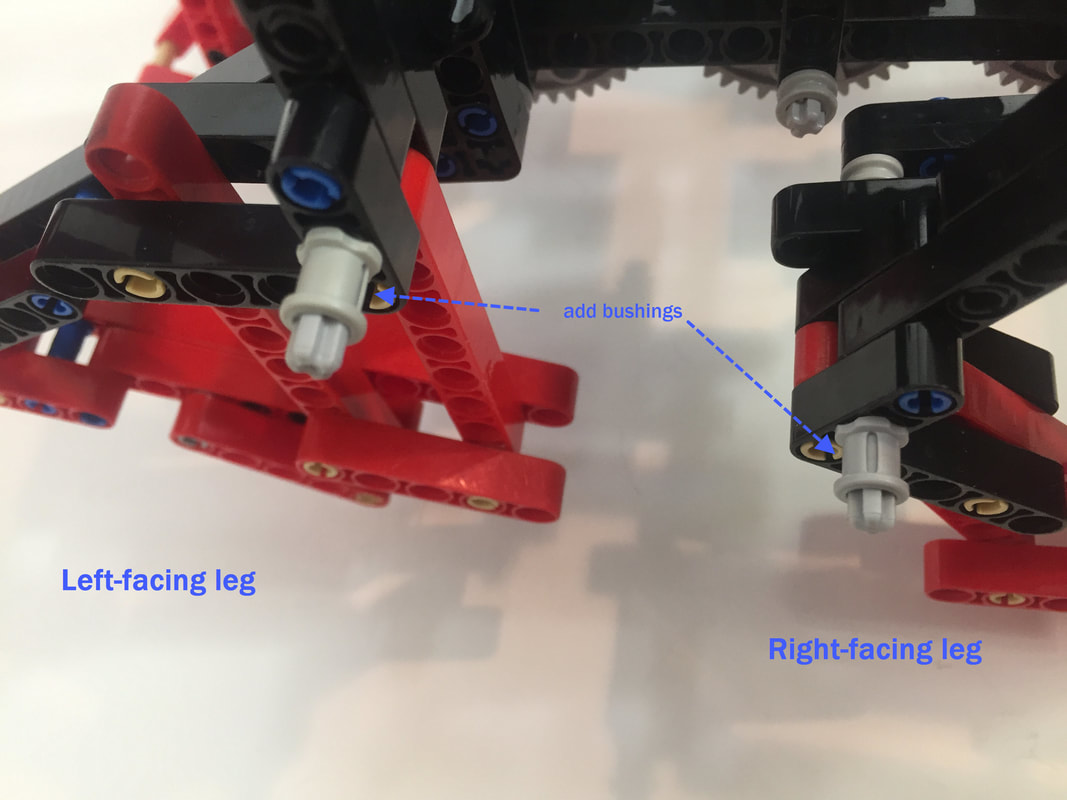
3. Take care to space each bar properly, with the use of bushings on axles as necessary. If the leg parts collide the linkage can lock up causing gears to grind, and you will find it is much easier to get your leg spacing correct before assembling the entire walker than it is to fix the legs in a fully assembled walker!
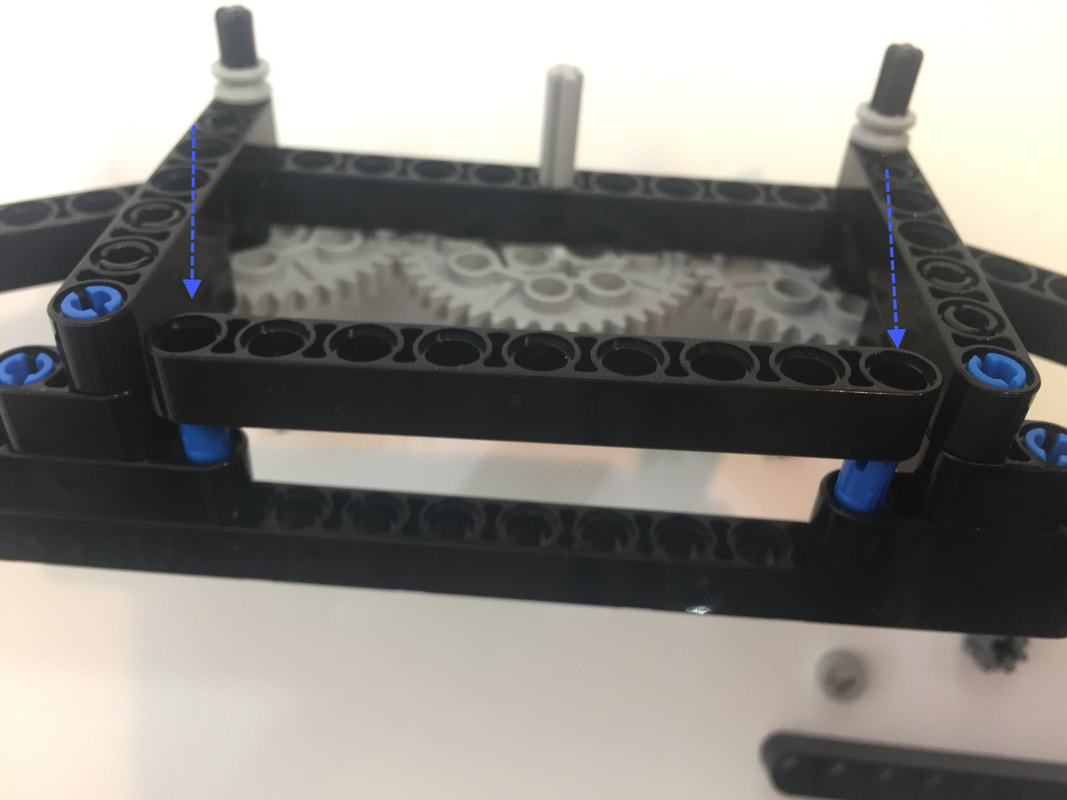
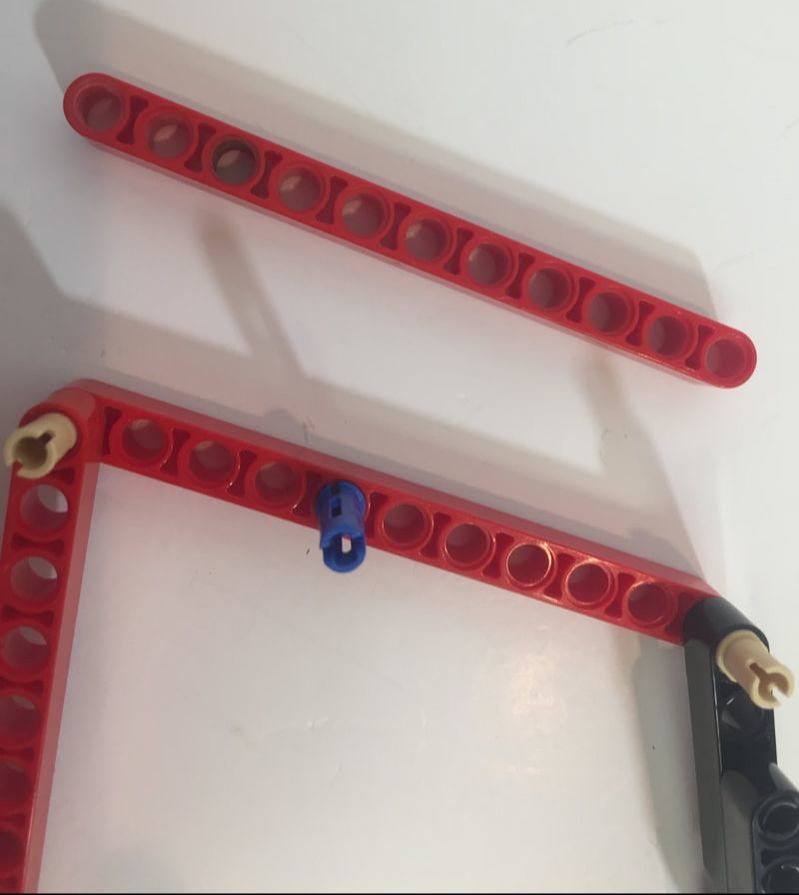
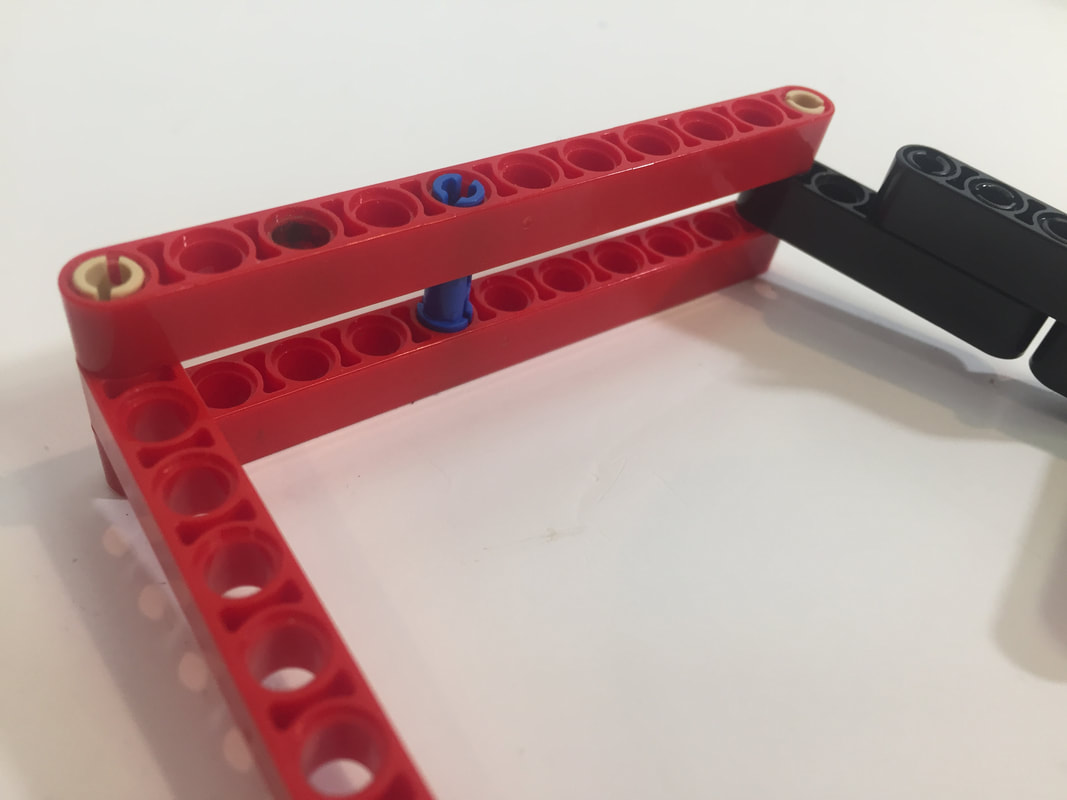
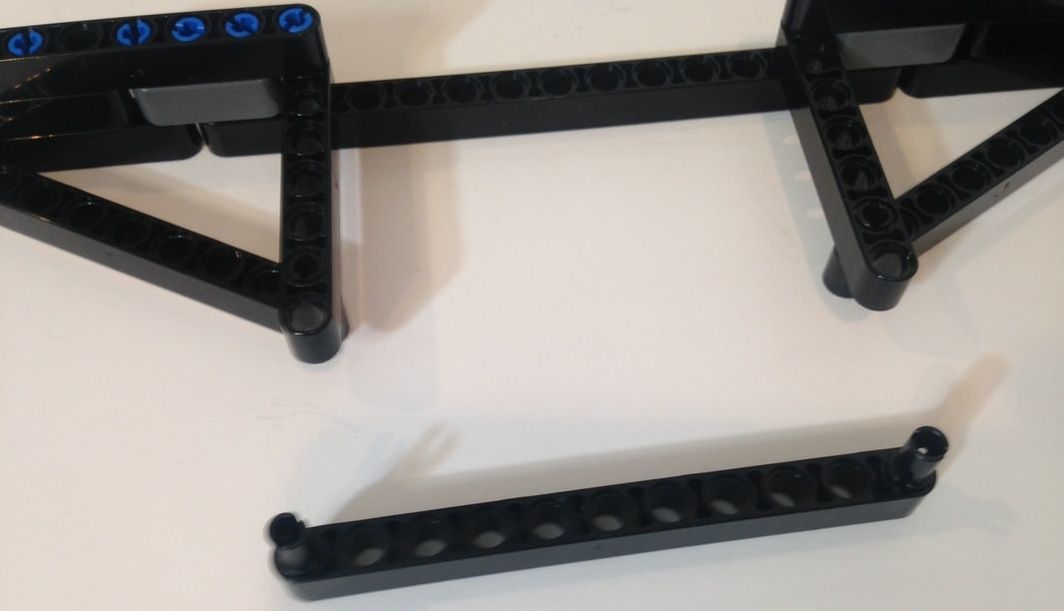
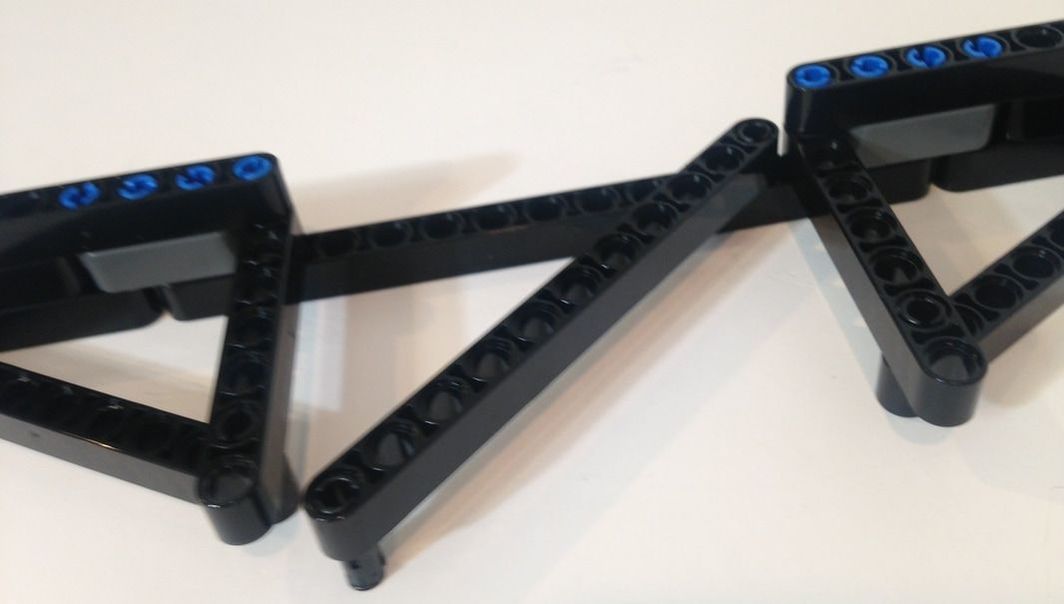
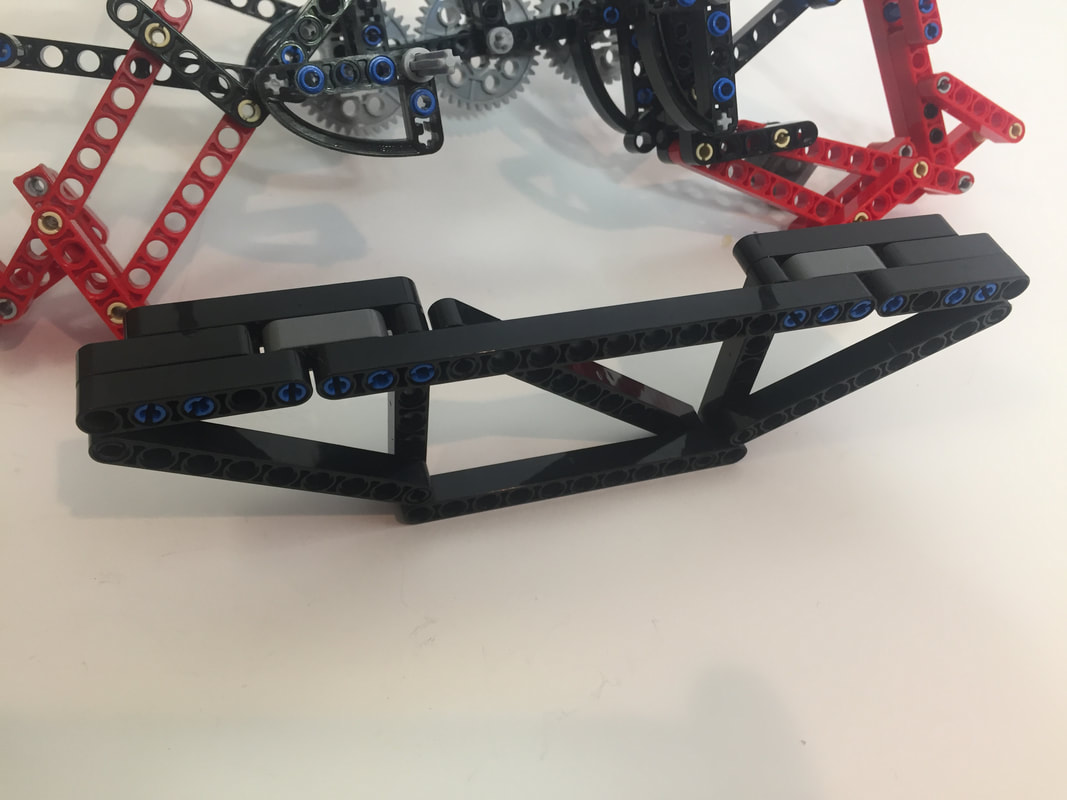
Because the hexapod TrotBot only has one one motor it only has one gear train. We'll start by building the frame side with the gear train.
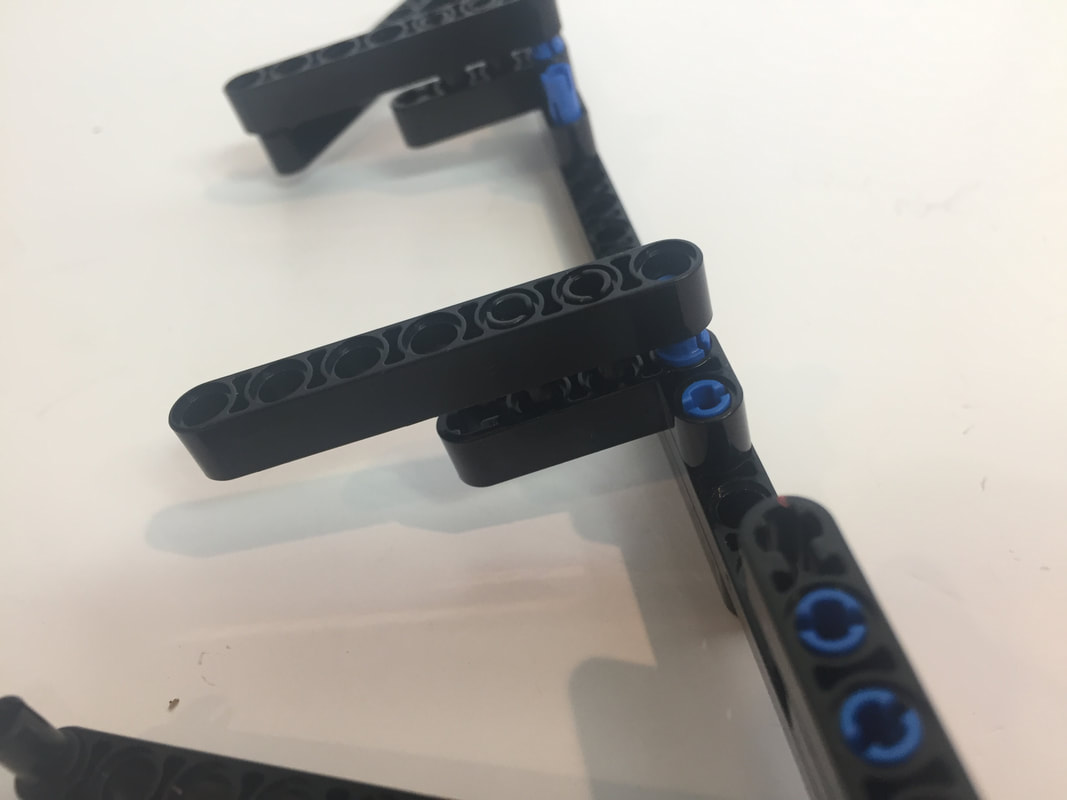
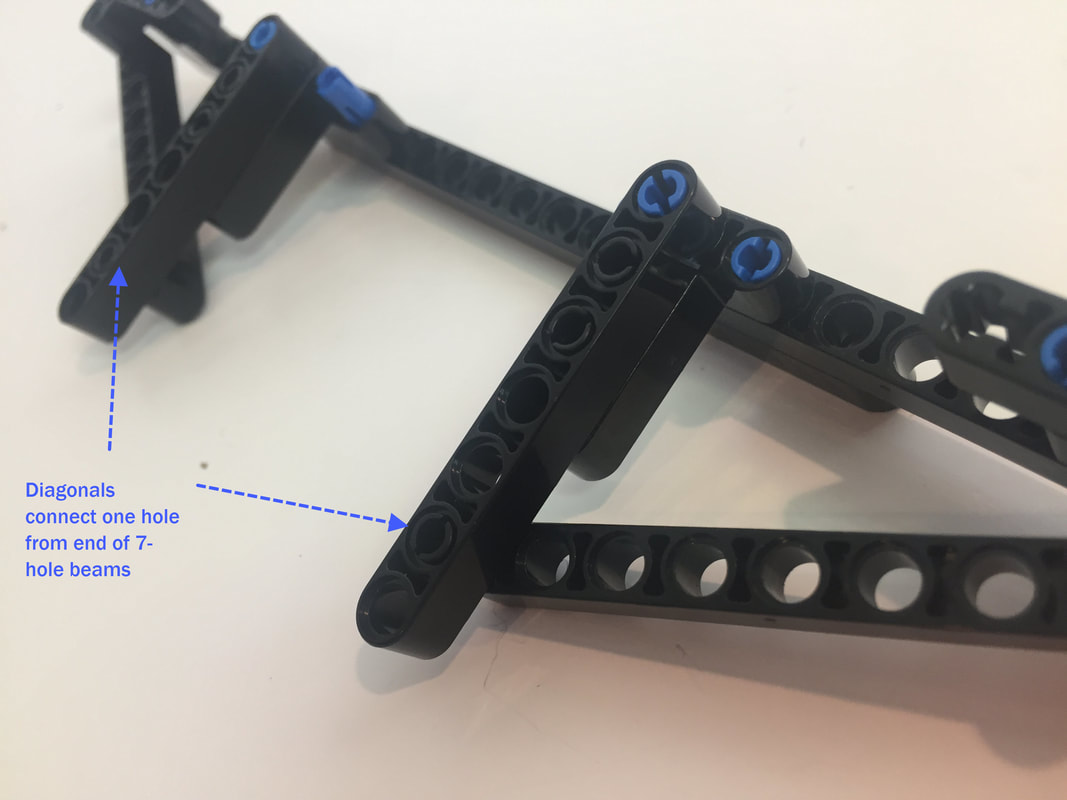
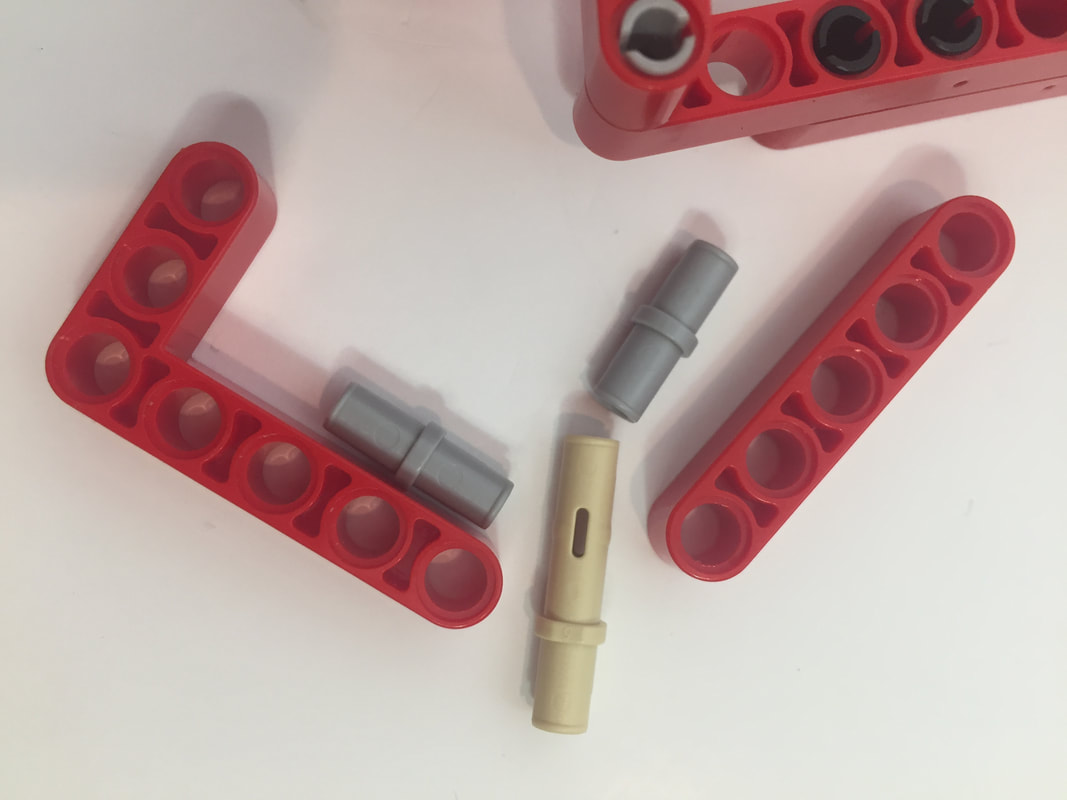
You may have noticed the 9-hole beams I used for the diagonals above are not the correct length for the triangle's hypotenuse, which I describe in this post.

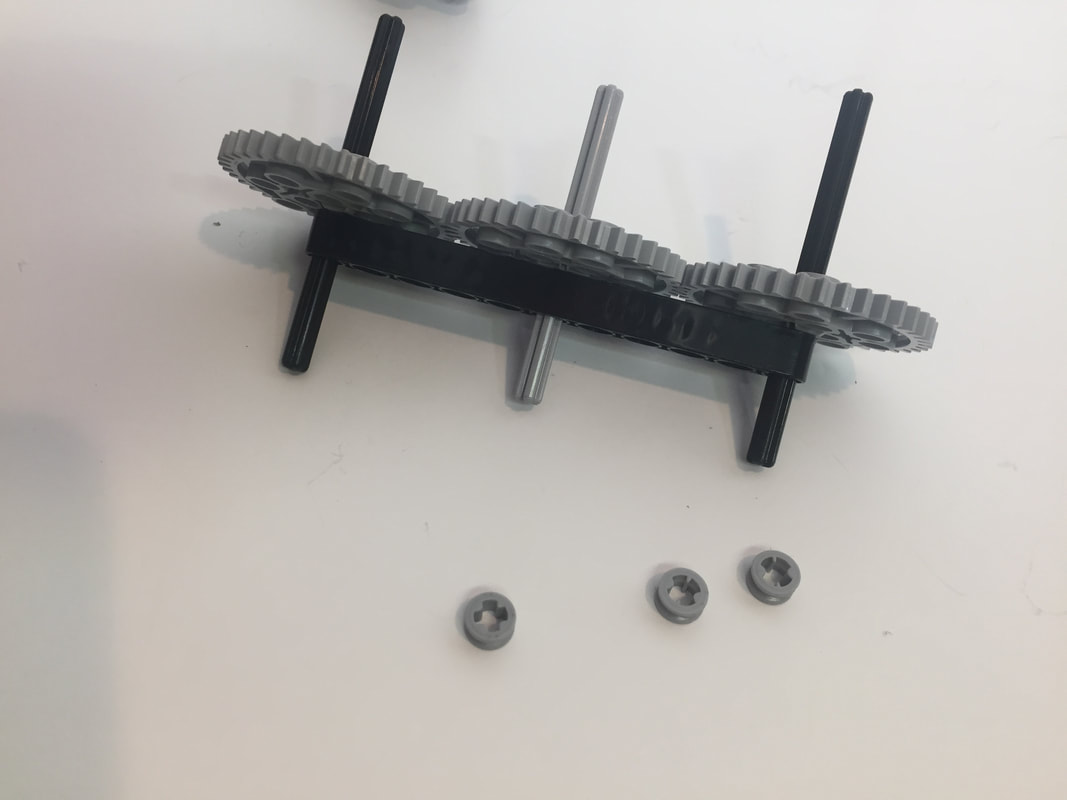


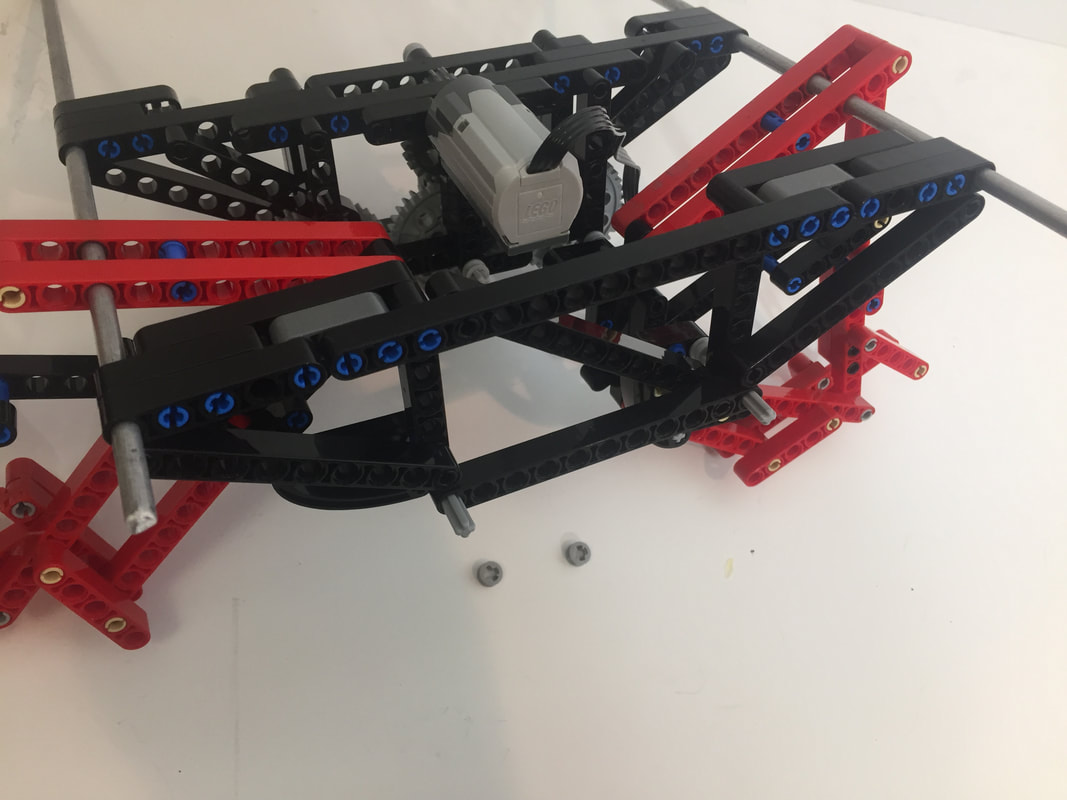
Cut 2 metal rods to 10 inches in length, and be sure to file down the edges of the cut so that they slide easily thru the beam's holes.
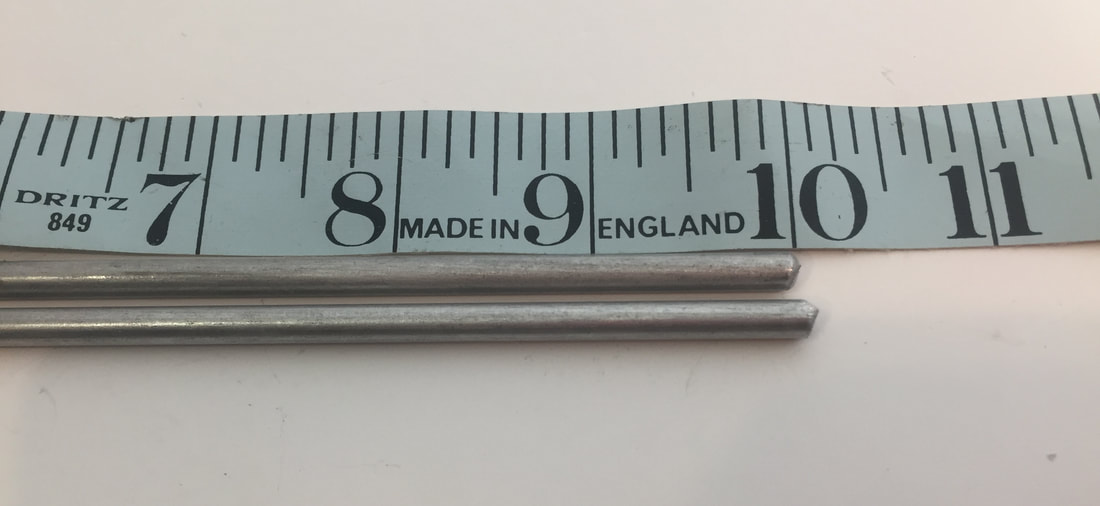
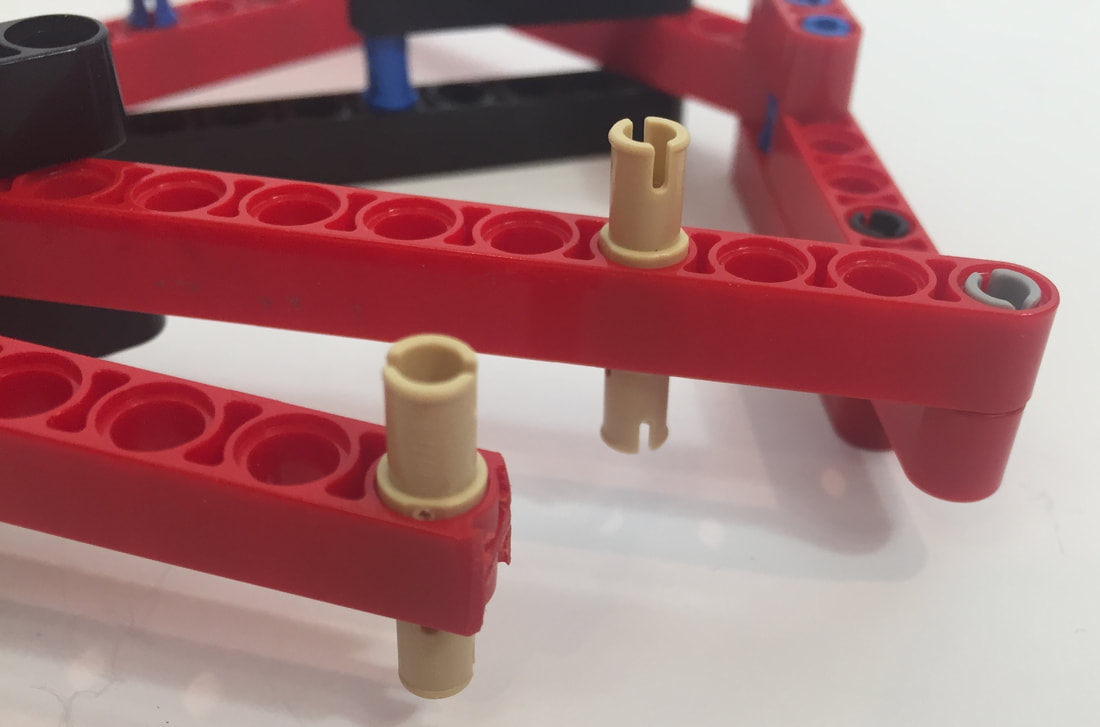
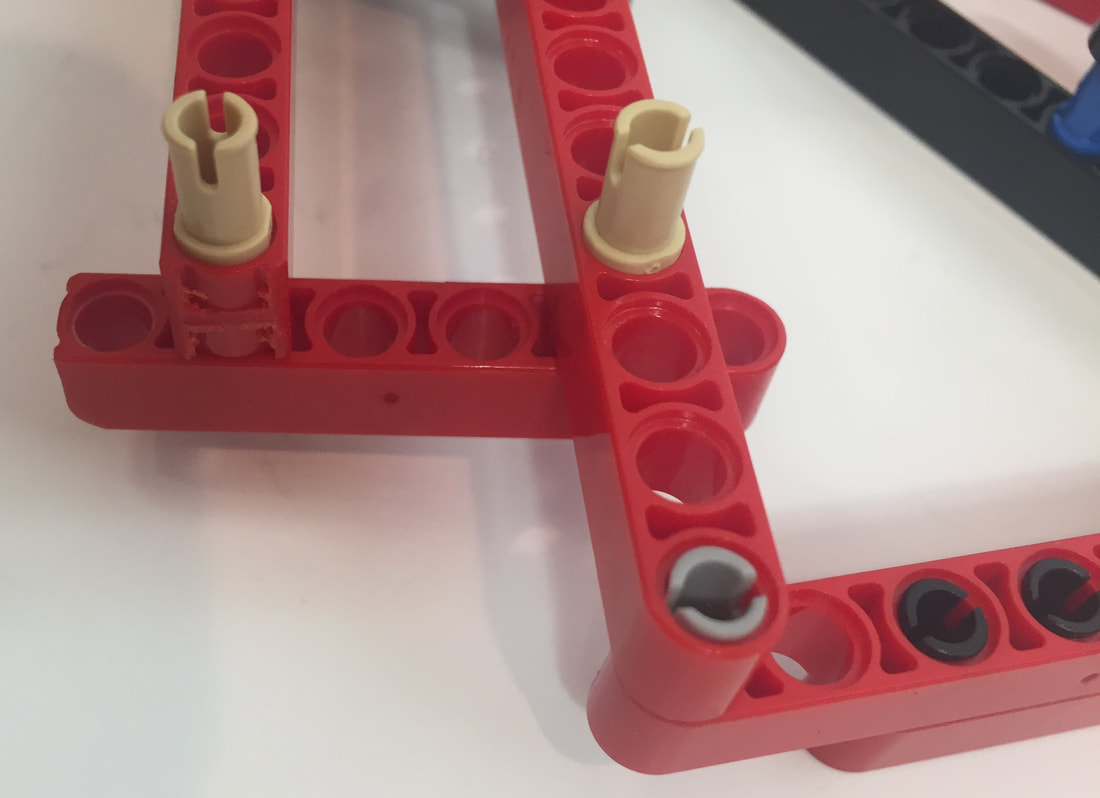
Then slide the rods thru the upper corners of the frame:
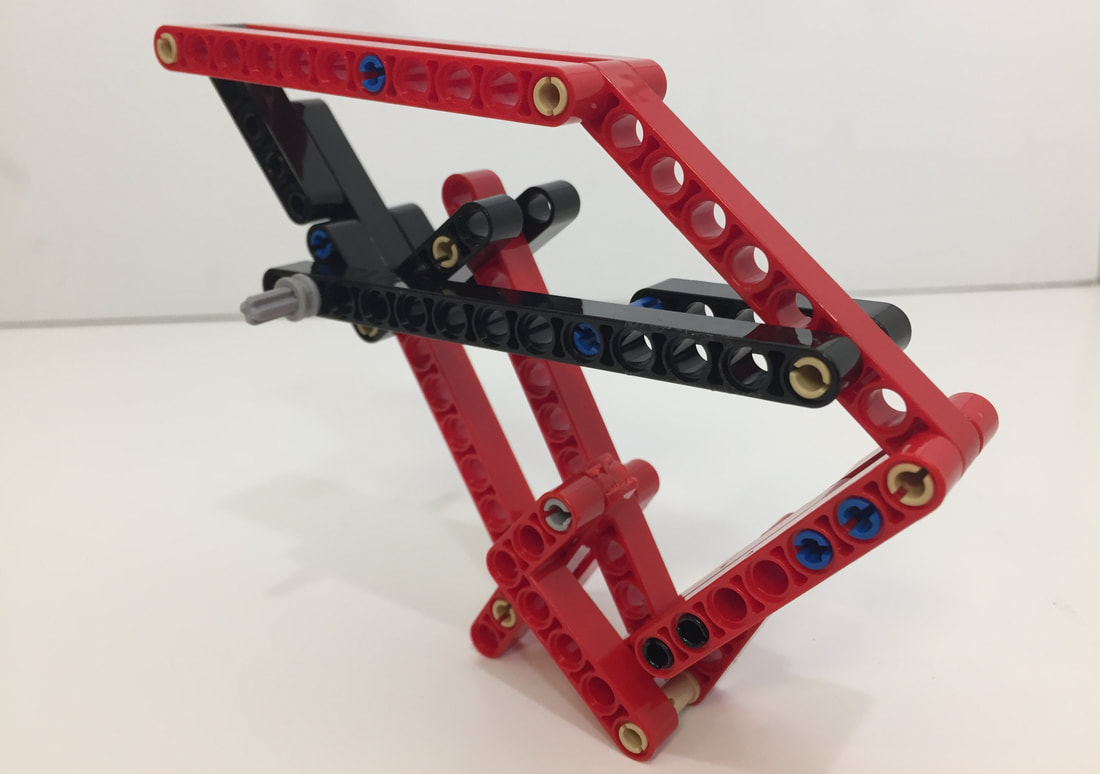
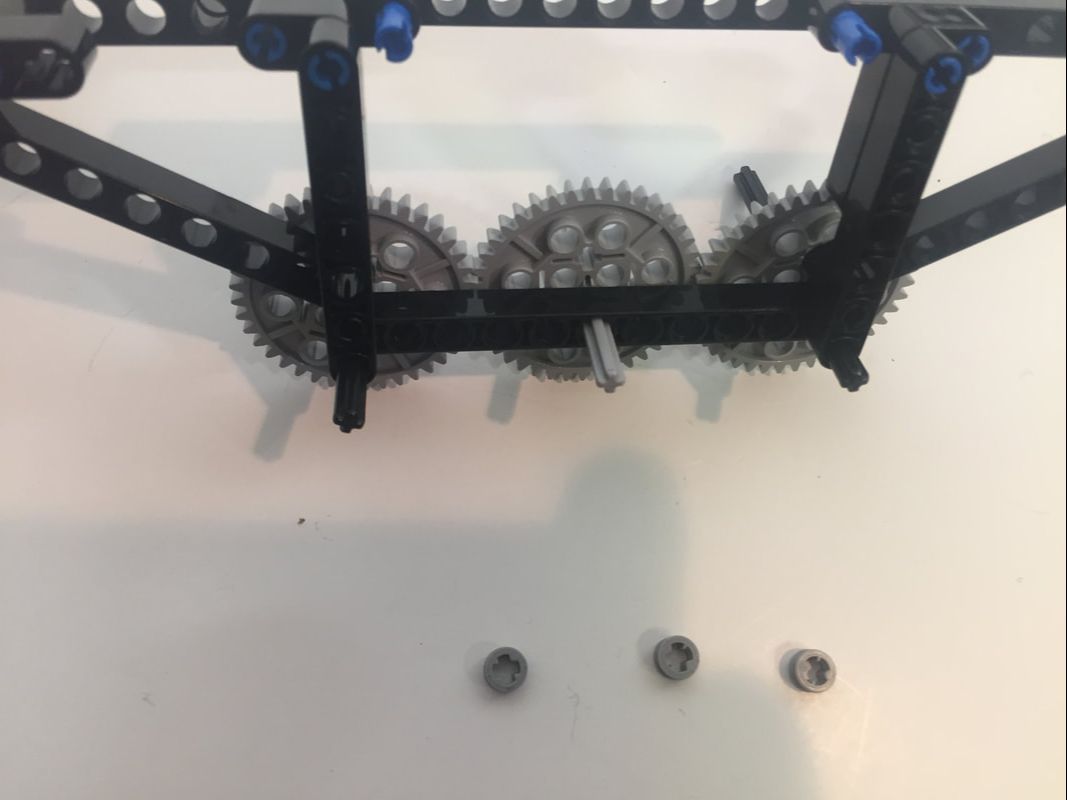
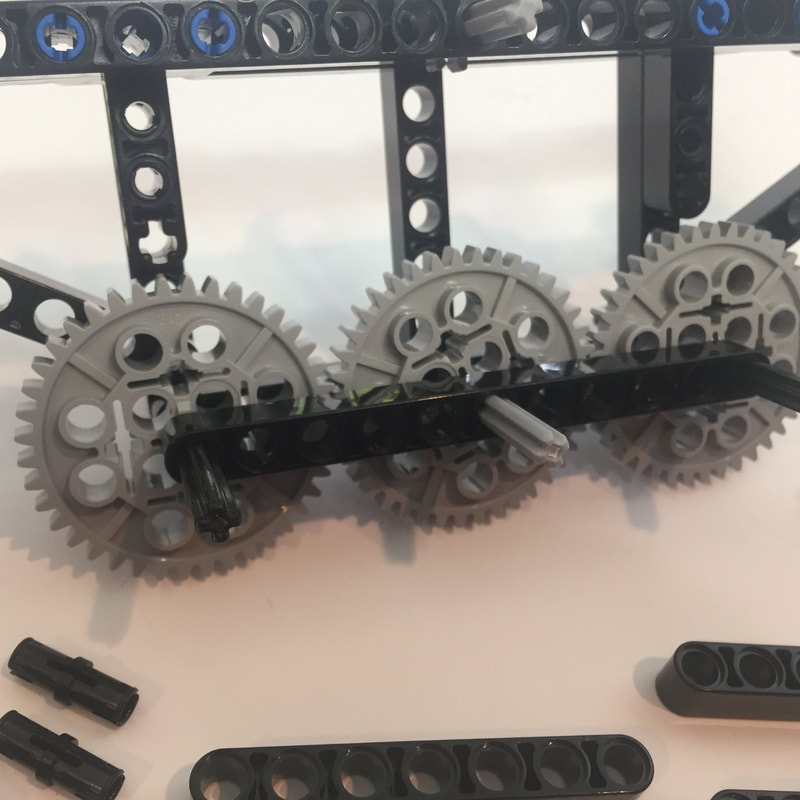
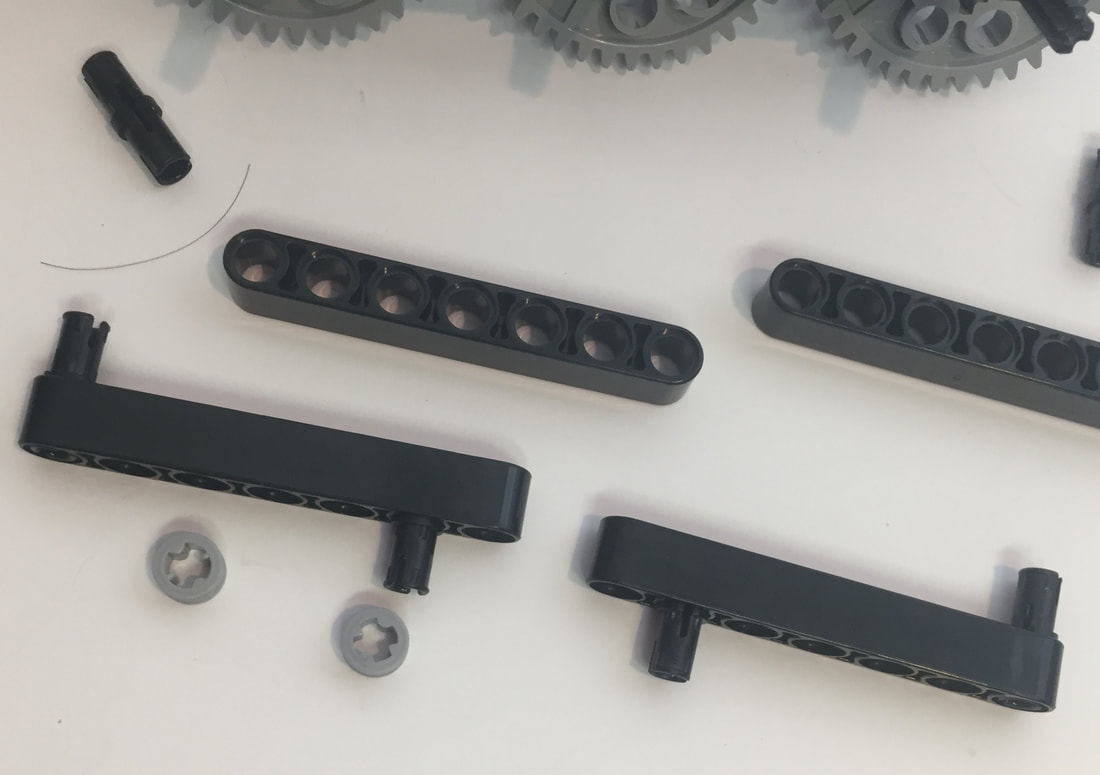
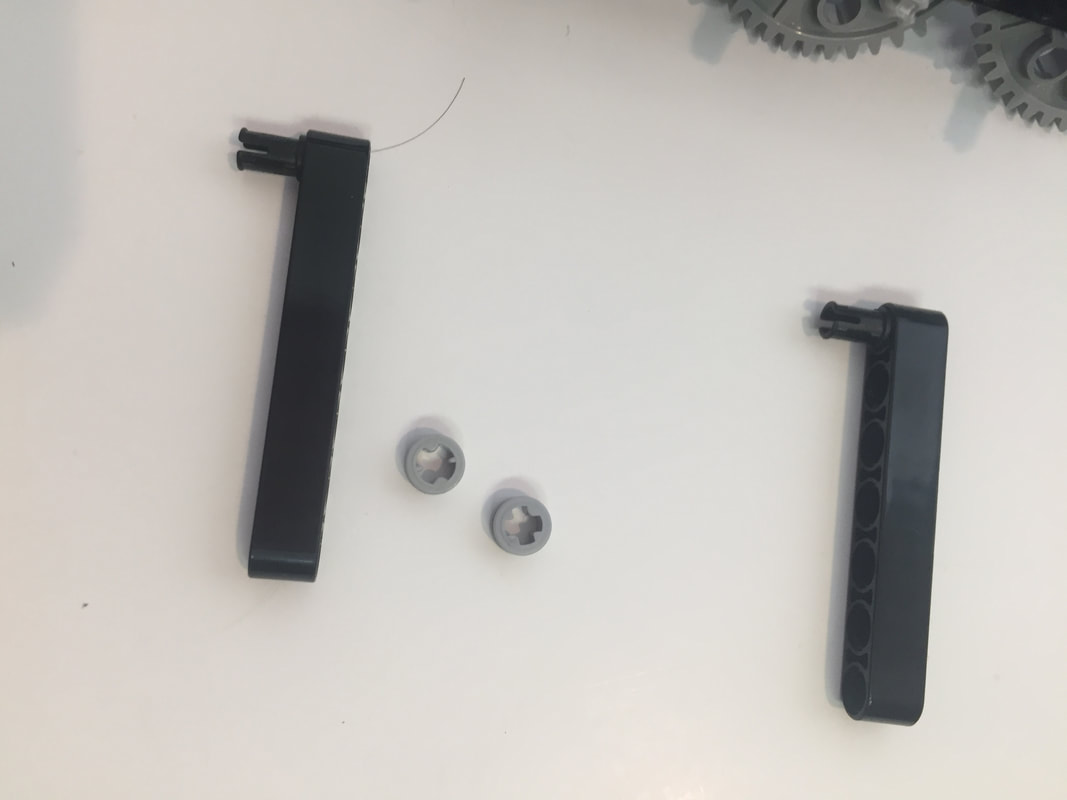
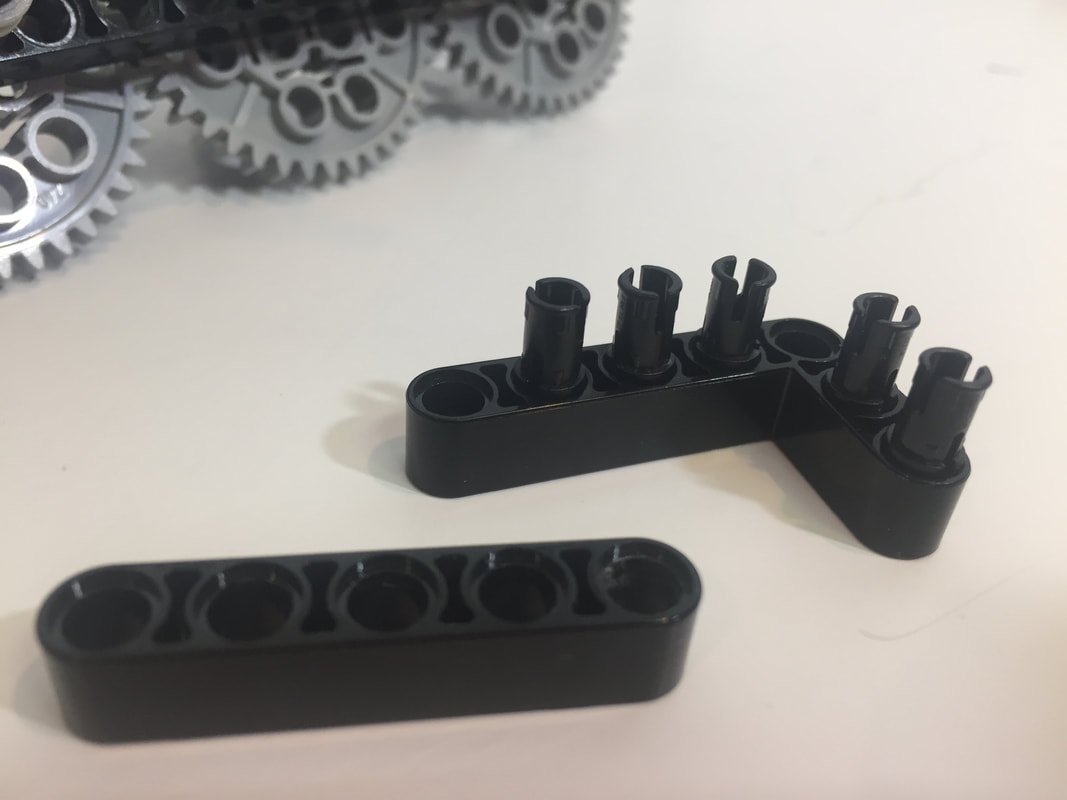
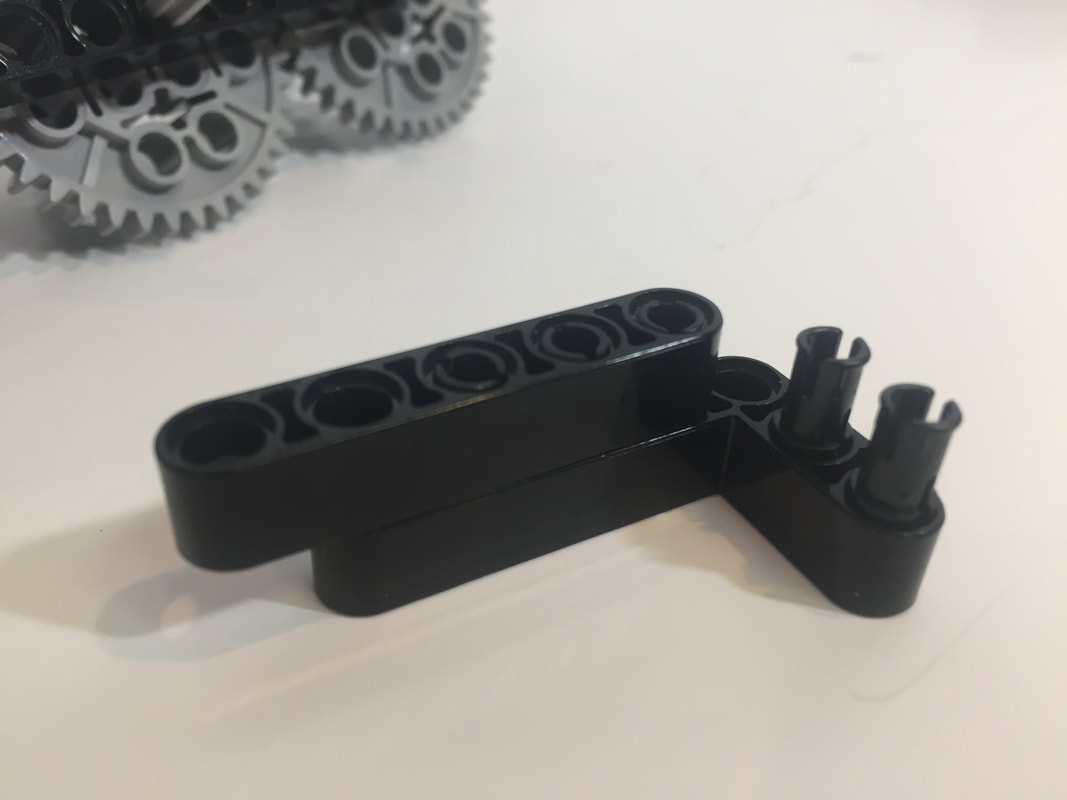
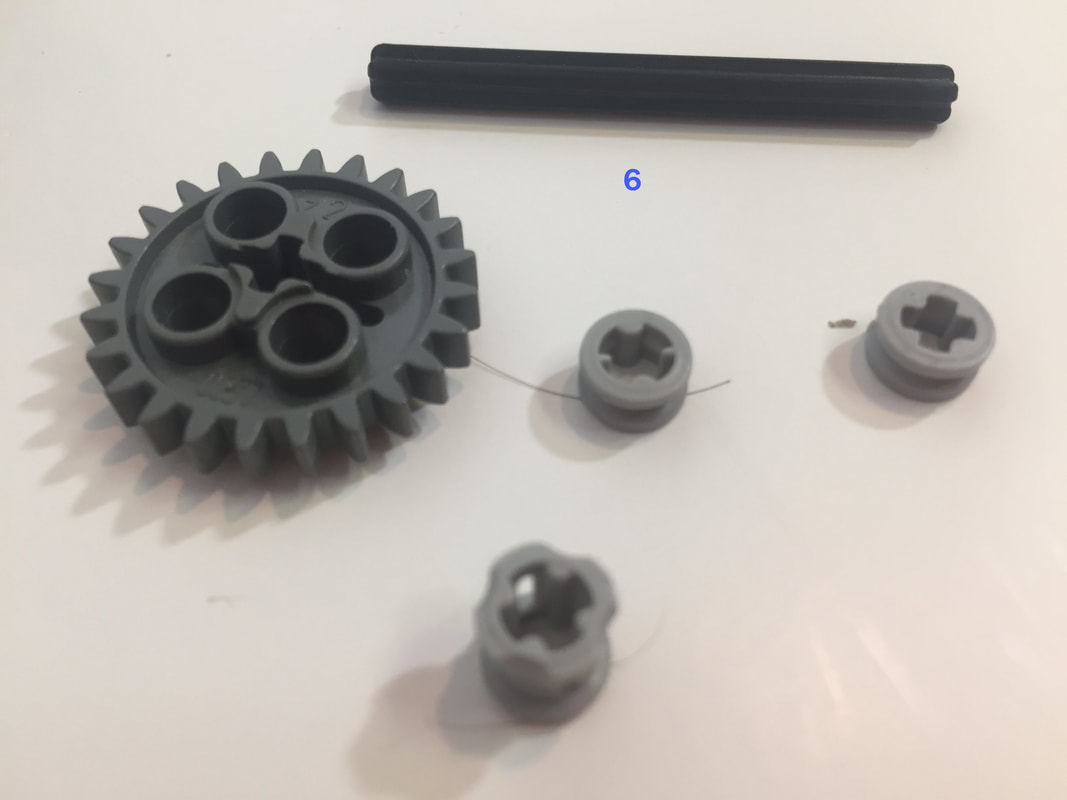
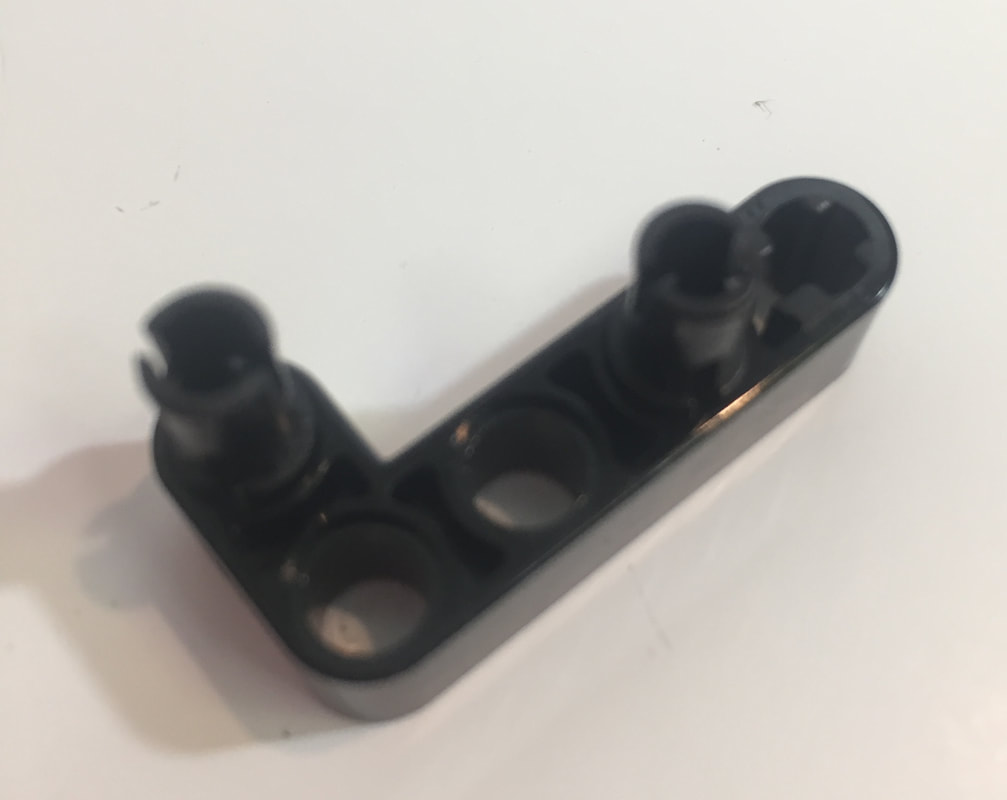
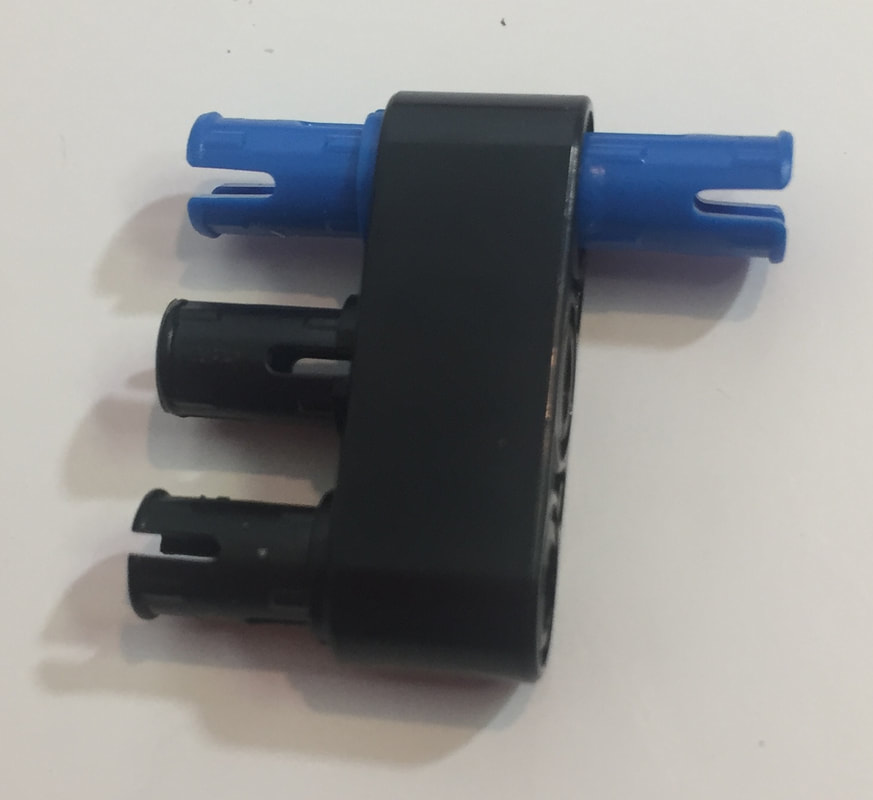
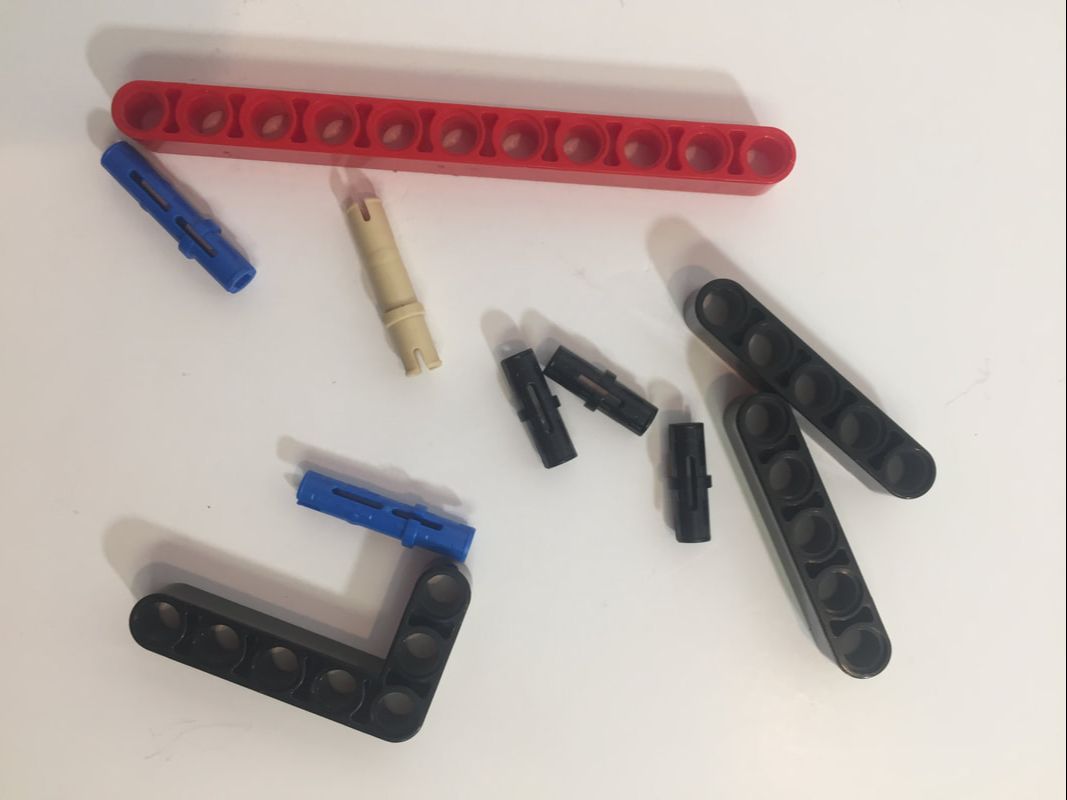
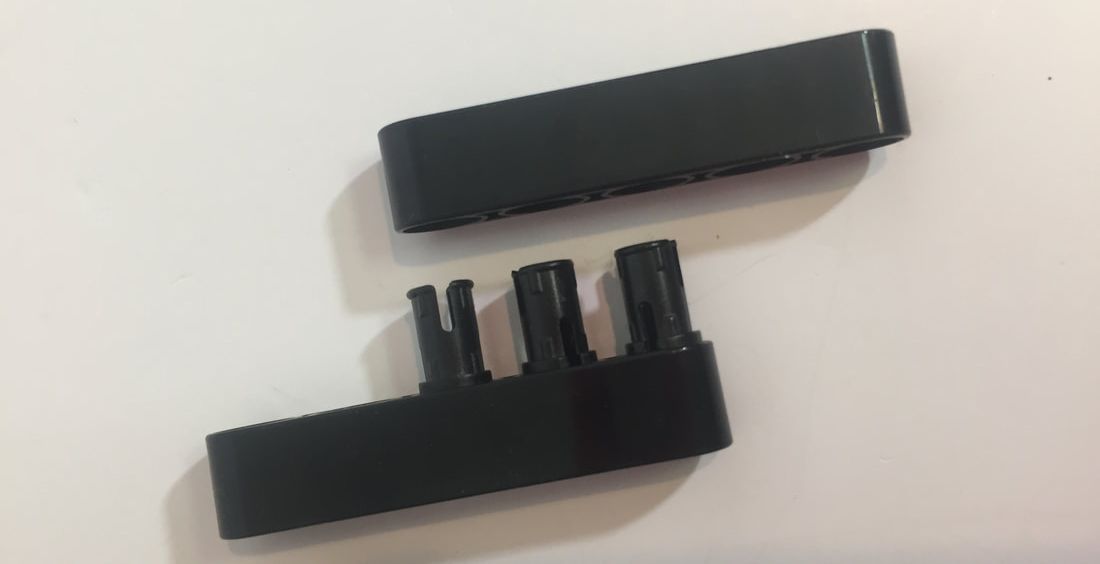
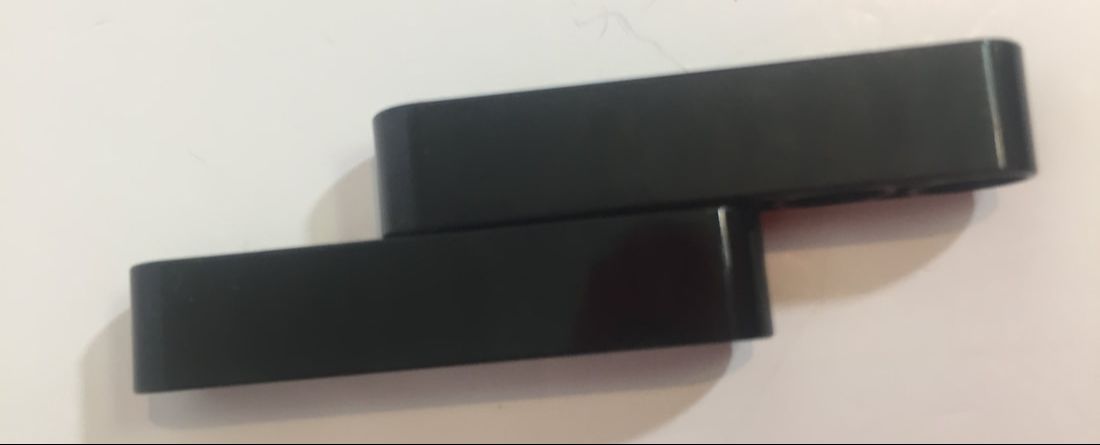
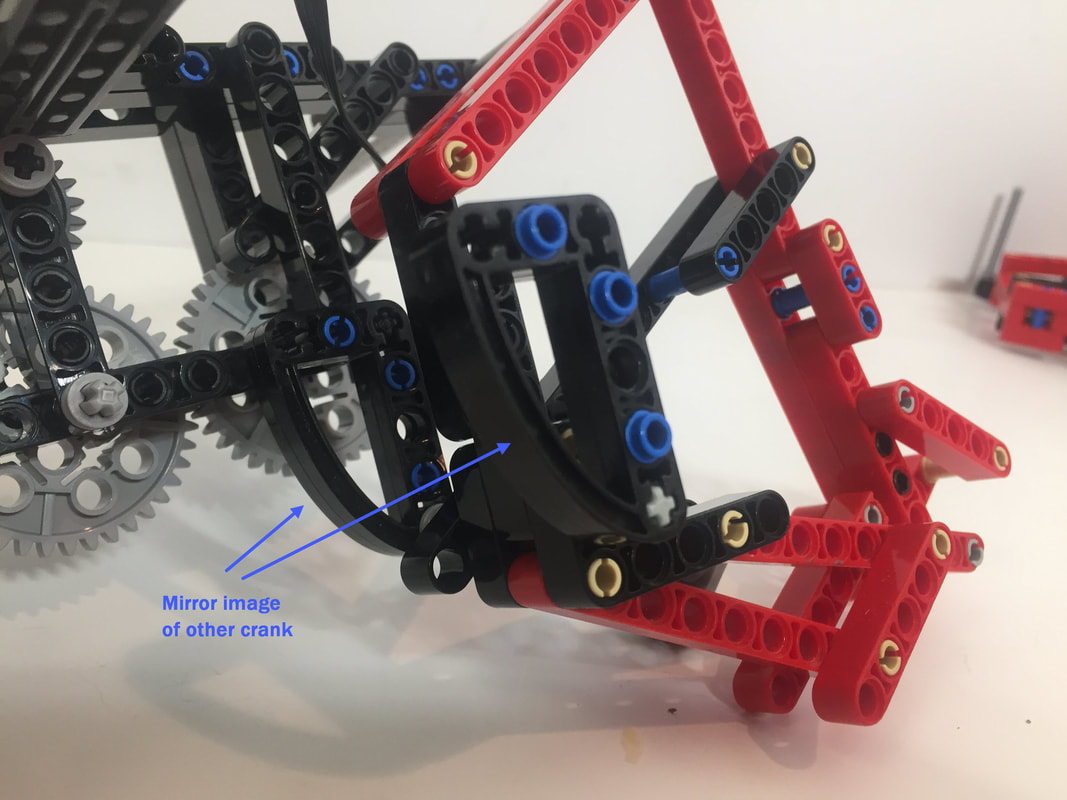
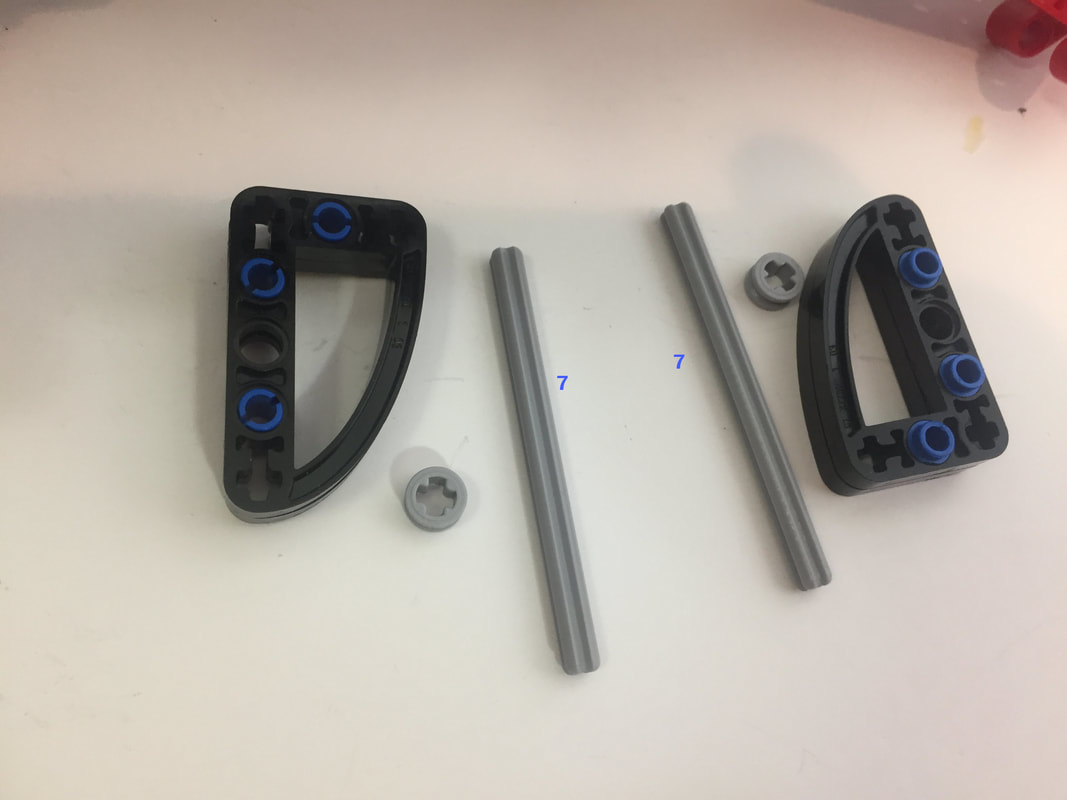
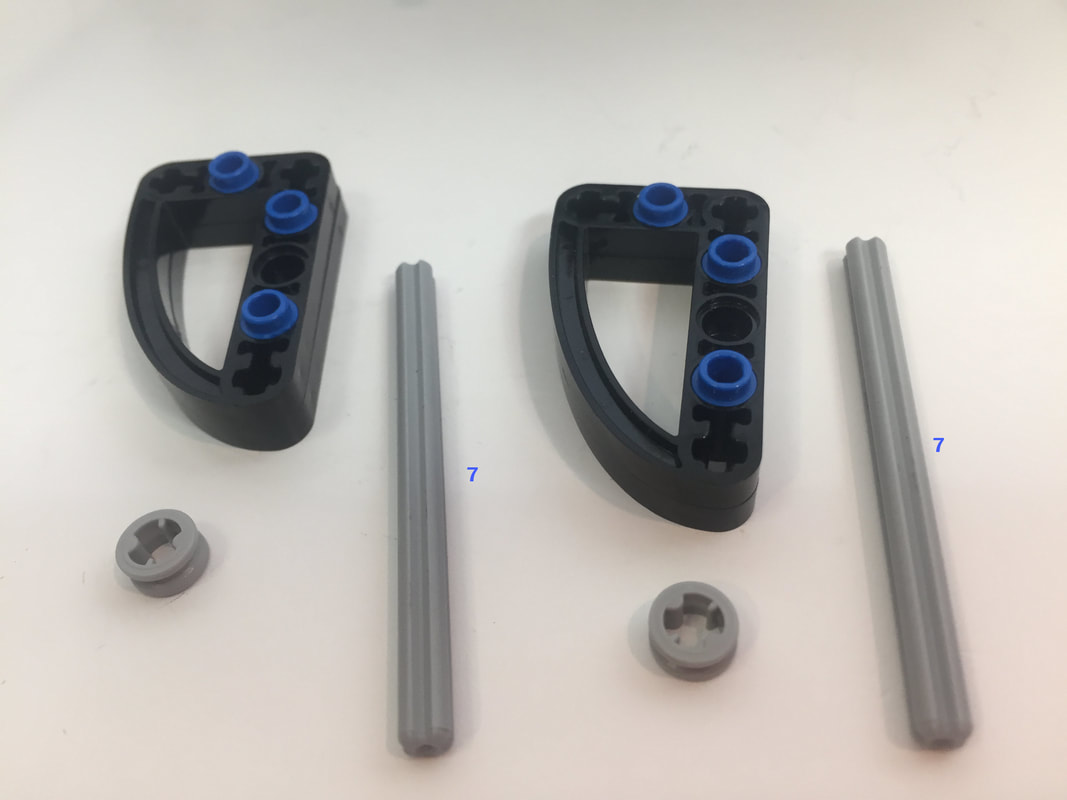
Walker cranks need to be strong, so each crank is made of 2 of the 3x5 quarter ellipse parts pictured below. You will need to make 8 cranks in total.
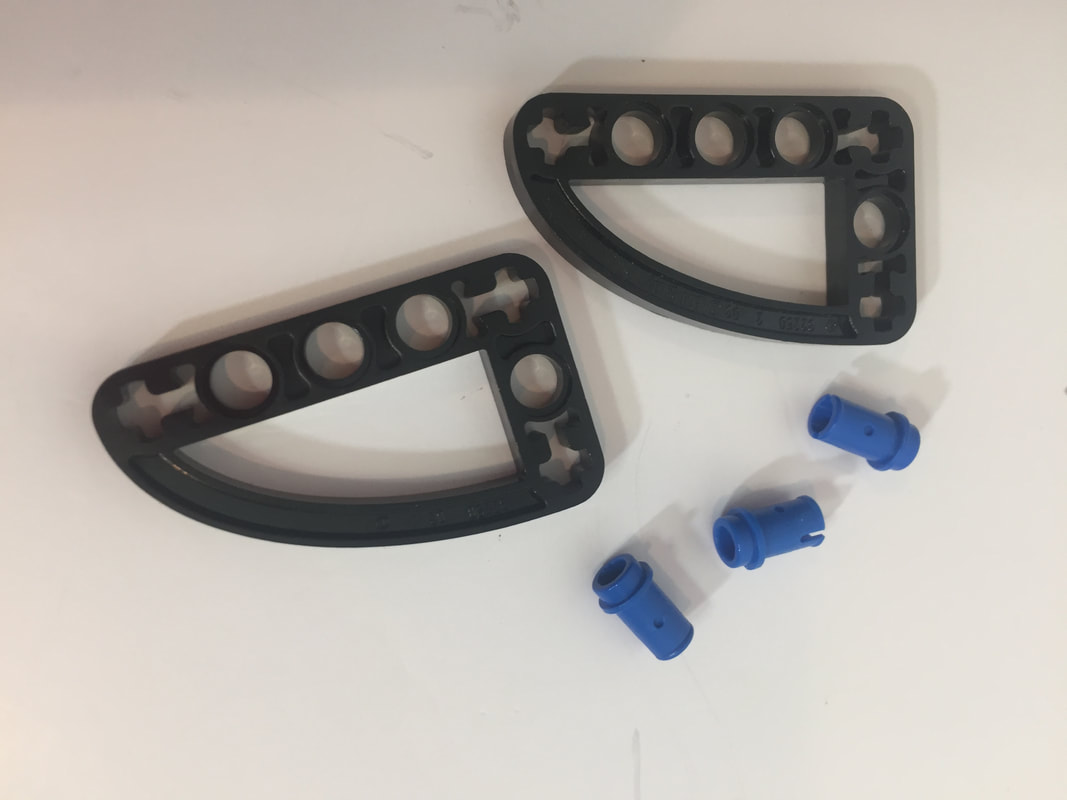
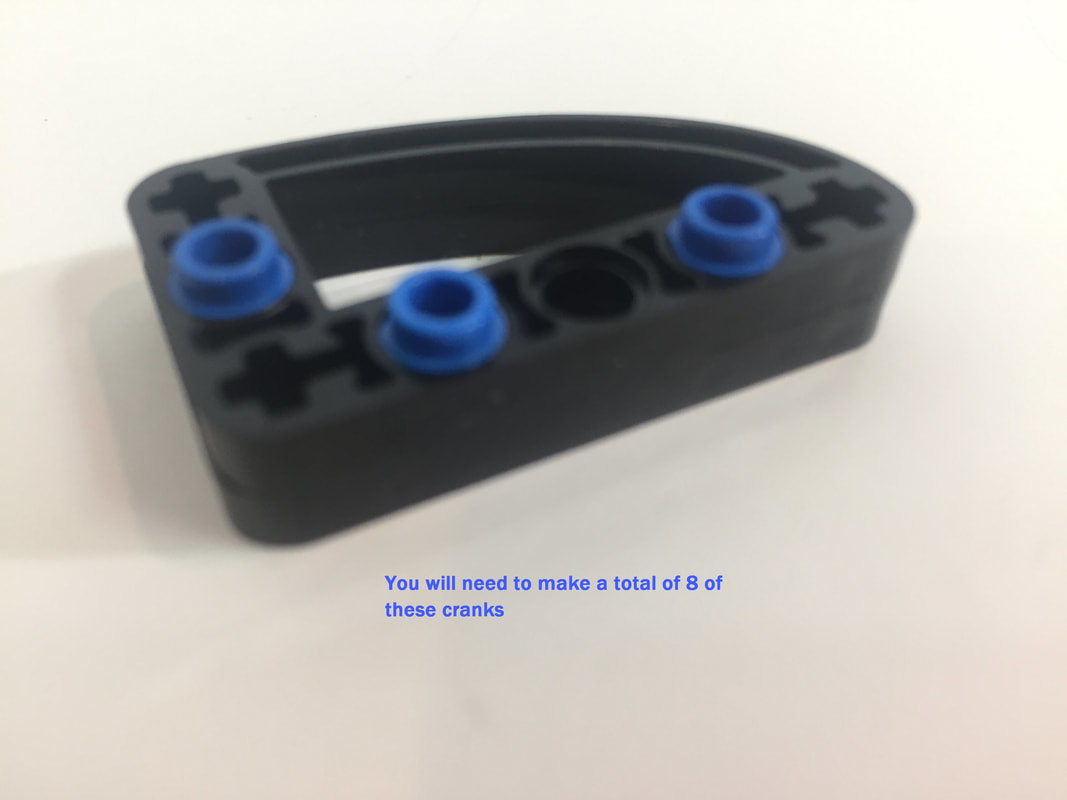
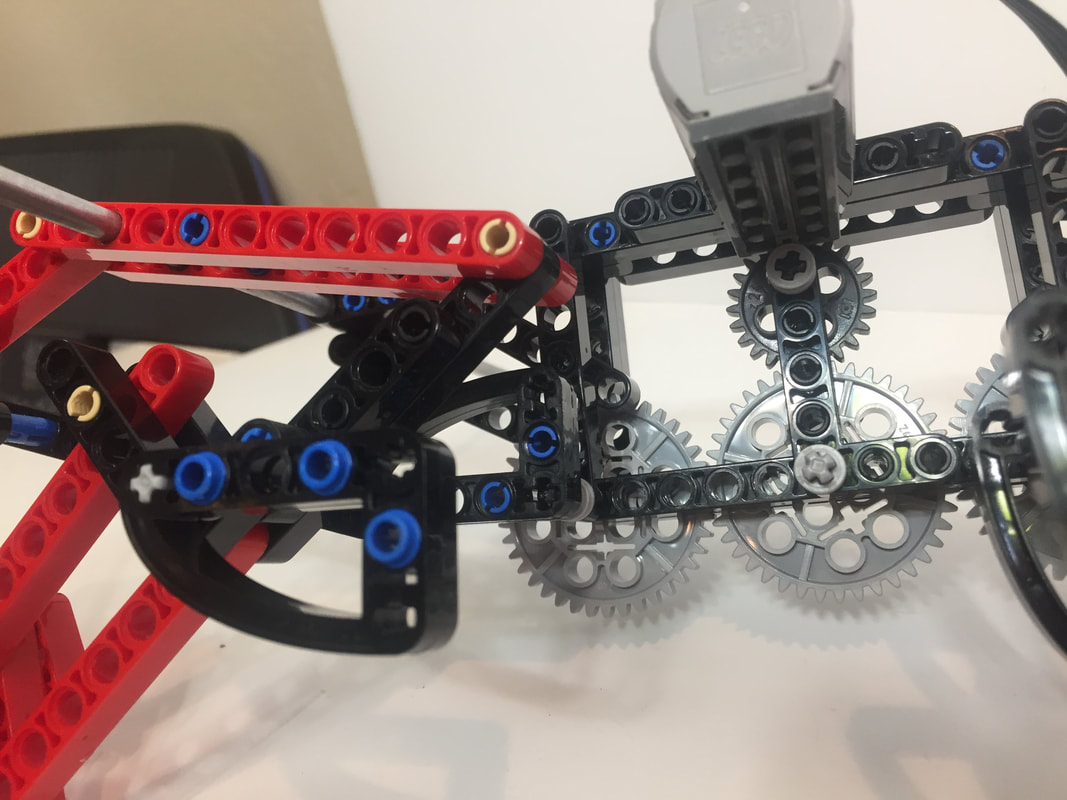
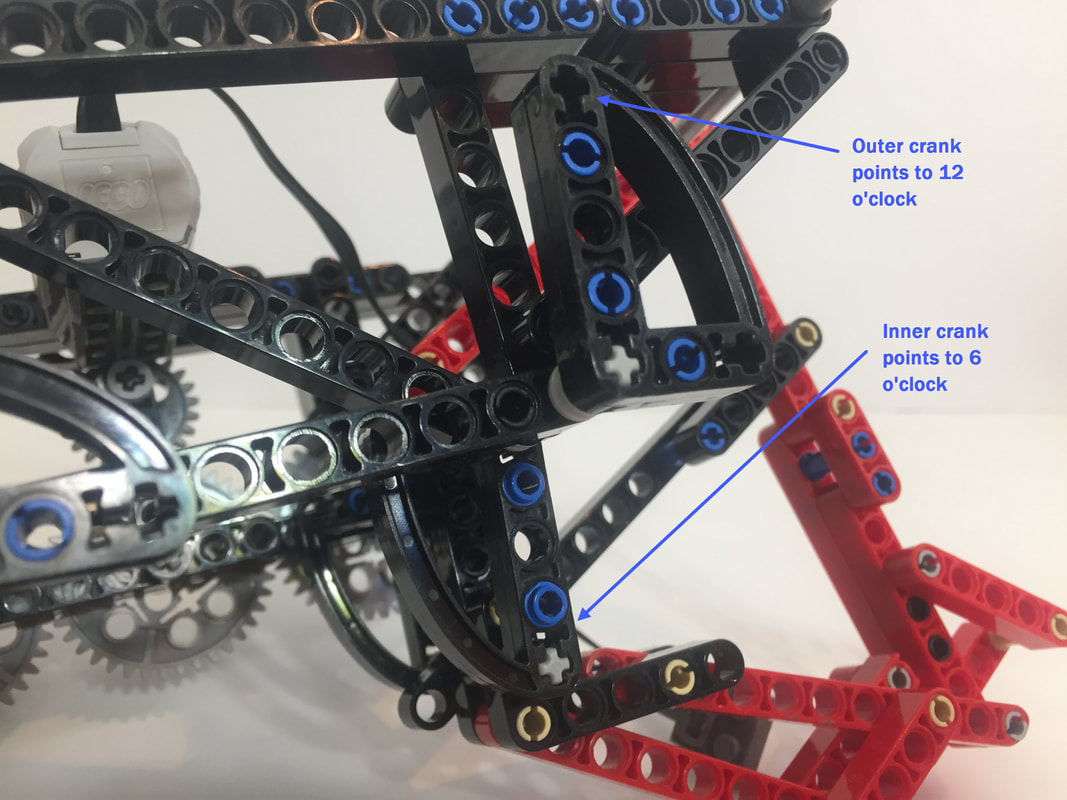
The cranks can be repositioned by loosening the gear train's beams, and rotating one of the 40 tooth gears a couple of teeth
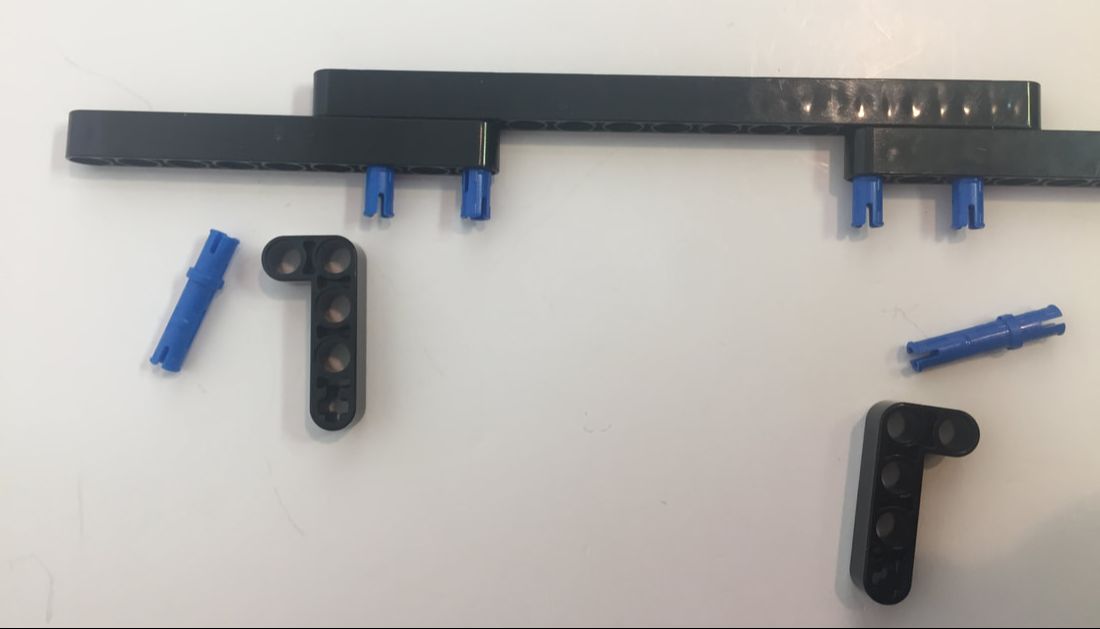
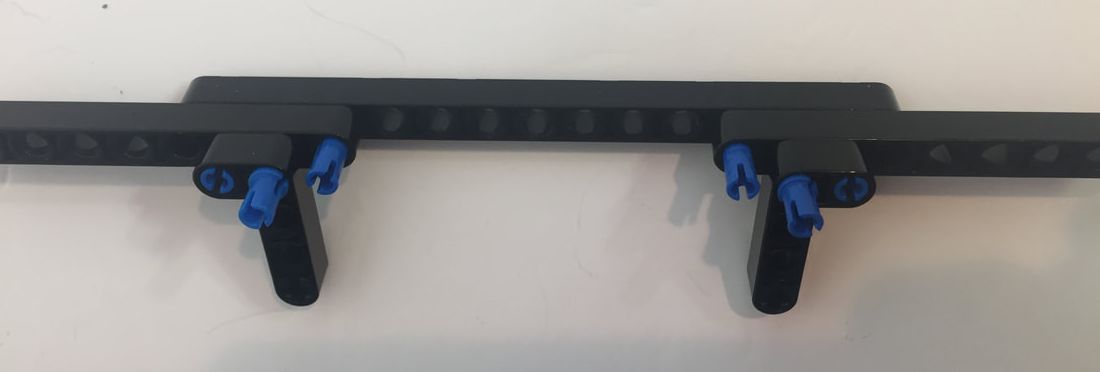
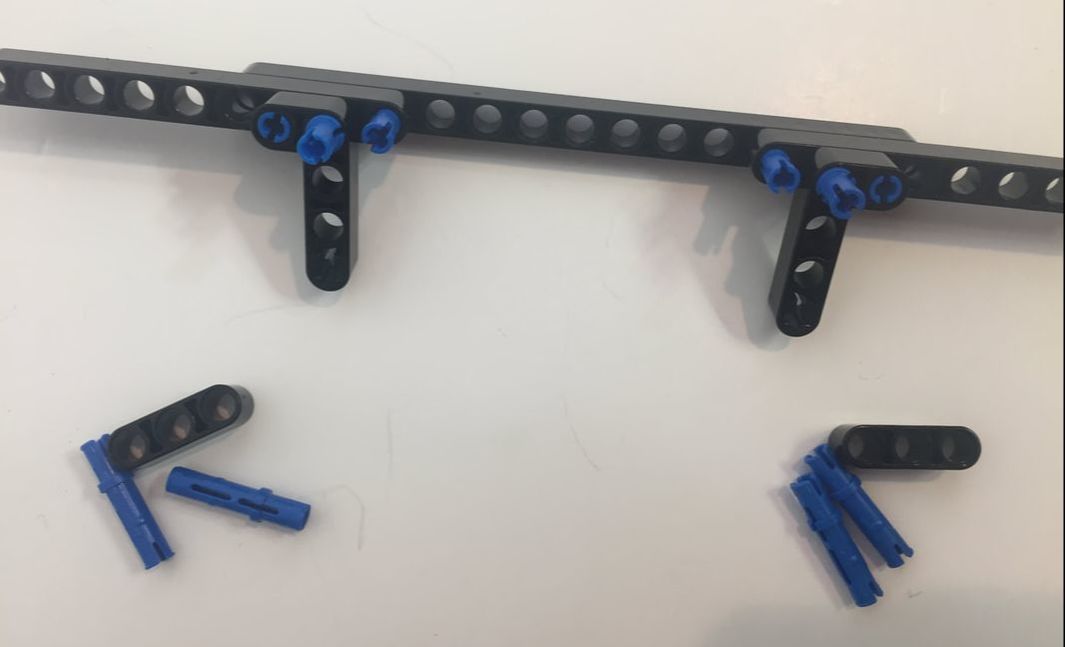
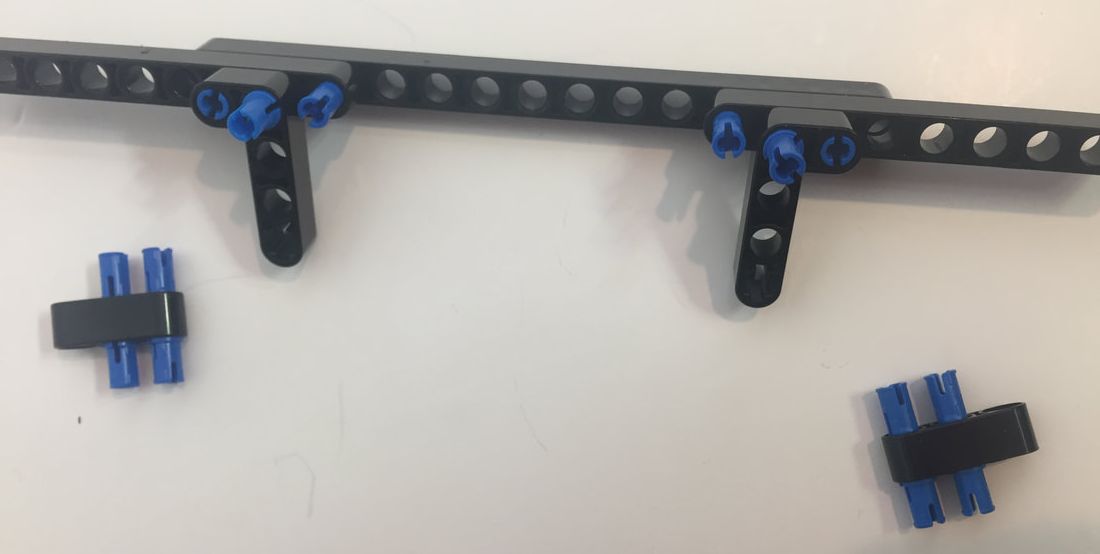
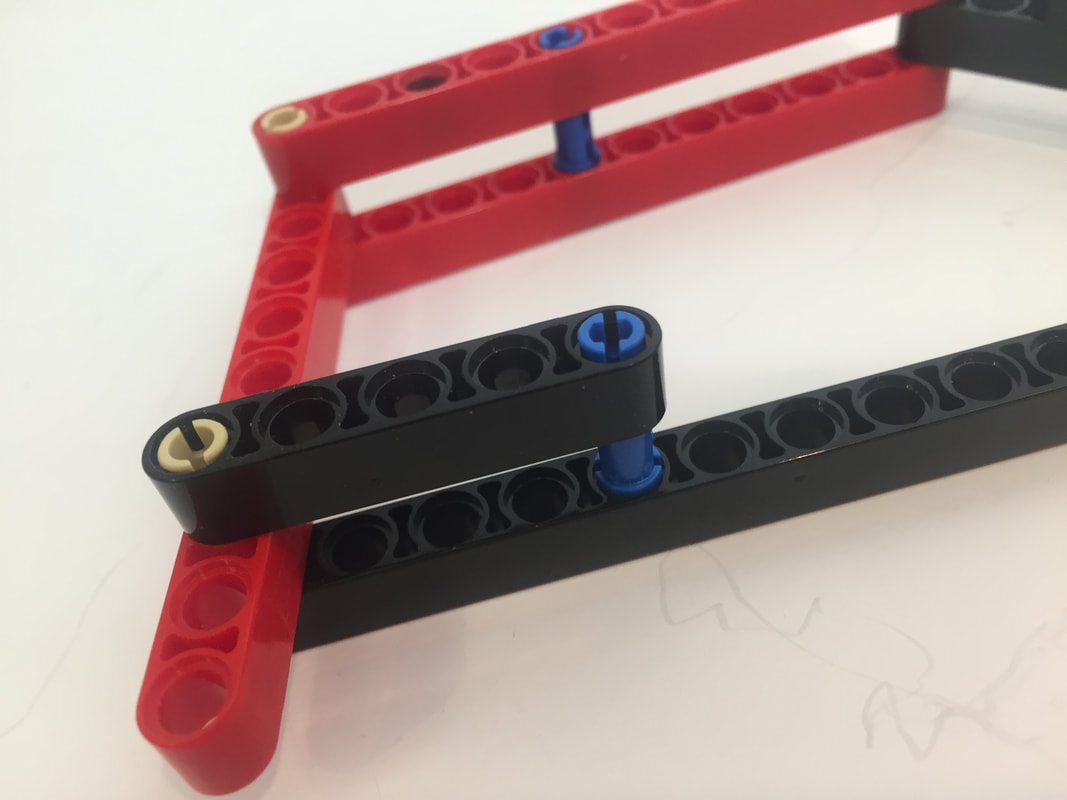
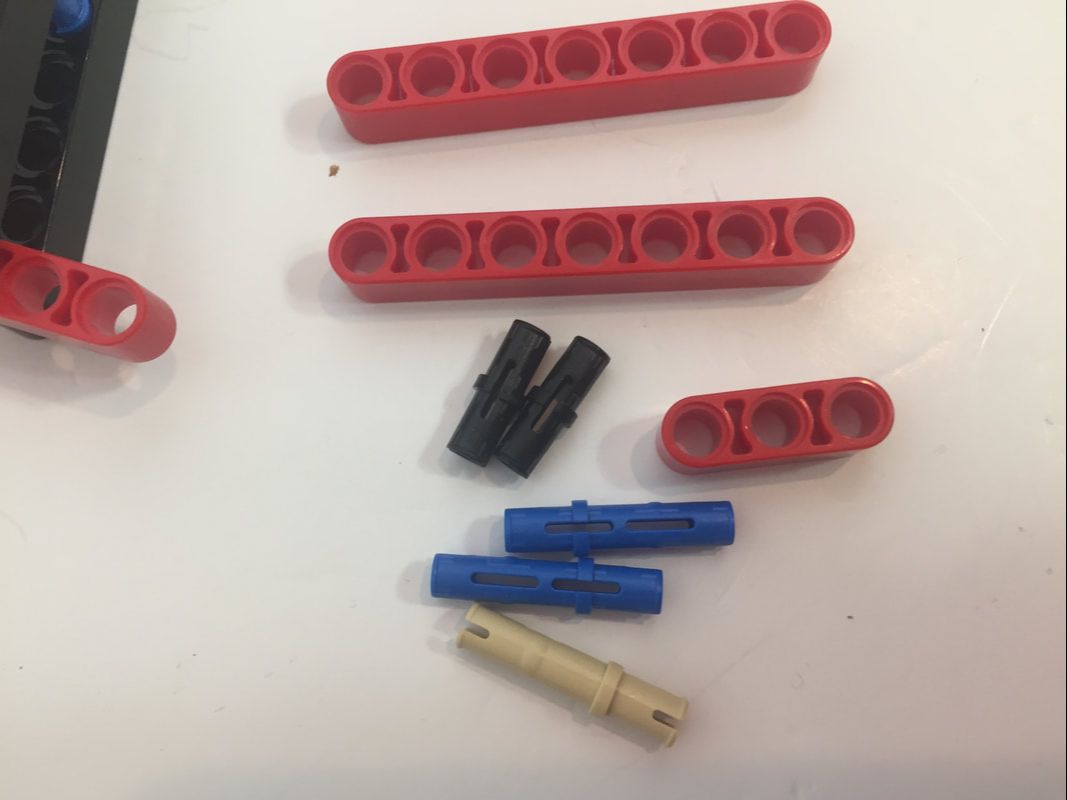
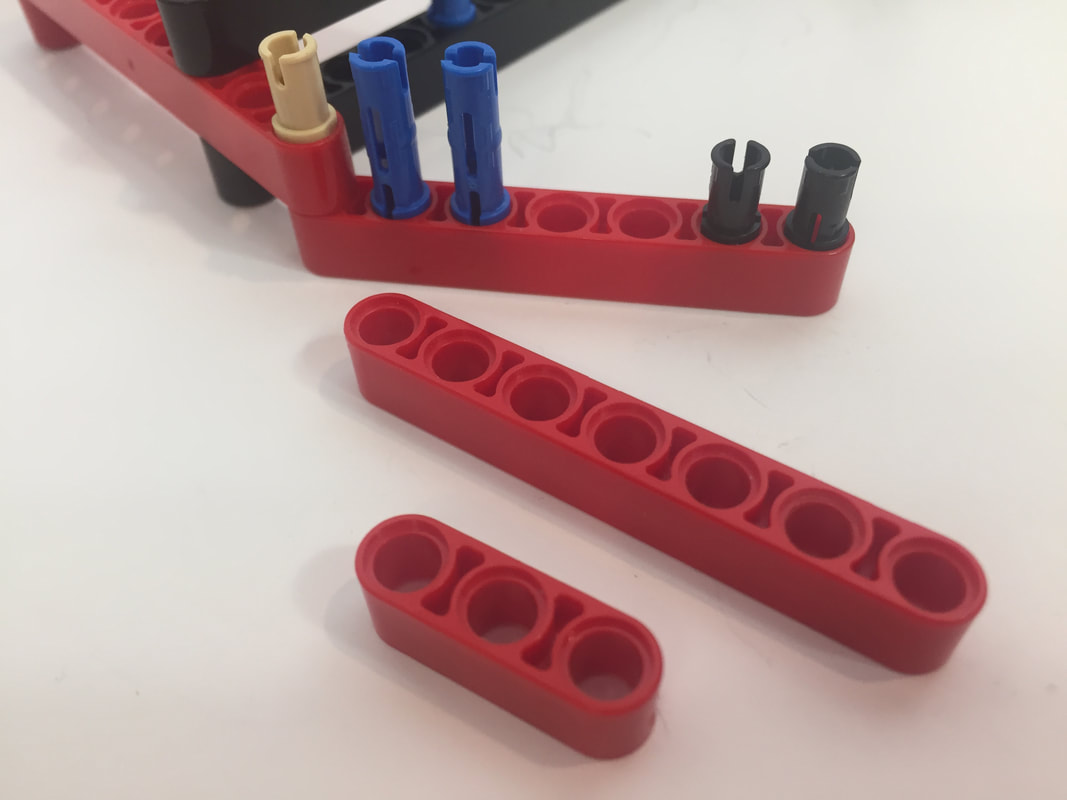
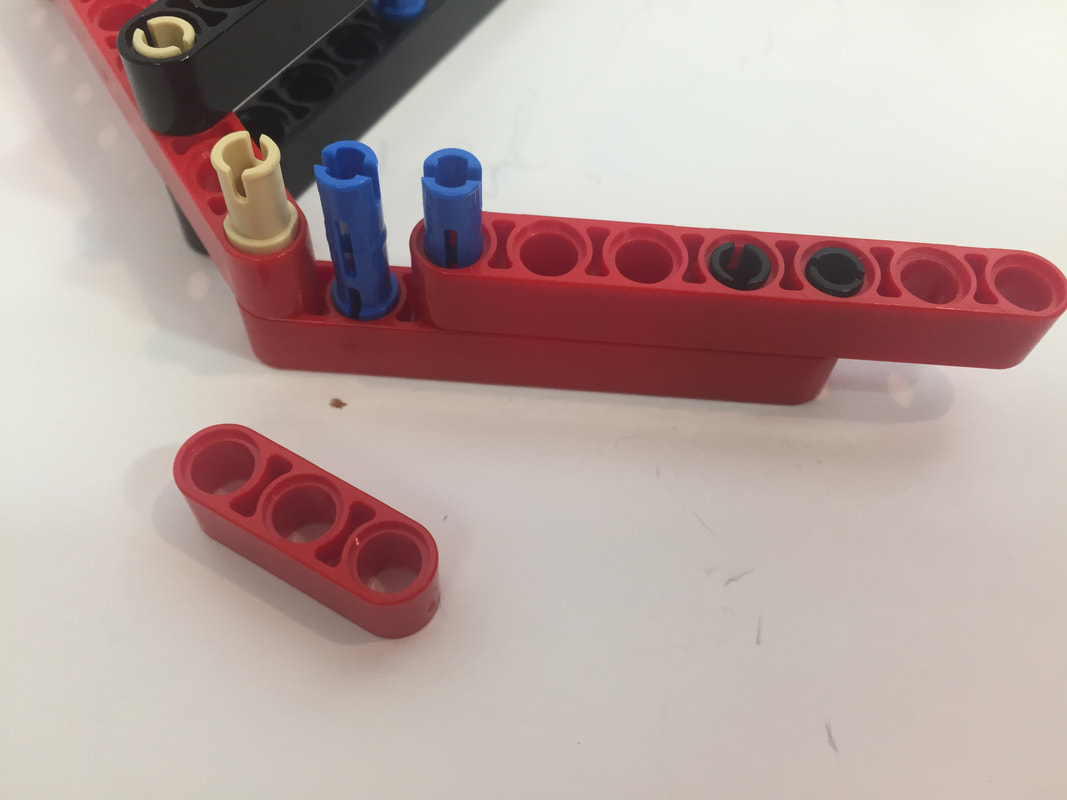
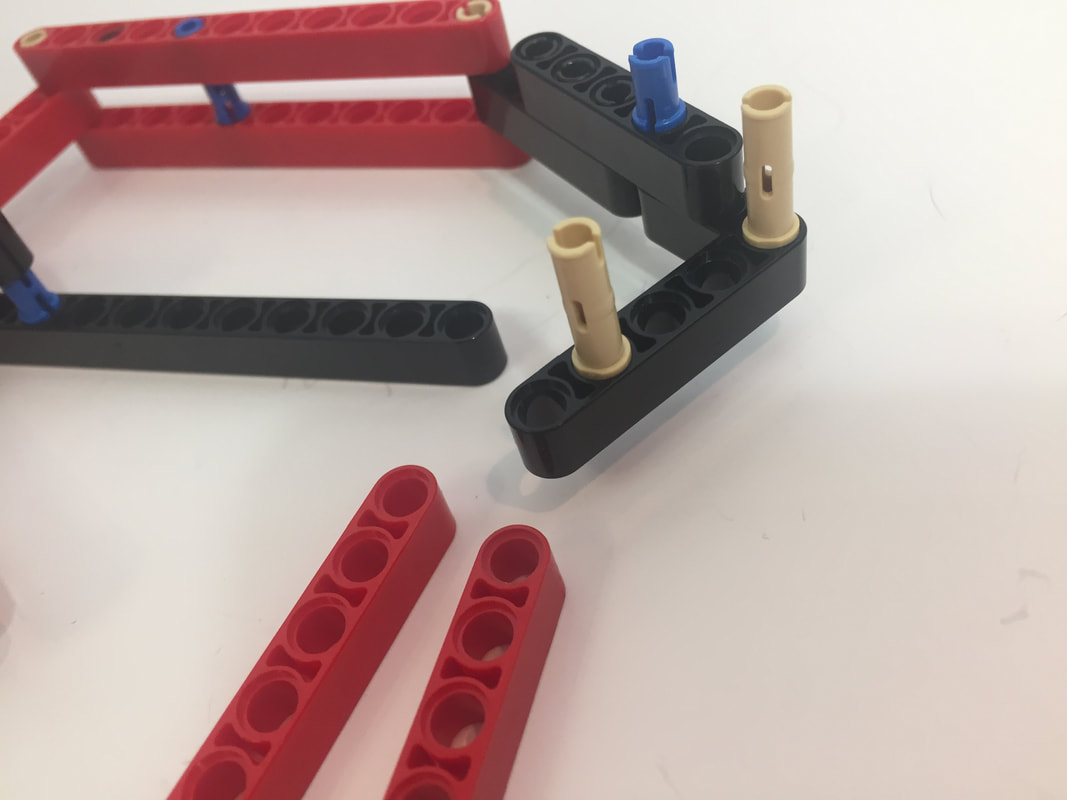
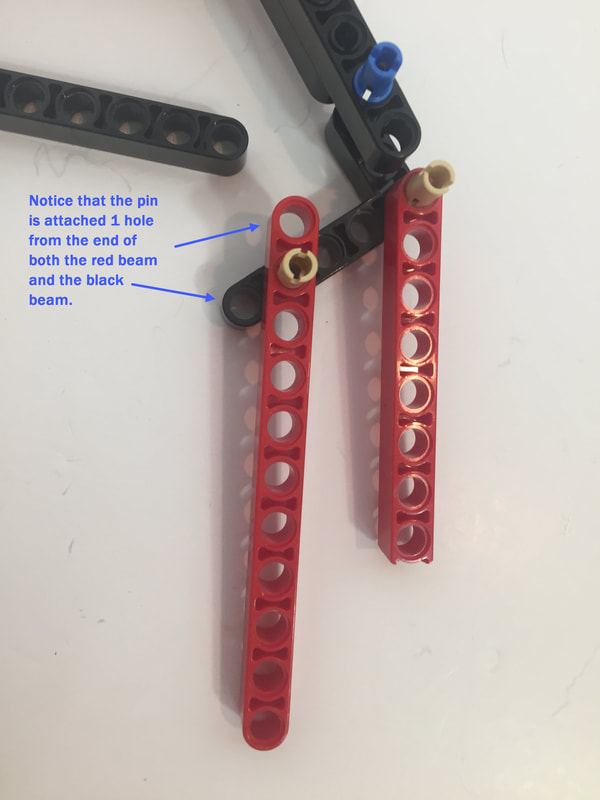
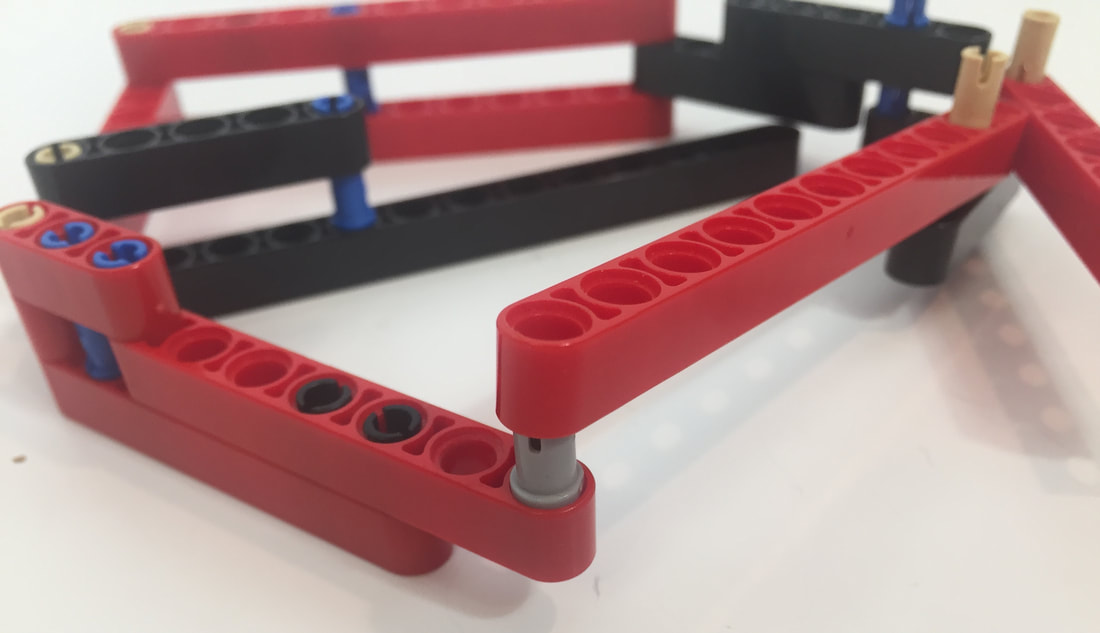
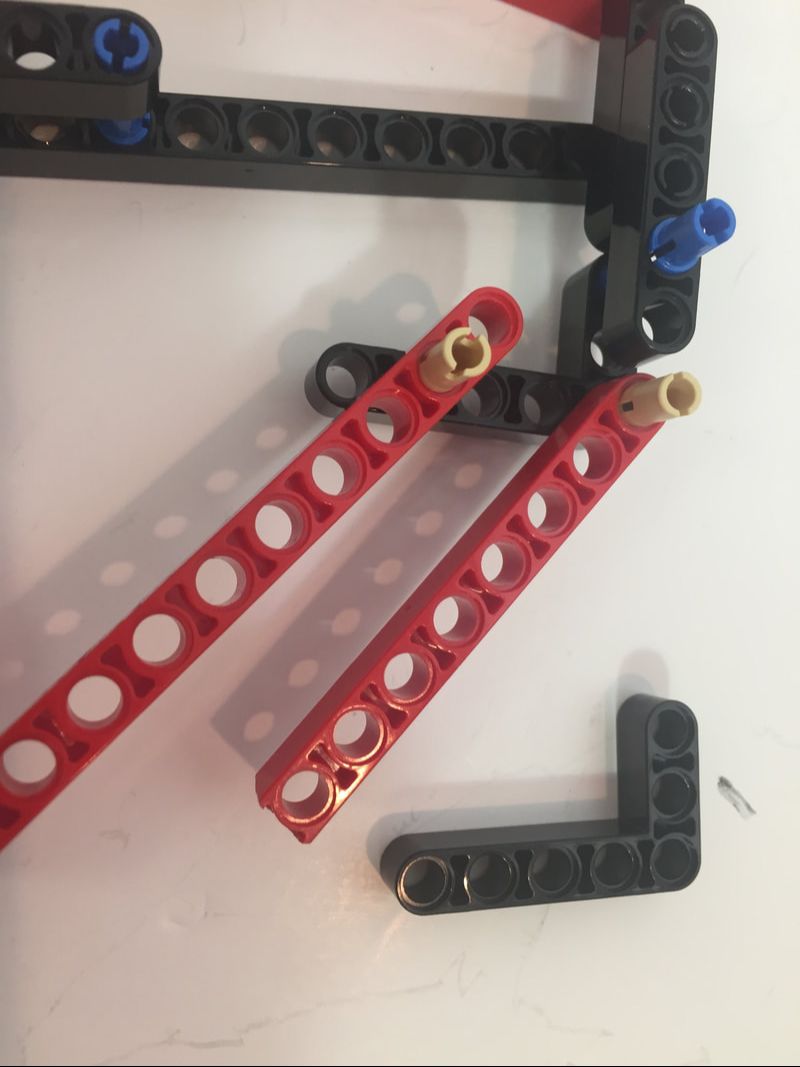
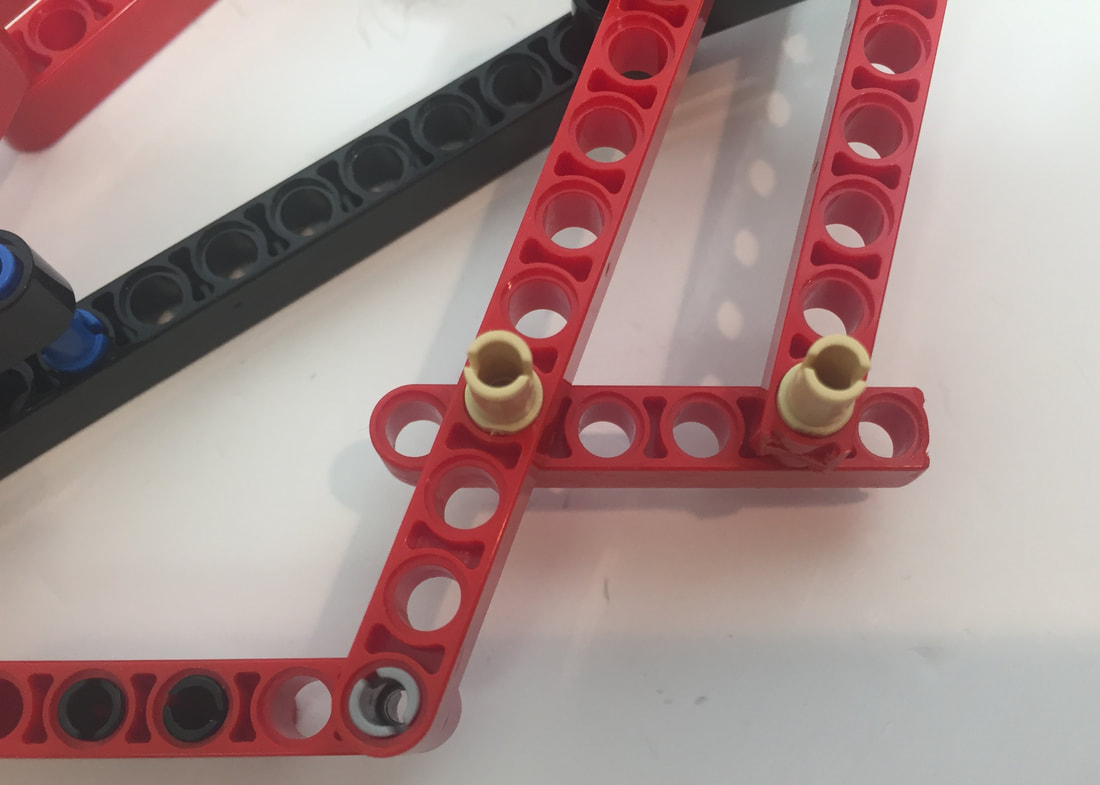
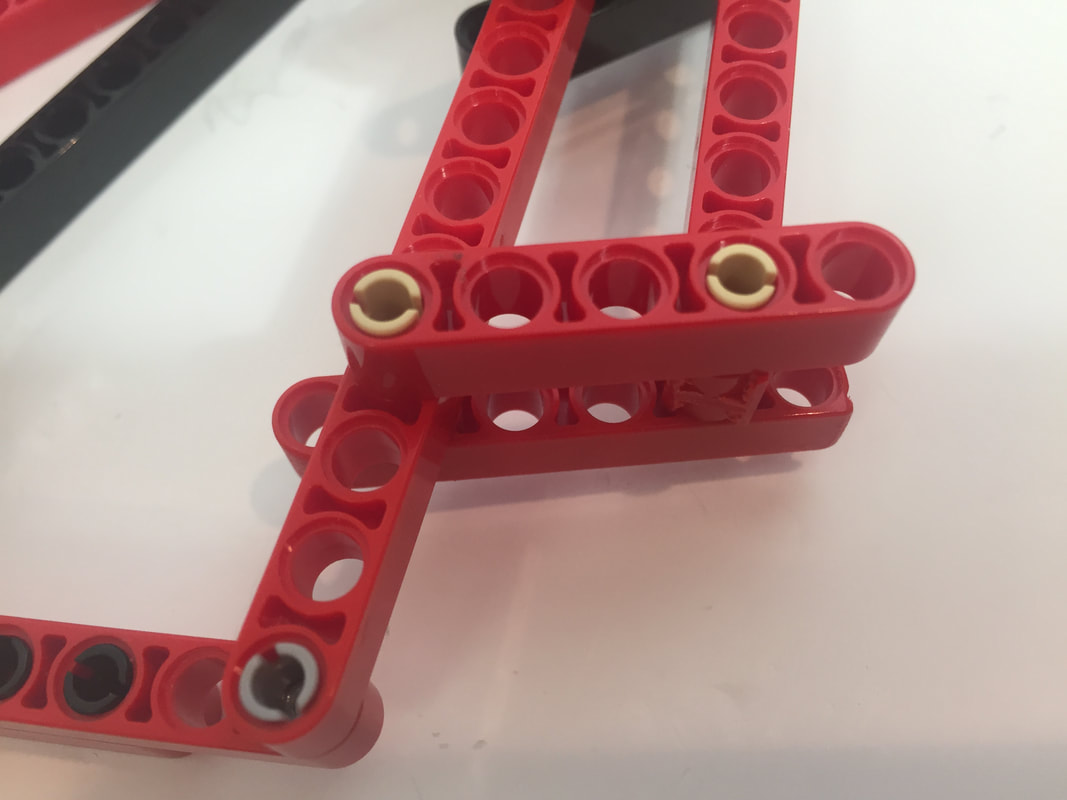
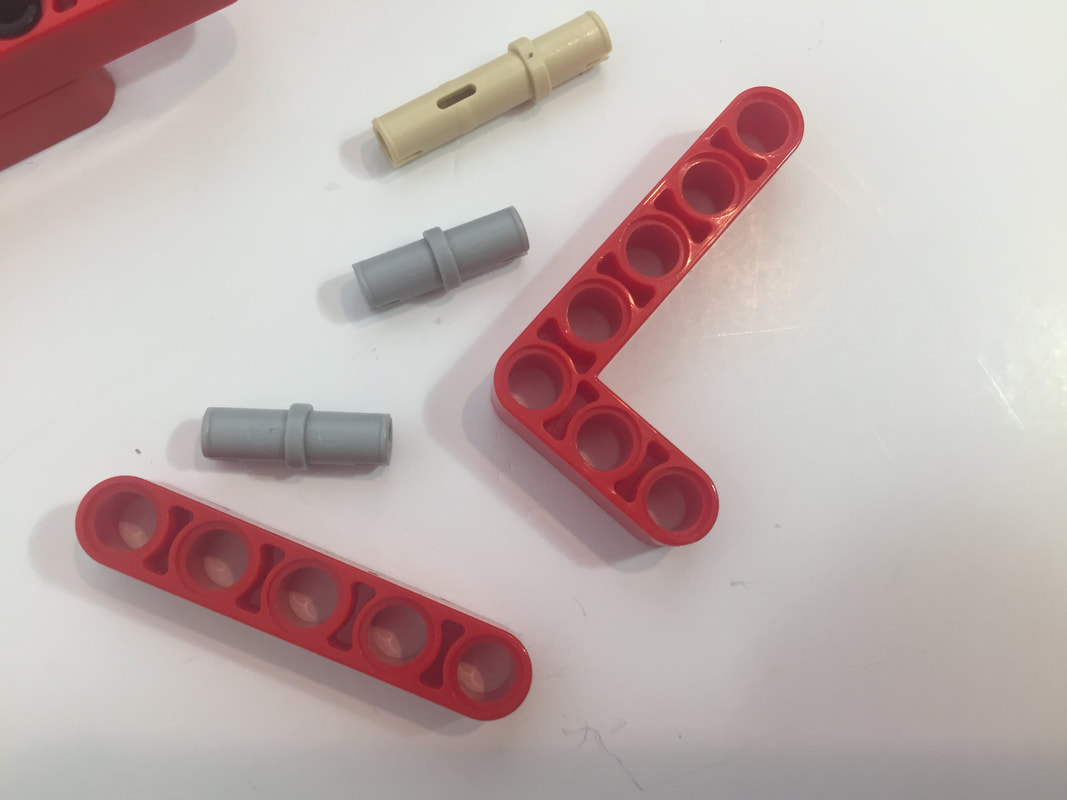
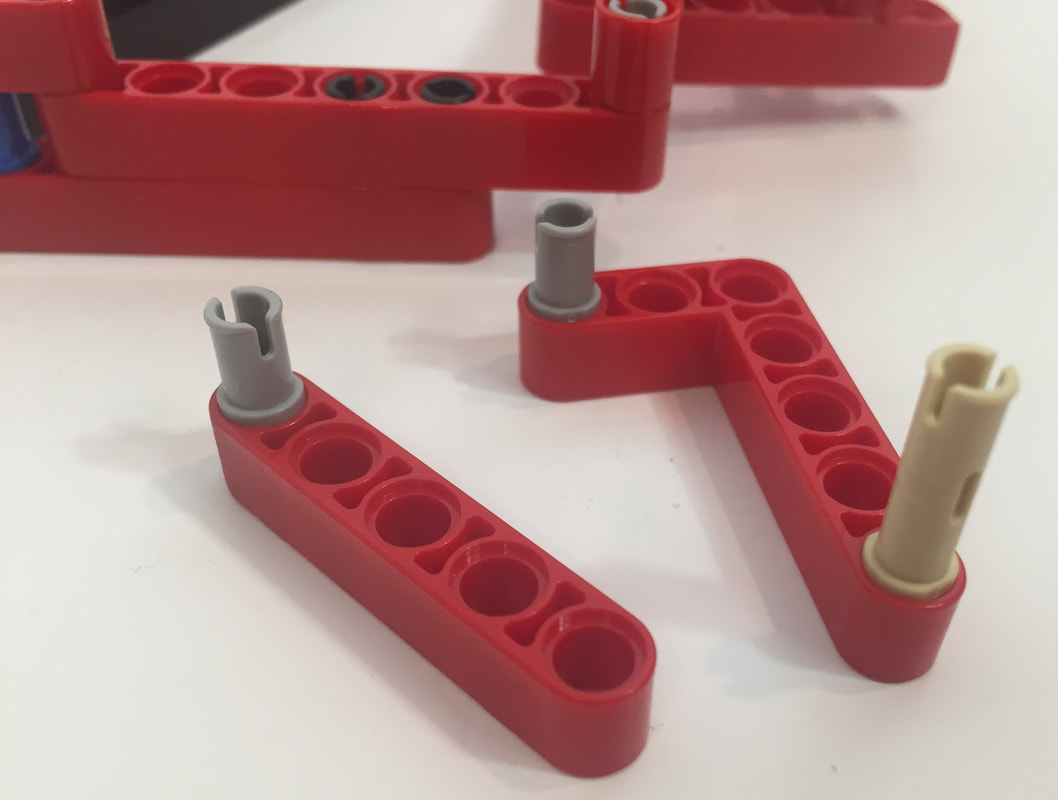
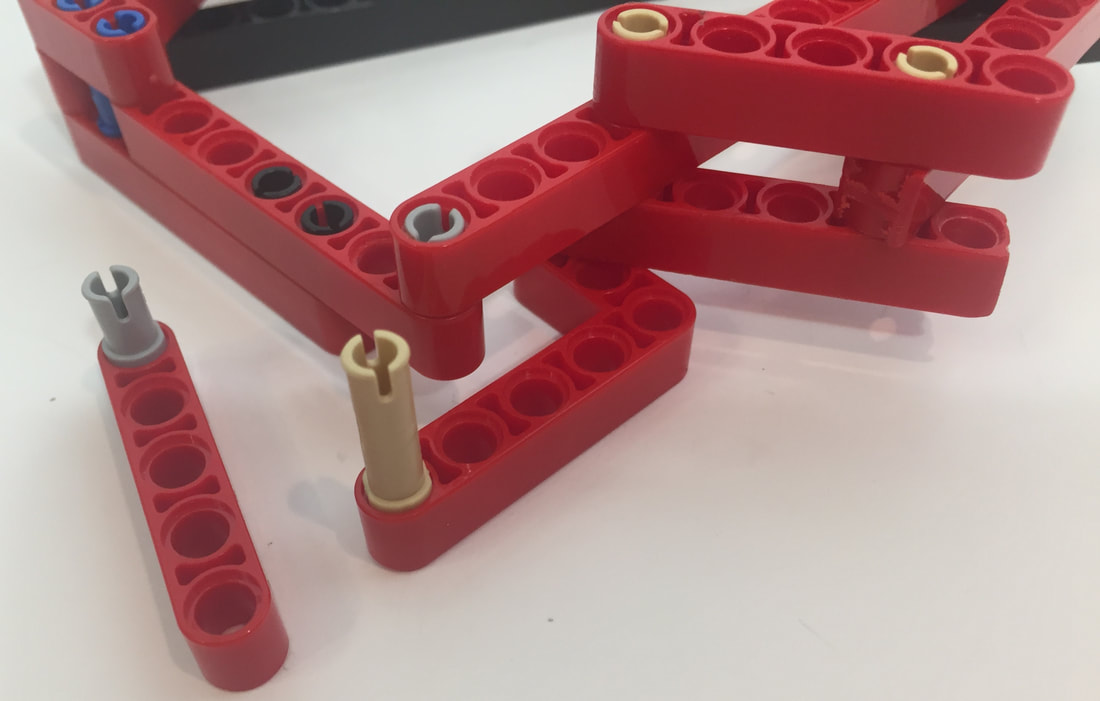
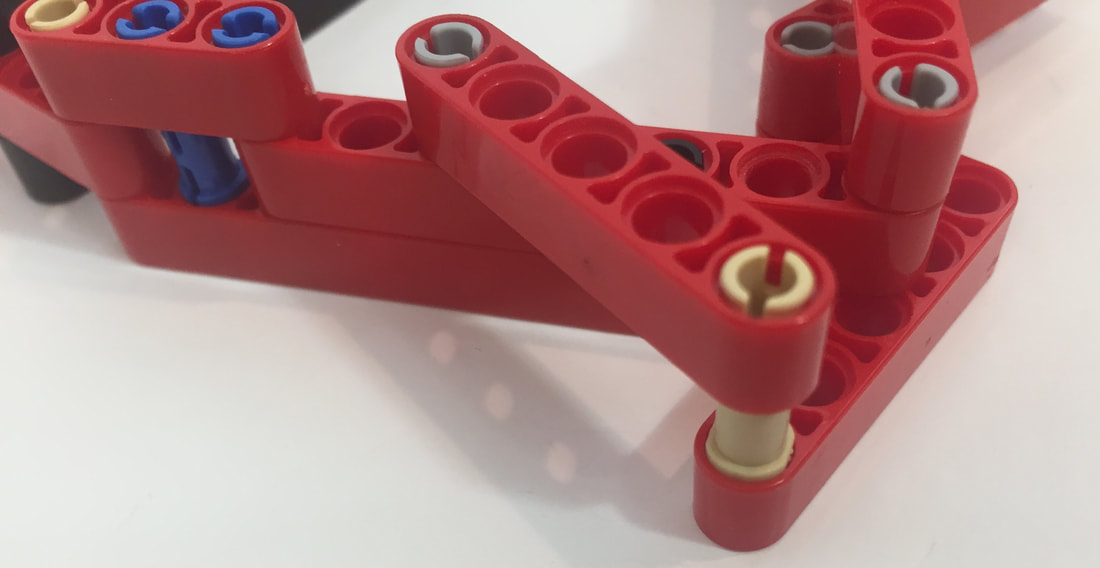
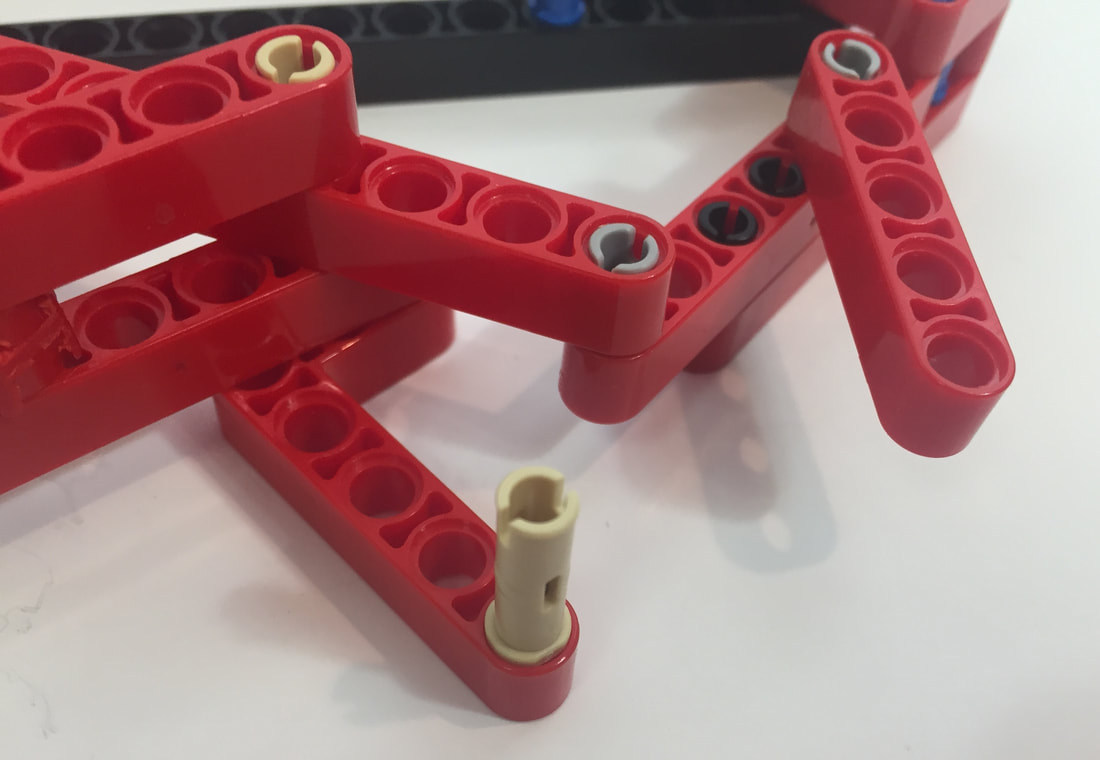
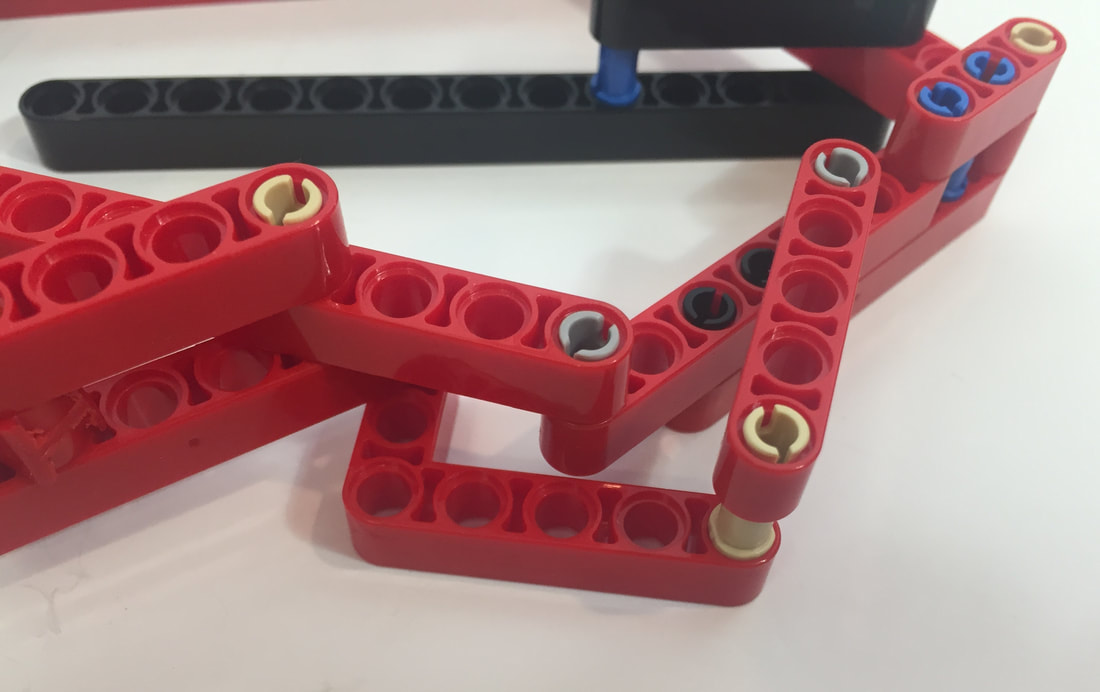
Leg Construction
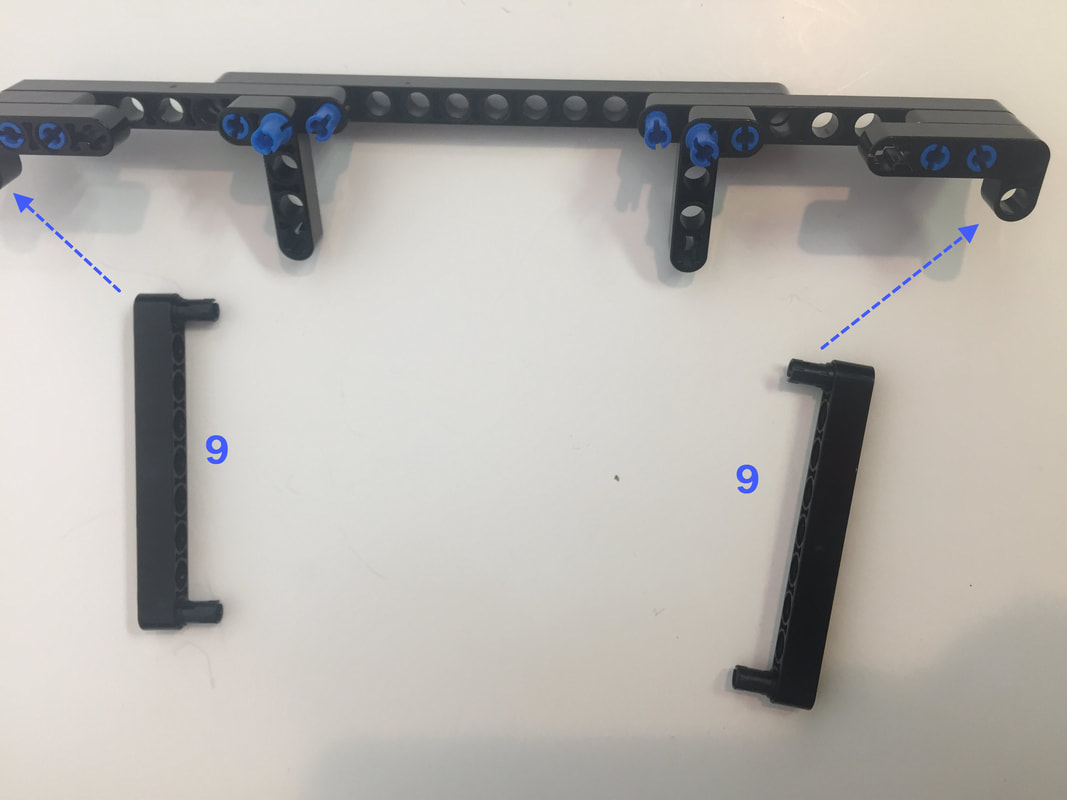
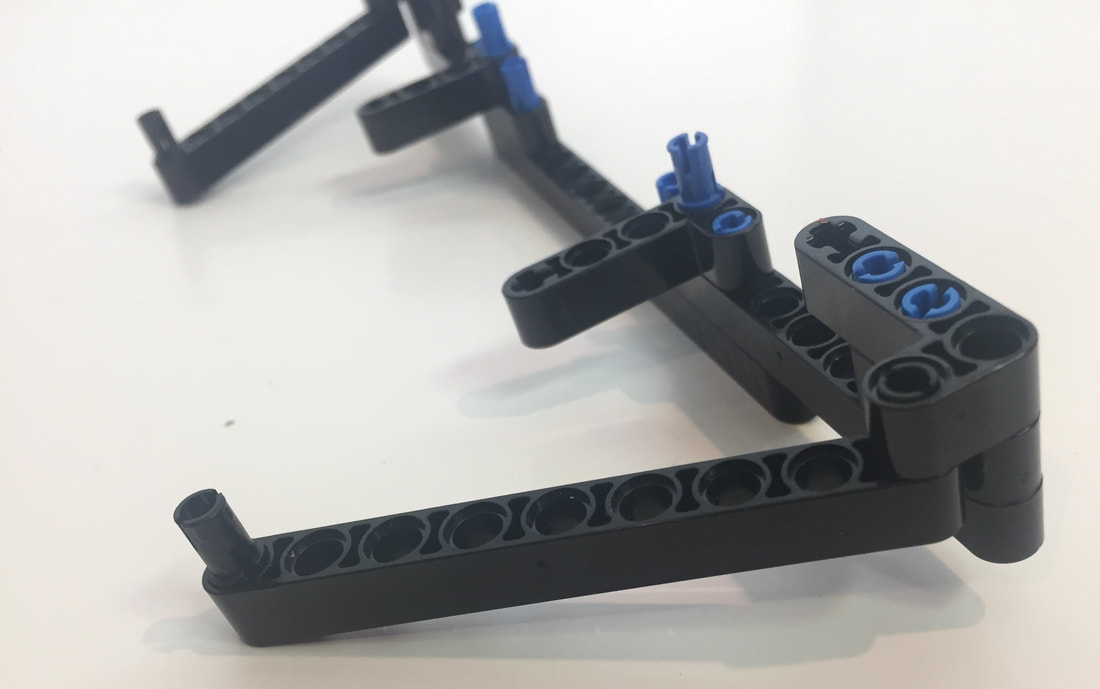
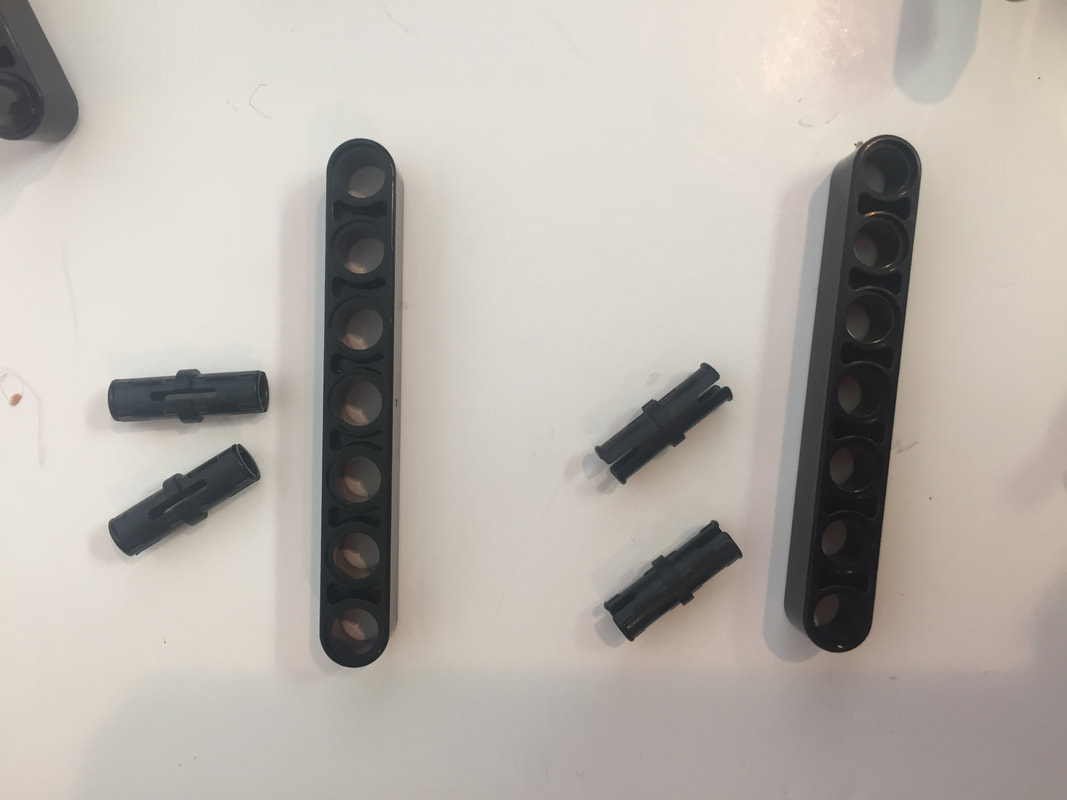
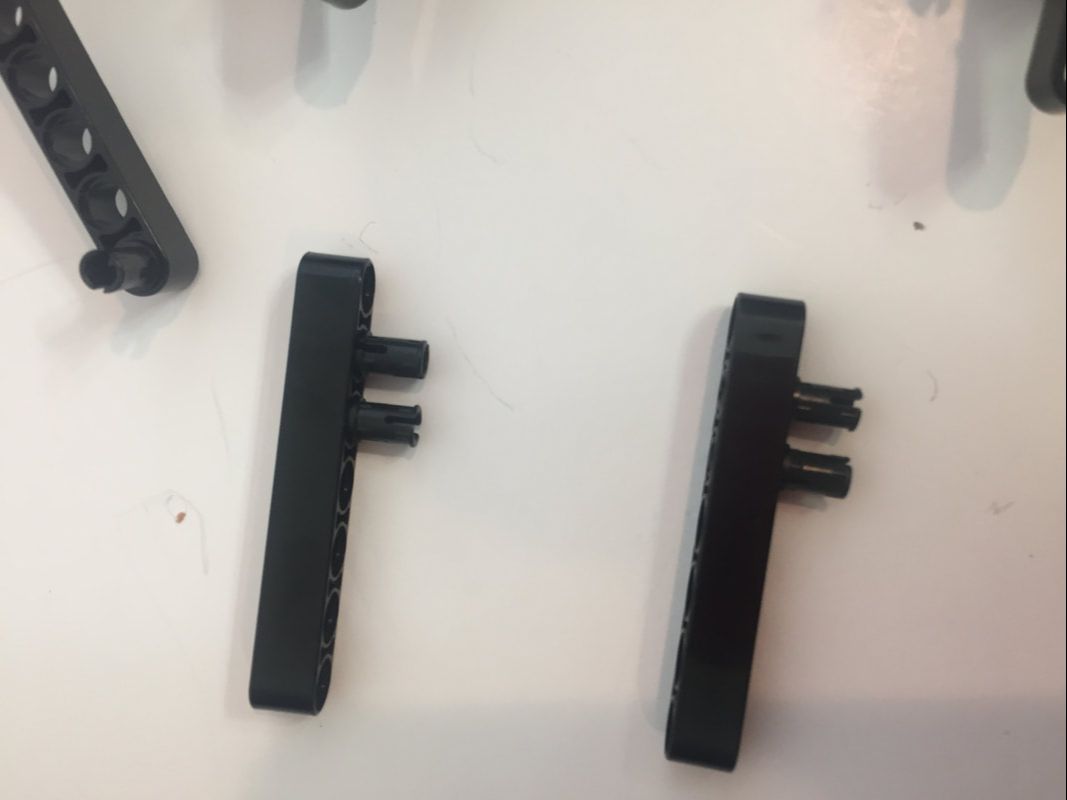
|
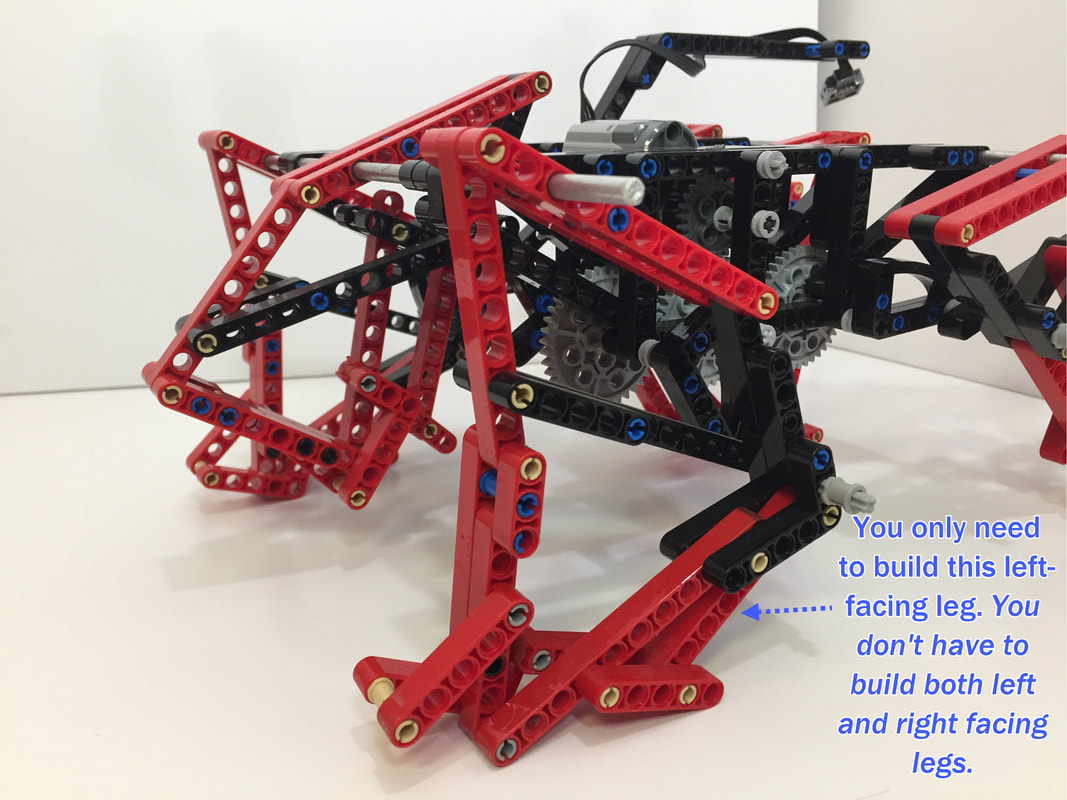
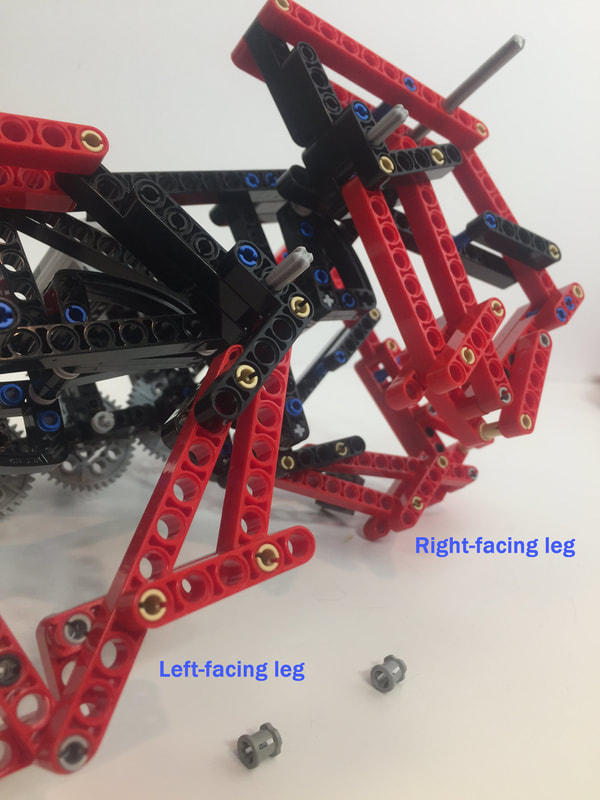
Update: The following instructions have the legs built in both a left-facing and a right-facing orientation, but you can build all 6 legs in either orientation since it won't affect TrotBot's functionality - simply flip a left-facing leg around to face right, so that TrotBot's "knees" are always facing away from the center of the robot. Here are some simplified instructions for building TrotBot's leg mechanism, one plane at a time. This leg will work for all 6 legs of Hexapod TrotBot. Alternatively, instructions for building both left and right-facing legs are below. |
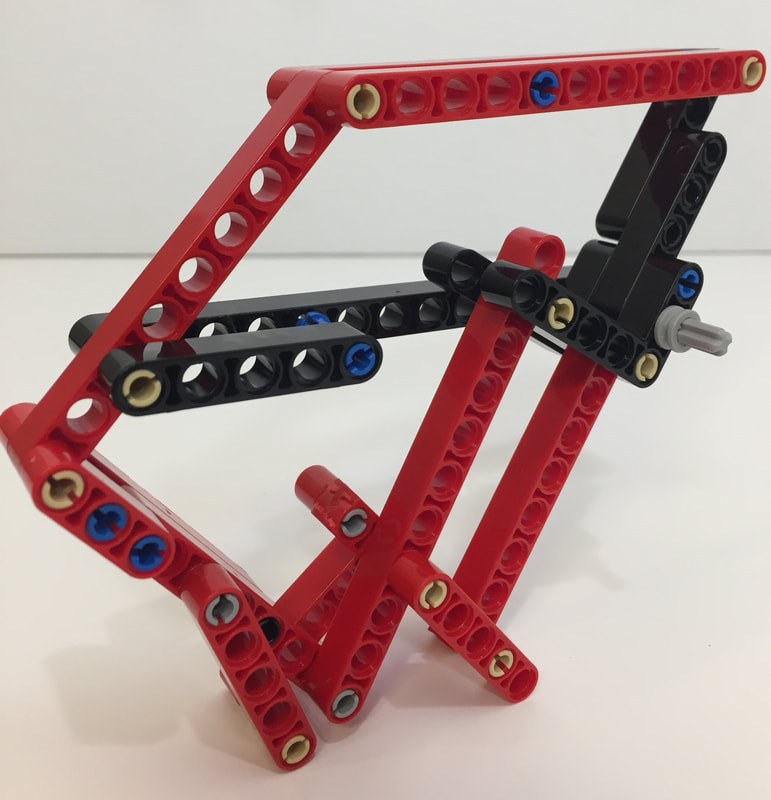
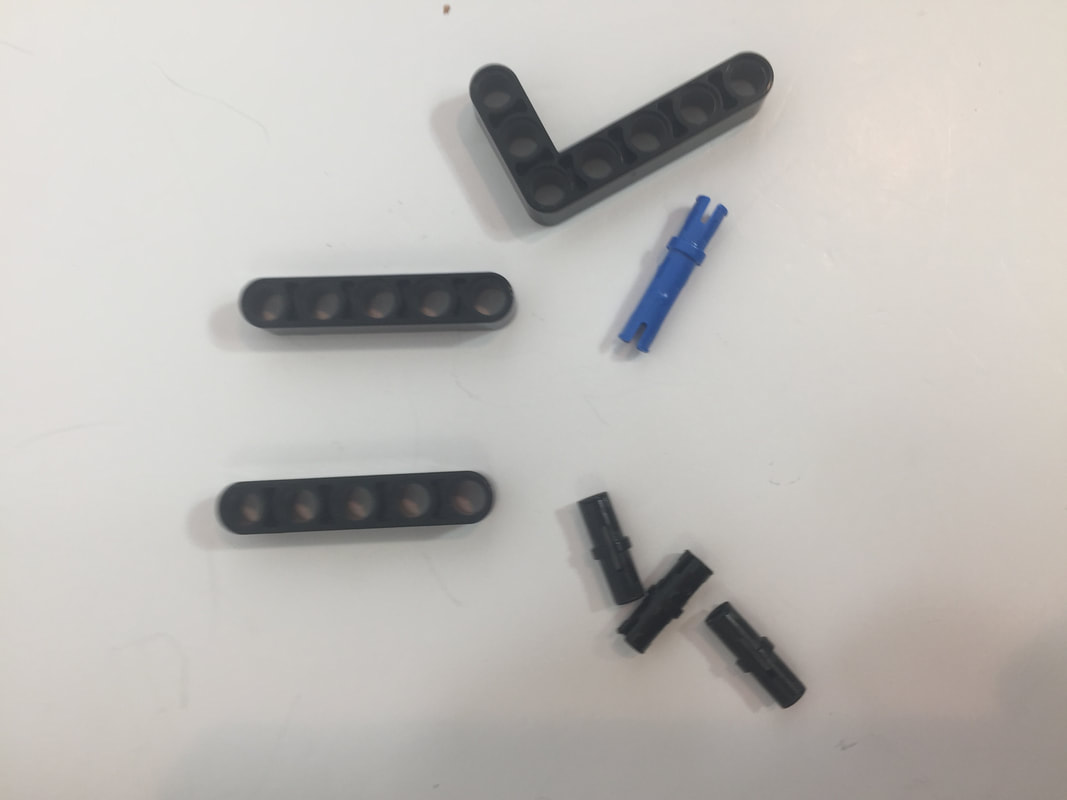
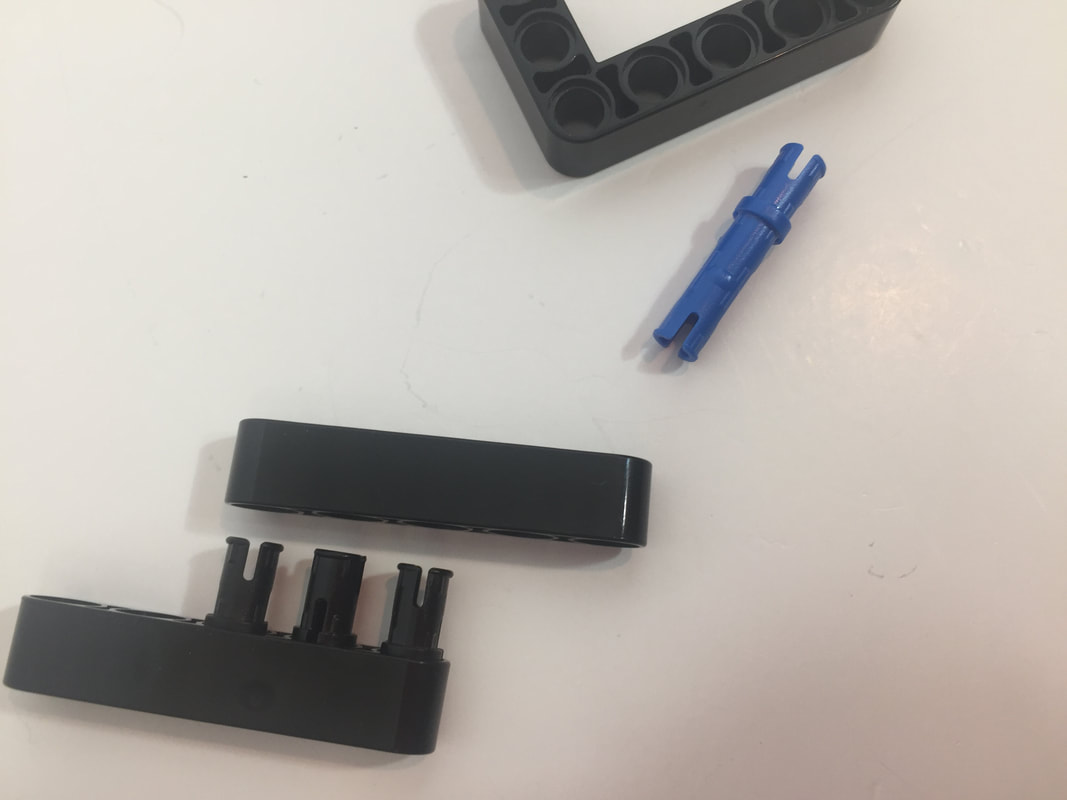
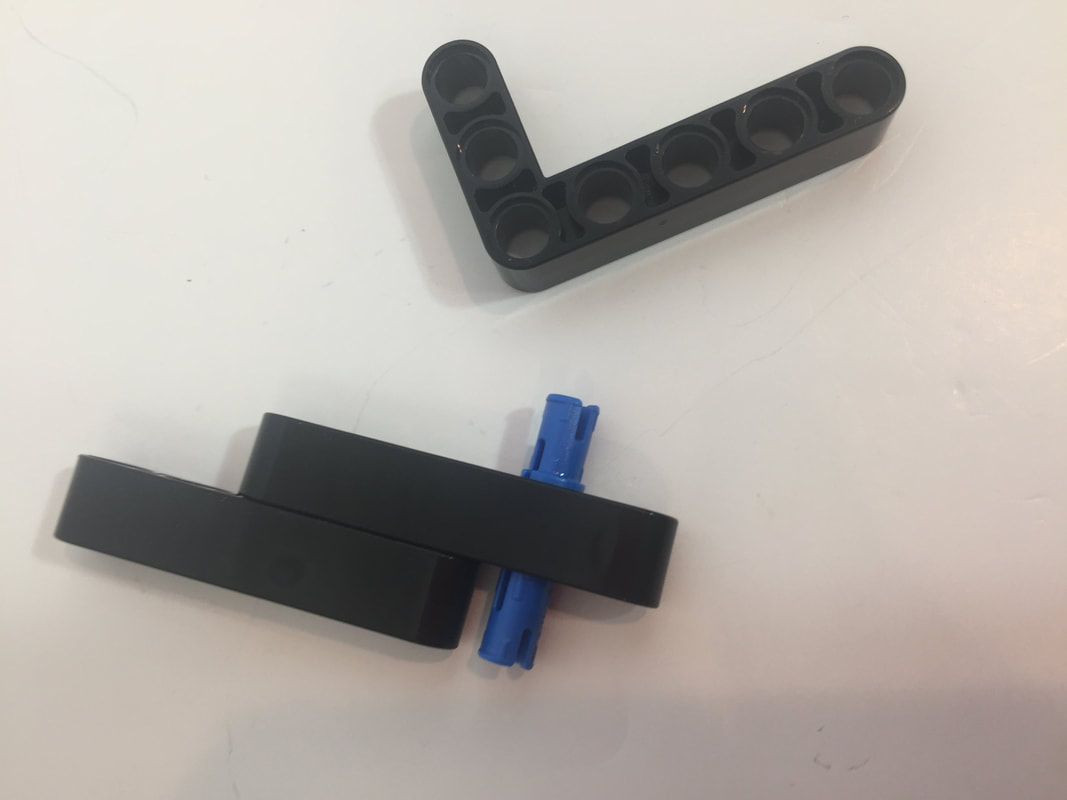
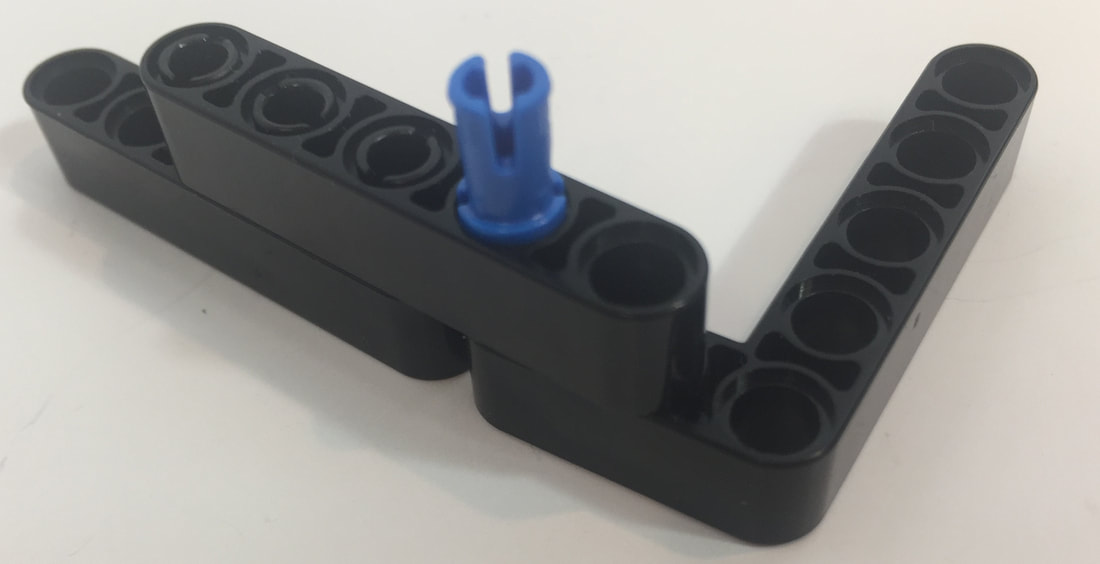
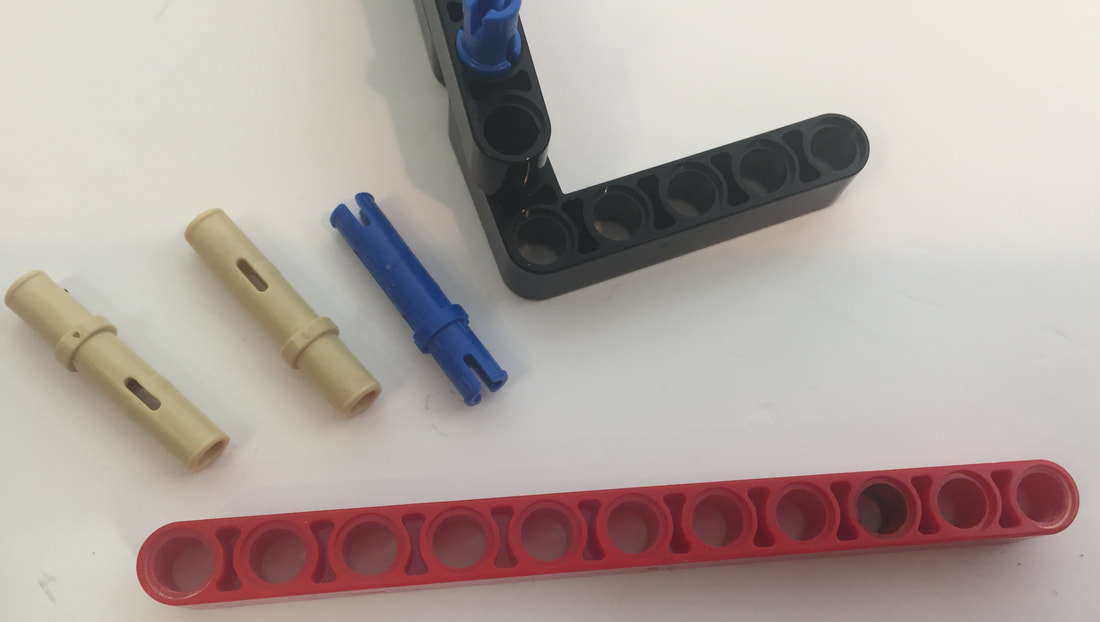
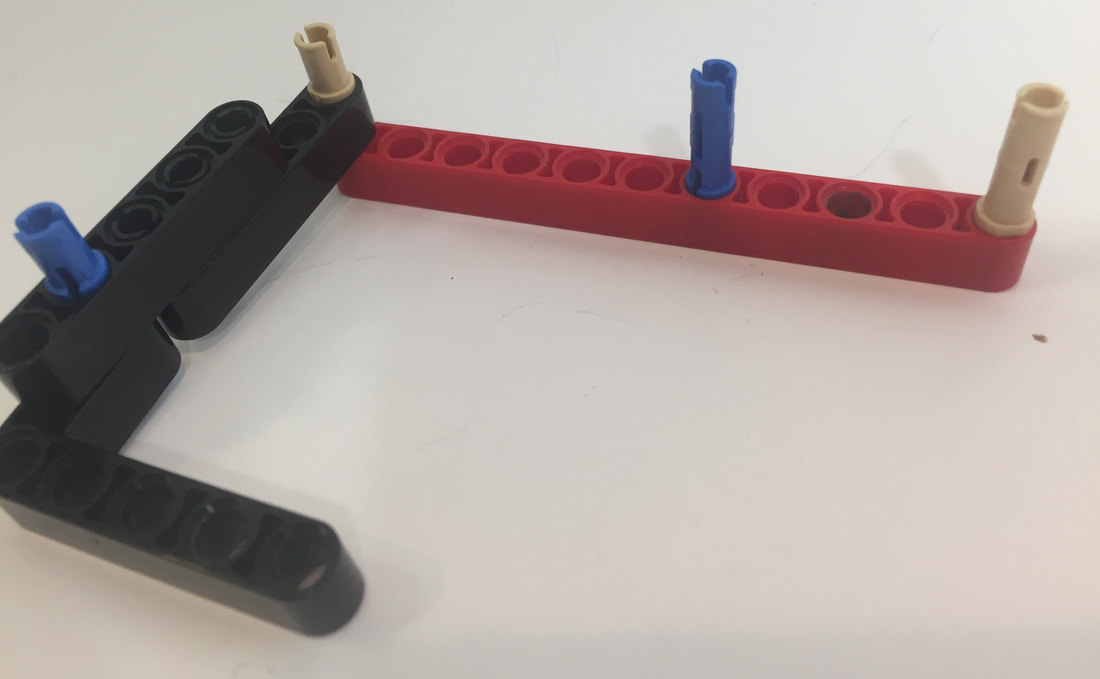
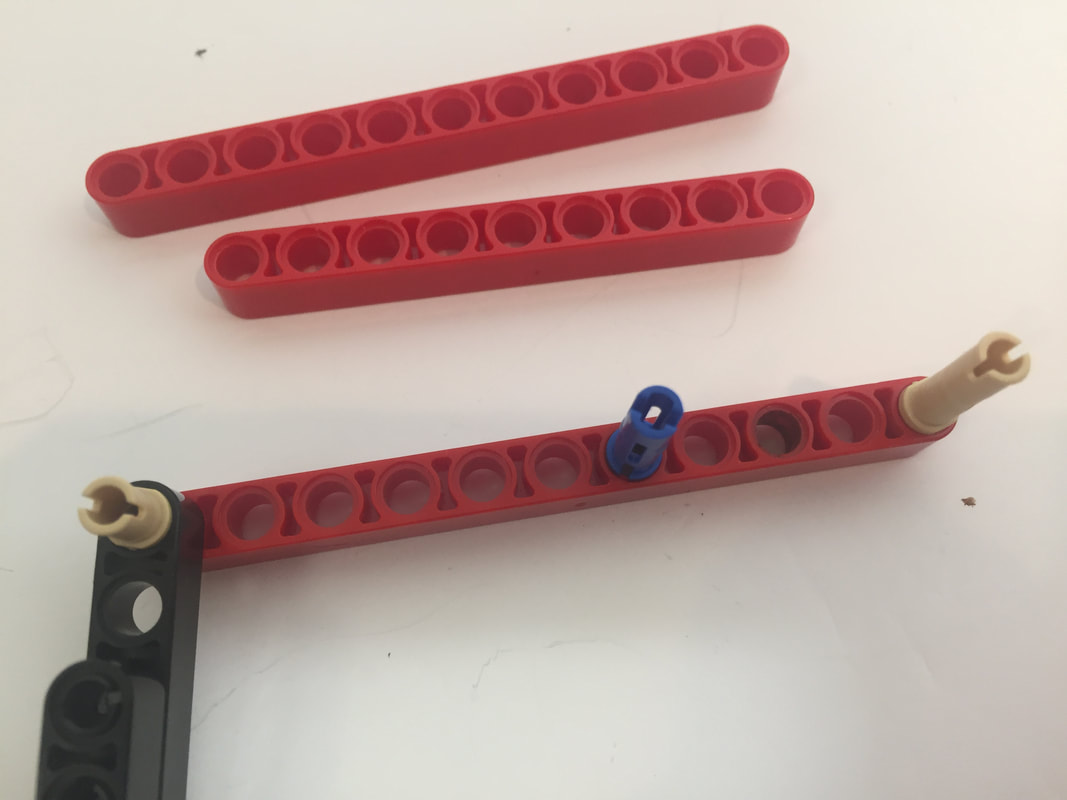
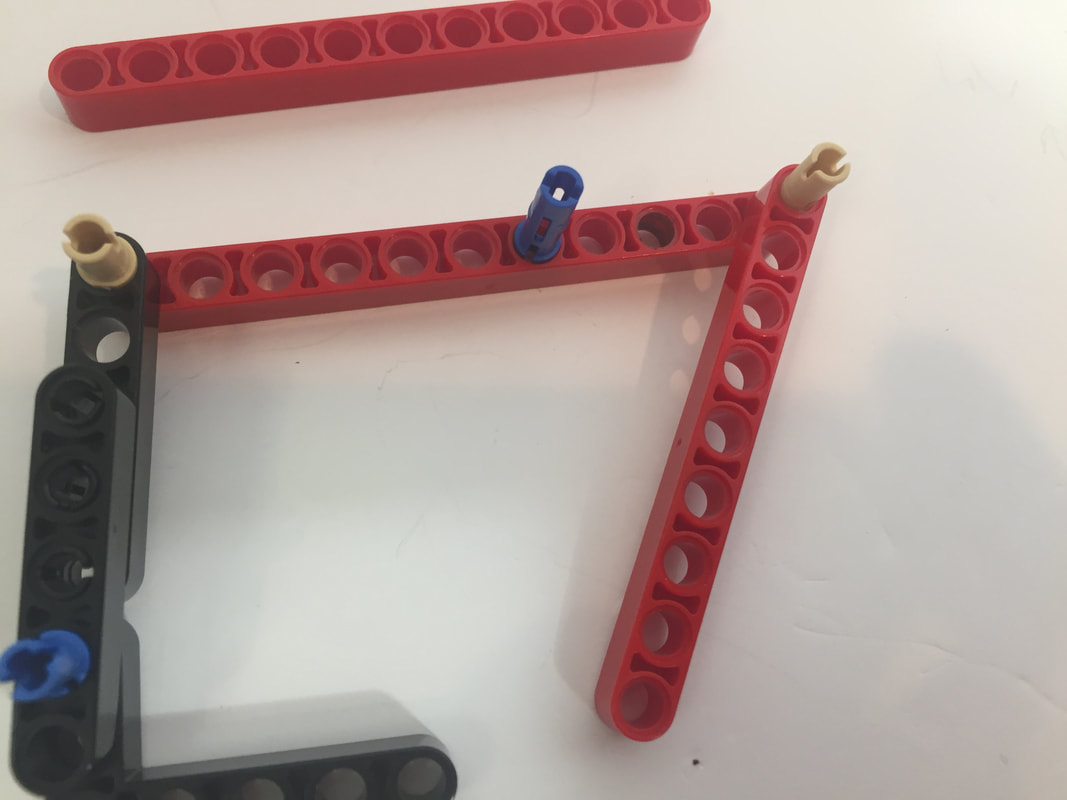
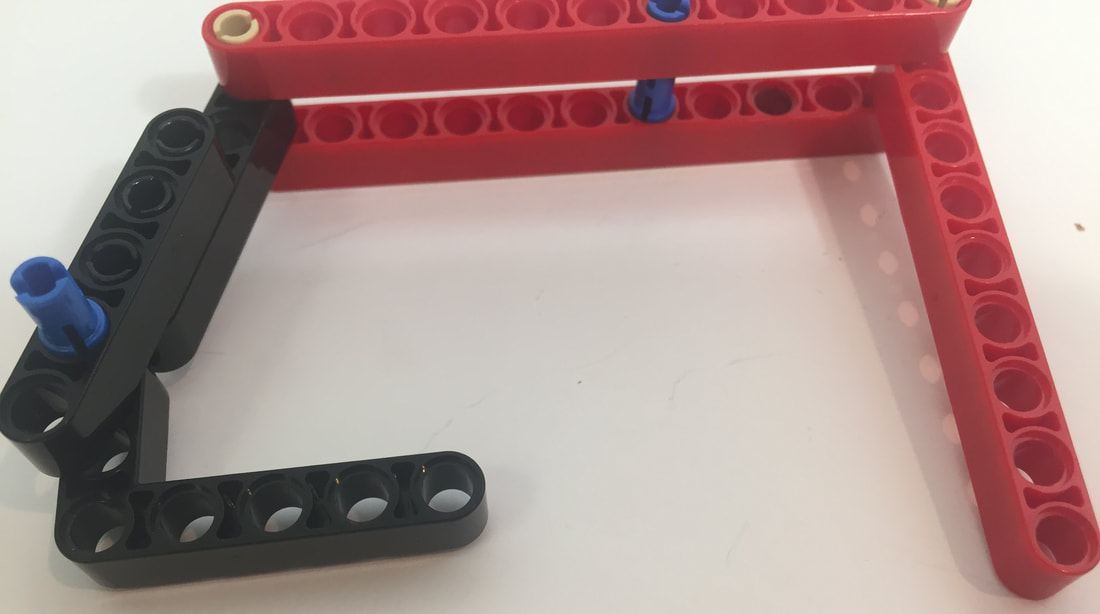
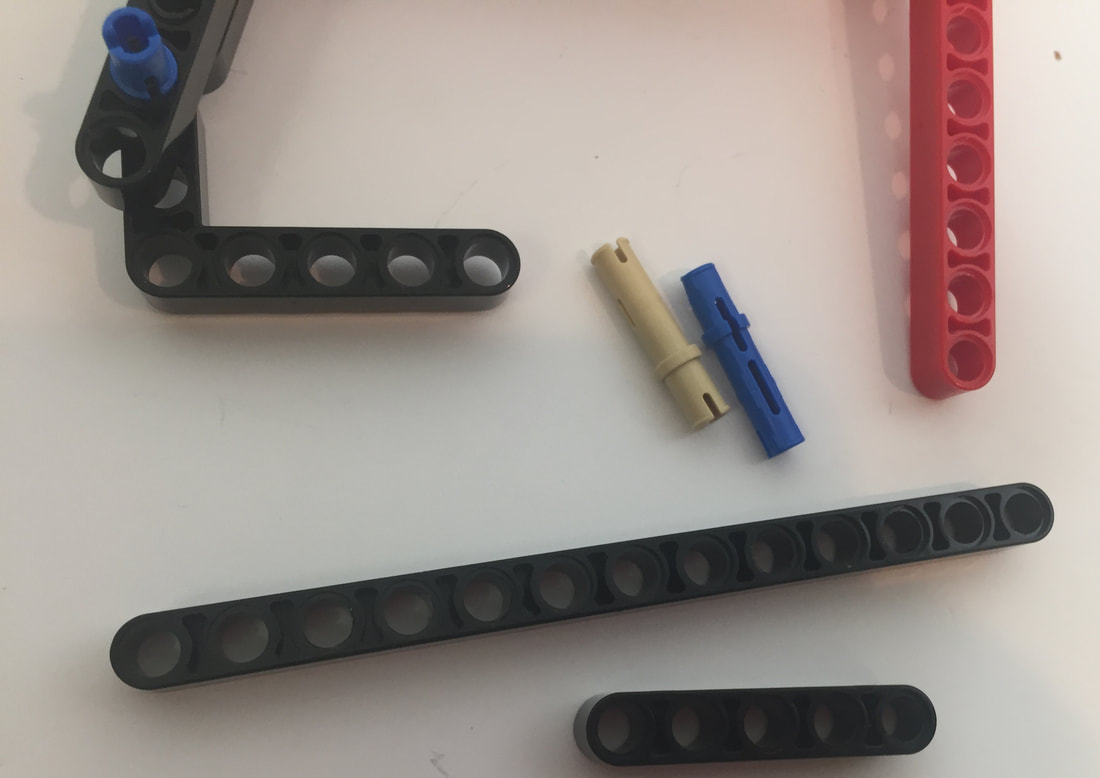
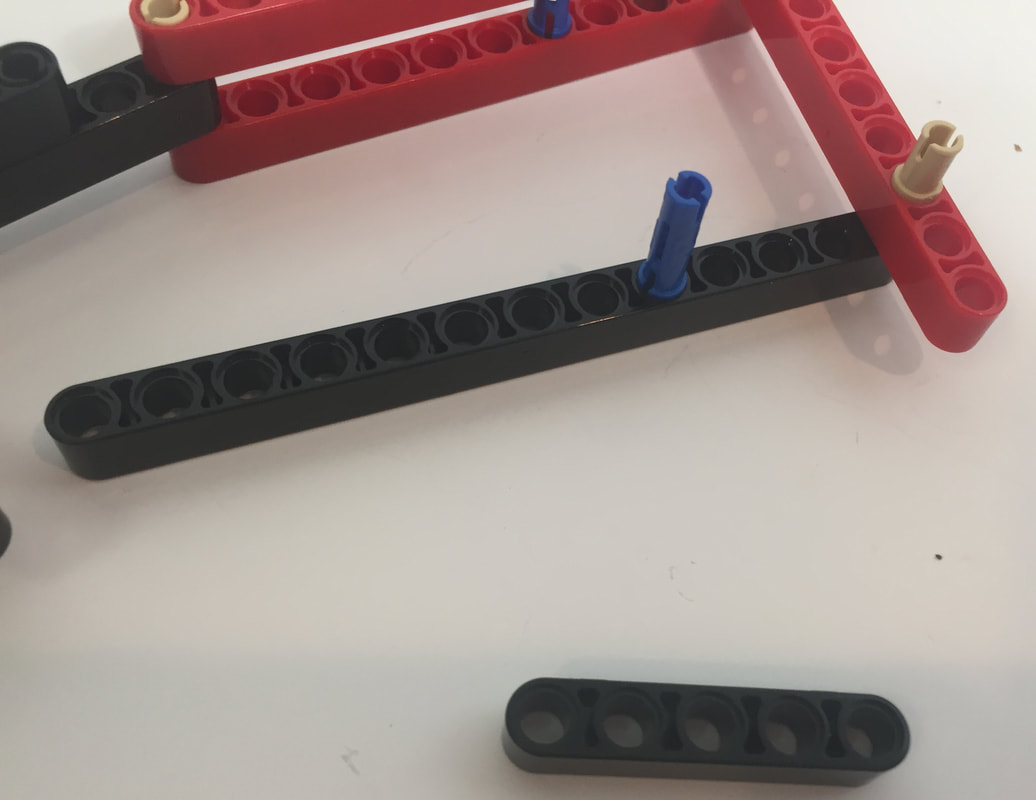
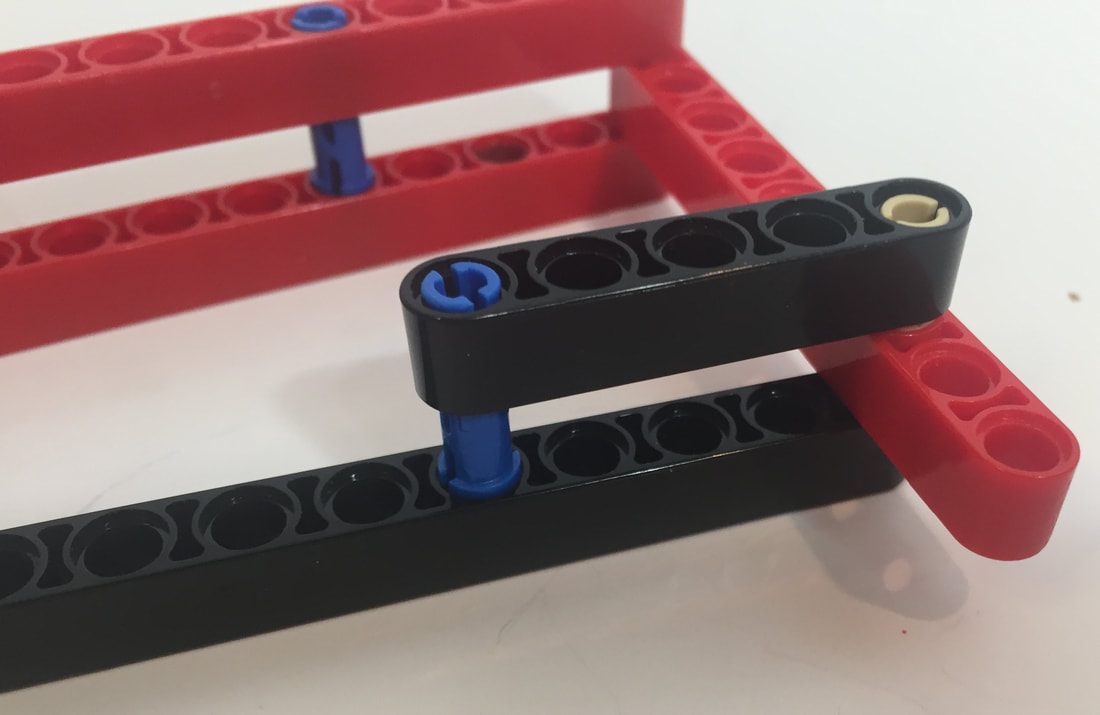
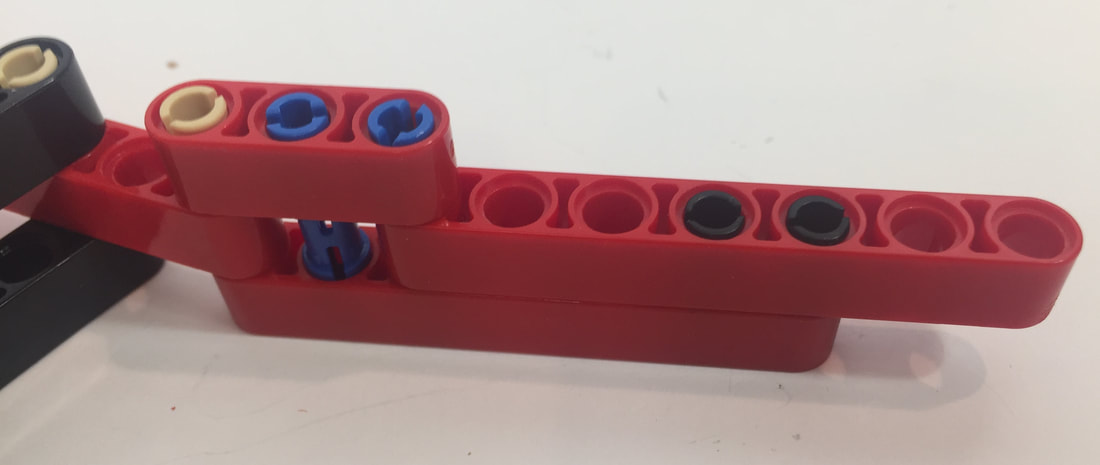
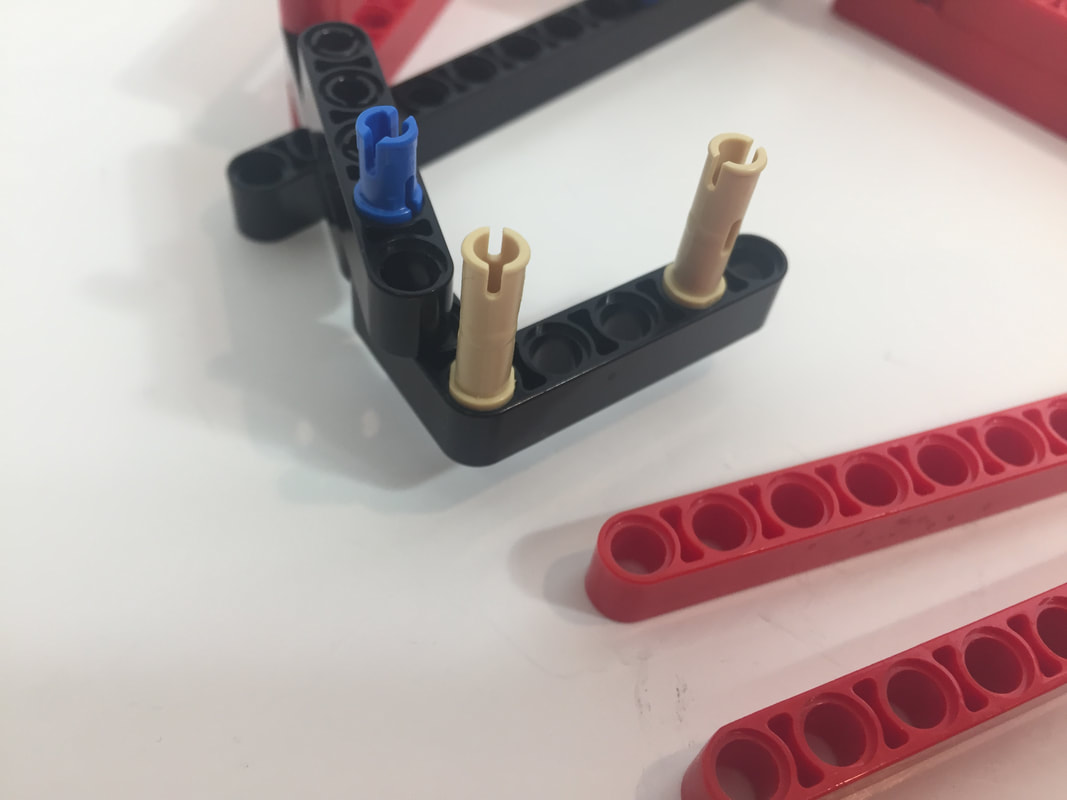
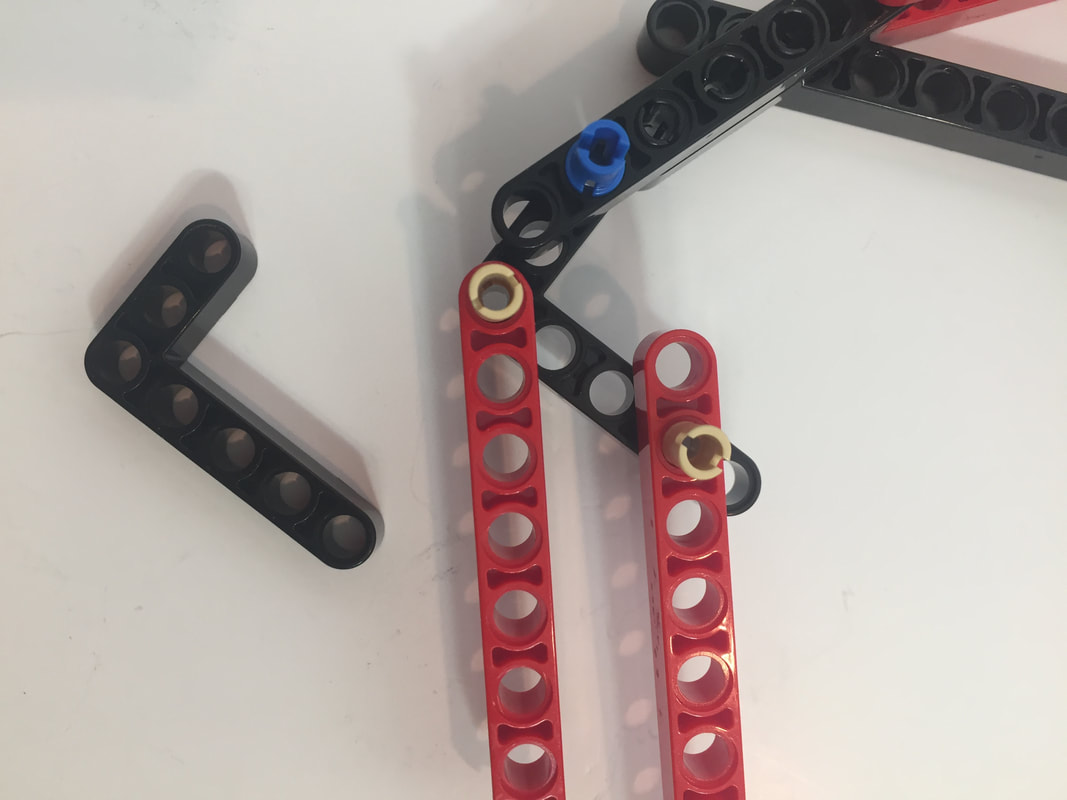
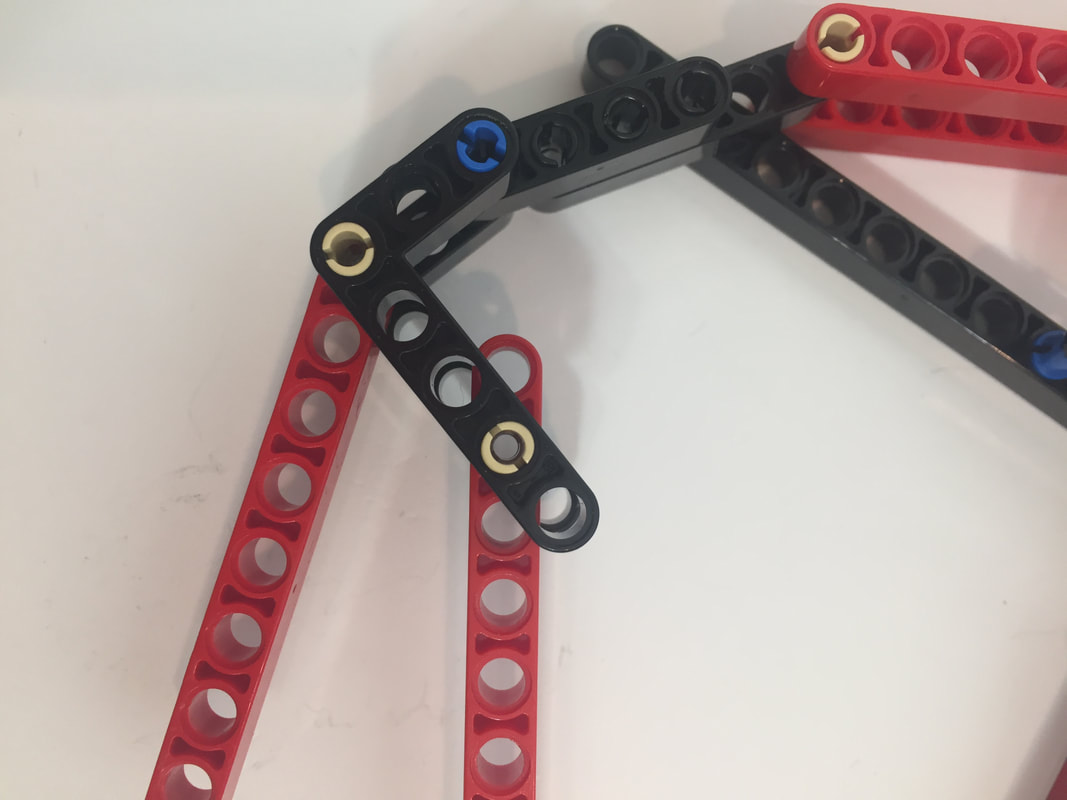
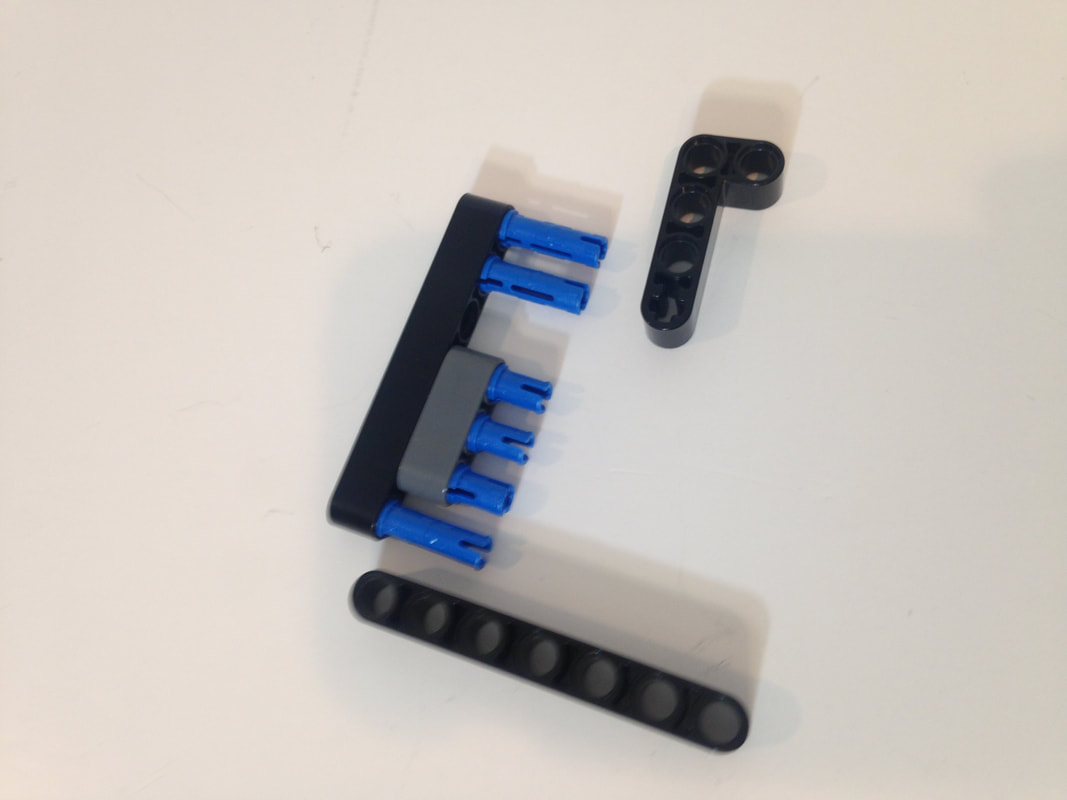
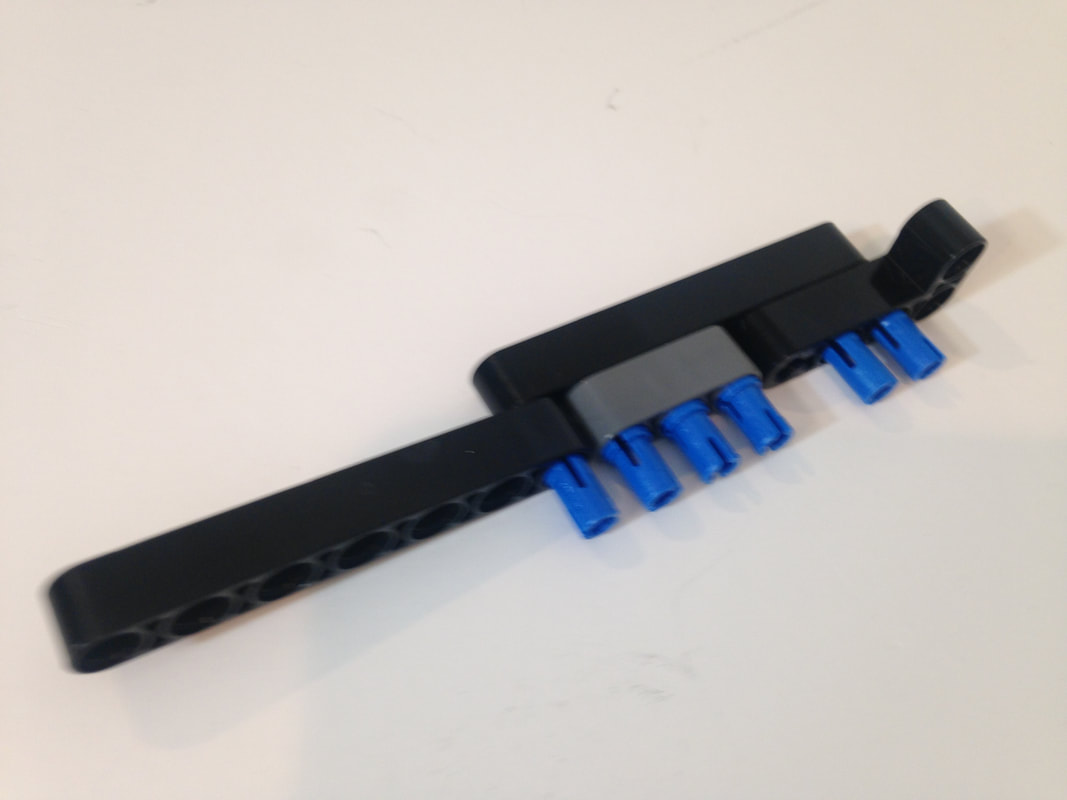
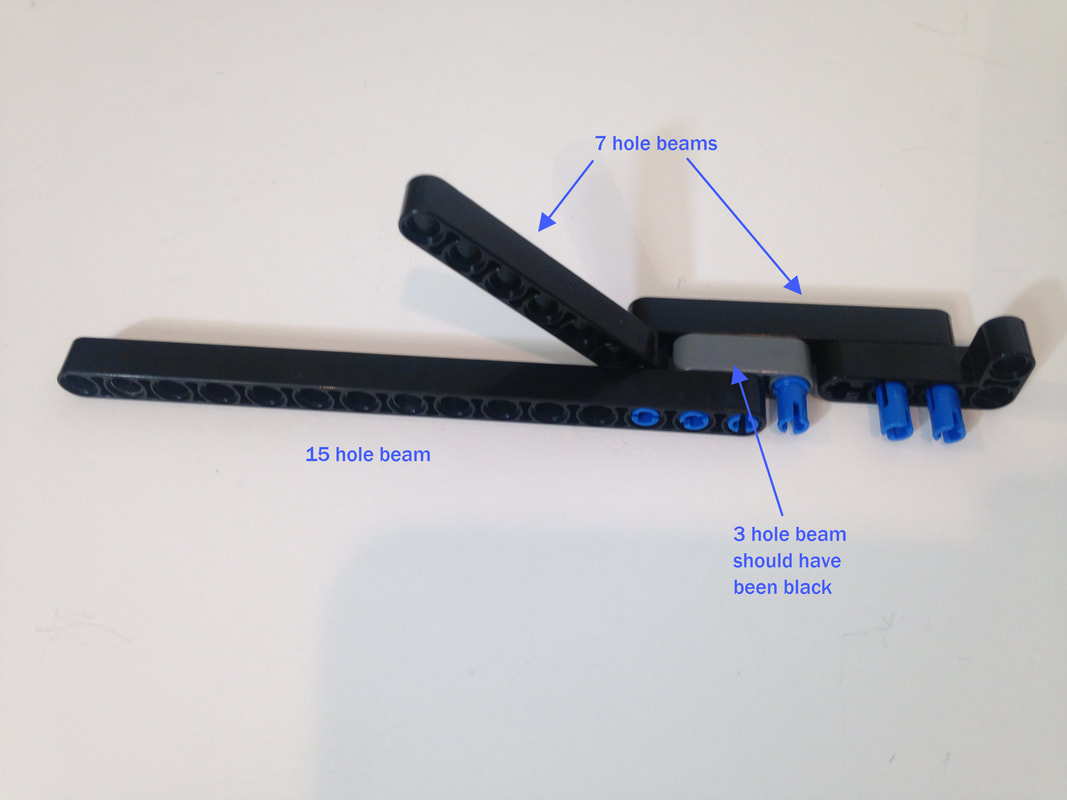
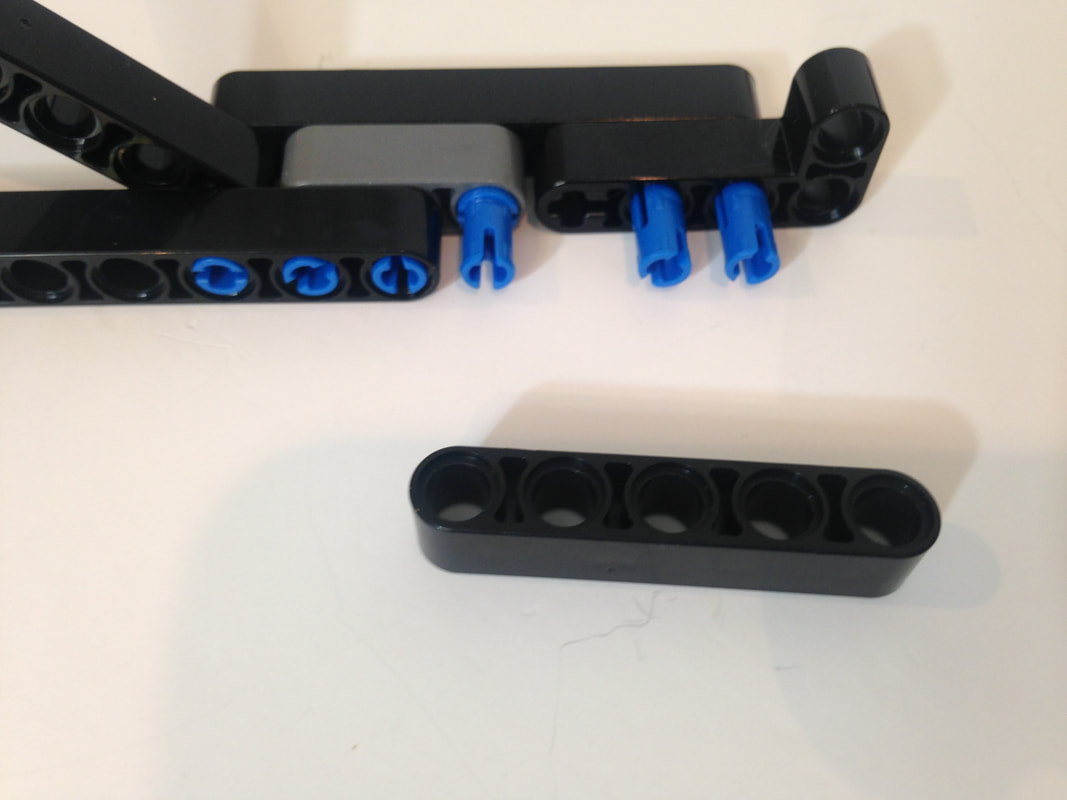
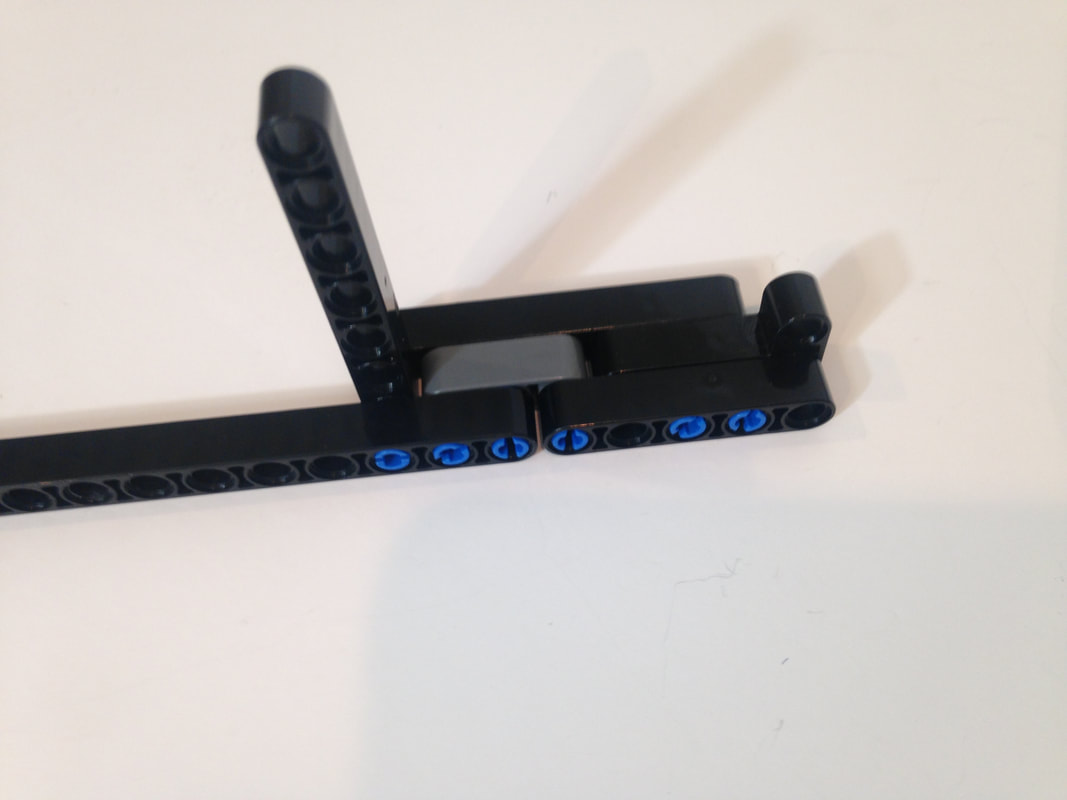
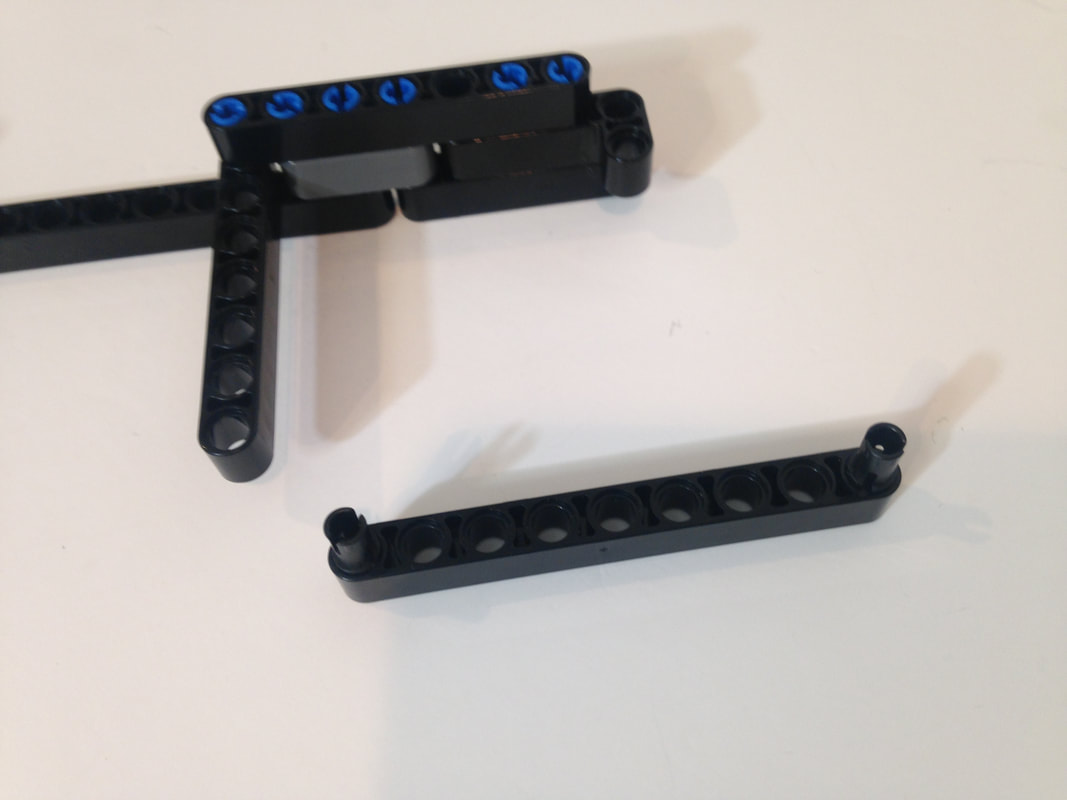
Simplified Instructions for Building TrotBot's Leg Mechanism
|
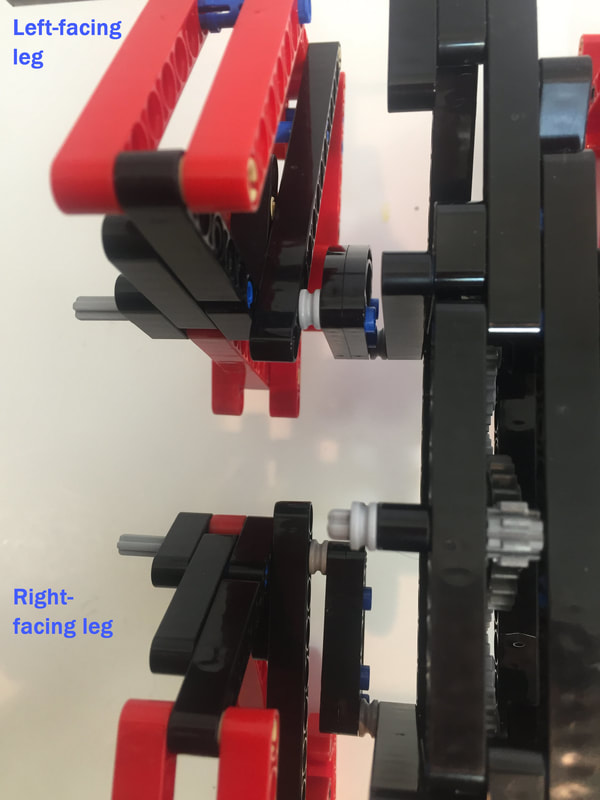
Alternatively, below are instructions for making both a left-facing leg, and a right-facing leg.
Alternatively, below are instructions for making both a left-facing leg, and a right-facing leg.
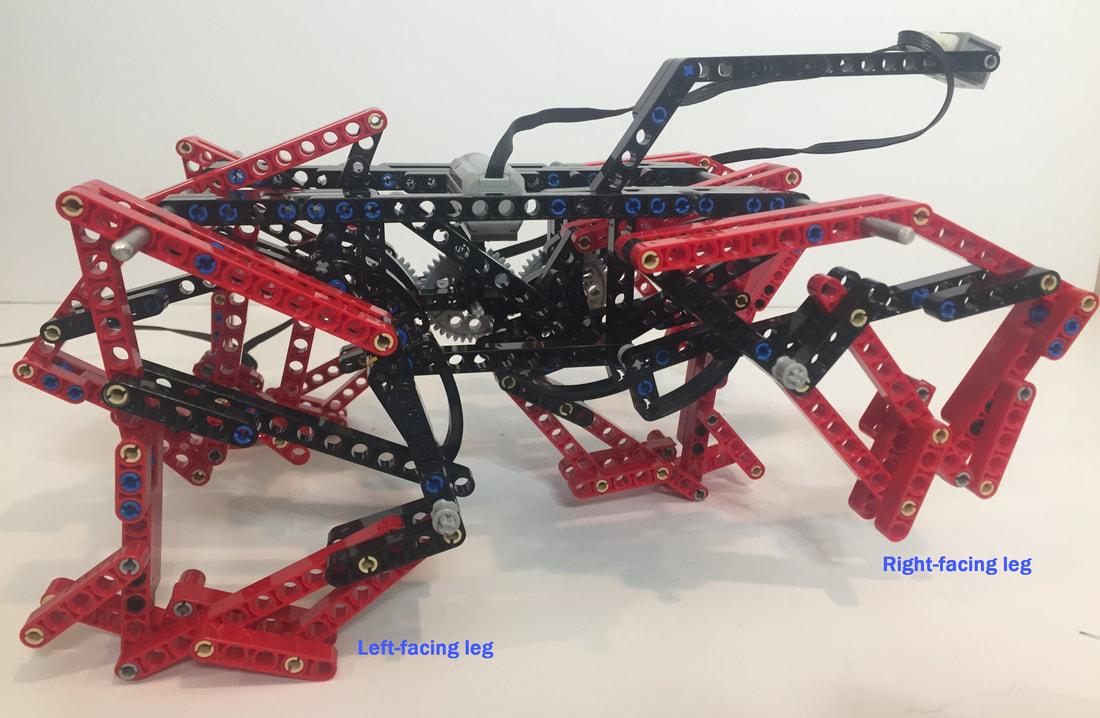
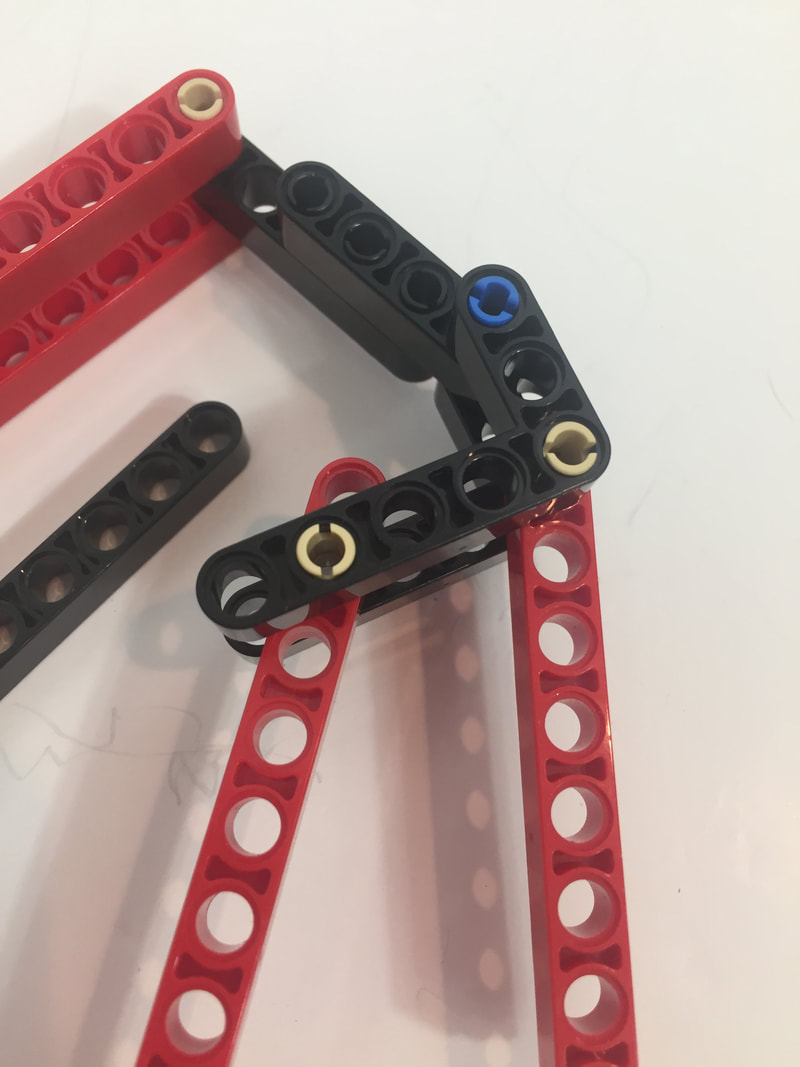
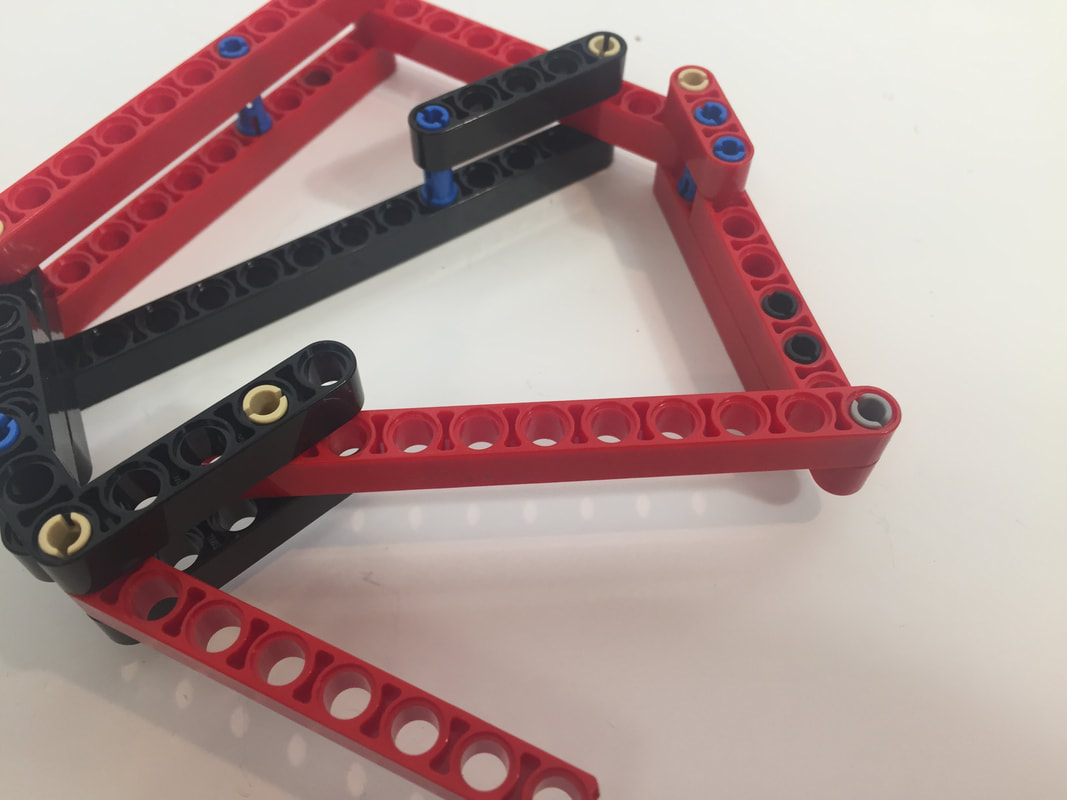
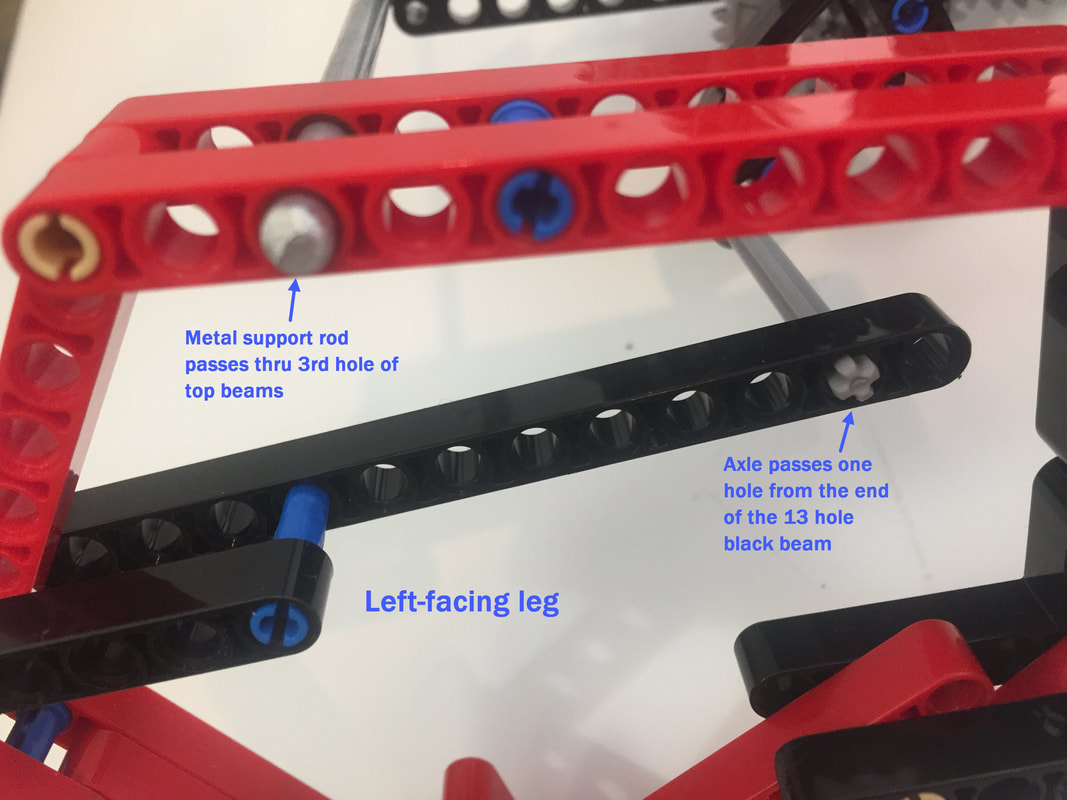
Left-Facing Leg Instructions. Either make 6 of these (and don't bother making the right-facing leg shown later in the instructions), or make 3 of these legs, followed by 3 right-facing legs.

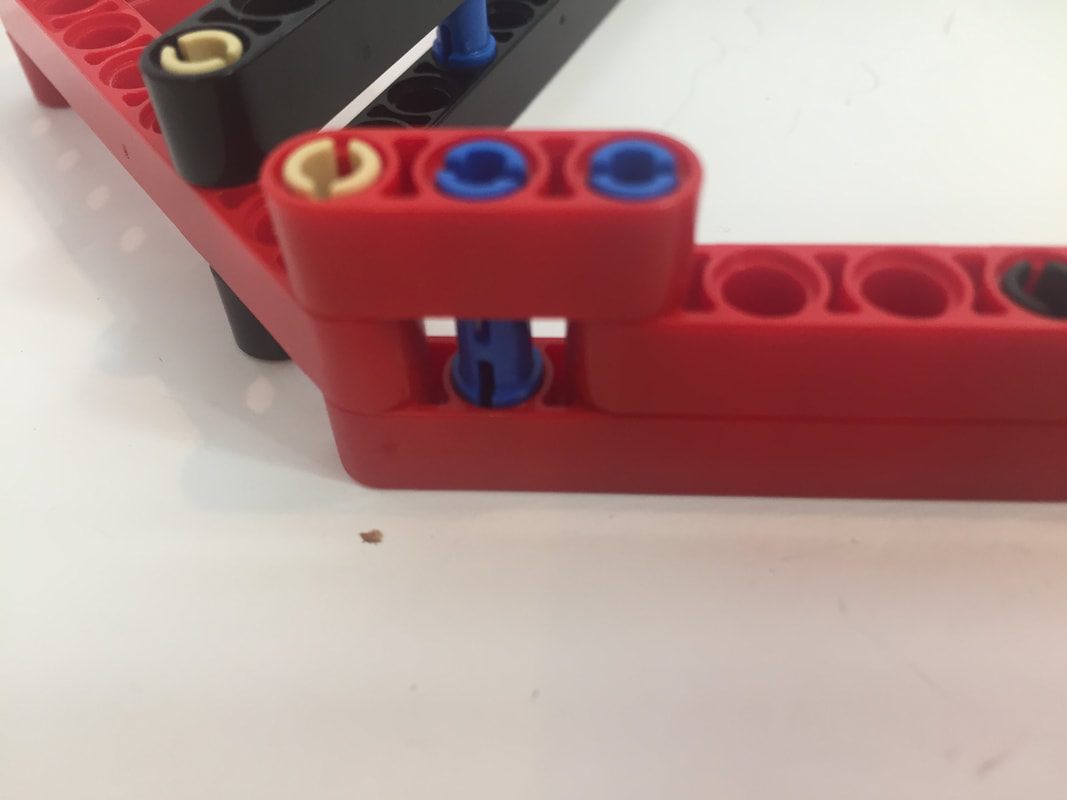
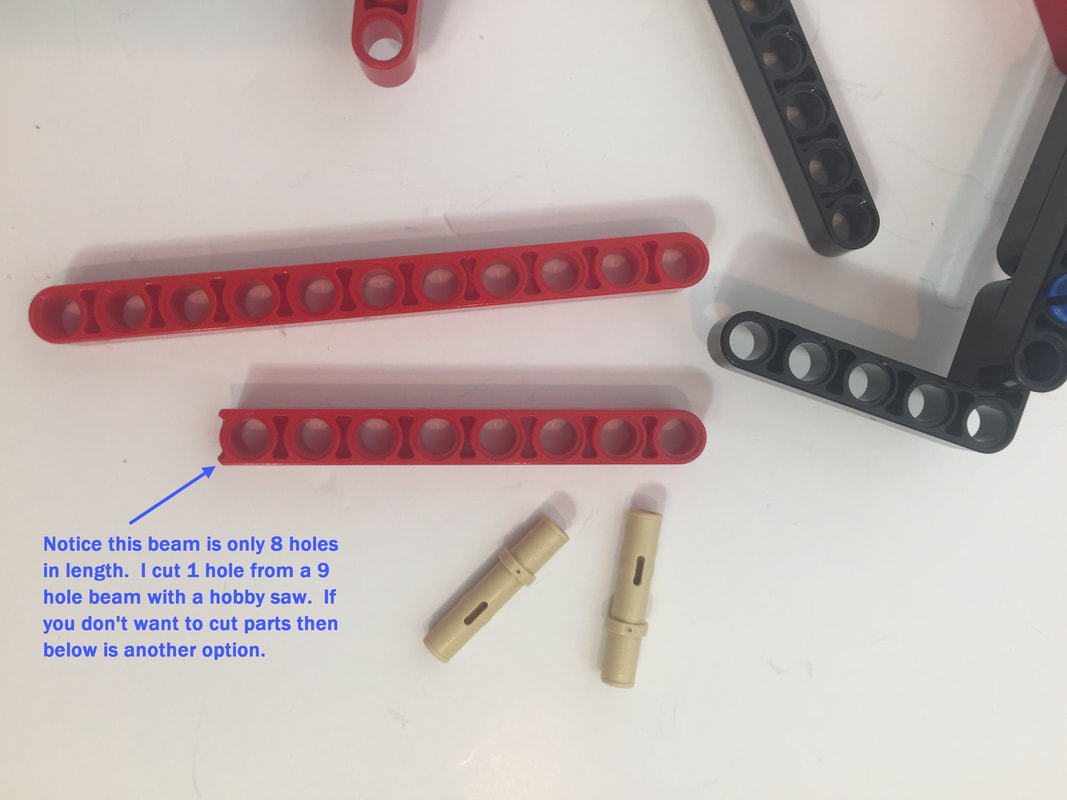
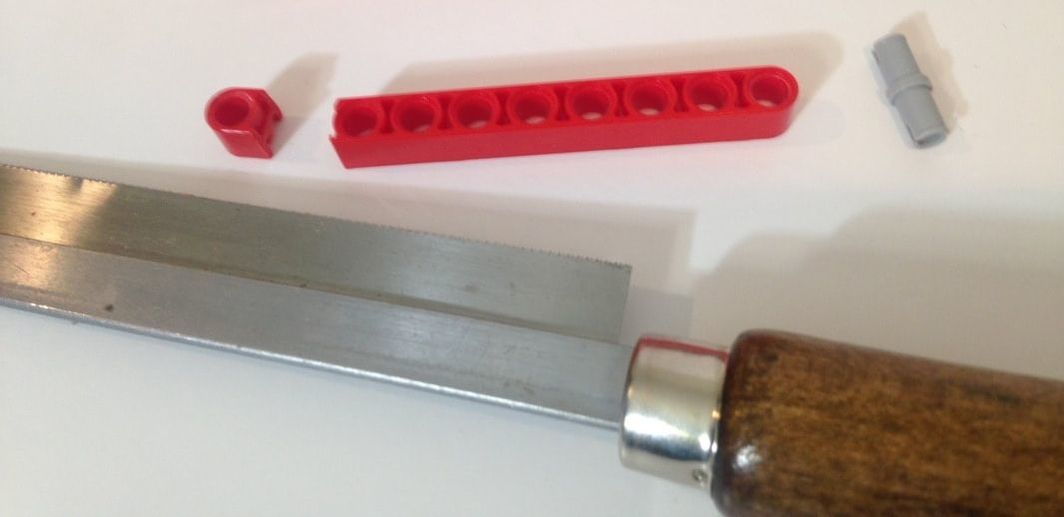
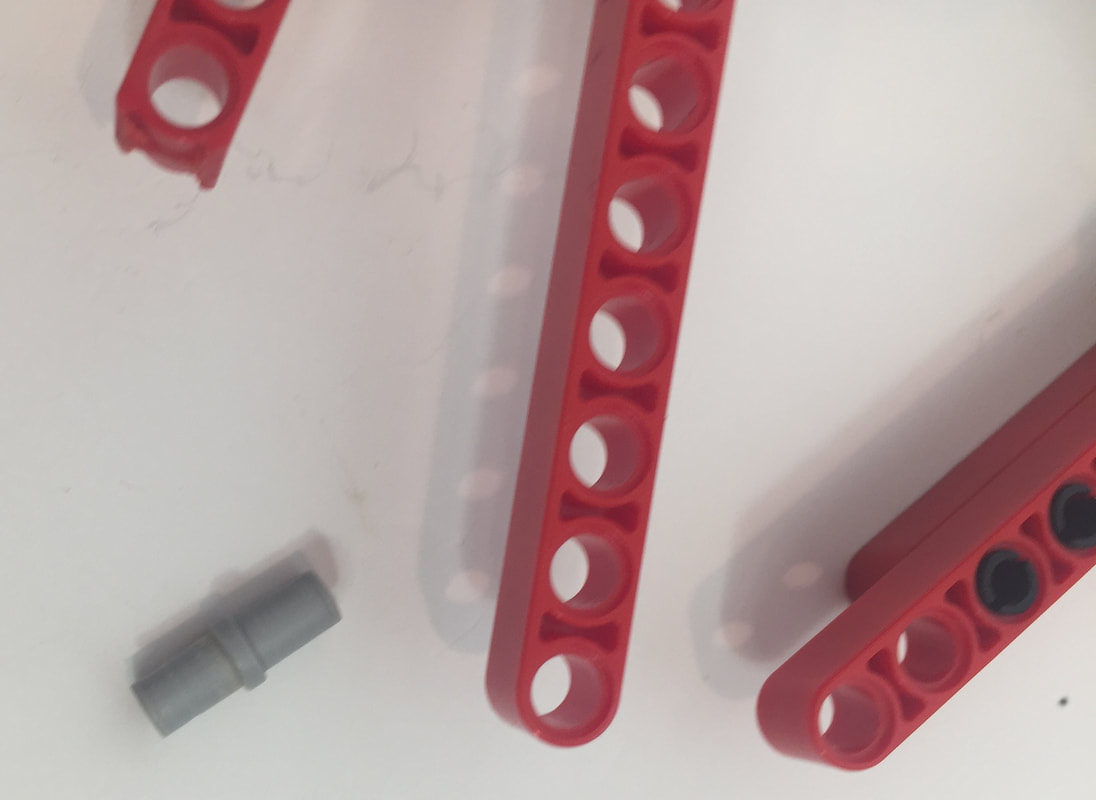
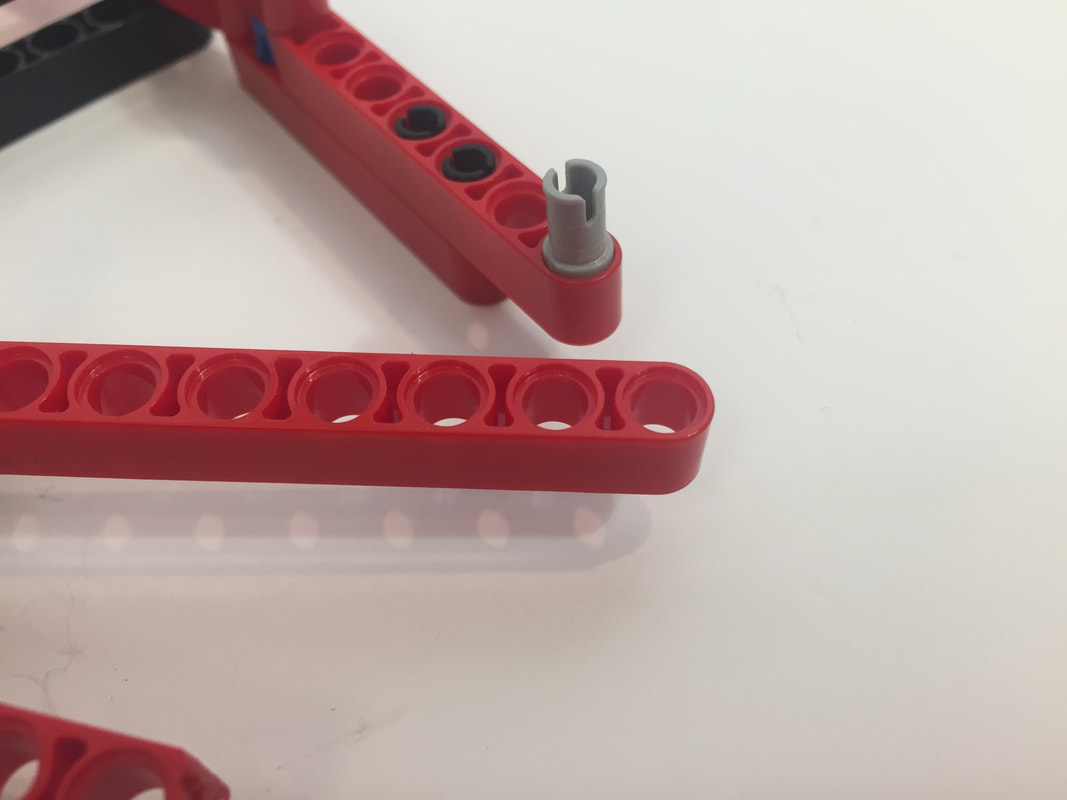
Above is the saw I used, but if you don't want to cut LEGO beams to create 8-hole versions for the heel then below is Catweazel's solution for the heel's 8 hole beam:

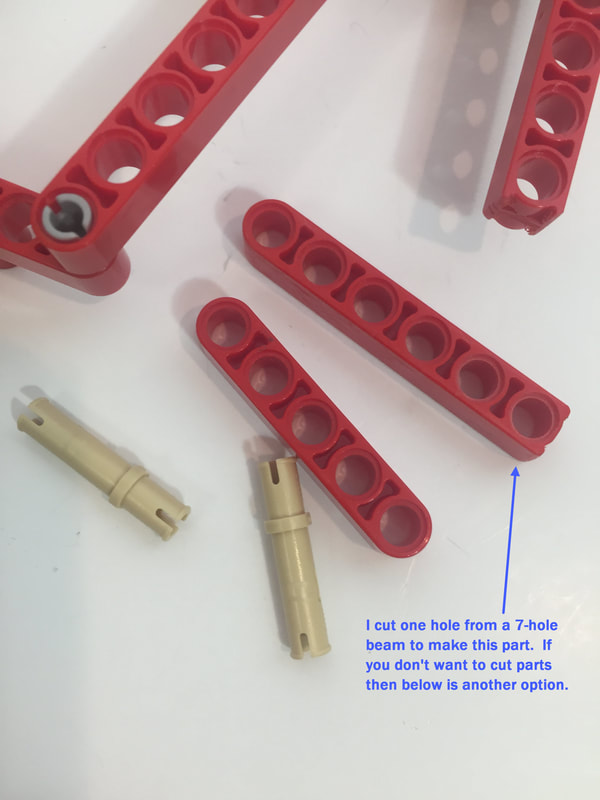
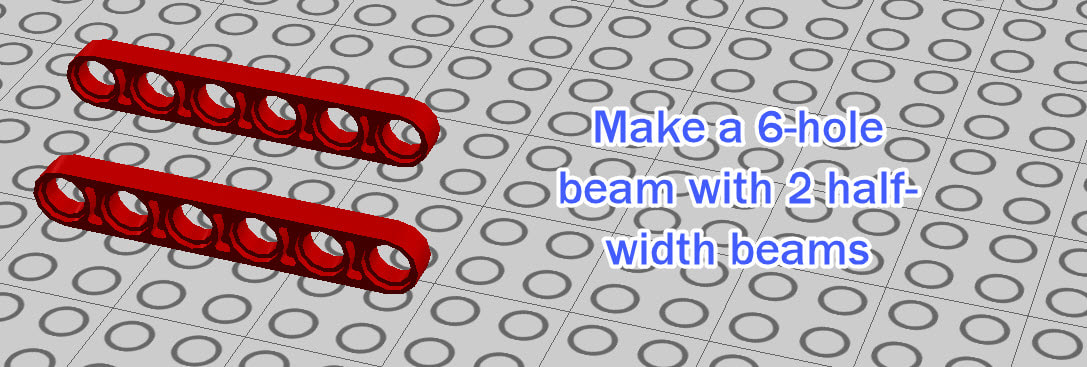
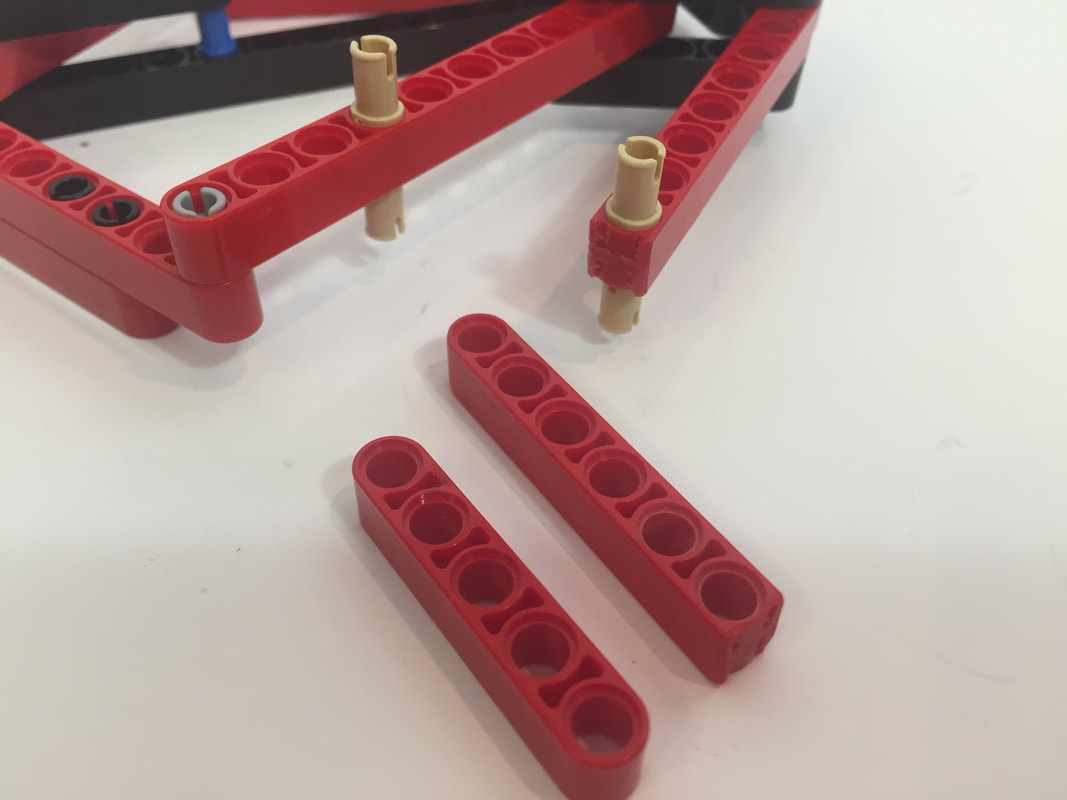
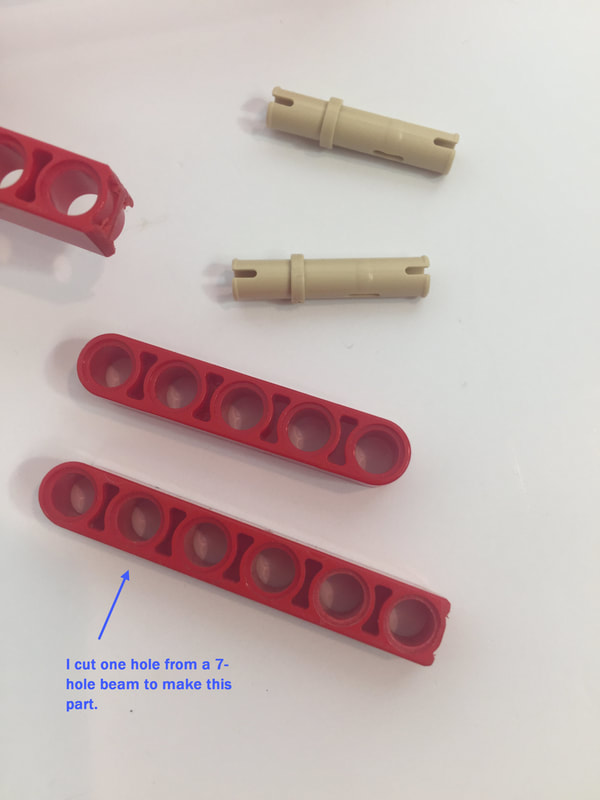
Here's another option for a 6-hole beam if you don't want to saw a 7-hole beam
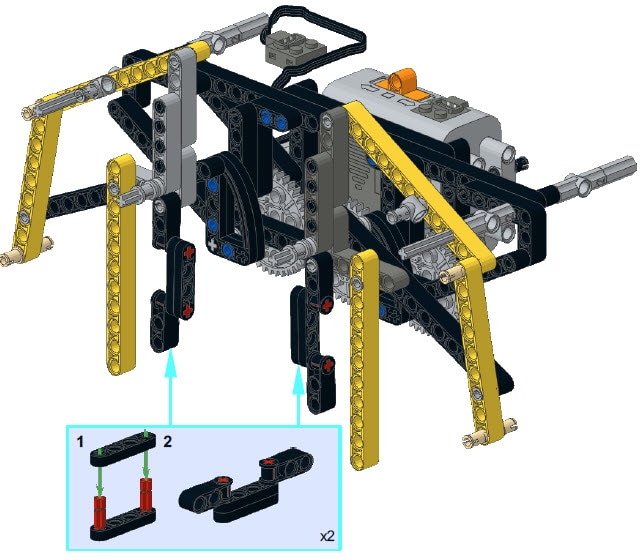
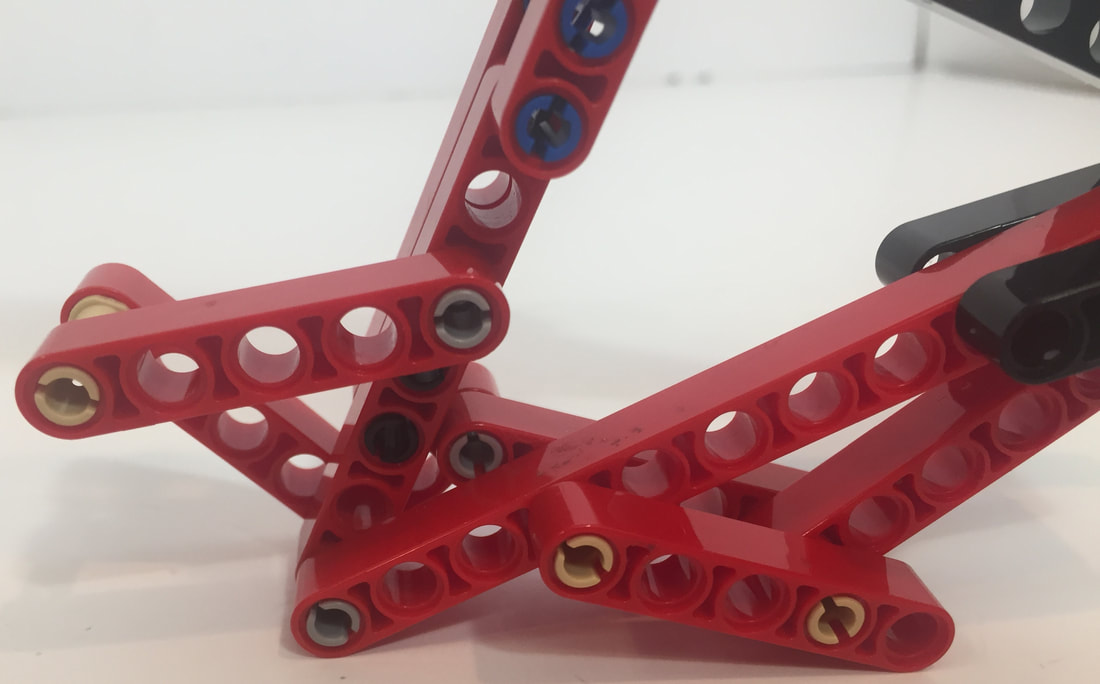
Next I add the retractable toe

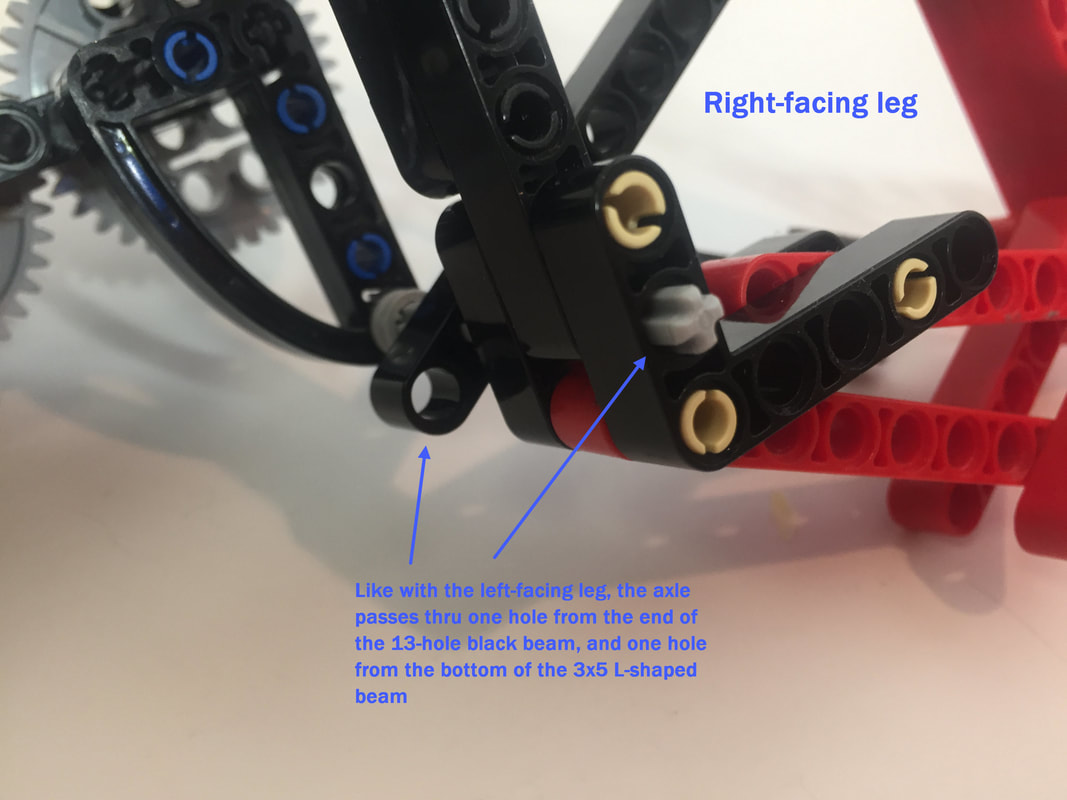
Next I build the right-facing leg. If you built 6 of the left-facing legs then you do not need to build these. If you only built 3 of the left-facing legs, then you will need to build 3 right-facing legs.


Legs finished.
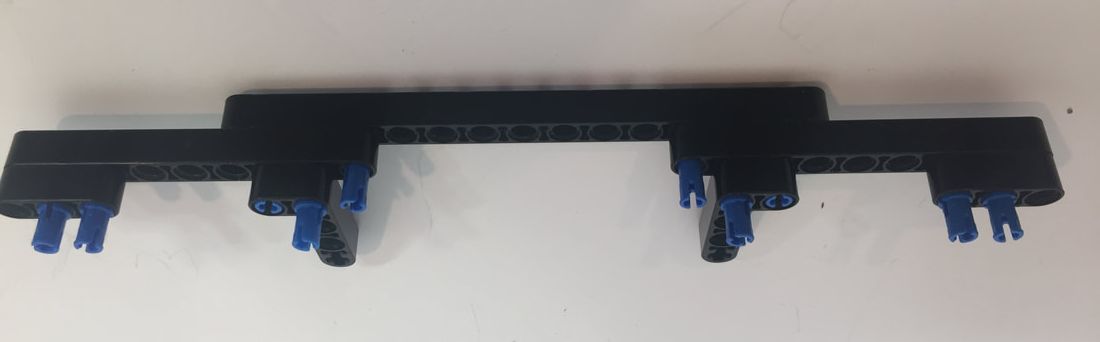
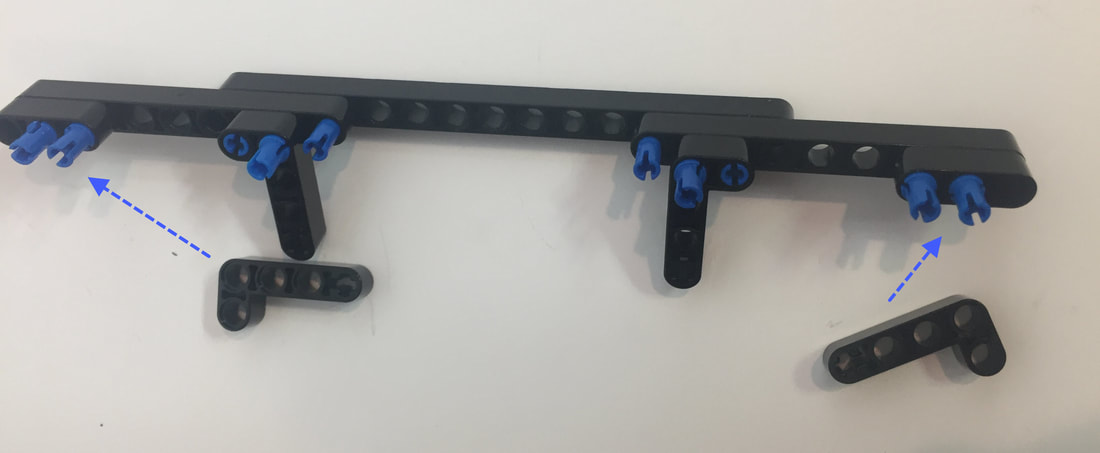
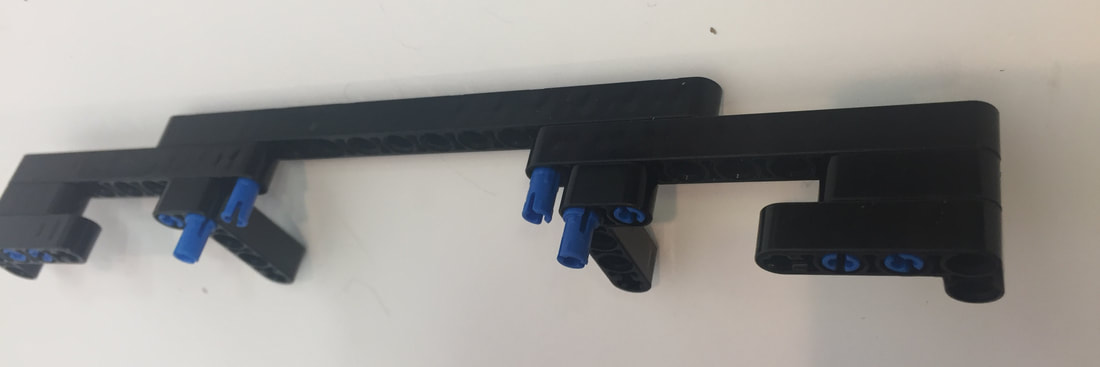
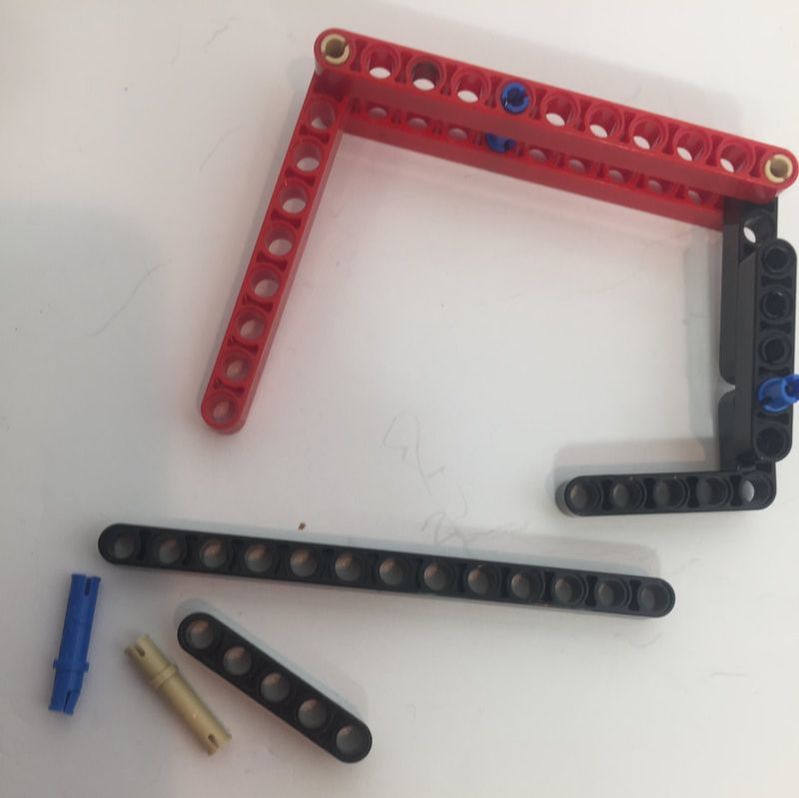
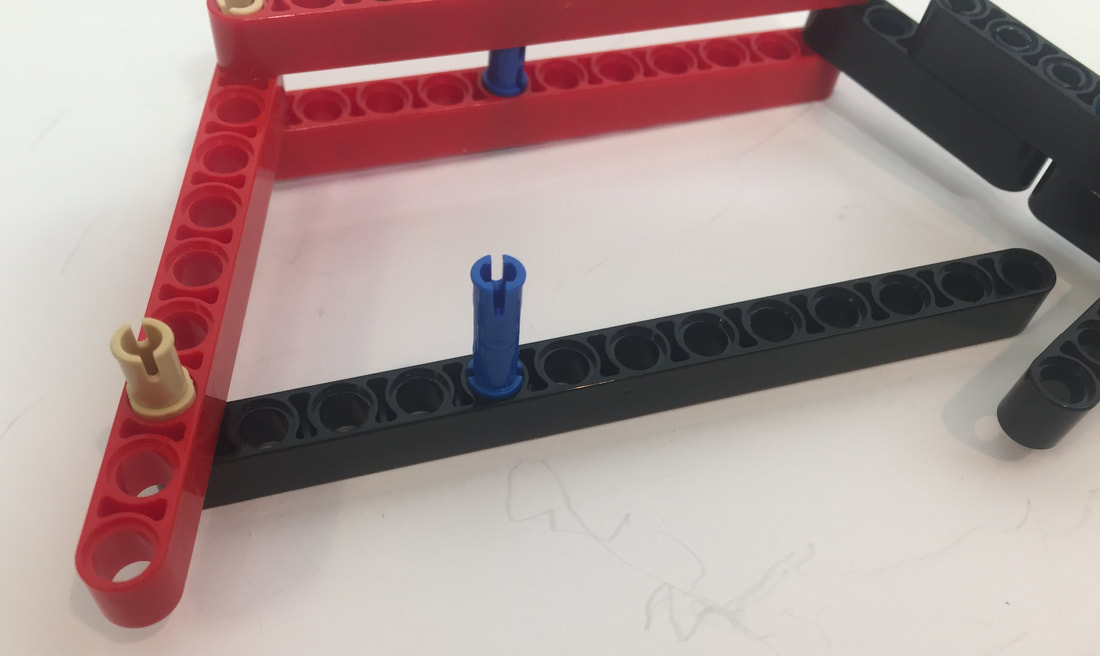
Next I'll build the other side of the frame.
Next I'll build the other side of the frame.
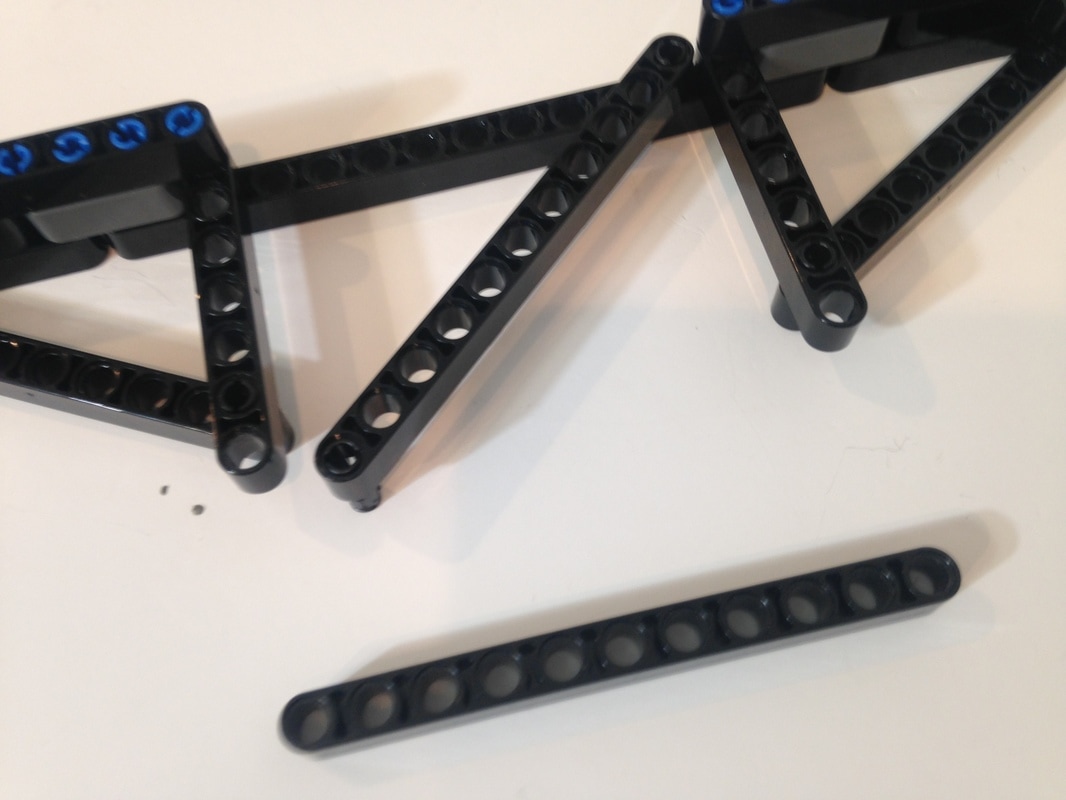
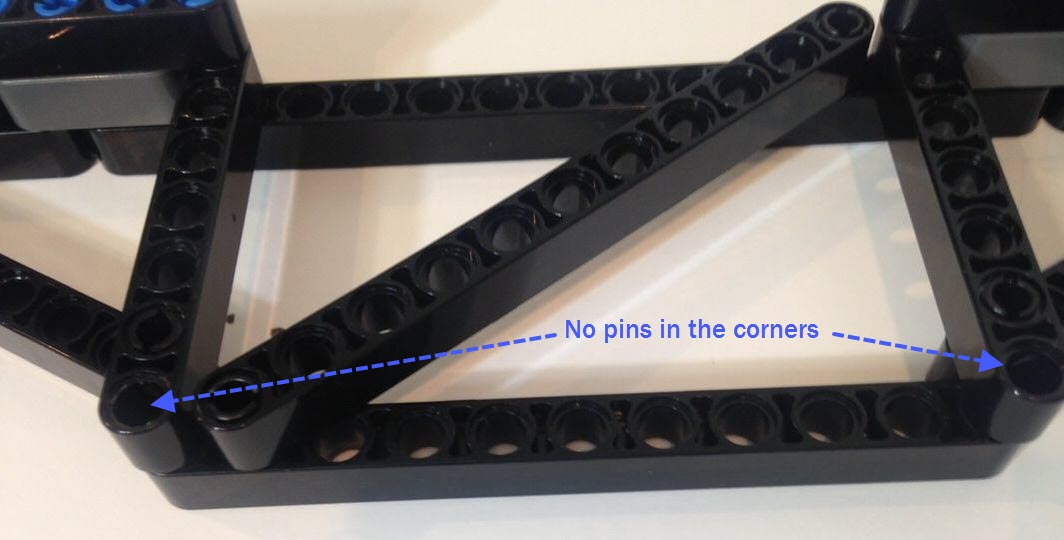
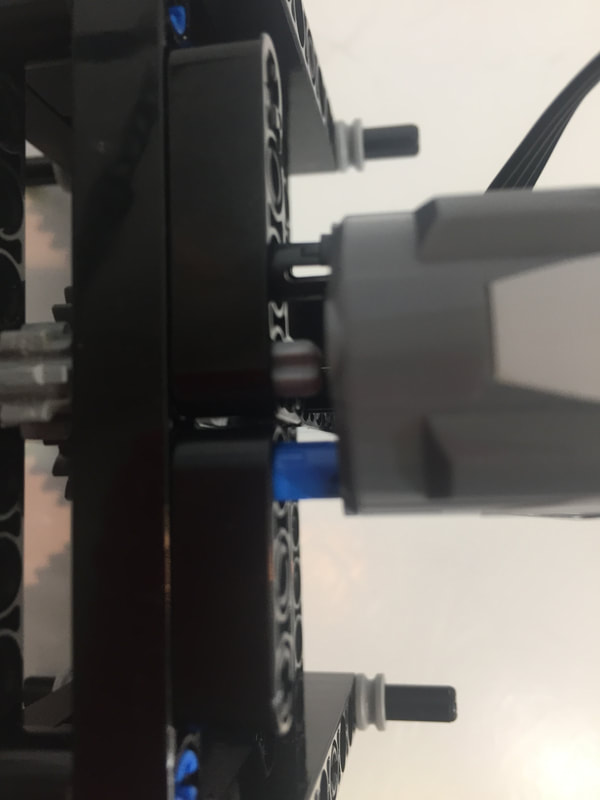
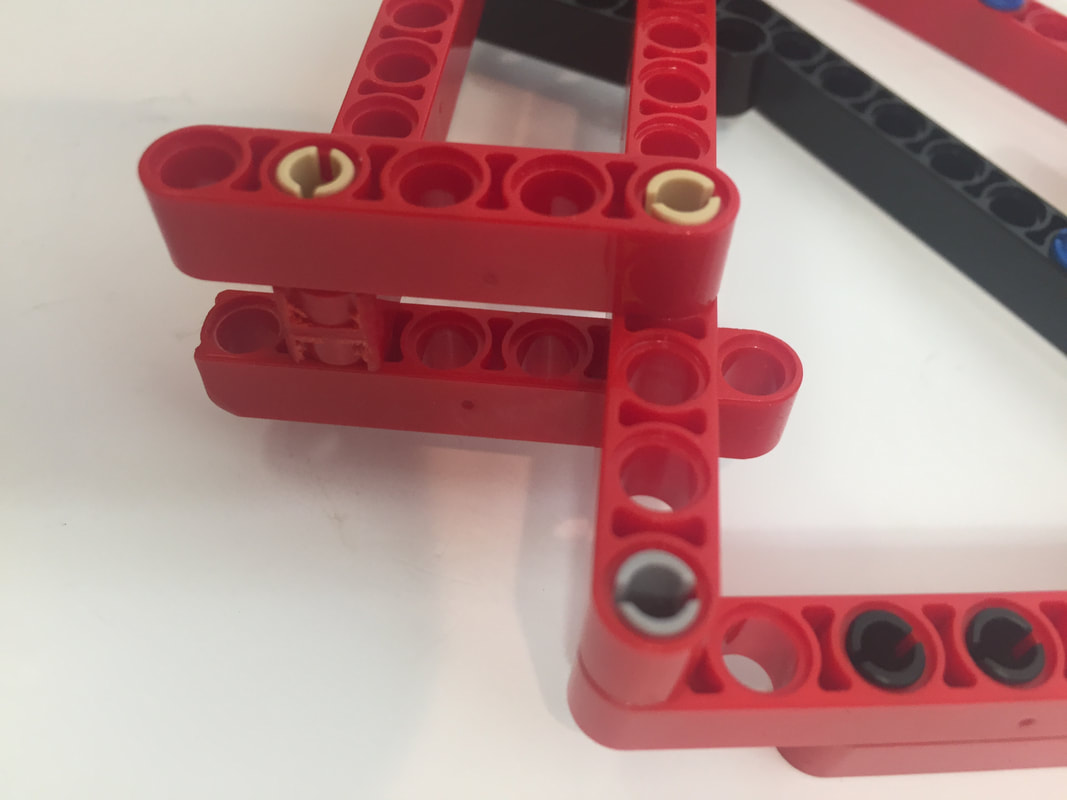
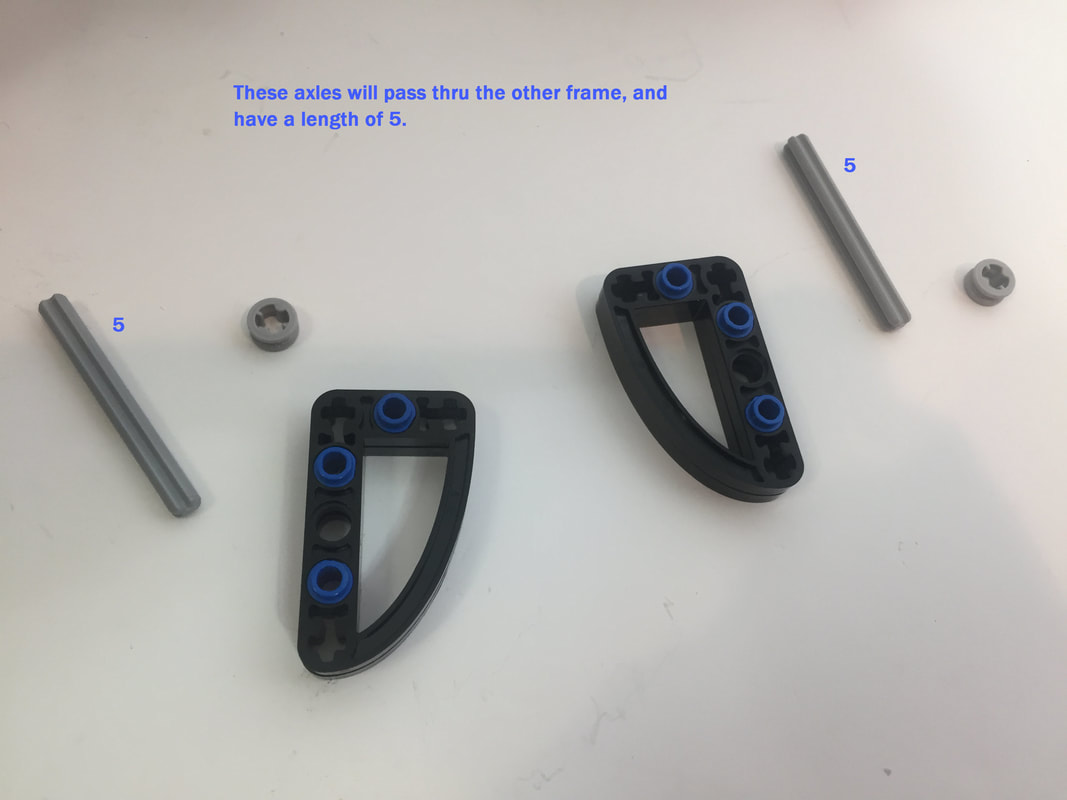
Notice there are no LEGO pins in the lower corners since the two motorized axles will pass thru these holes
Adding the Legs to the Frames
Next, I'll add the legs, starting with the center legs. Below I slide a left-facing leg onto the support rod and axle, but the left and right orientation of the legs doesn't affect how TrotBot walks, and either leg orientation can be used.
Slide a right-facing leg onto the other side, as pictured below:
Slide both a left-facing leg and a right-facing leg onto the support rods and axles, as pictured below.
Next, I'll add legs to the other side of the robot.
Slide both a left-facing leg and a right-facing leg onto the support rods and axle, as pictured below.
Nearly finished. Below are few images of progress so far
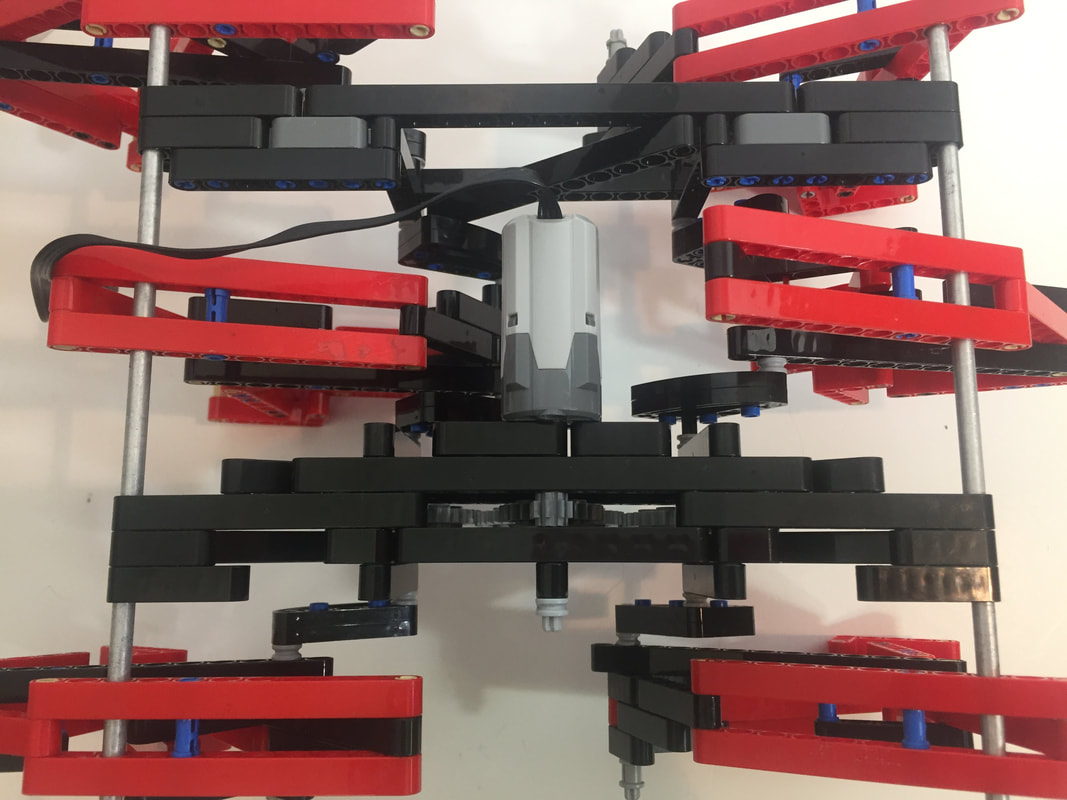
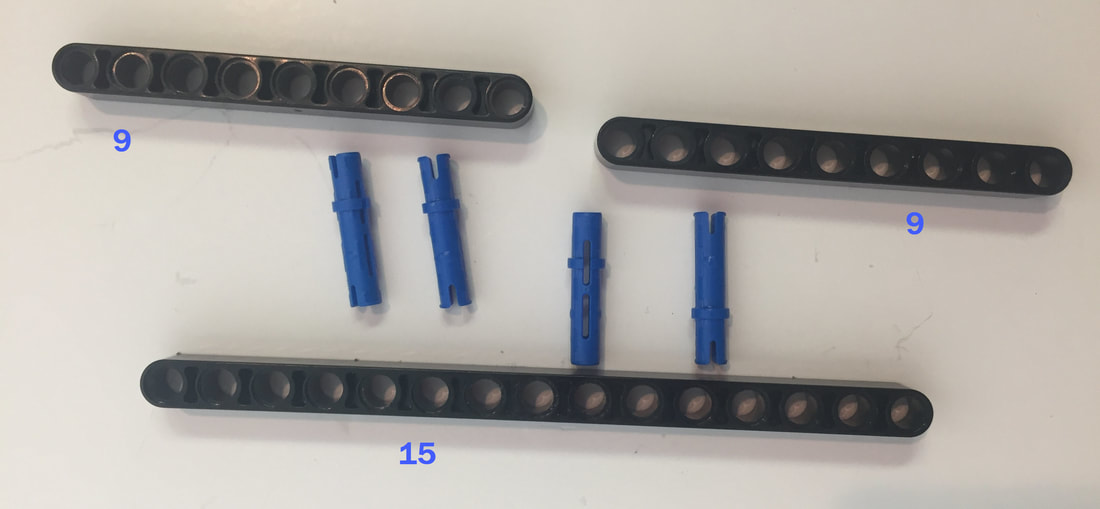
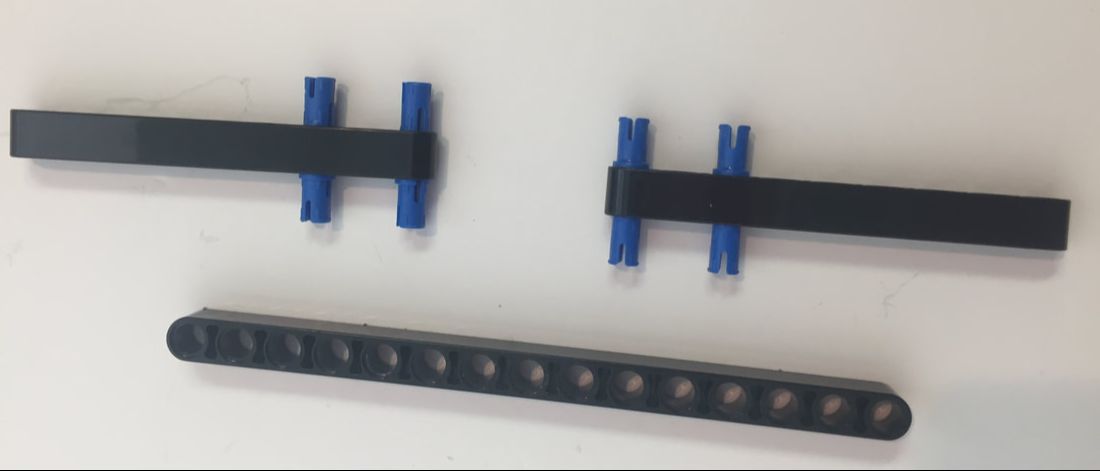
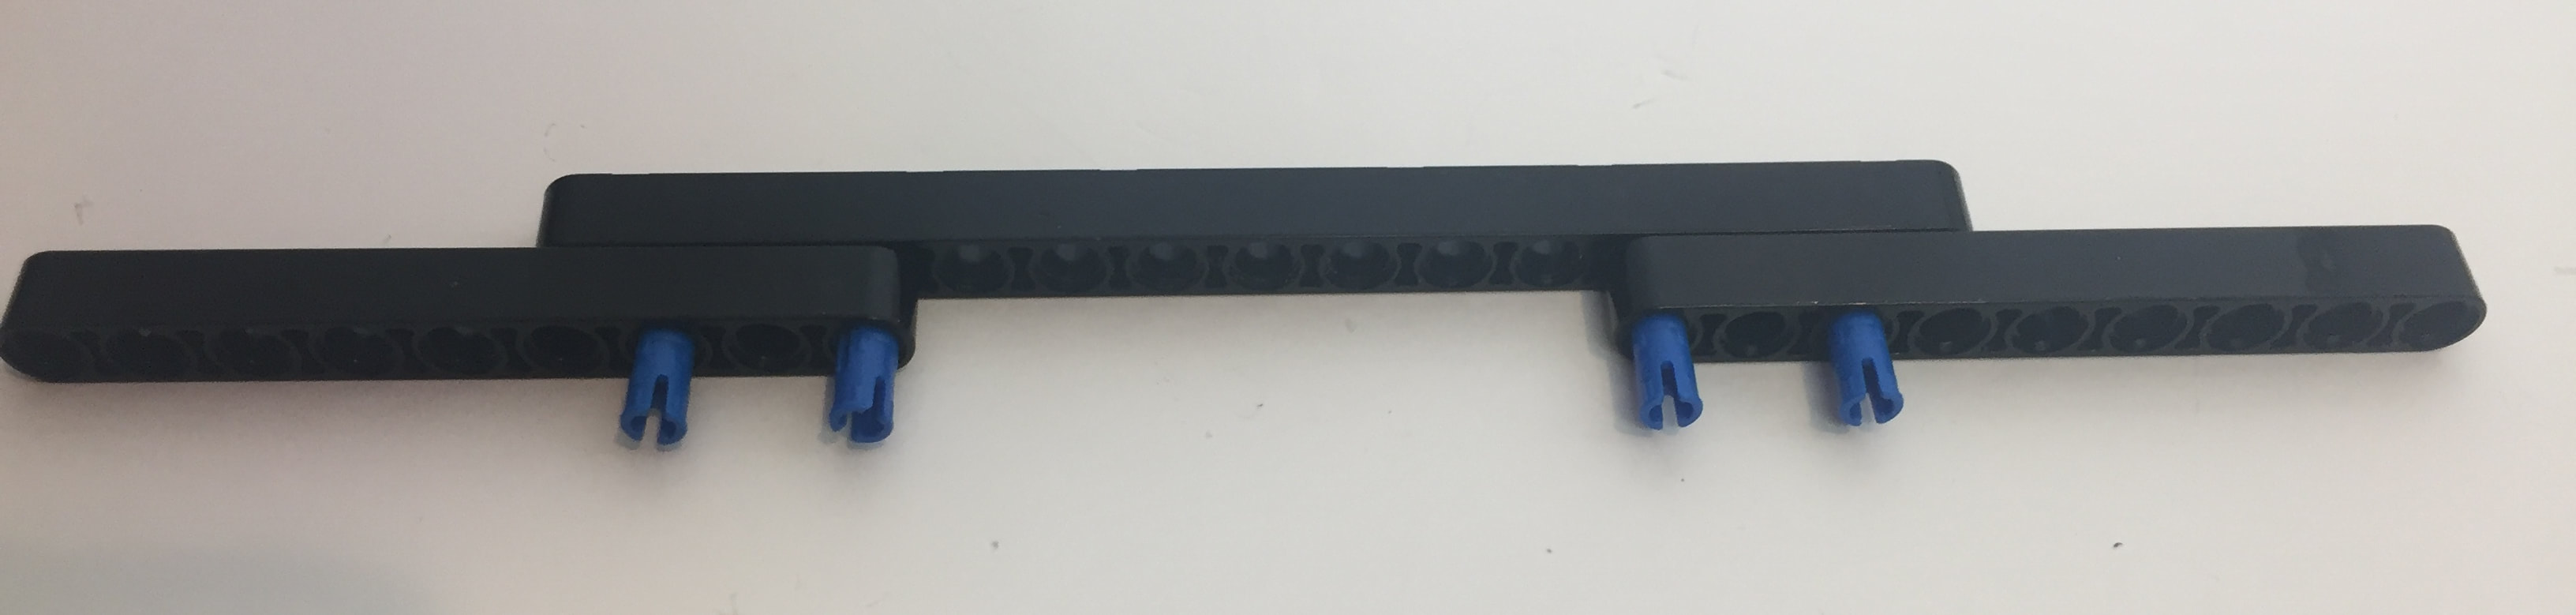
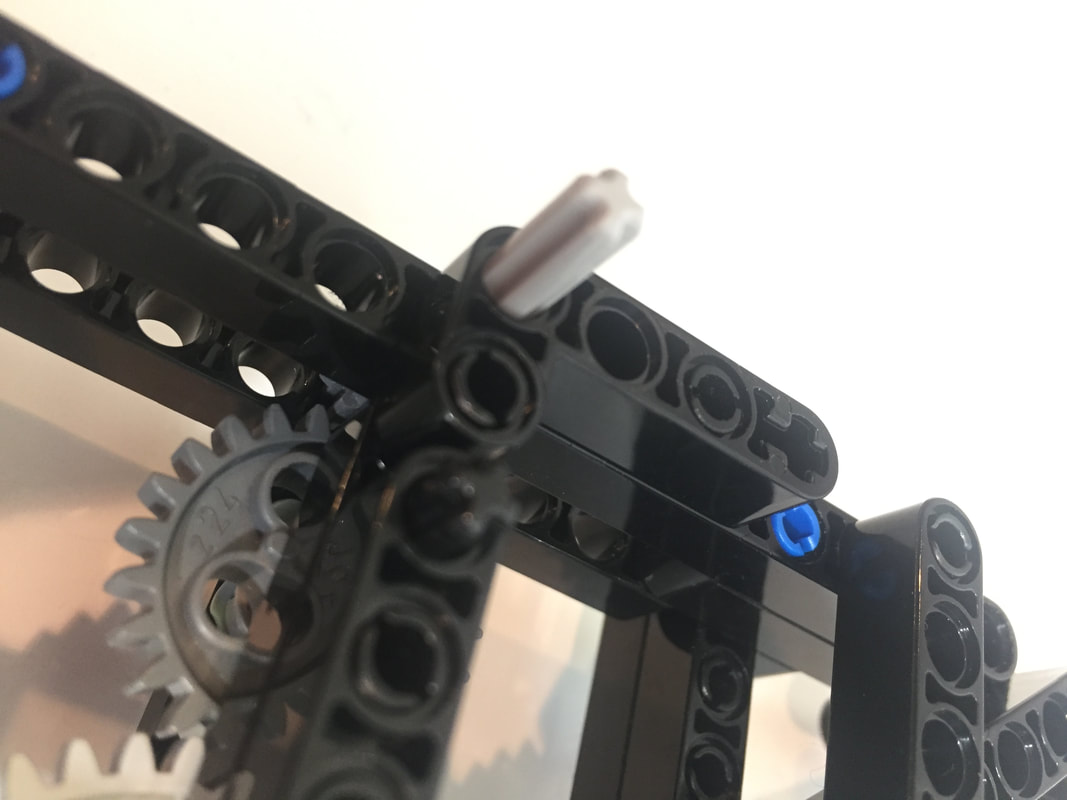
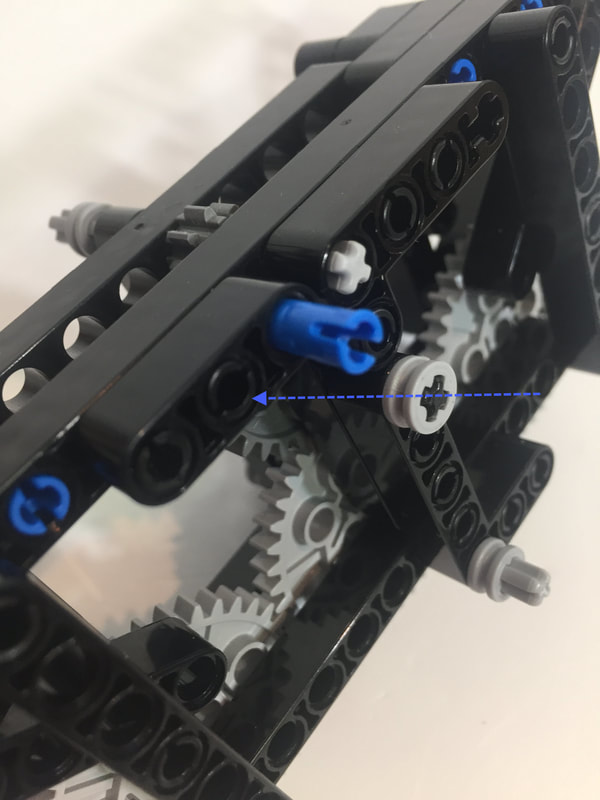
Next I'll add the beam that the motor's wire attaches to. This is important because it prevents the wire from getting tangled in the legs, and it allows TrotBot to be "steered" by tugging on the wire.

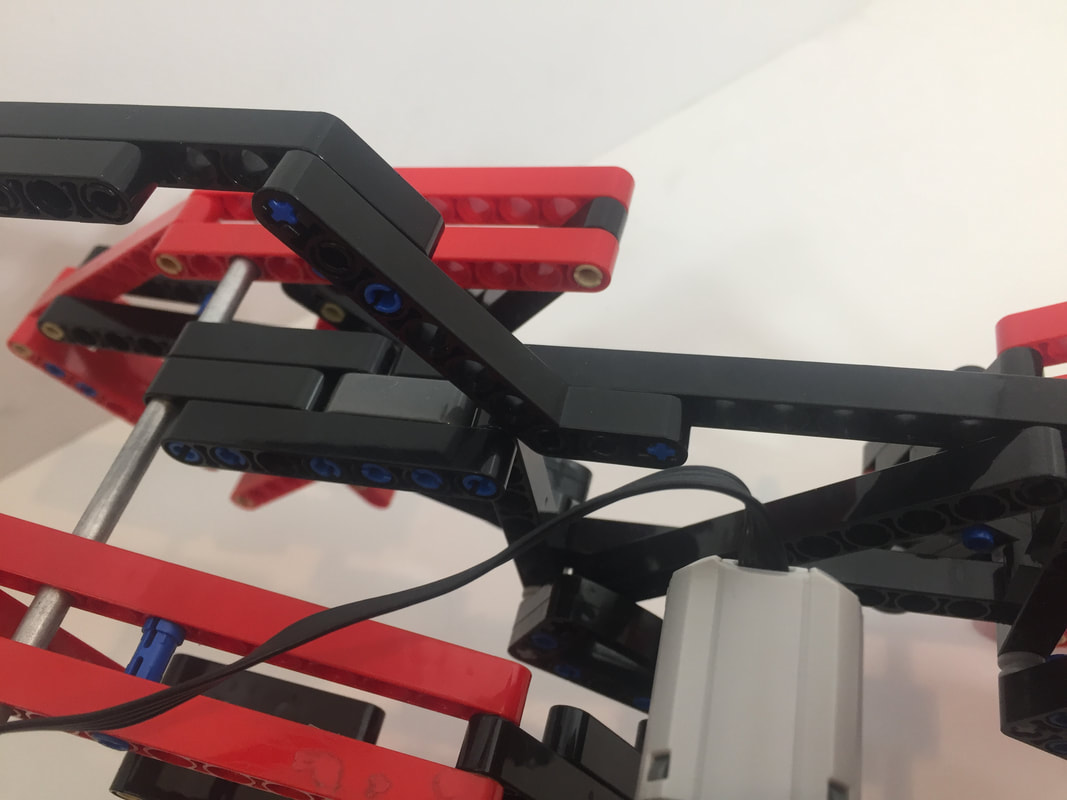
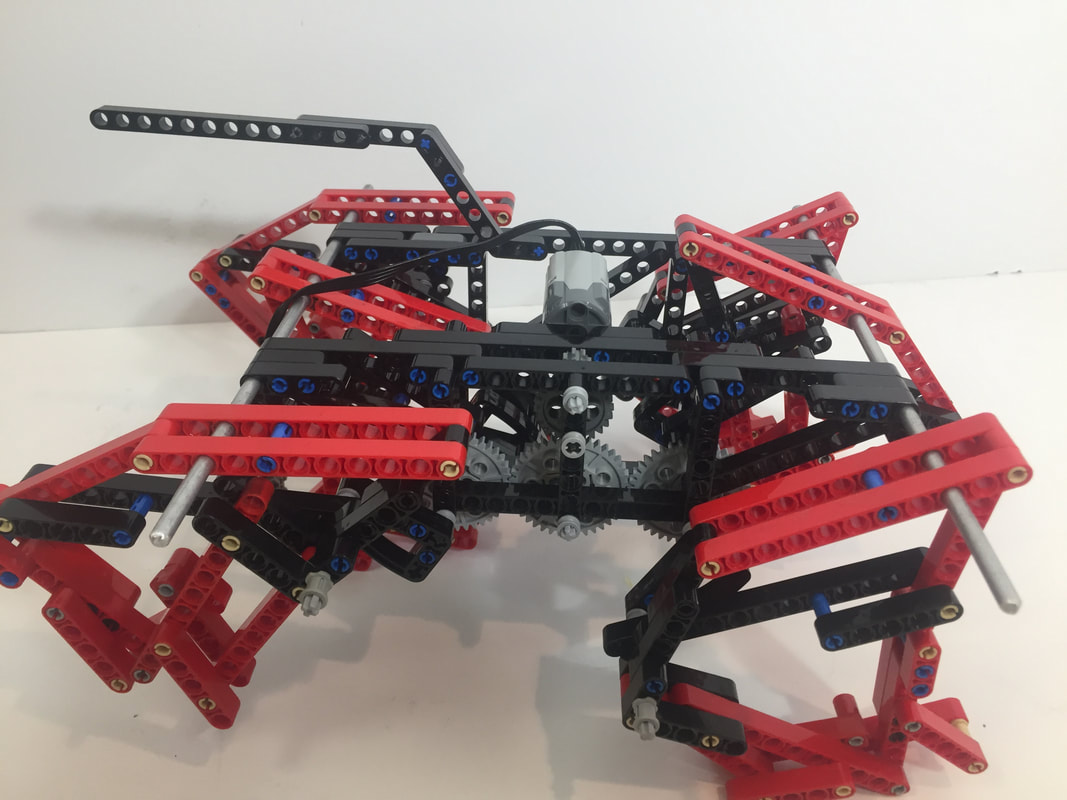

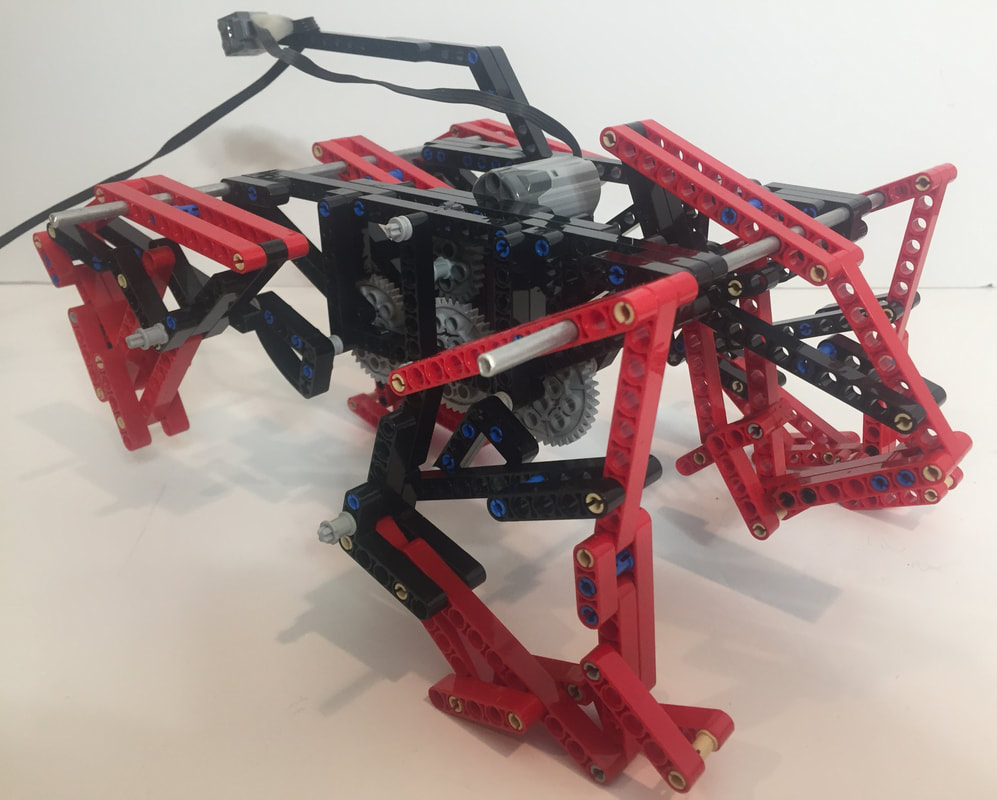
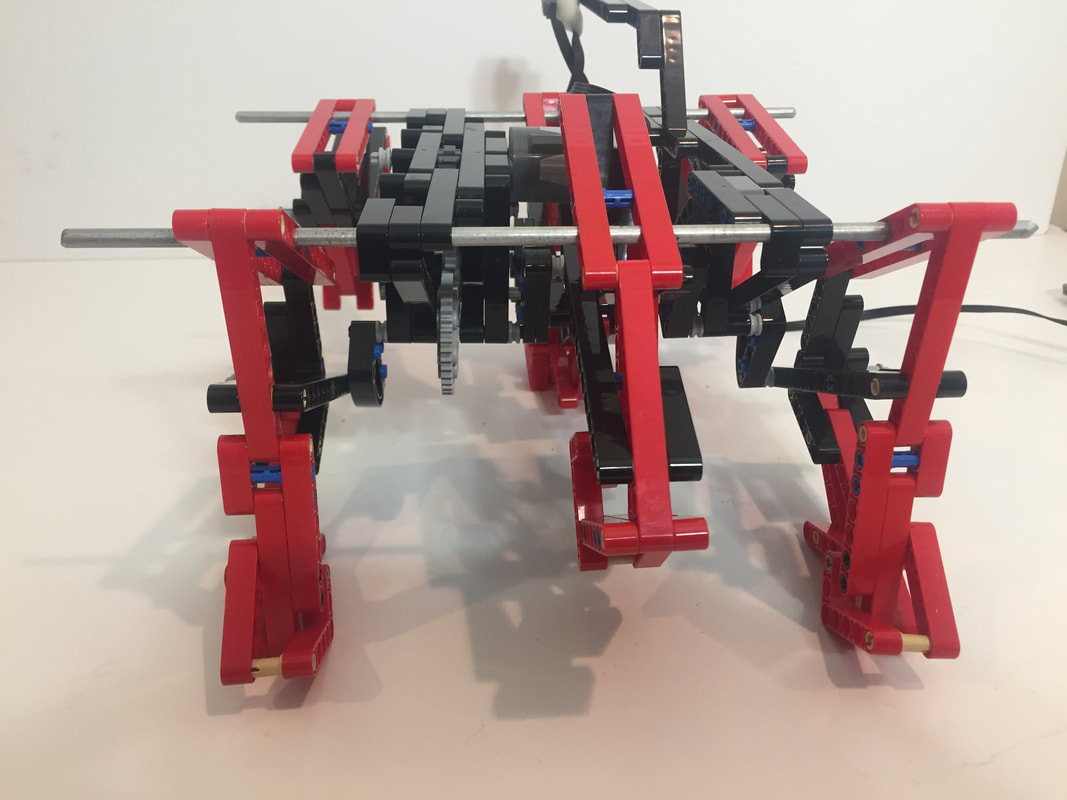
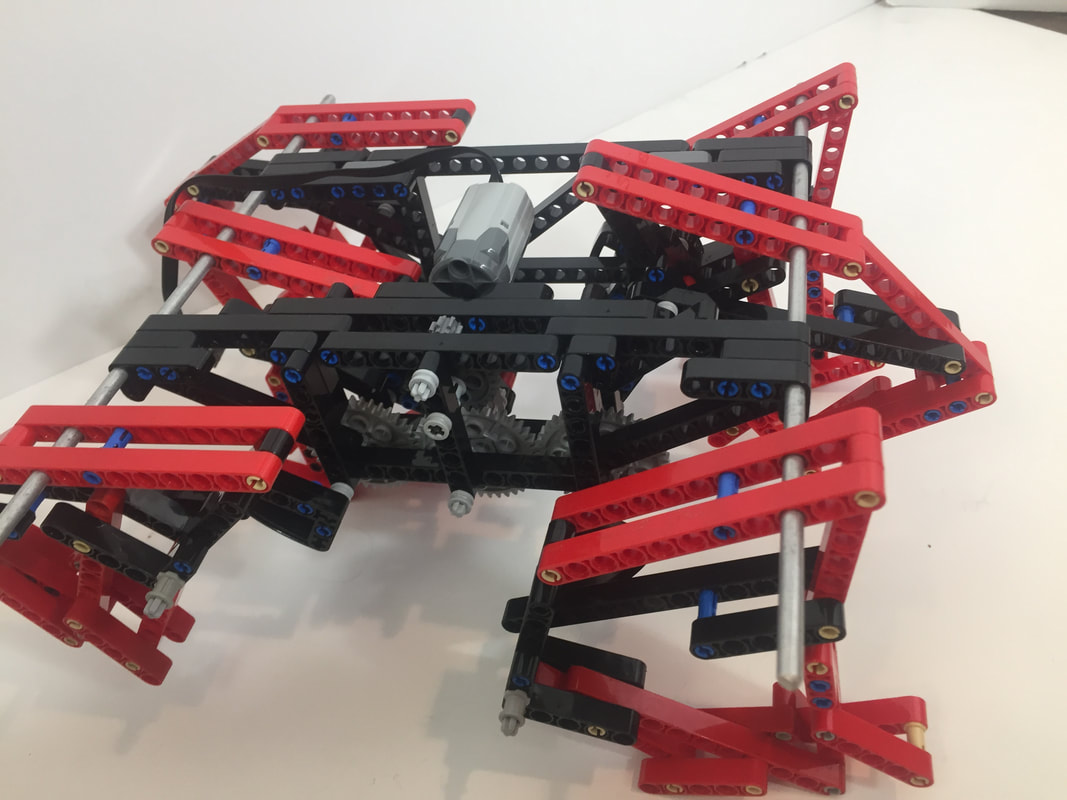
Finished!
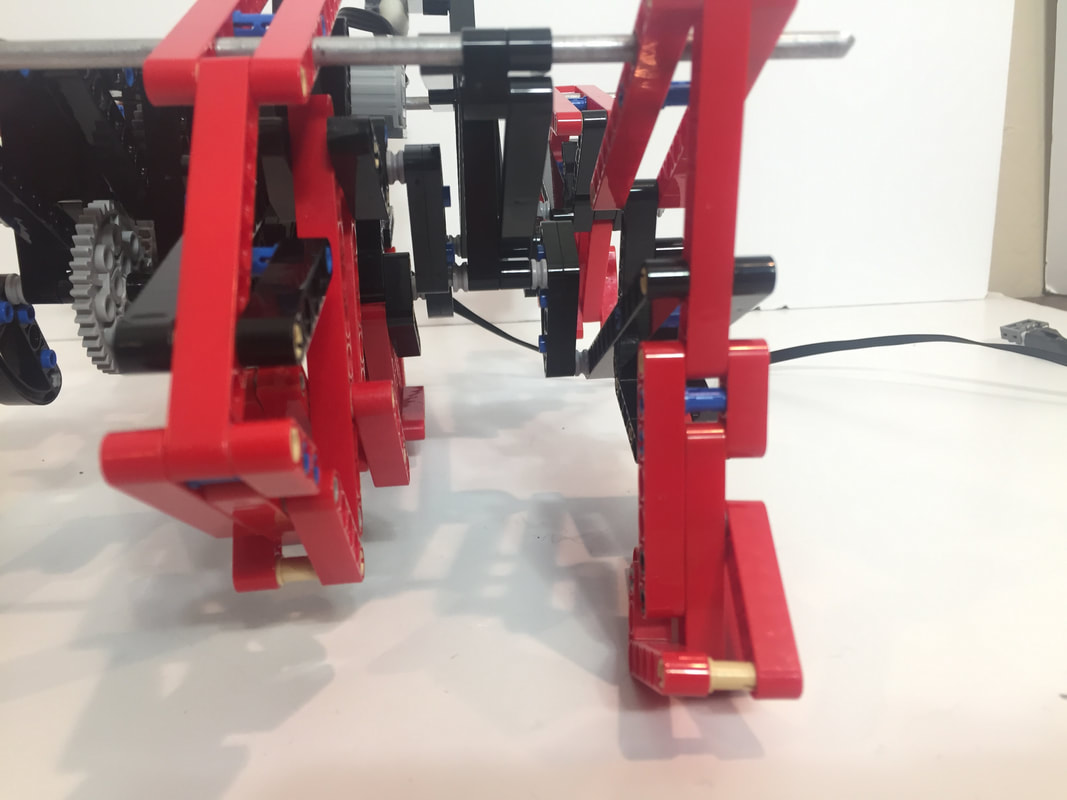
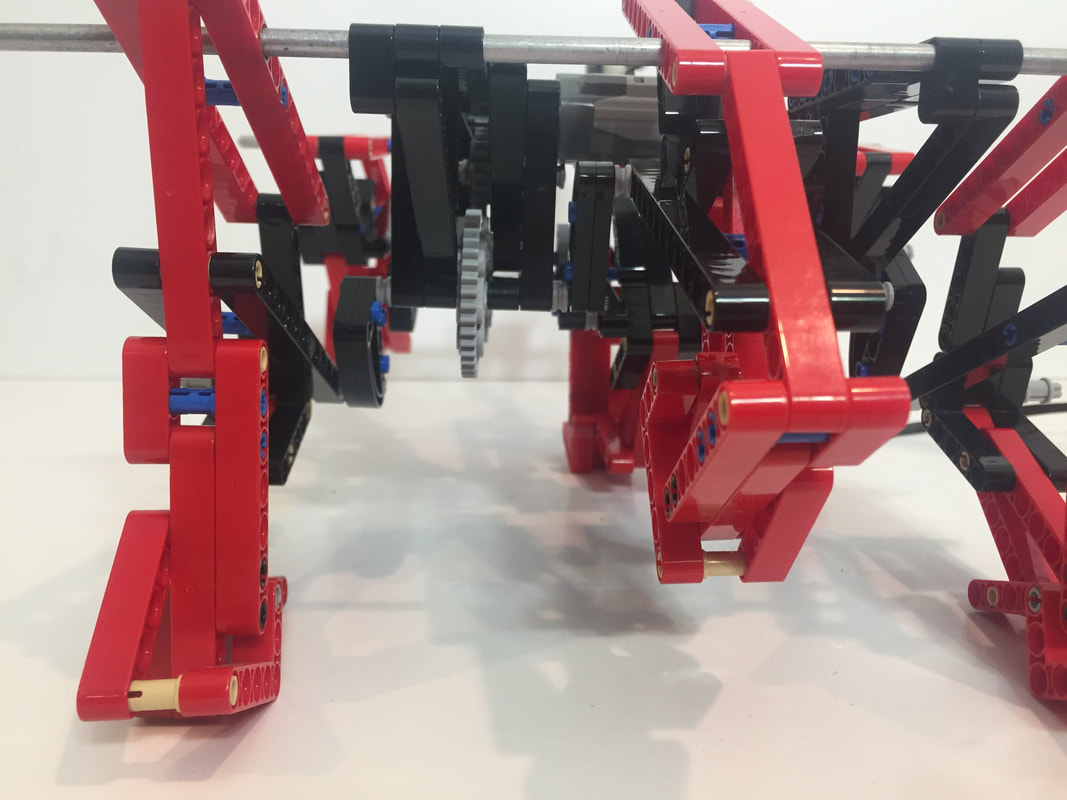
Below are pictures from a few more angles in case anything is confusing.
Below are pictures from a few more angles in case anything is confusing.