Strider Ver 3's Frame
This frame works for both the Mindstorms and the battery box versions, and can use either 8 or 12 legs. If building a Mindstorms Strider, be sure to check out the instructions for mounting the brick higher here before starting your build.
Frame triangles are critical for making strong frames for walkers, but LEGO's integer-based beam lengths can make it difficult to find diagonal beams of the correct length. You can find other ideas for creating rigid, triangle-based frames with LEGO beams in this blog post.
Frame triangles are critical for making strong frames for walkers, but LEGO's integer-based beam lengths can make it difficult to find diagonal beams of the correct length. You can find other ideas for creating rigid, triangle-based frames with LEGO beams in this blog post.

Strider Ver 3
This frame build assumes that each side of the robot will have its own motor for steering, using either the battery box and IR sensors, or the EV3 components. If instead you want to build Strider Ver 3 without steering and only one motor, then you can still build most of this frame, except for the gear train and motor mounts. For ideas on how to add only one motor to Strider Ver 3's frame, see Strider Ver 2's instructions.
We purchased the plastic LEGO parts from Bricklink
We purchased the motors, controllers and battery box from Amazon
We purchased the 3/16" OD metal support rods from our local hardware store
UPDATE: If building a Mindstorms Strider and if you want more ground clearance for rugged terrain, see these instructions for how Strider's frame can be modified before building your frame, which should allow you to build it with a higher brick mounting without having to modify anything later.
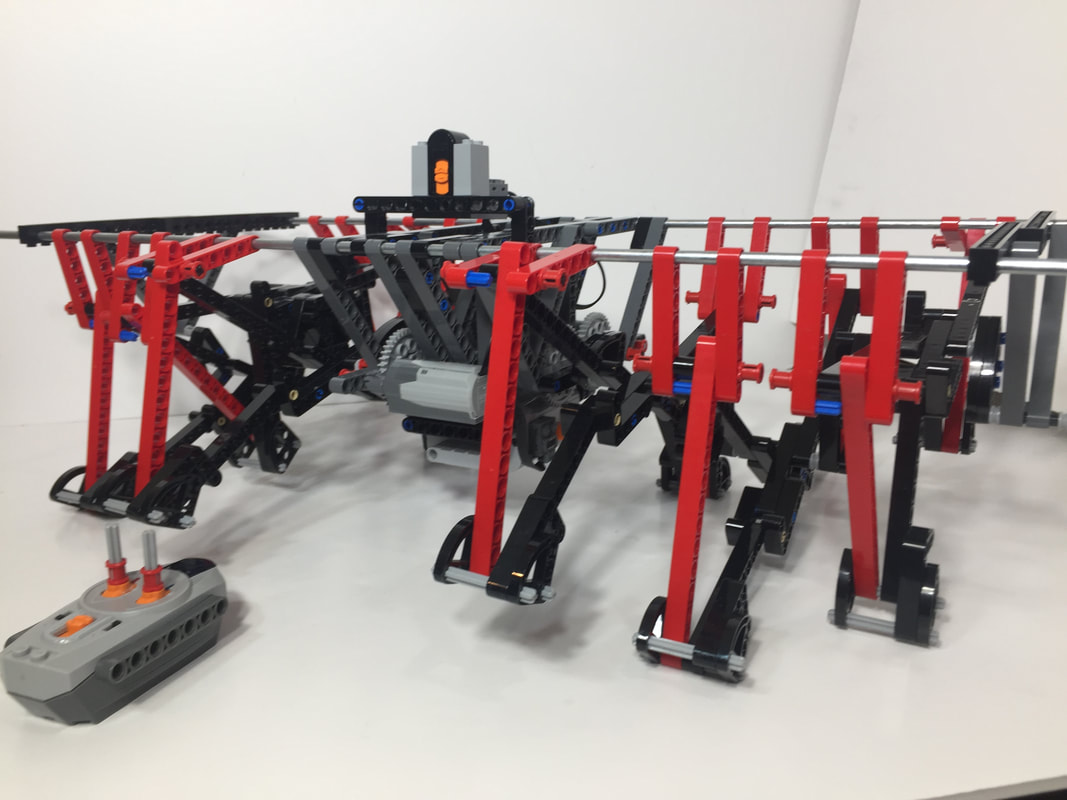
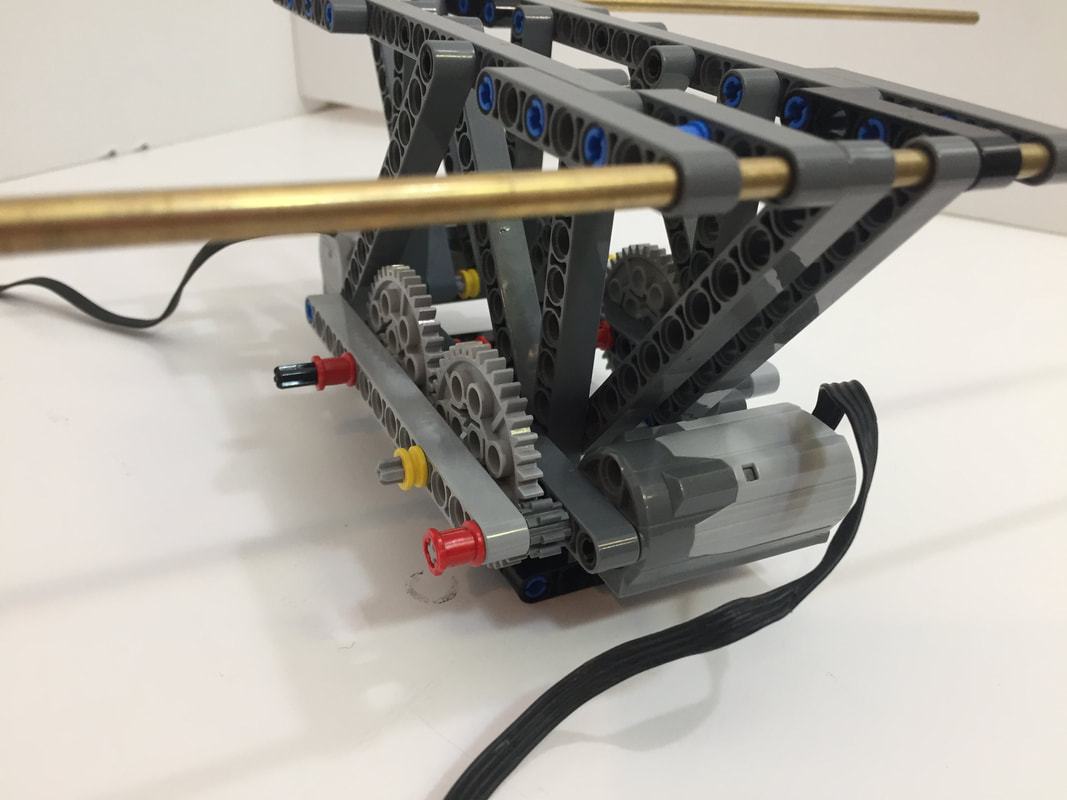
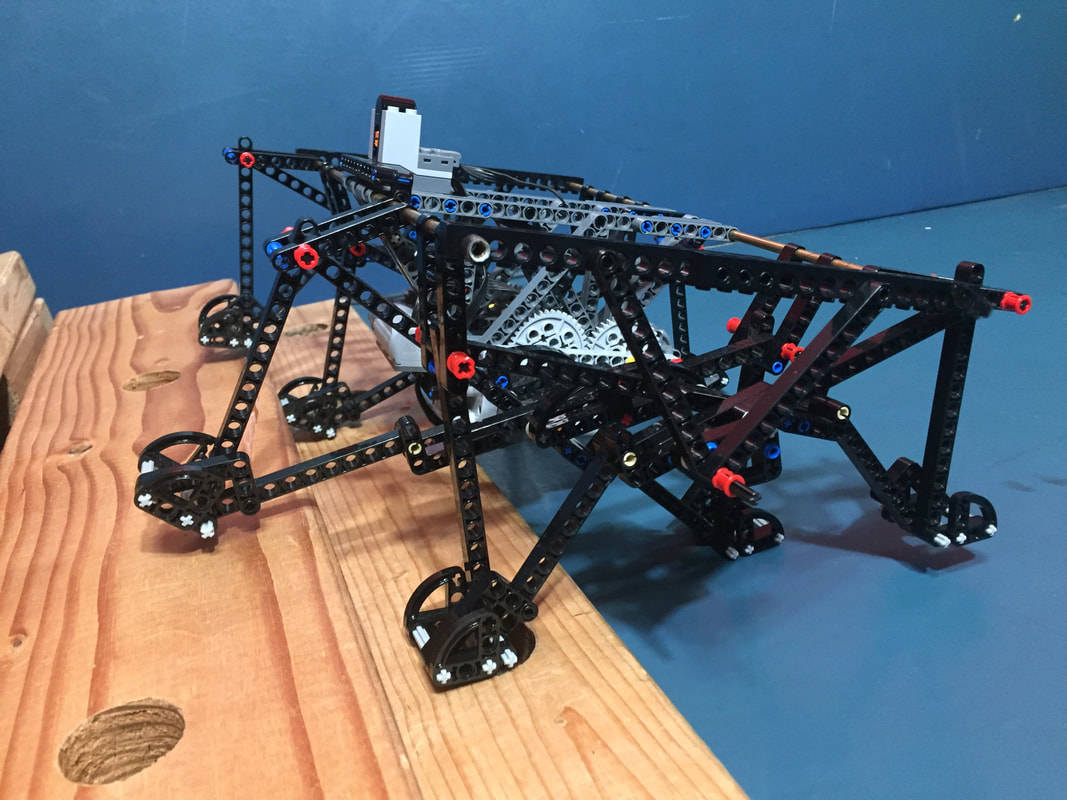
Below is an 8-leg, battery box version. Striders with only 8 legs have a gait that is too bumpy to walk at the high speeds that 12-legged Striders can. Therefore, 8-legged Striders should use LEGO's Power Function 8883 medium motors geared down by 5:1, as is used in the video below.
Below is an 8-leg, battery box version. Striders with only 8 legs have a gait that is too bumpy to walk at the high speeds that 12-legged Striders can. Therefore, 8-legged Striders should use LEGO's Power Function 8883 medium motors geared down by 5:1, as is used in the video below.
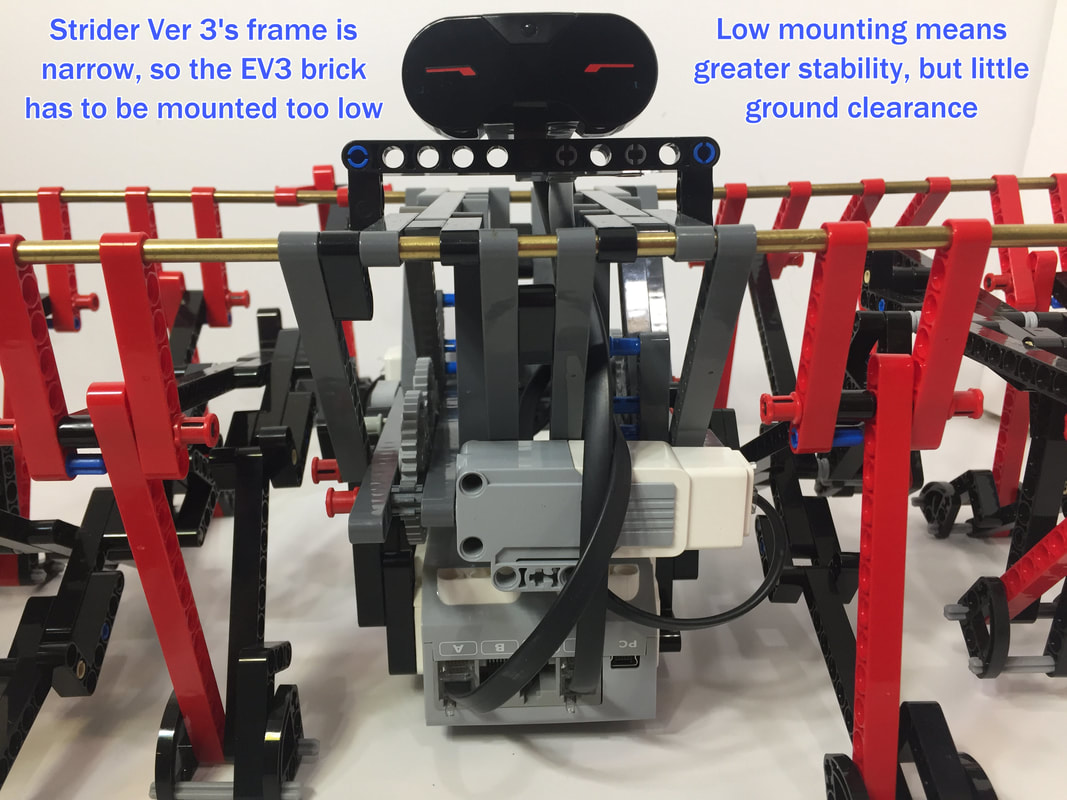
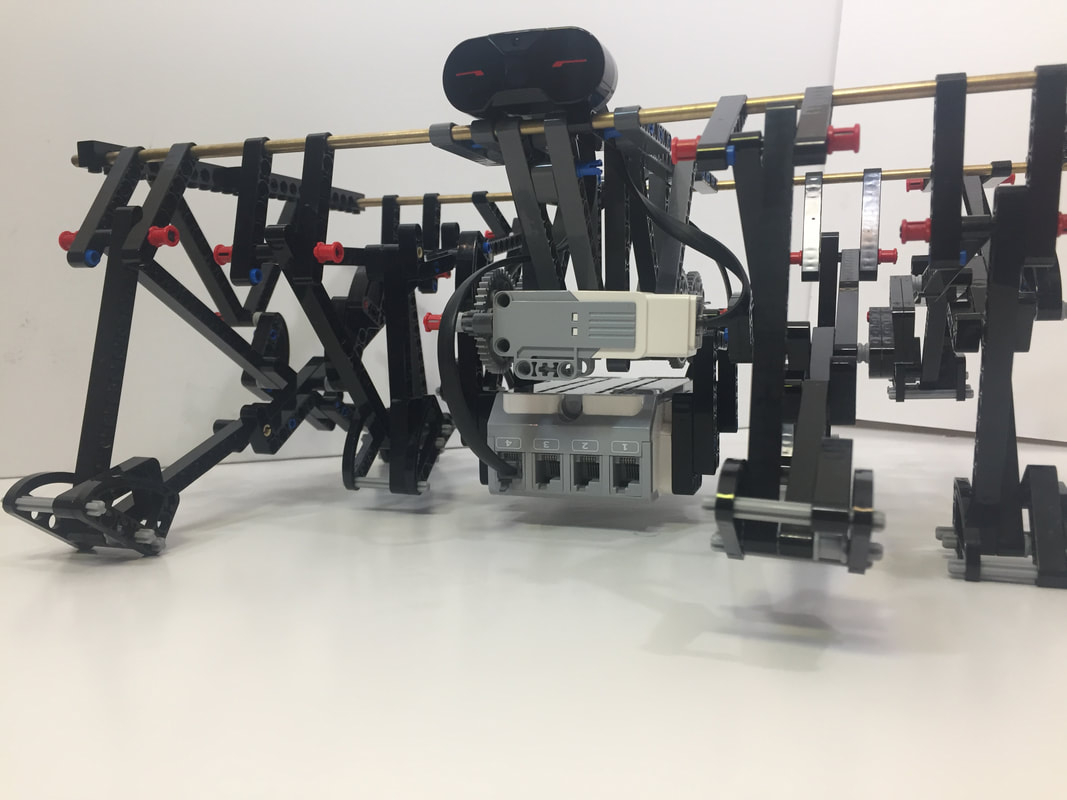
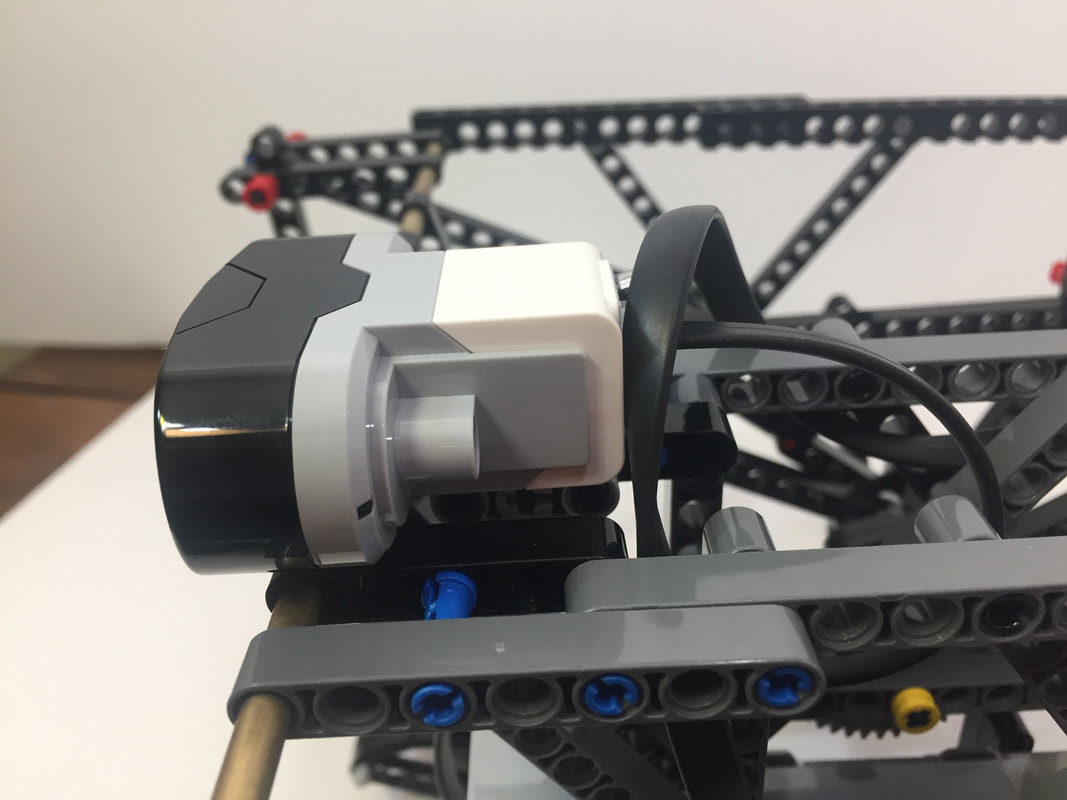
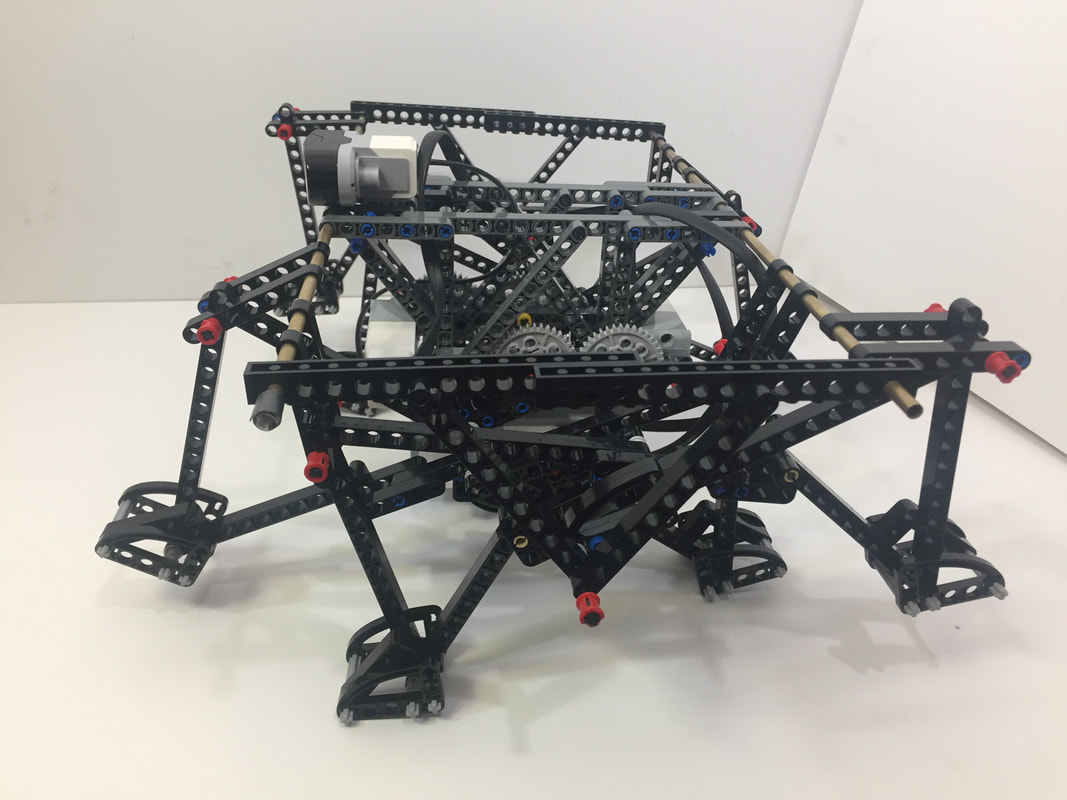
And below is a Mindstorms version using 2 medium motors. For a smoother gait, build it with 12 legs instead, which you can see an example of a couple of videos down. Also, you could try mounting the EV3 brick on top for more clearance (but it would be less stable), or perhaps sideways inside the frame as mounted in our first version of Mindstorms Klann.
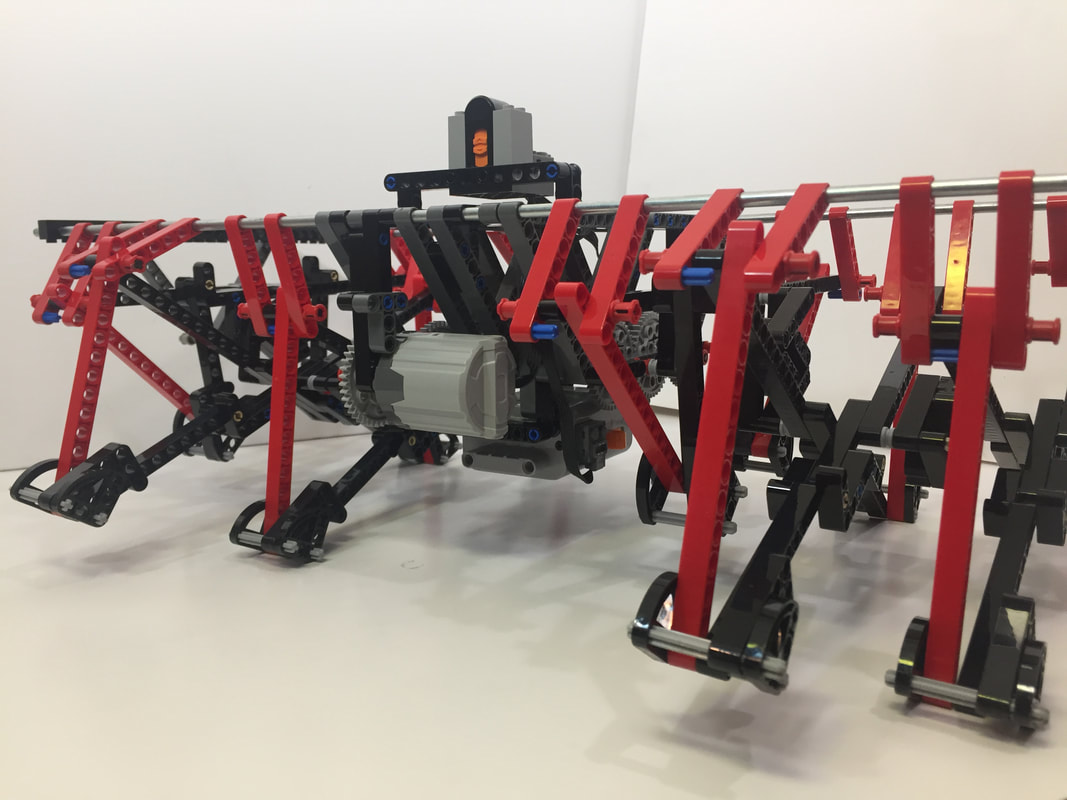
Below is a 12 leg build using the same Strider Ver 3 linkage. If you use medium motors for the 12 leg build then the only differences from the 8-leg version are:
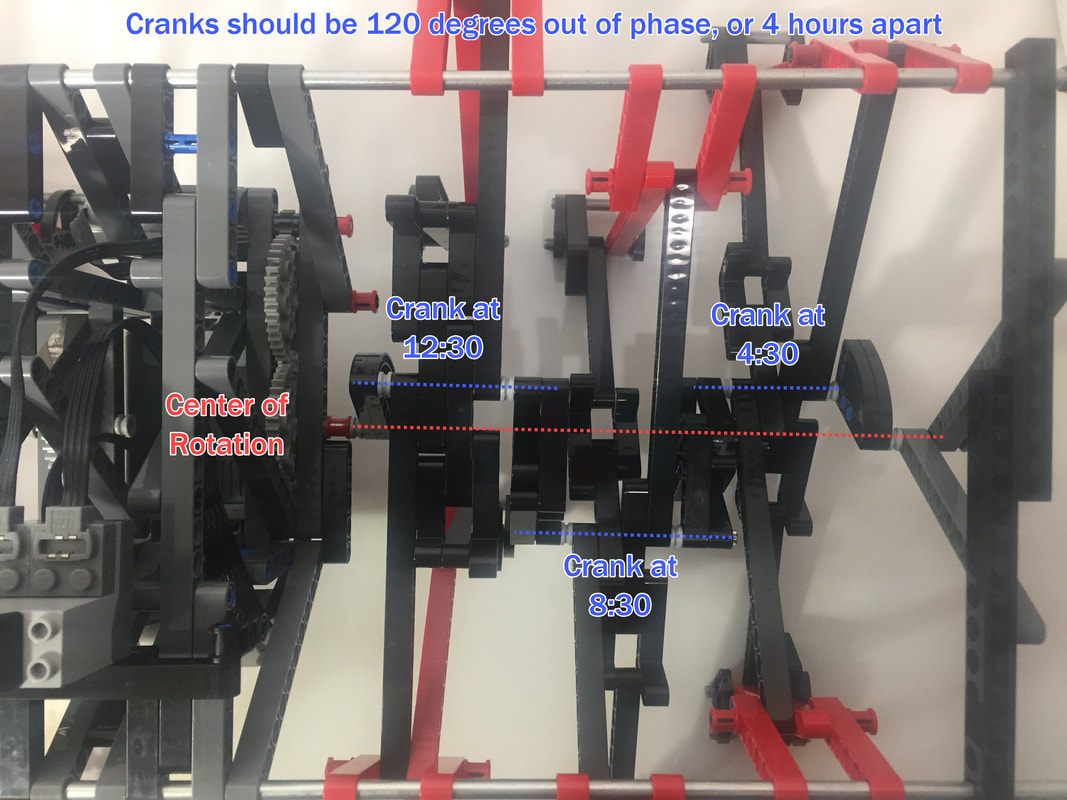
1. change the four inner cranks to 120 degrees, as shown at the bottom of the leg's instructions (which require longer axles for the legs)
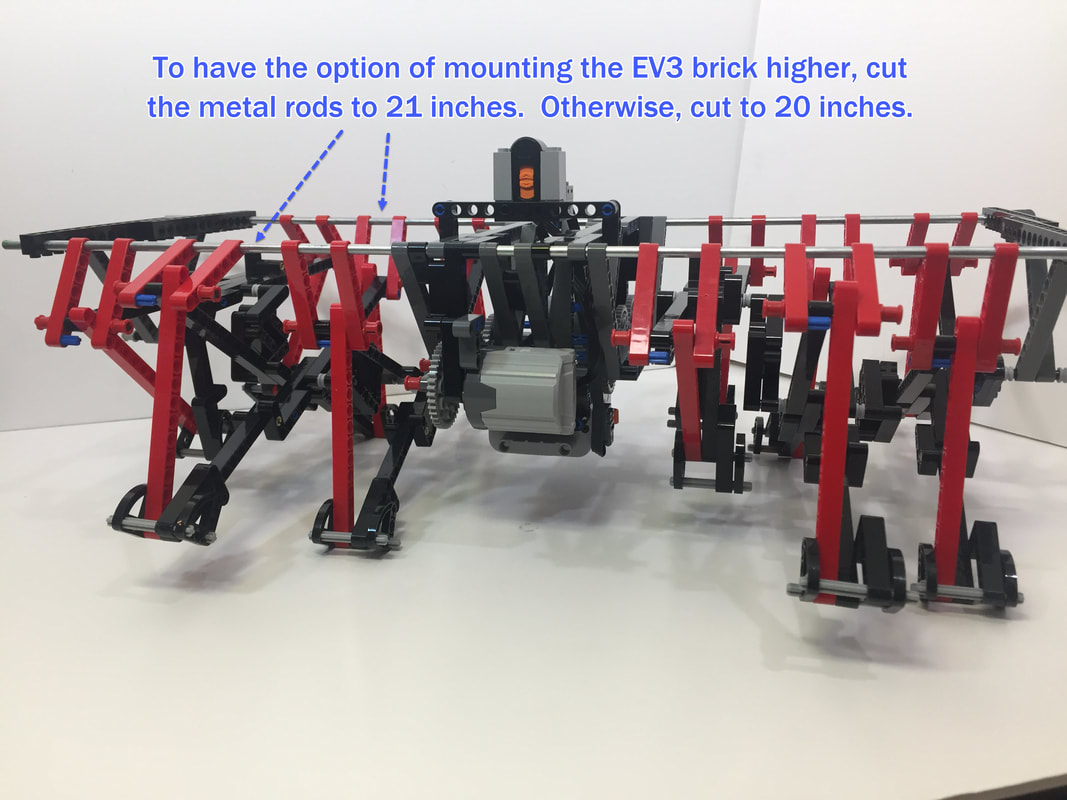
2. cut longer, 21 inch metal rods of 3/16" OD
Below tests Strider's climbing ability using LEGO's Power Function 8883 medium motors geared down by 5:1. The zig-zag surface of air filters can trip walkers, but they also provide small "steps" for climbing.
And the following EV3 version uses two of the Mindstorms medium motors as well (we bought the second motor on Amazon). This version has the EV3 brick mounted 2 holes higher, giving Strider the clearance to make it over the ramp. This required widening the frame by 2 holes - see these instructions for the modification to the frame.

Strider Ver 3 using medium motors
Strider Ver 3 using medium motors

Strider Ver 3 using XL motors, which allow for higher gearing and faster speeds for 12-legged Striders
You can find some detailed images of mounting an XL motor at the end of these instructions.
Building Instructions
Each side of Strider's frame is the same.
Build 2 of the following frame sides.
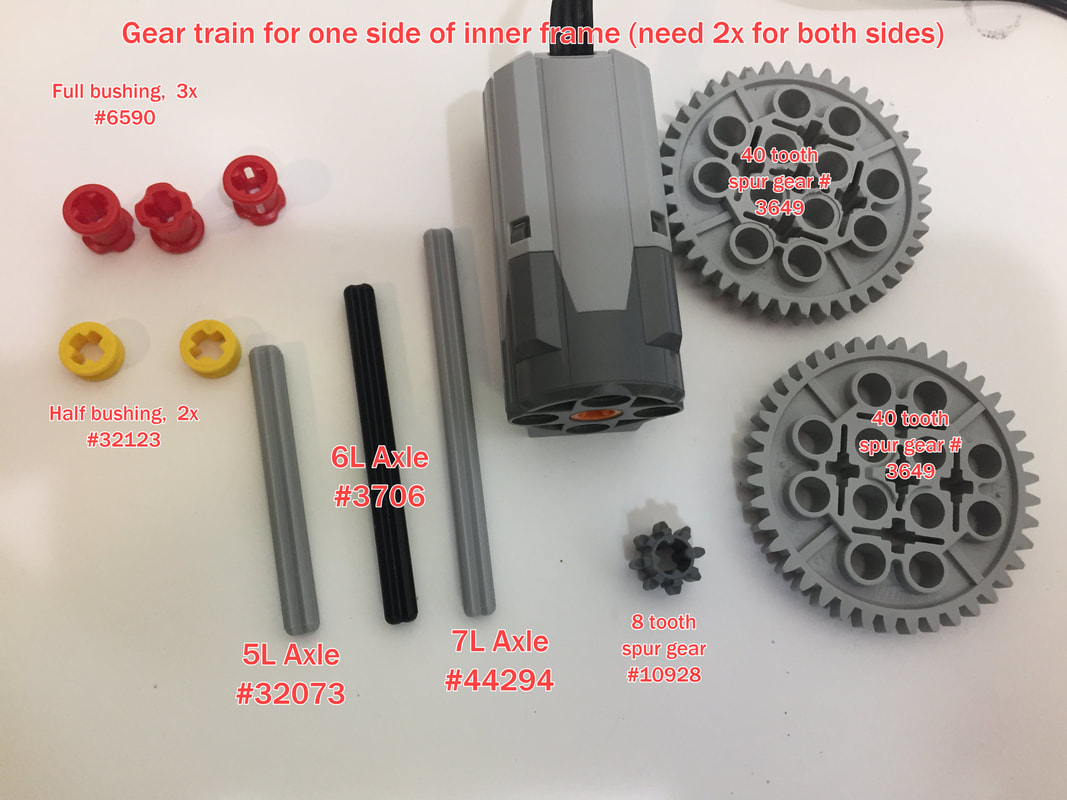
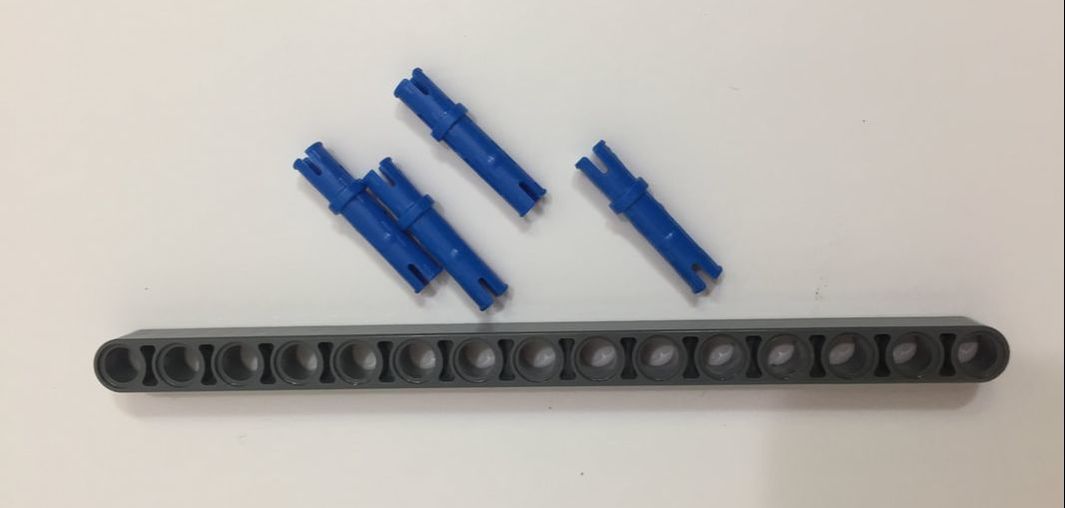
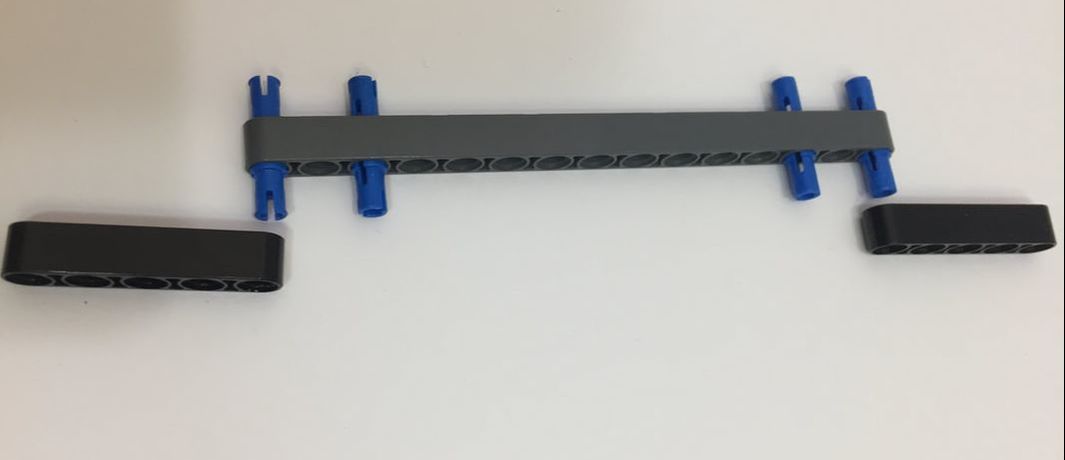
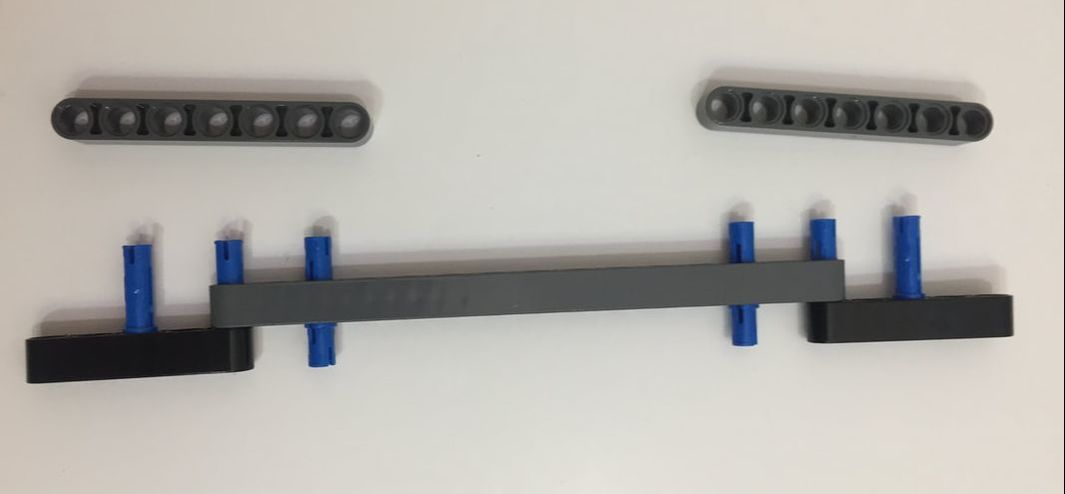
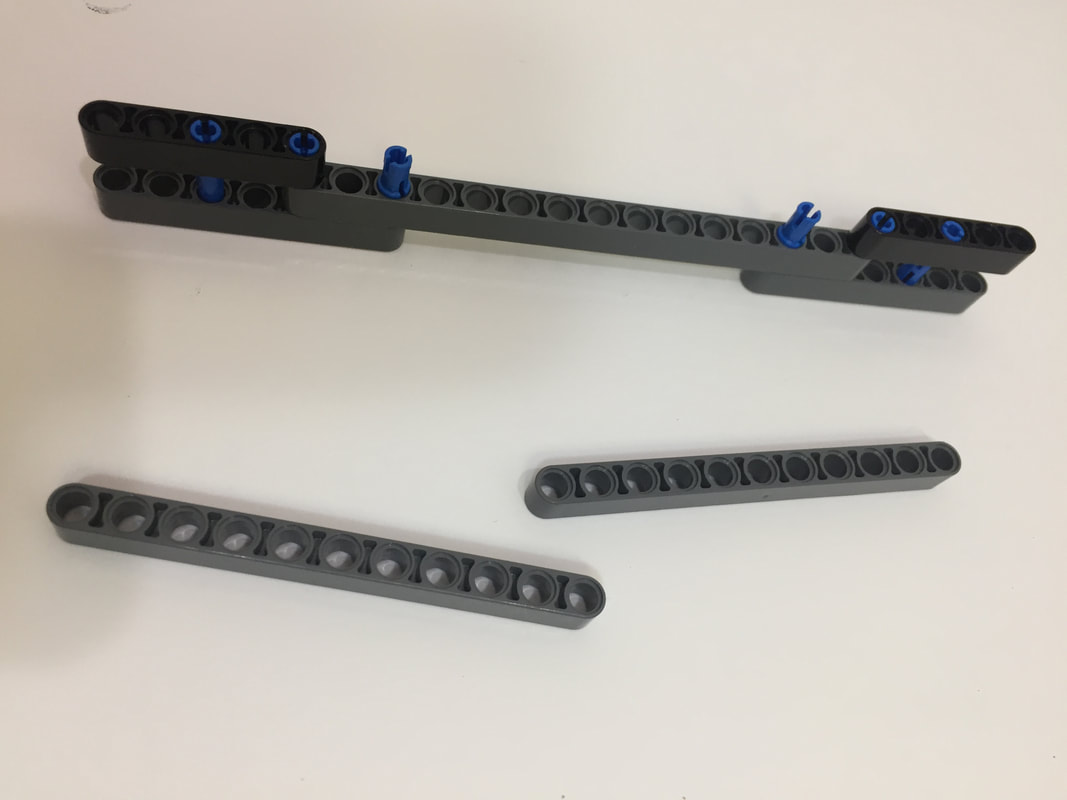
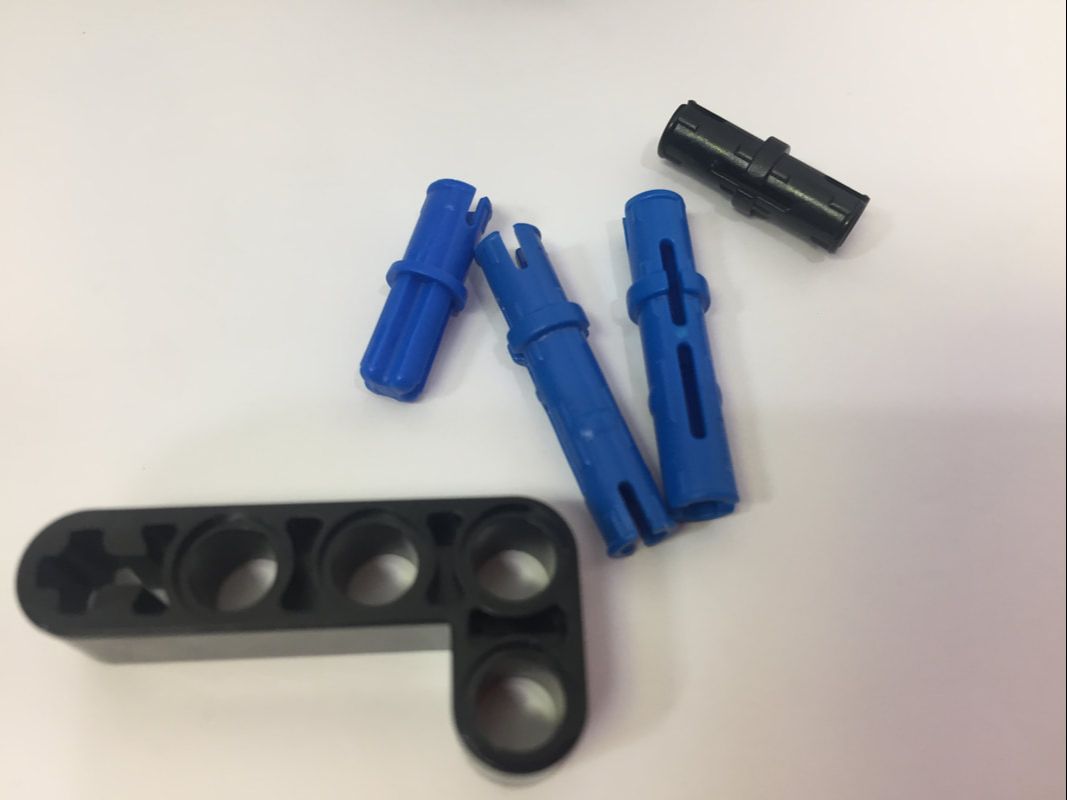
Below are the frame Parts for one side, which we purchased on Bricklink.com. If you've never used Bricklink, an easy way to browse for parts is by going to a larger store. Here's a list of stores in the USA.
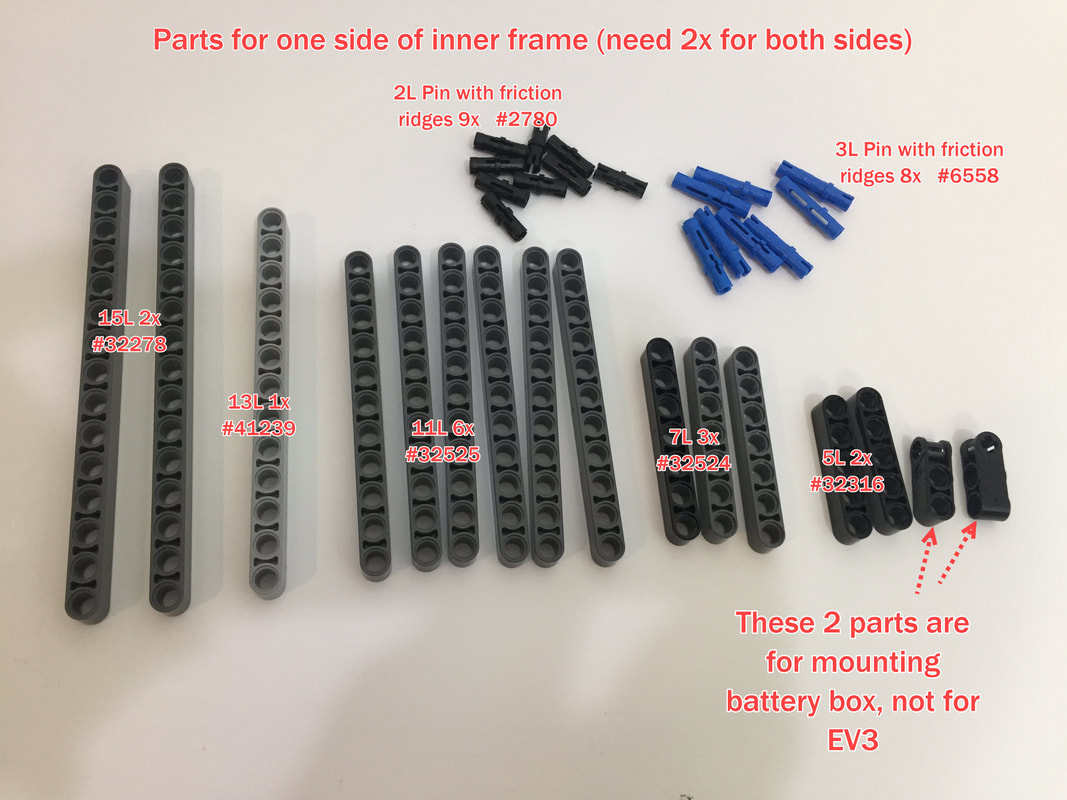
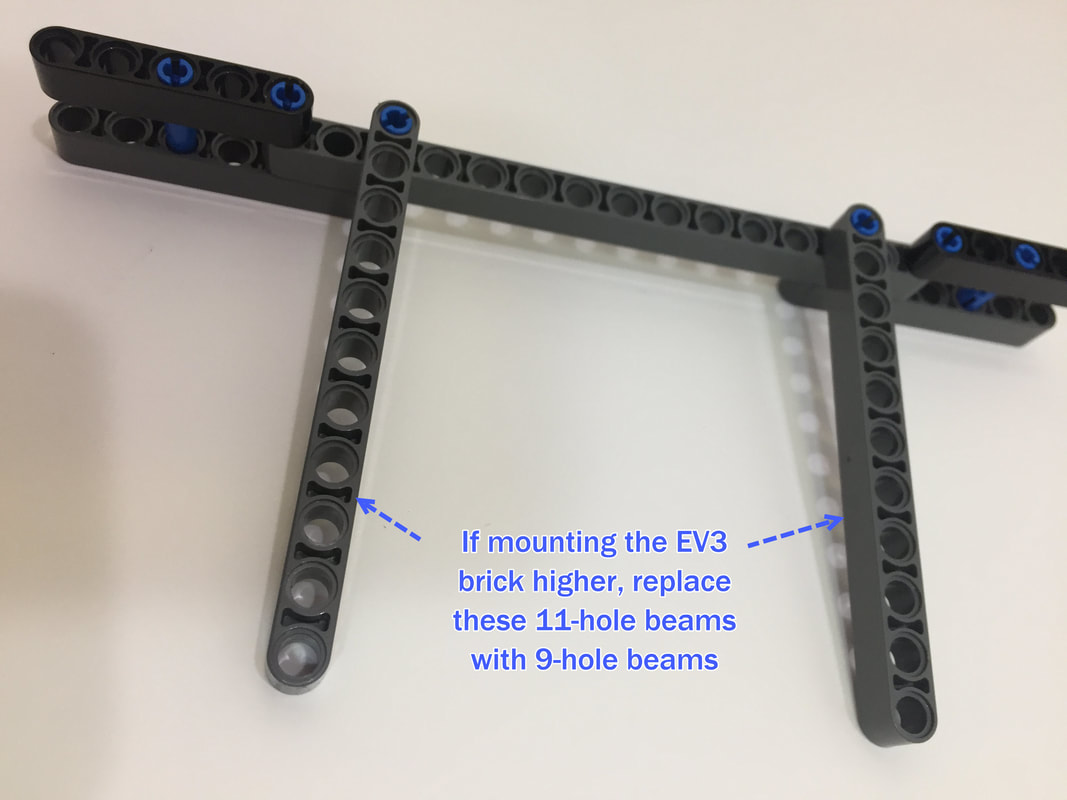
Update: if mounting the EV3 brick higher, than 2 of the 11-hole beams should be replaced by 9-hole beams.
Below are part numbers for ordering other parts, depending on how you choose to design your Strider.
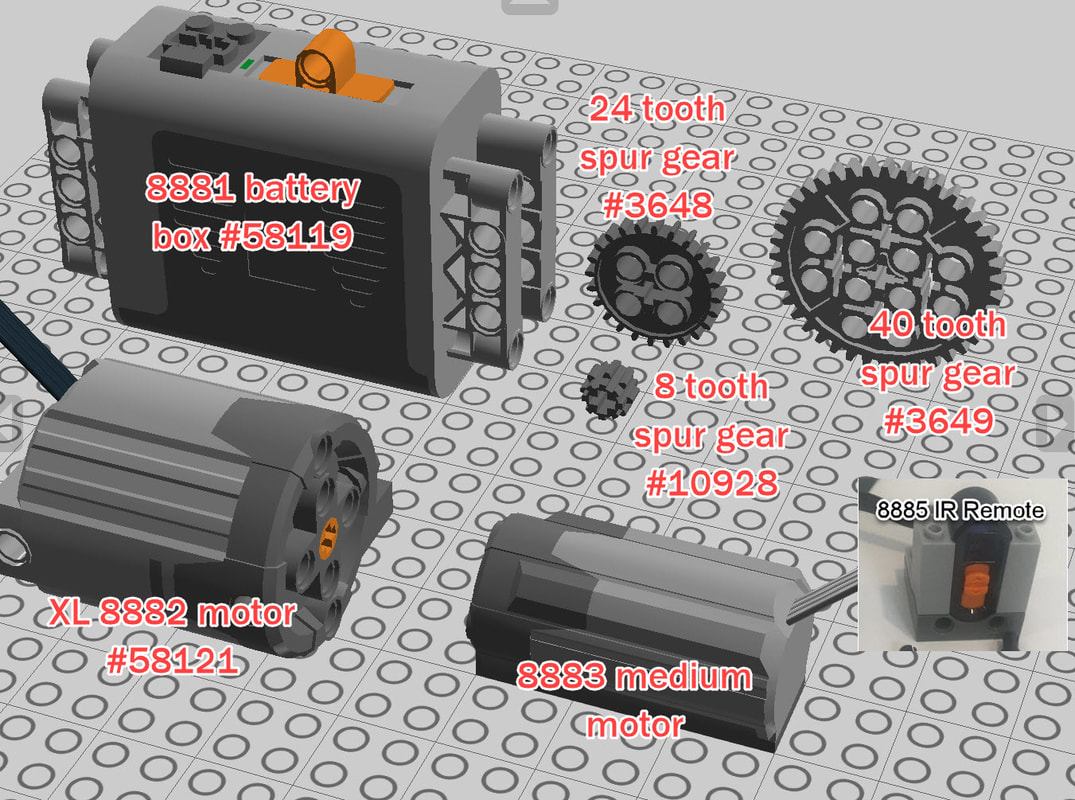
Assorted Part Numbers
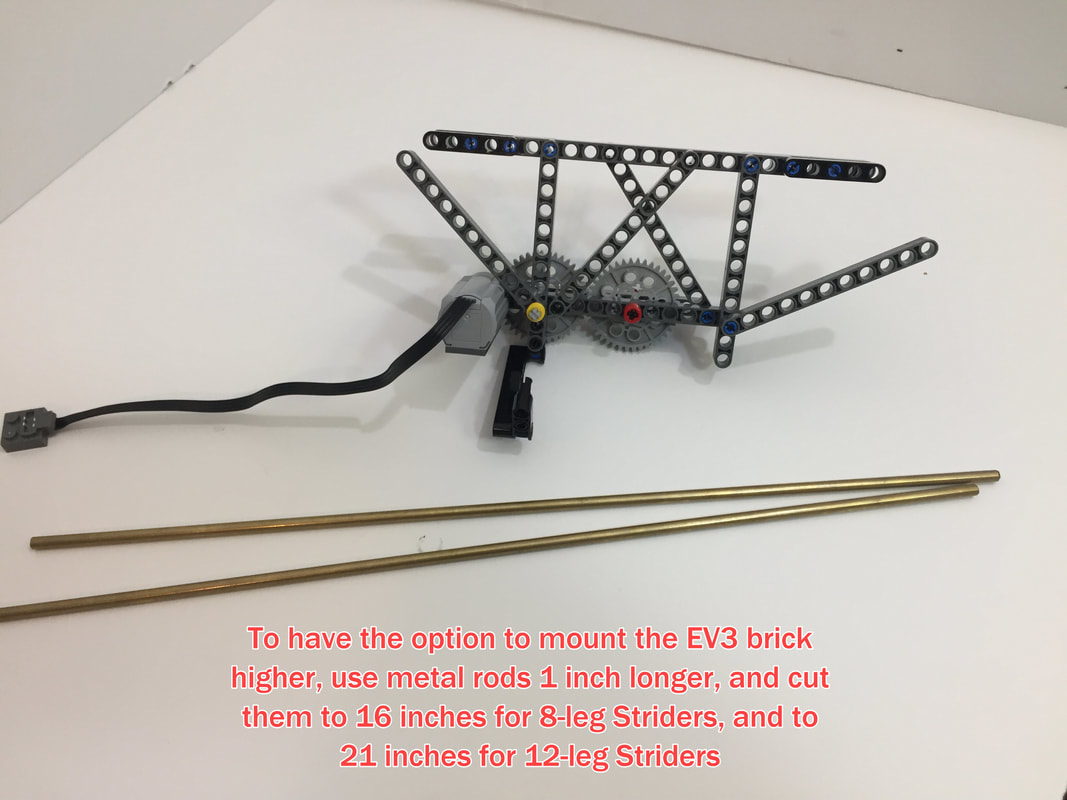
Also, the two metal support rods have a 3/16" OD. We've used brass tubes, aluminum rods, and zinc plated steel rods depending on what our local hardware store had in stock. To give more flexibility to mount an EV3 brick higher, cut the rods to 16" for 8-legged Striders, and to 21" for 12-legged Striders.
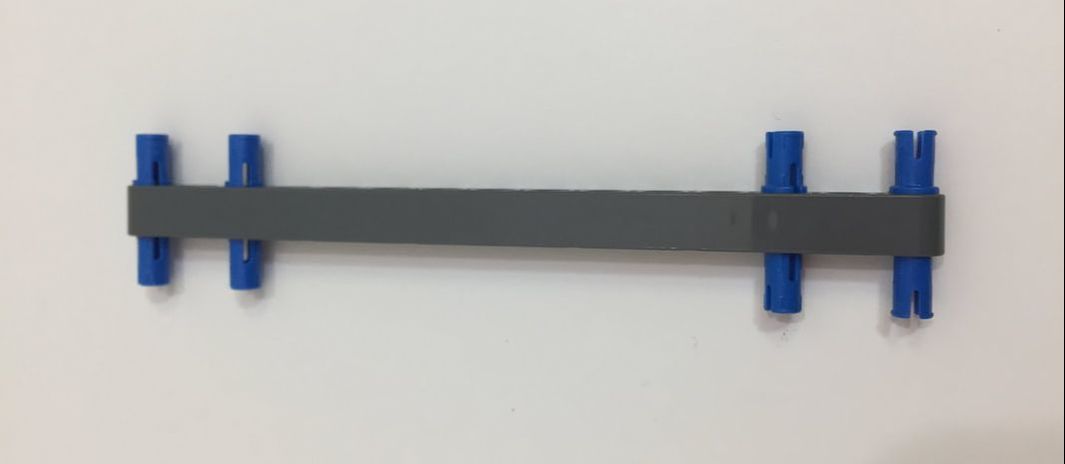
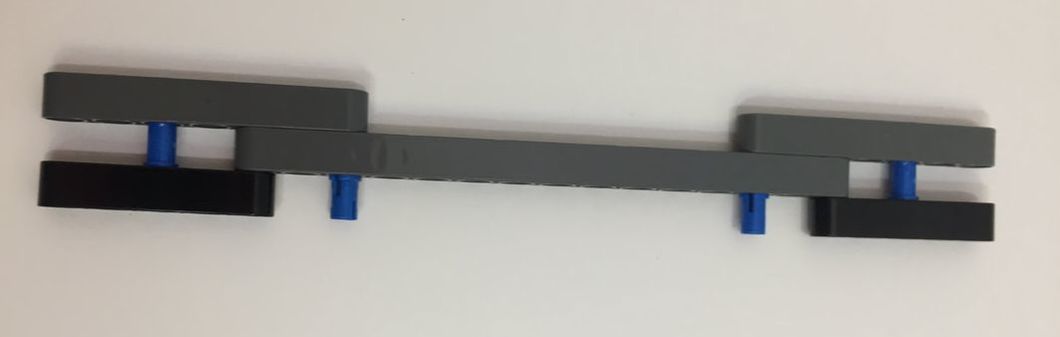
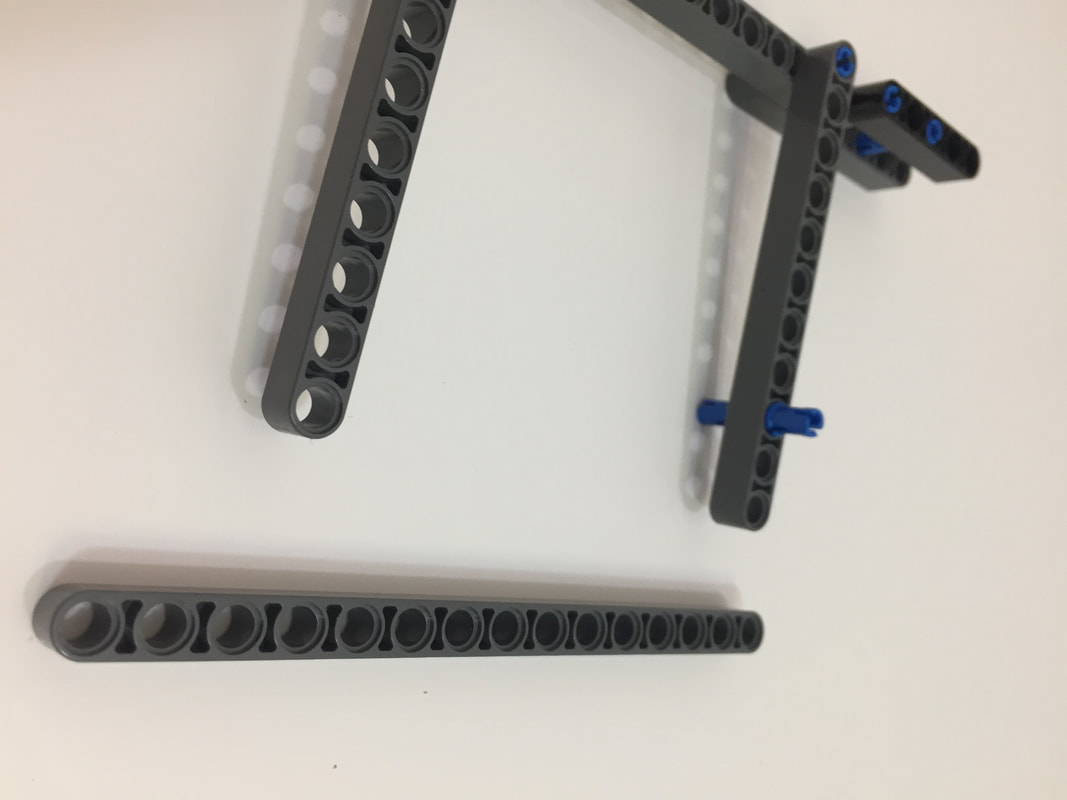
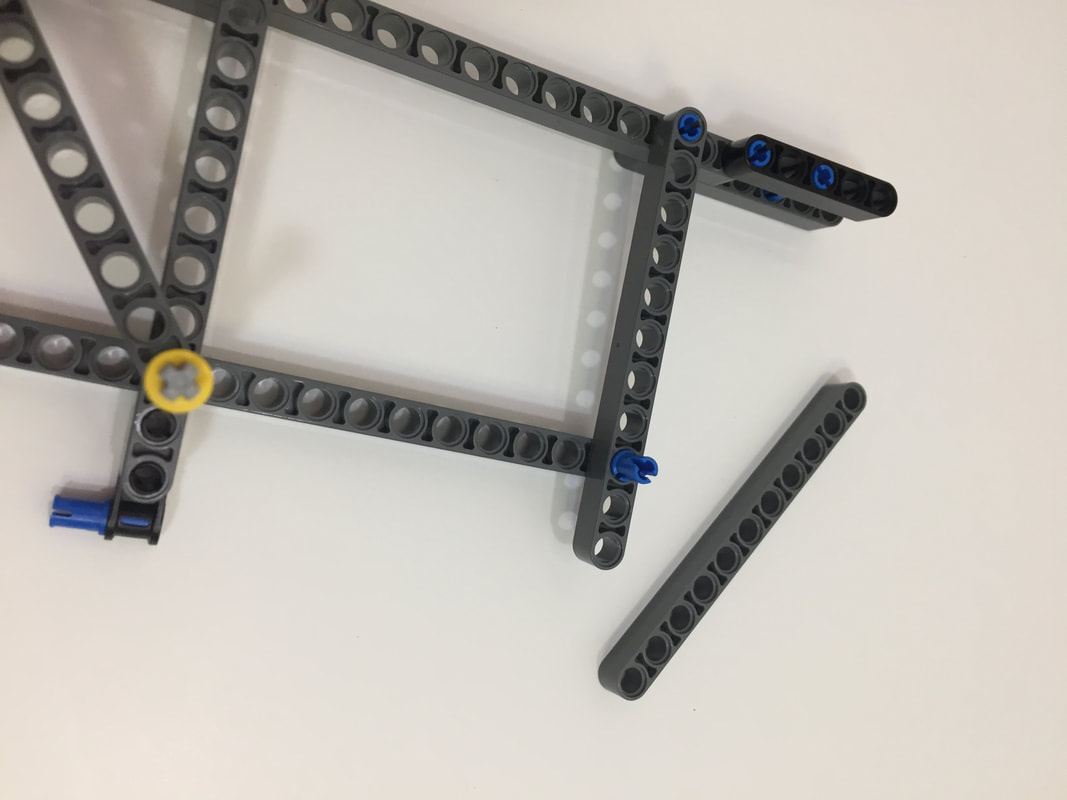
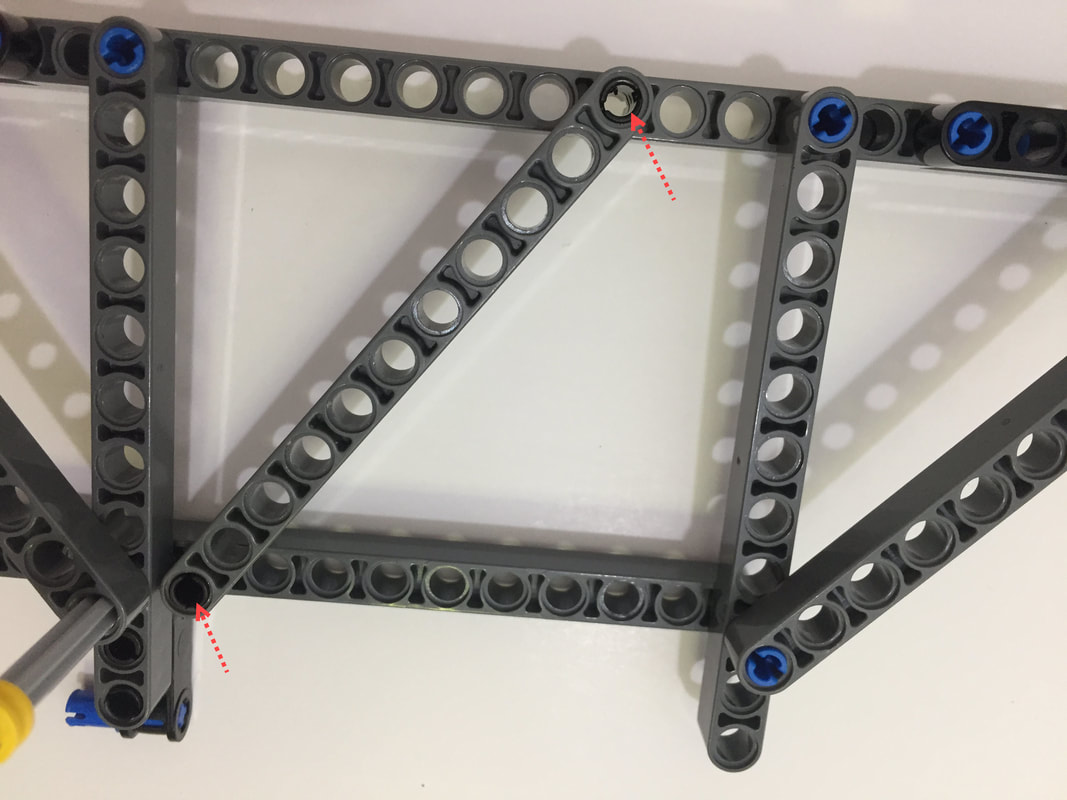
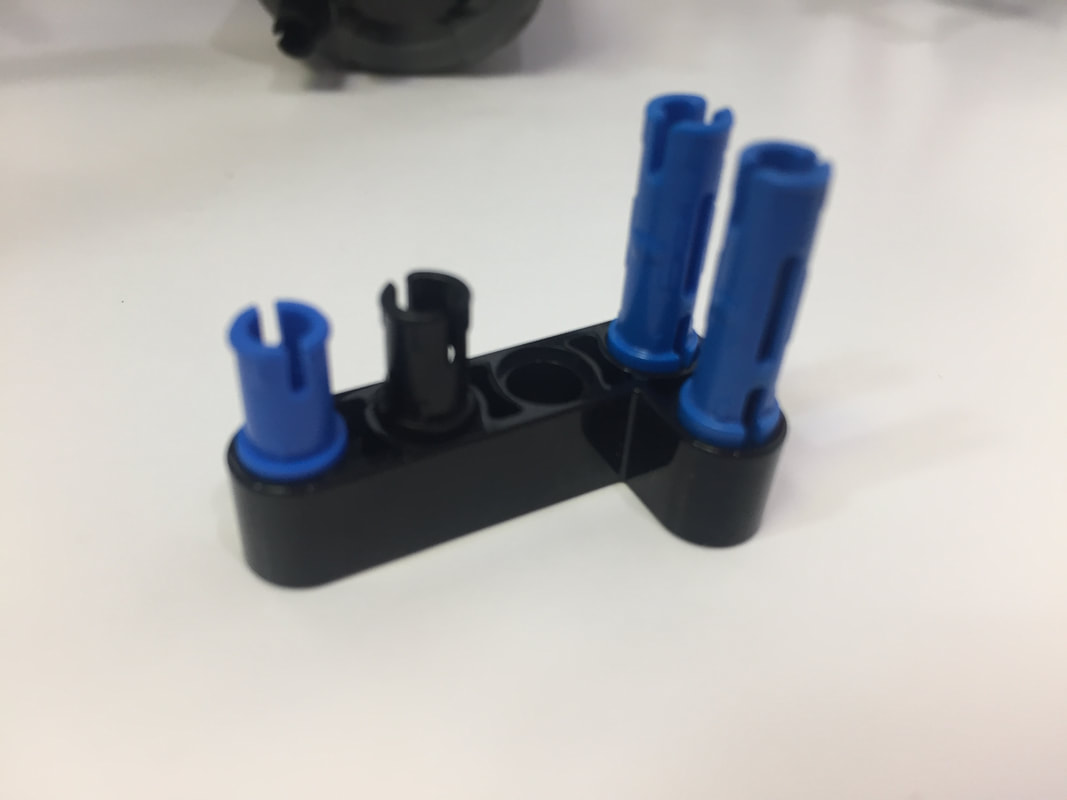
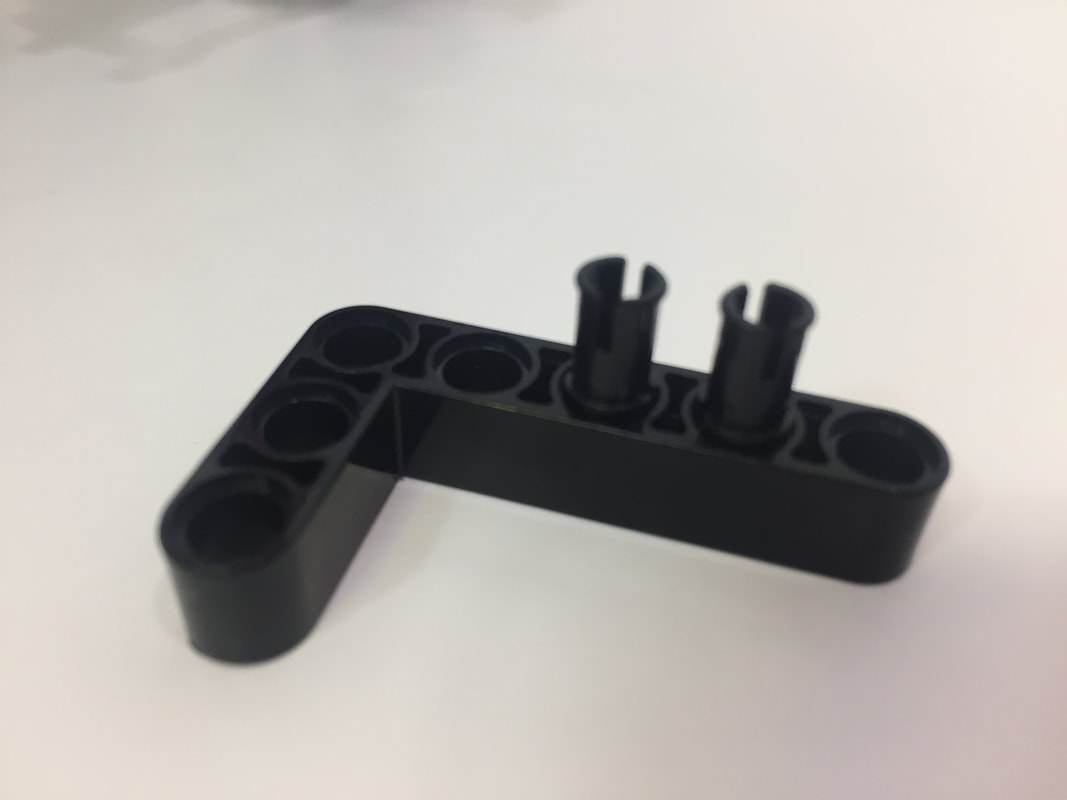
Let's begin:
Let's begin:
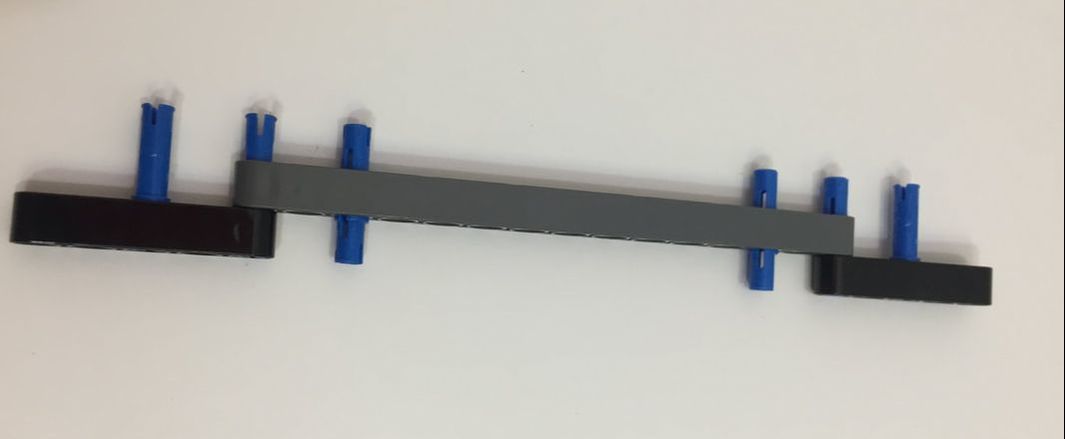
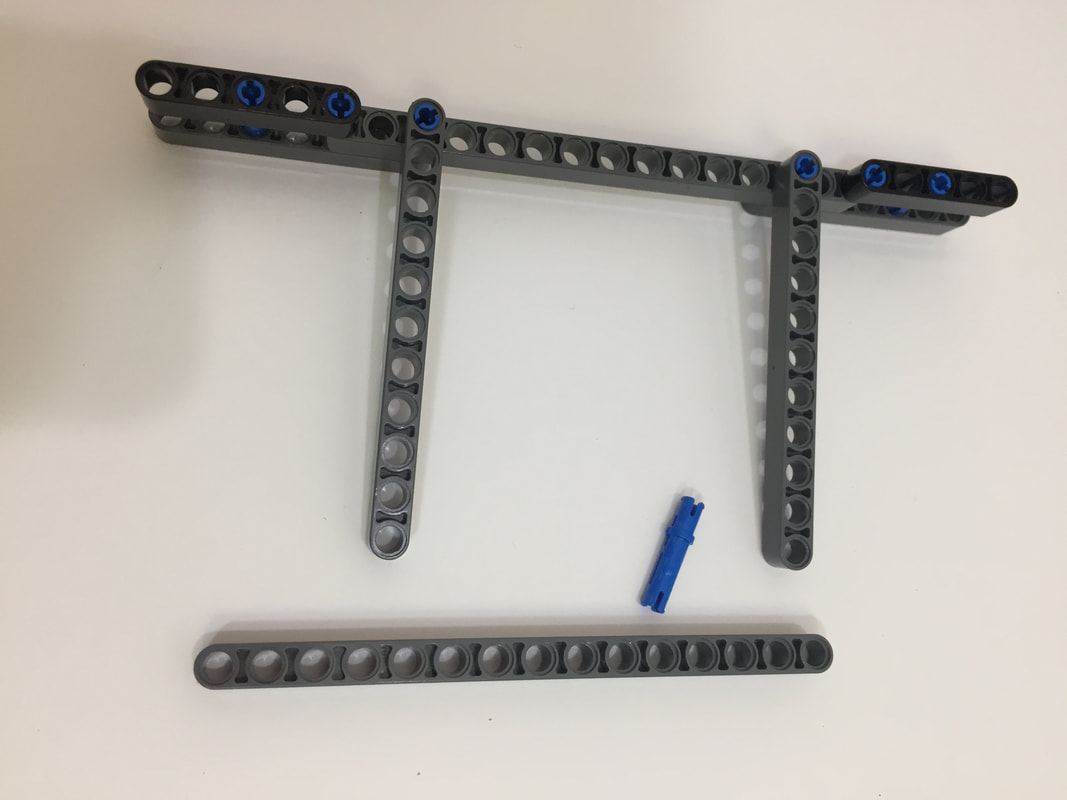


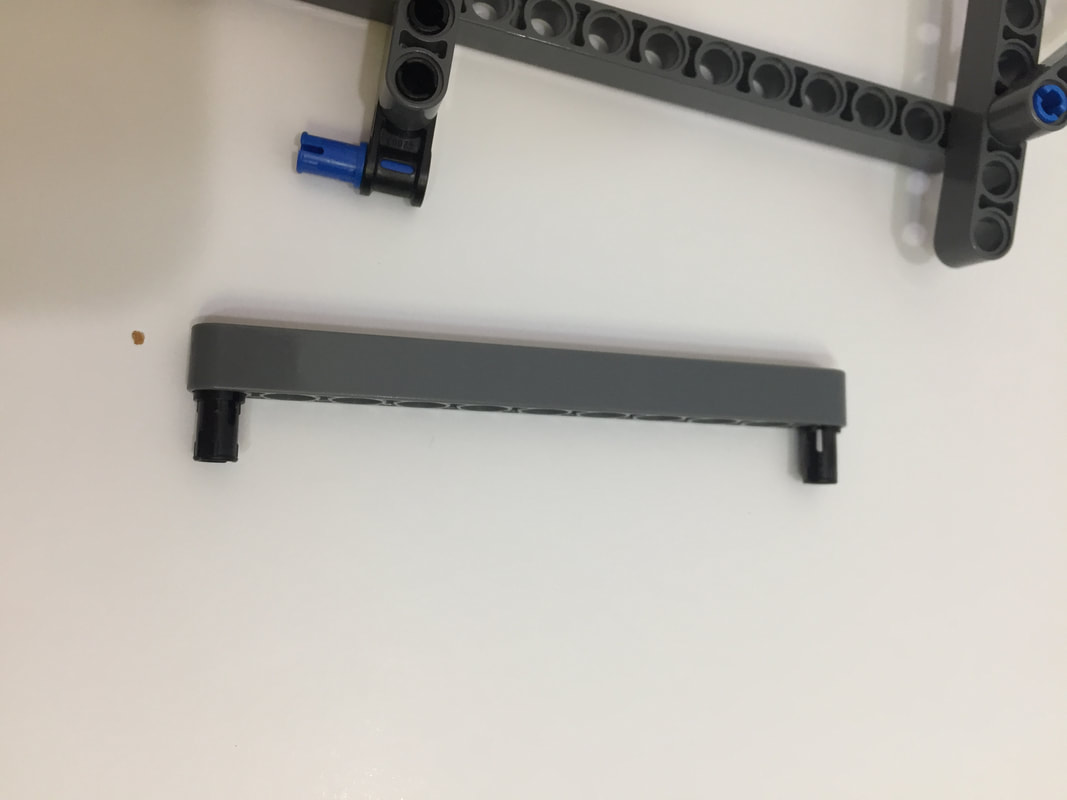
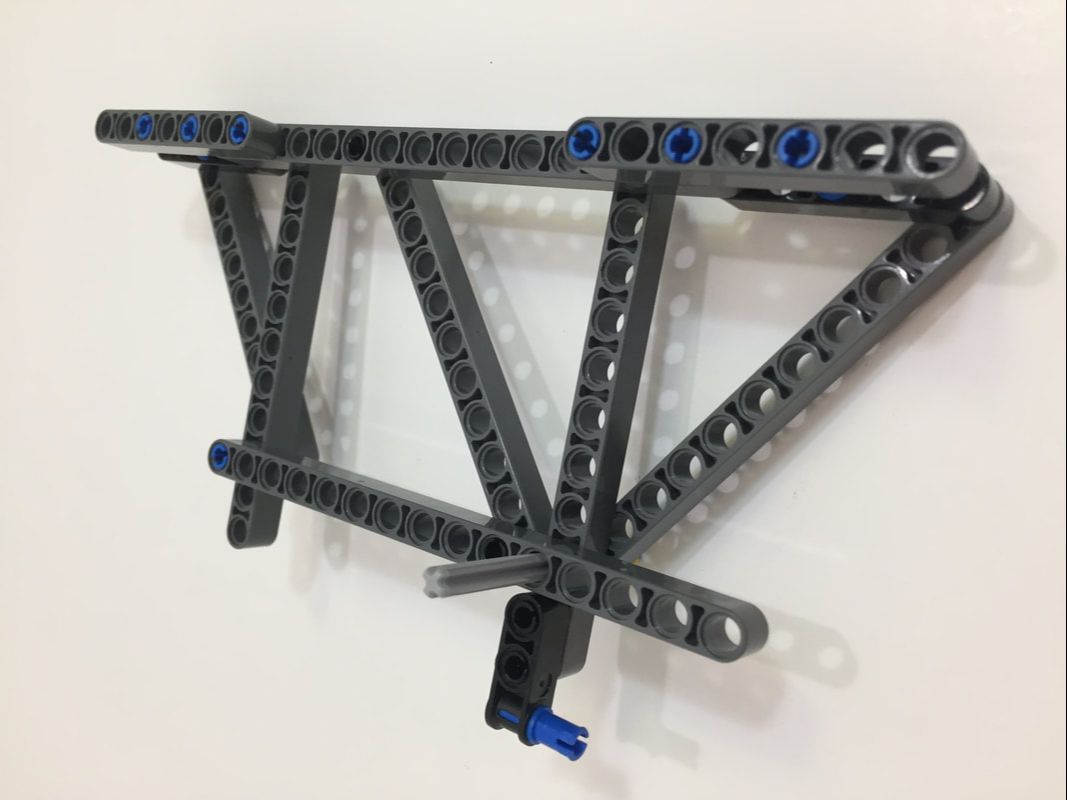
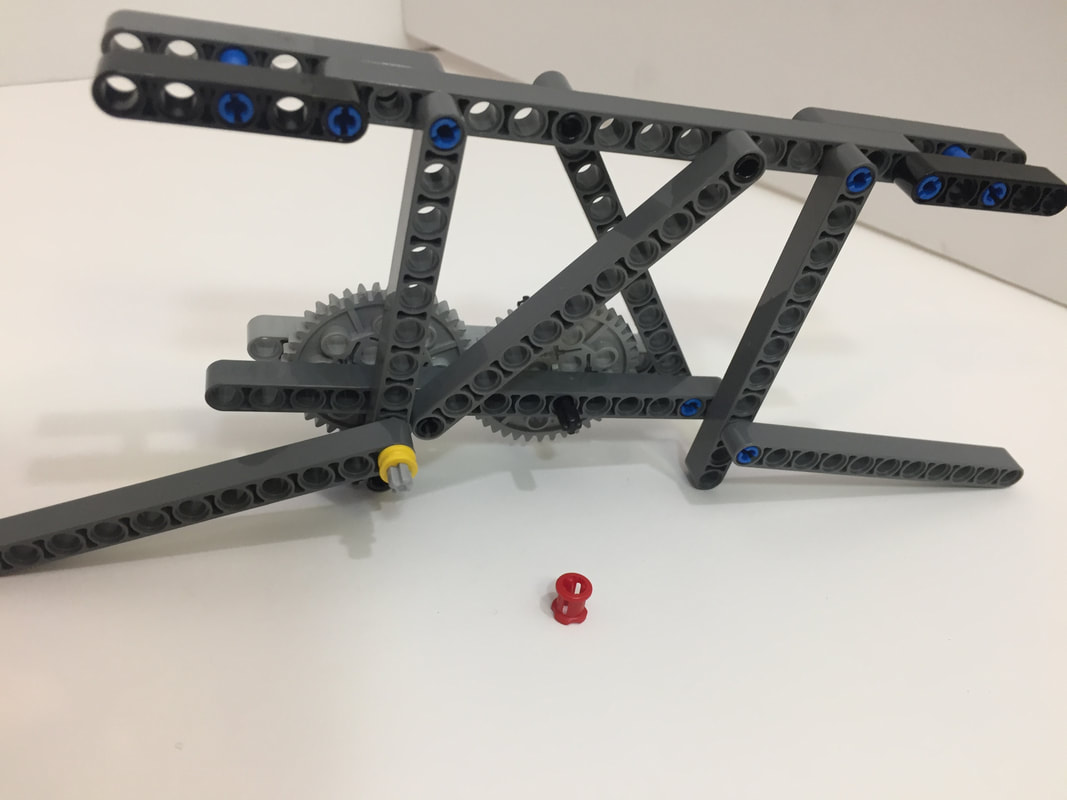
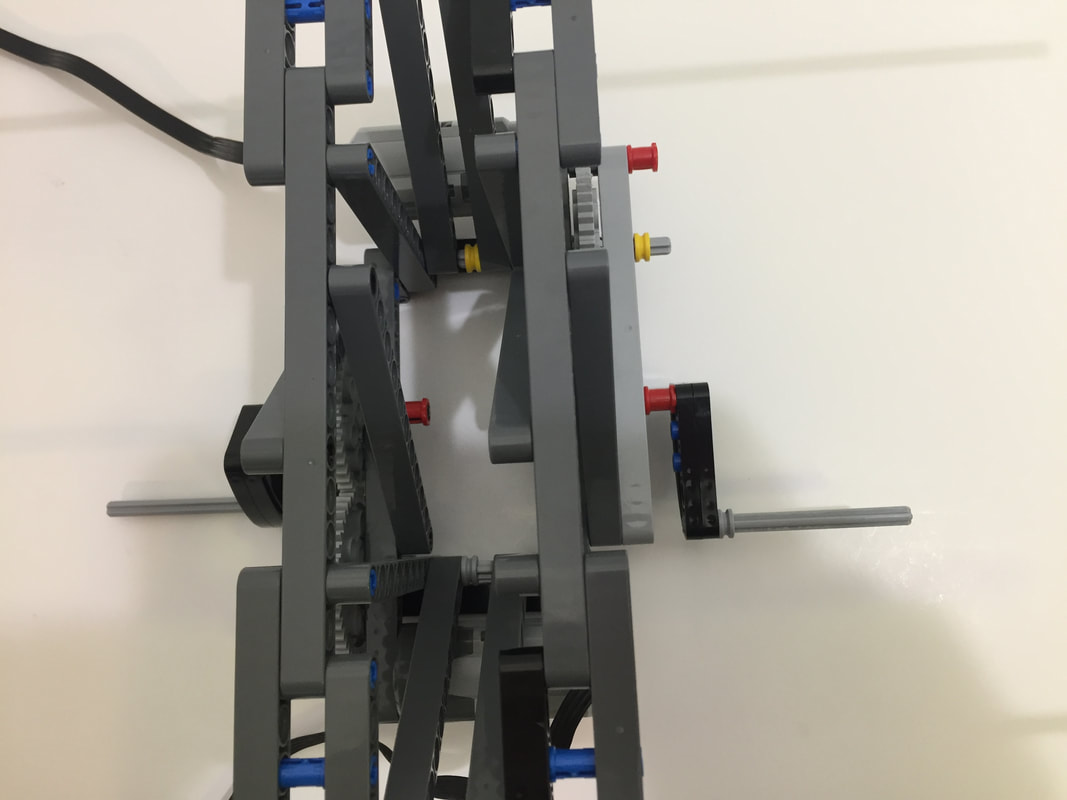
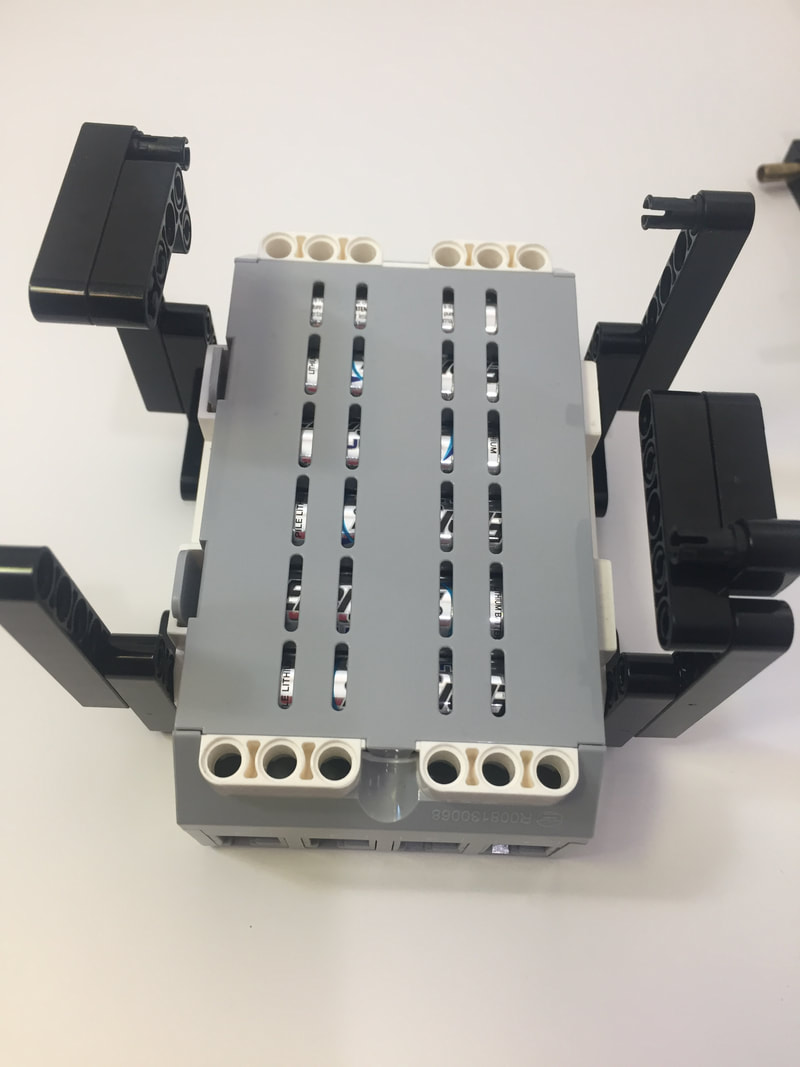
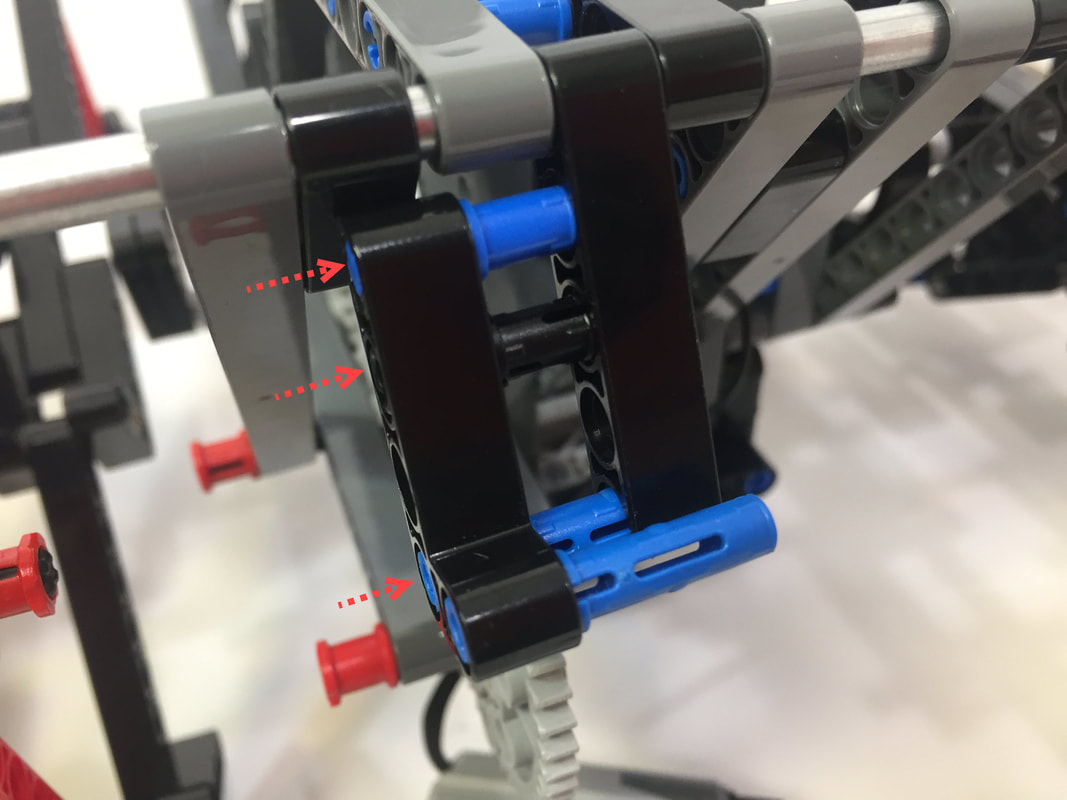
Next, flip the frame over:
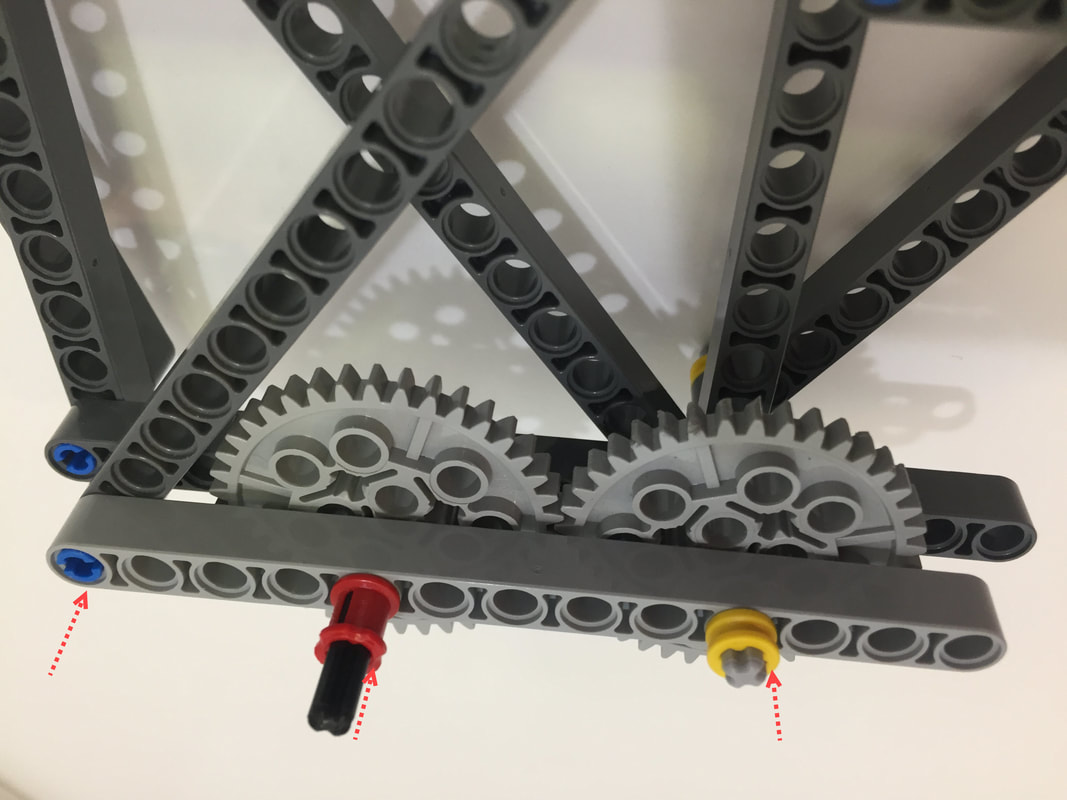
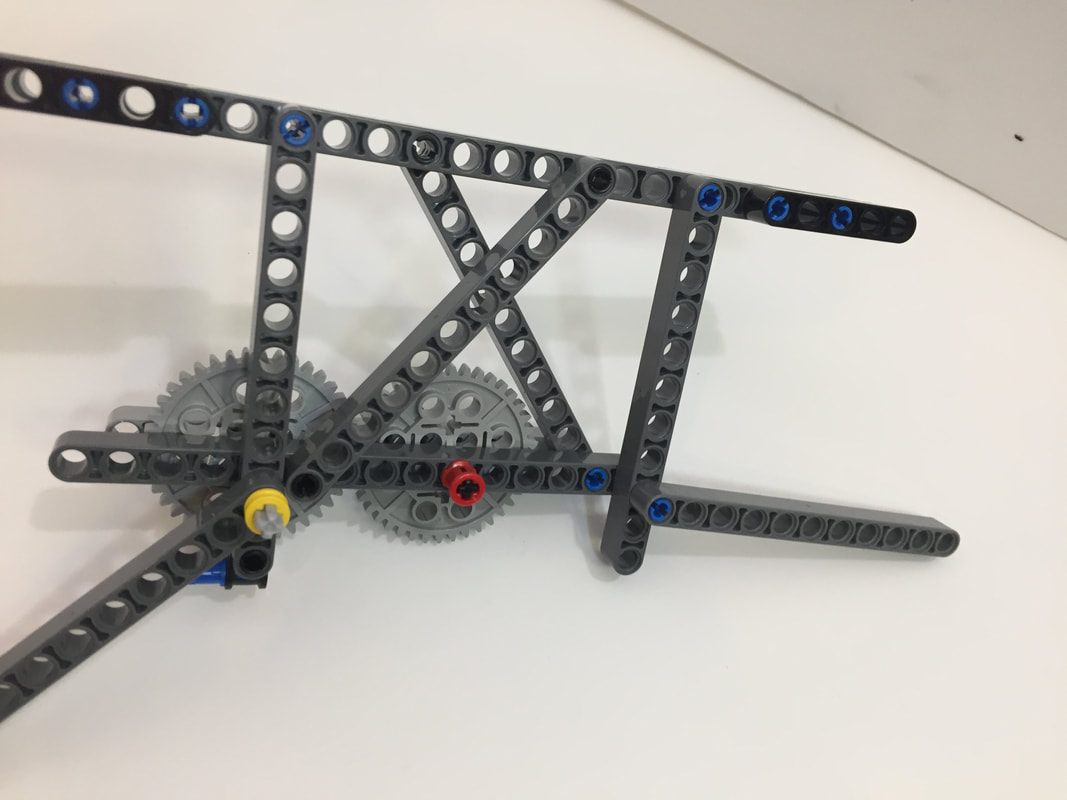
then, turn the frame around and add a red bushing to the other side:
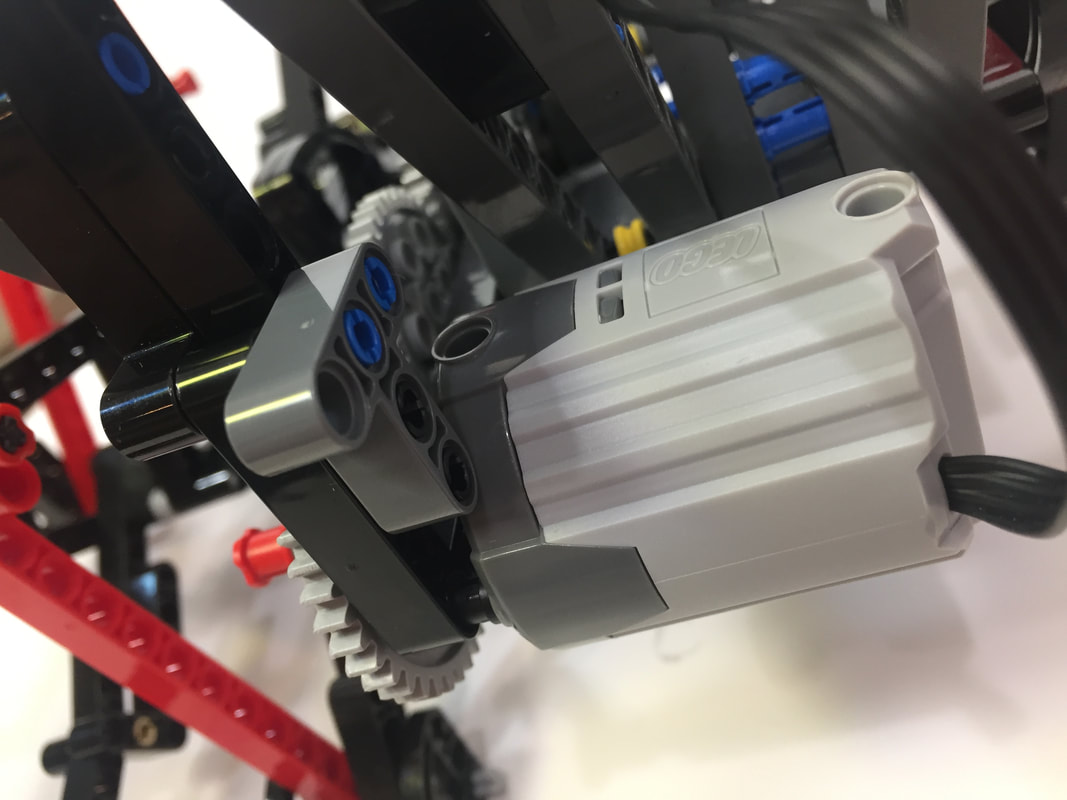
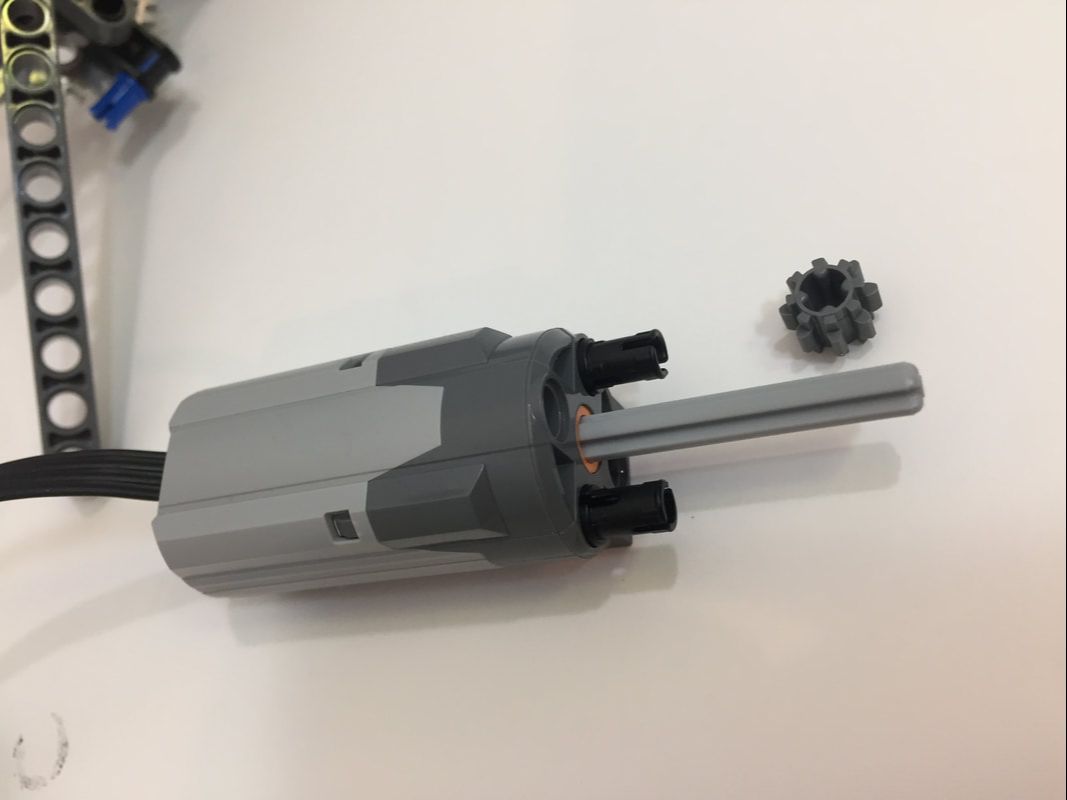
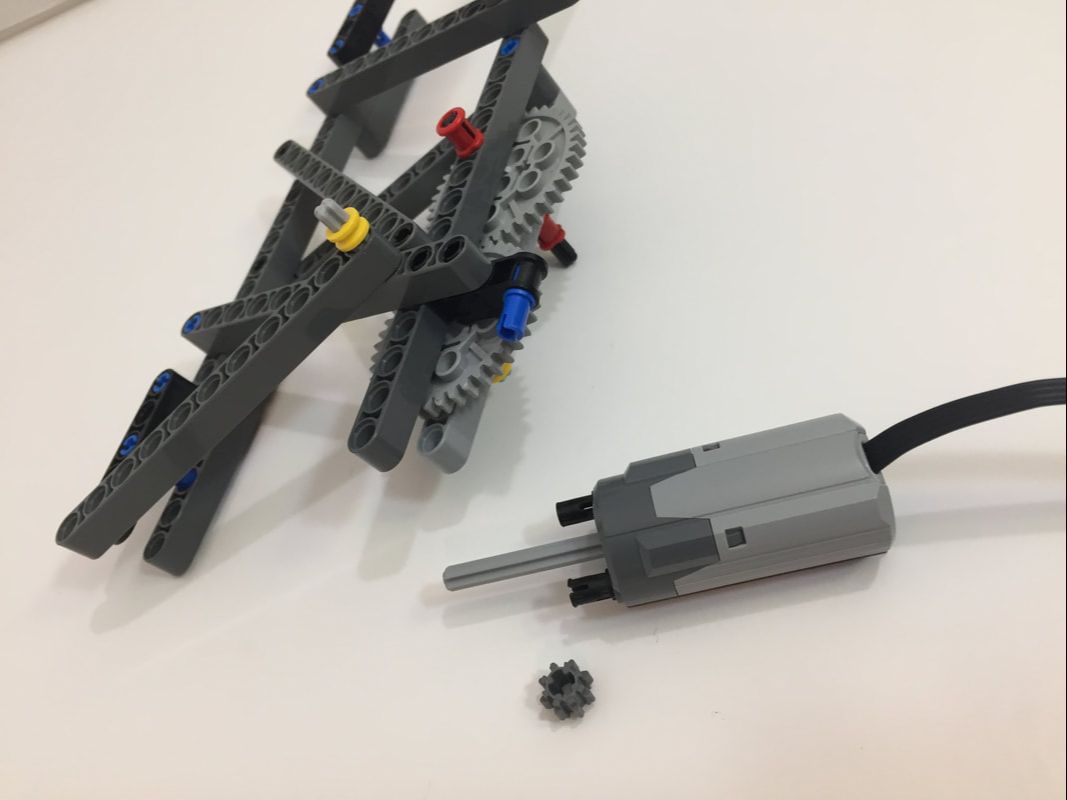
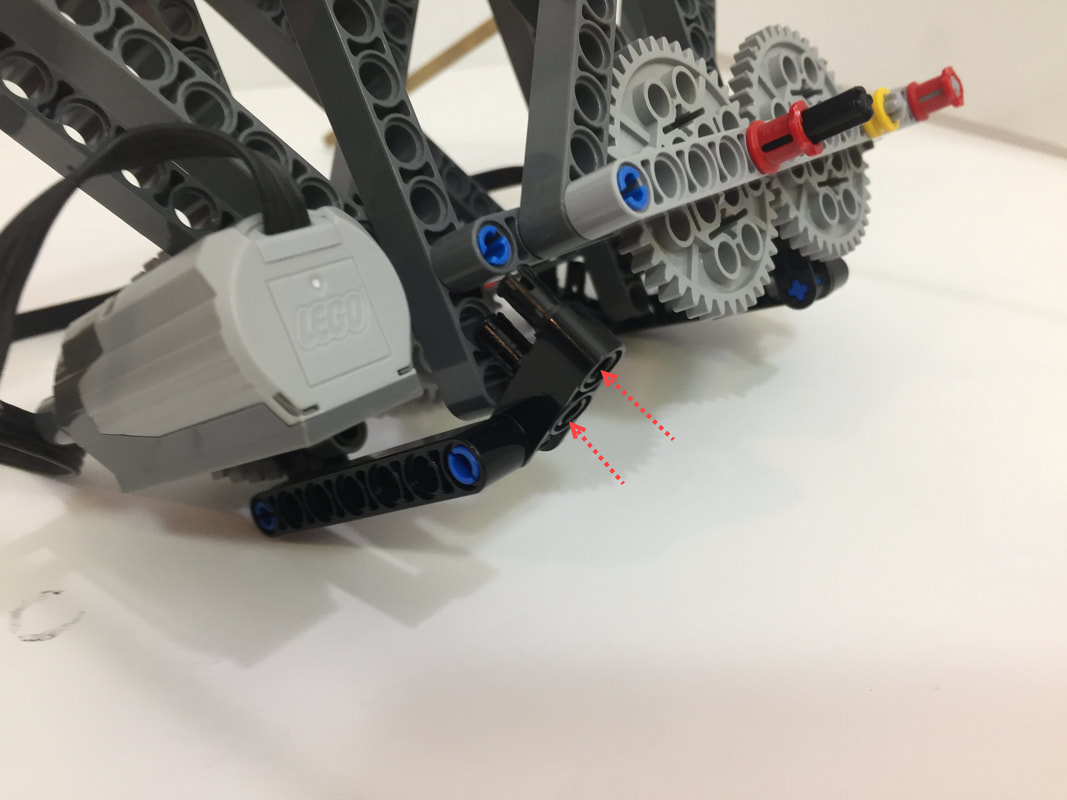
8-legged Striders should use this LEGO's Power Function 8883 medium motors geared down by 5:1 as shown here. 12-legged Striders can also use this configuration, or they can use XL motors with faster gearing as is shown at the end of these instructions.


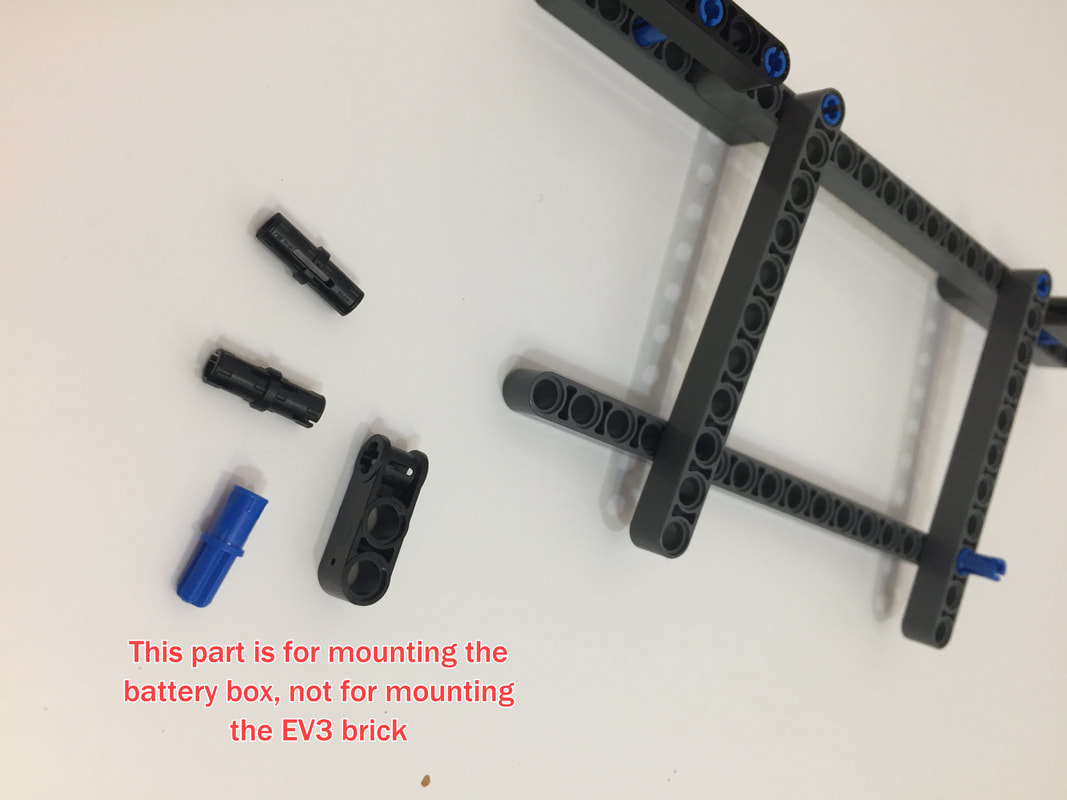
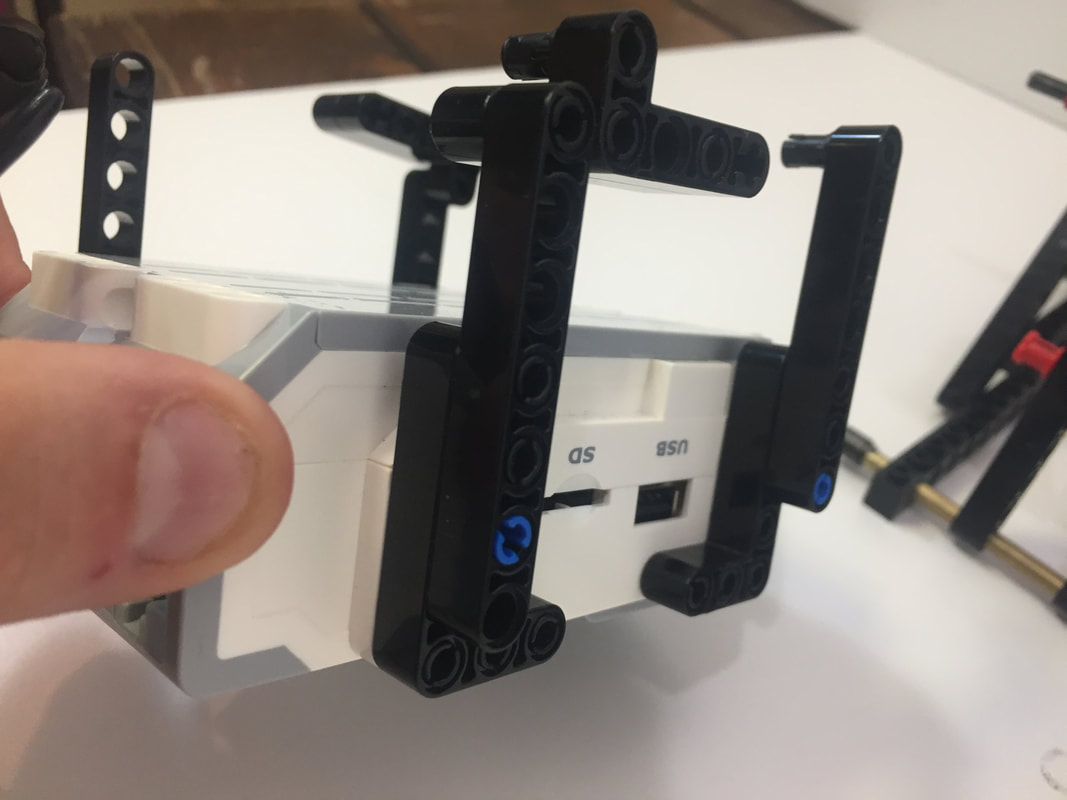
Again, this part is for mounting the battery box, not for mounting the EV3 brick.
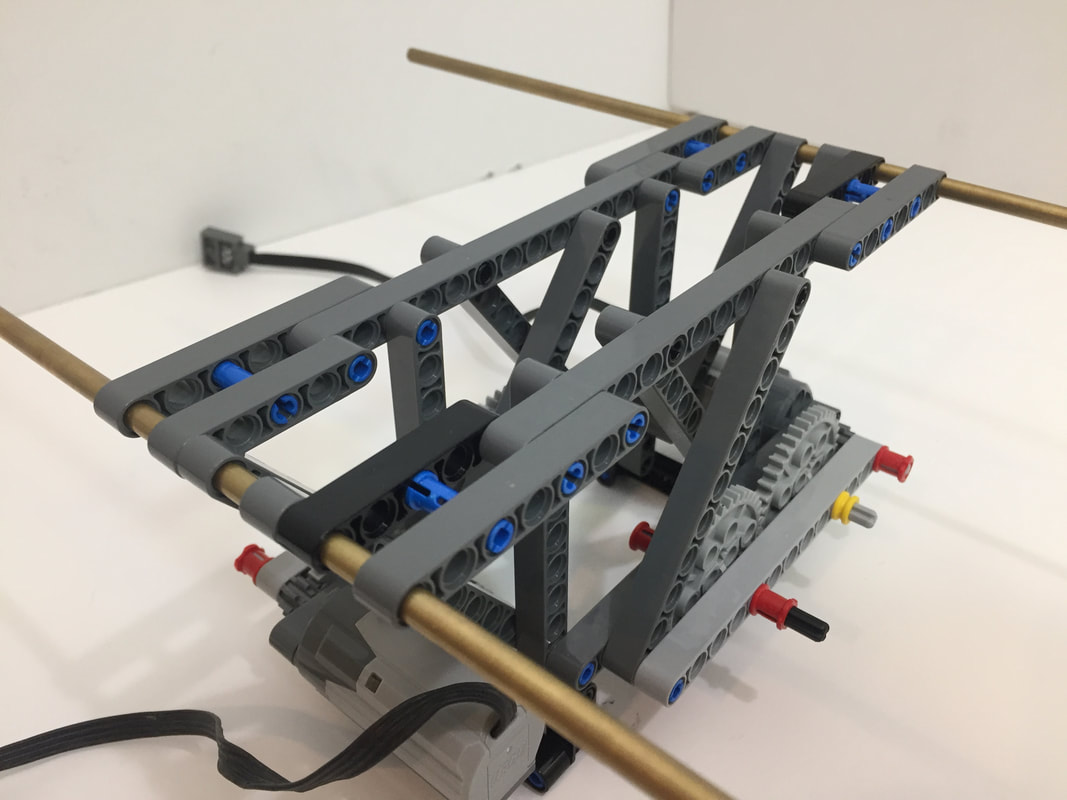
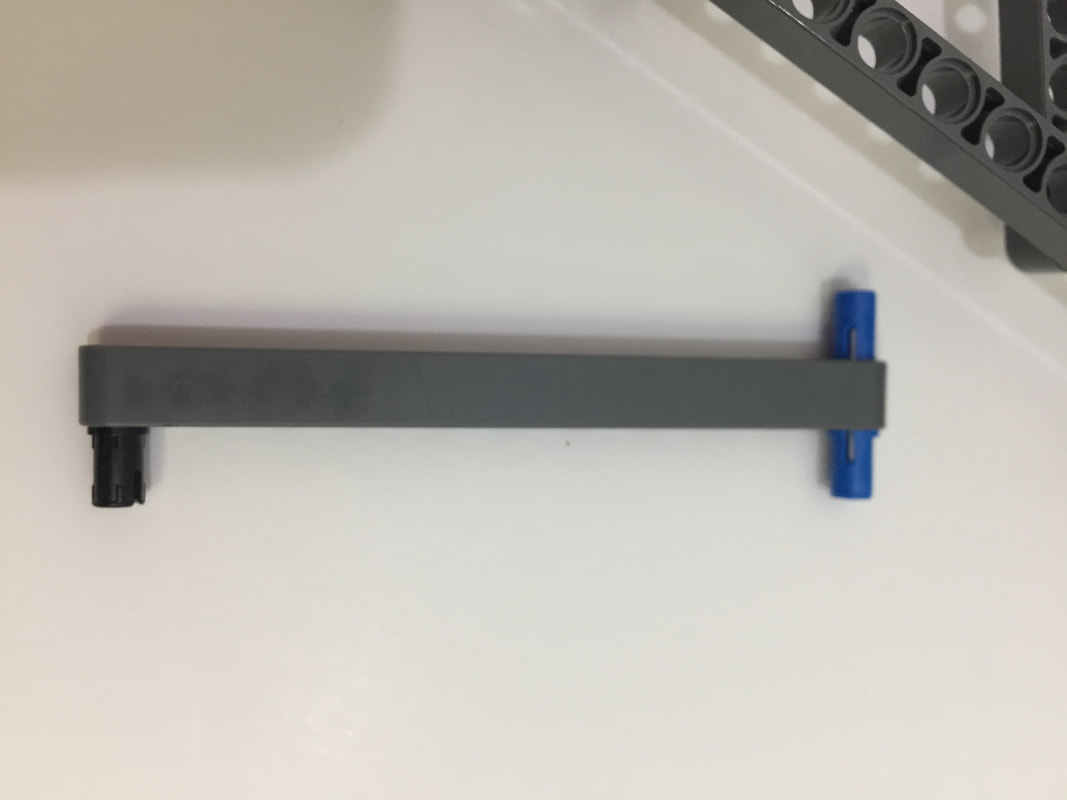
Make a second frame side, then join them with the below 3/16" OD metal rods
Rotate the rods to make them easier to slide thru the parts.
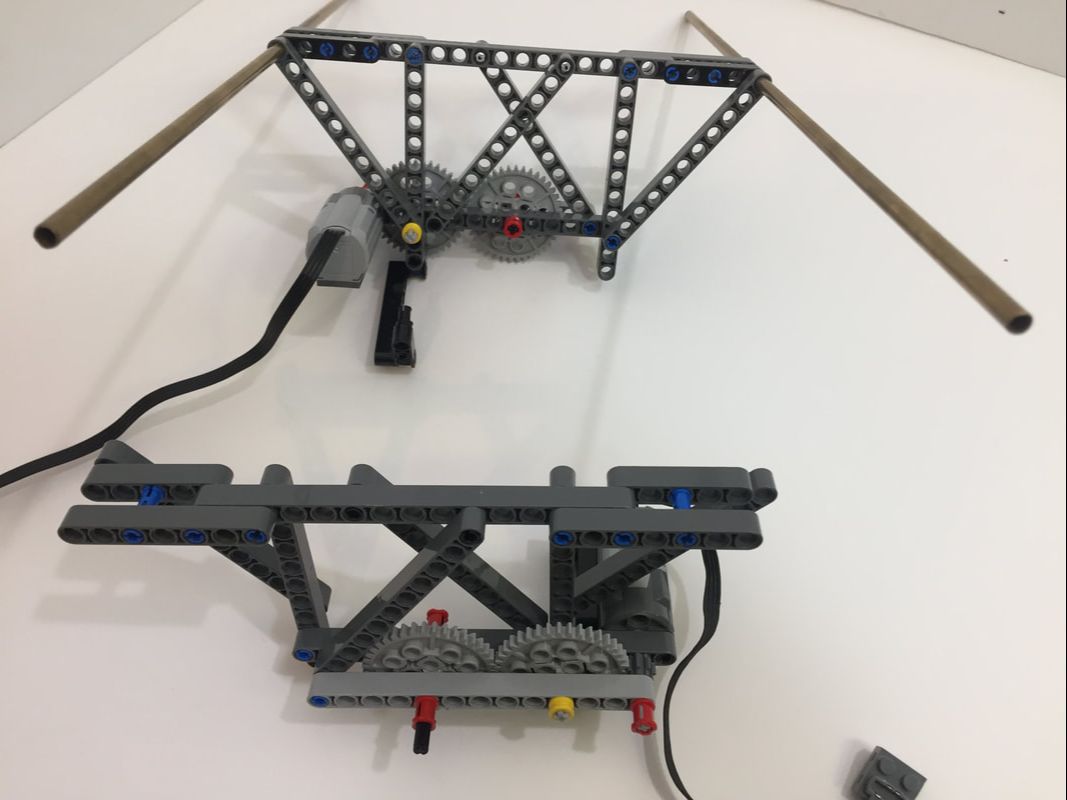
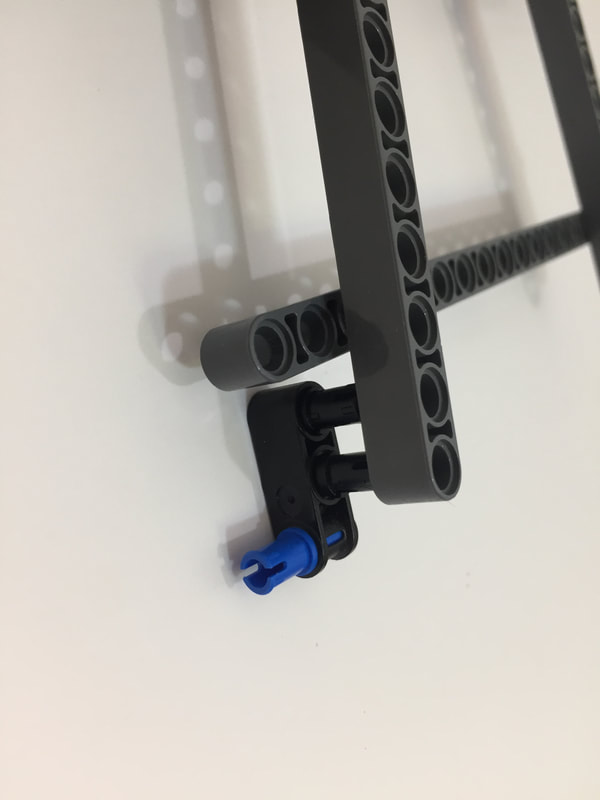
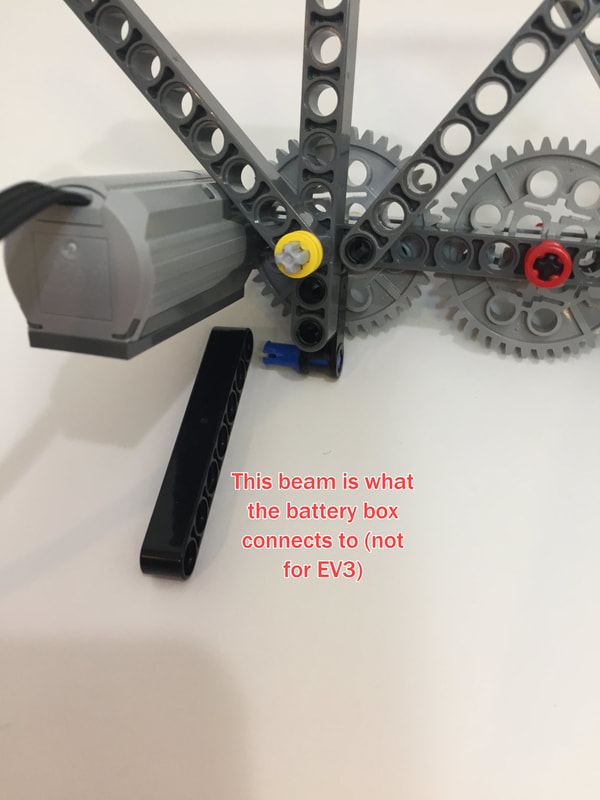
This lower beam is for mounting the battery pack, and is not necessary for mounting the EV3 brick


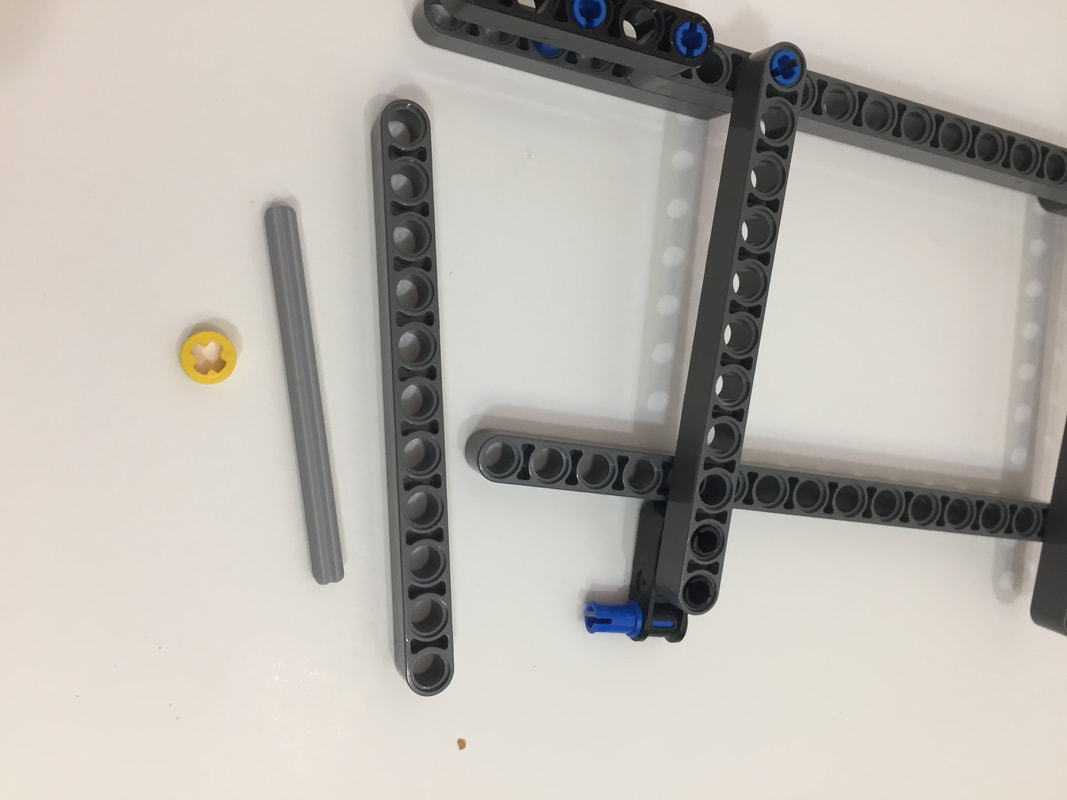
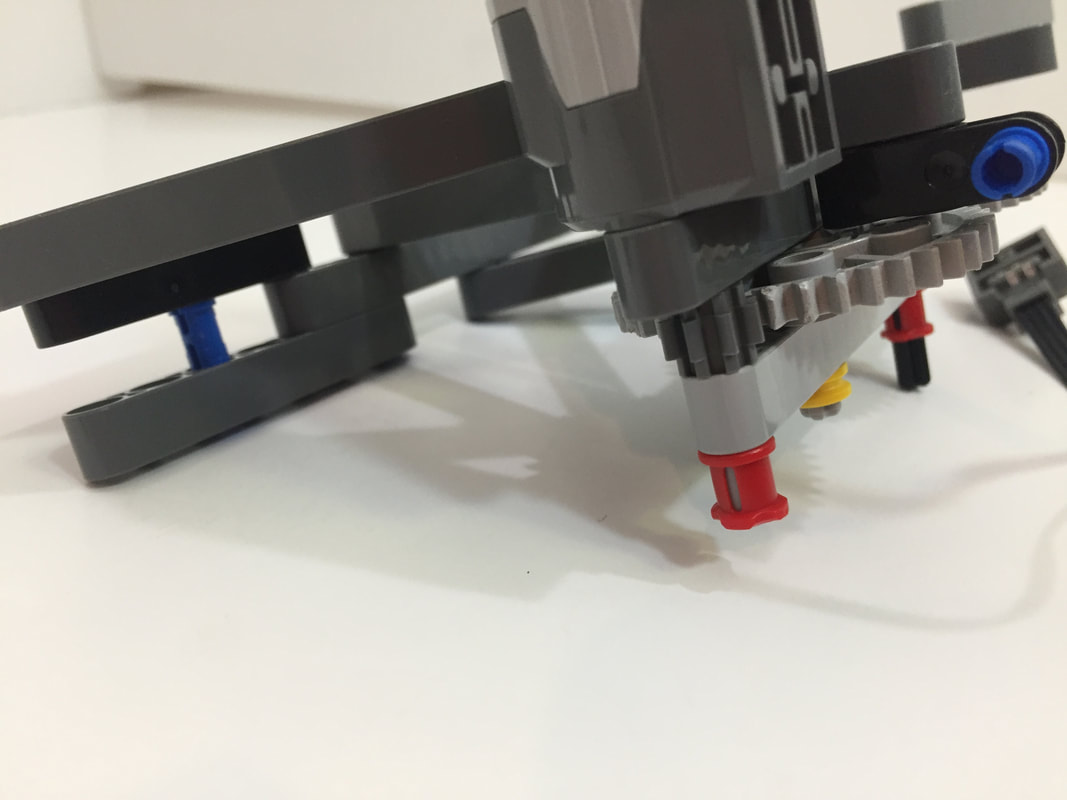
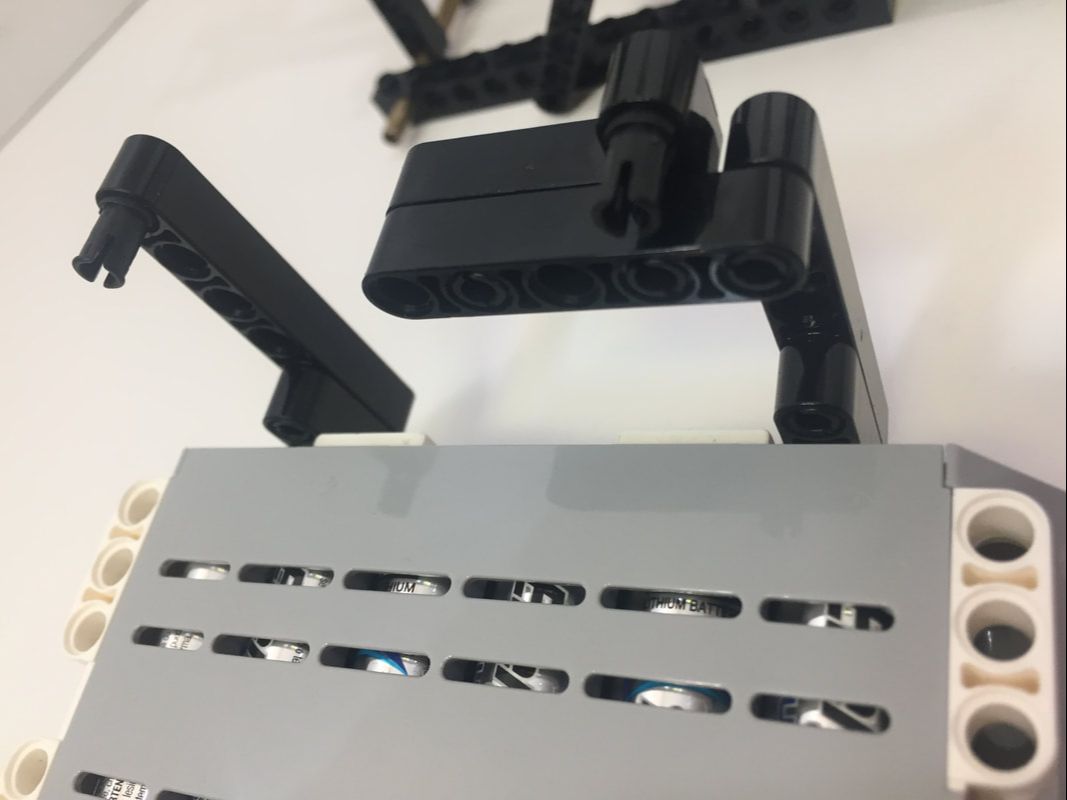
cranks attach as shown below.
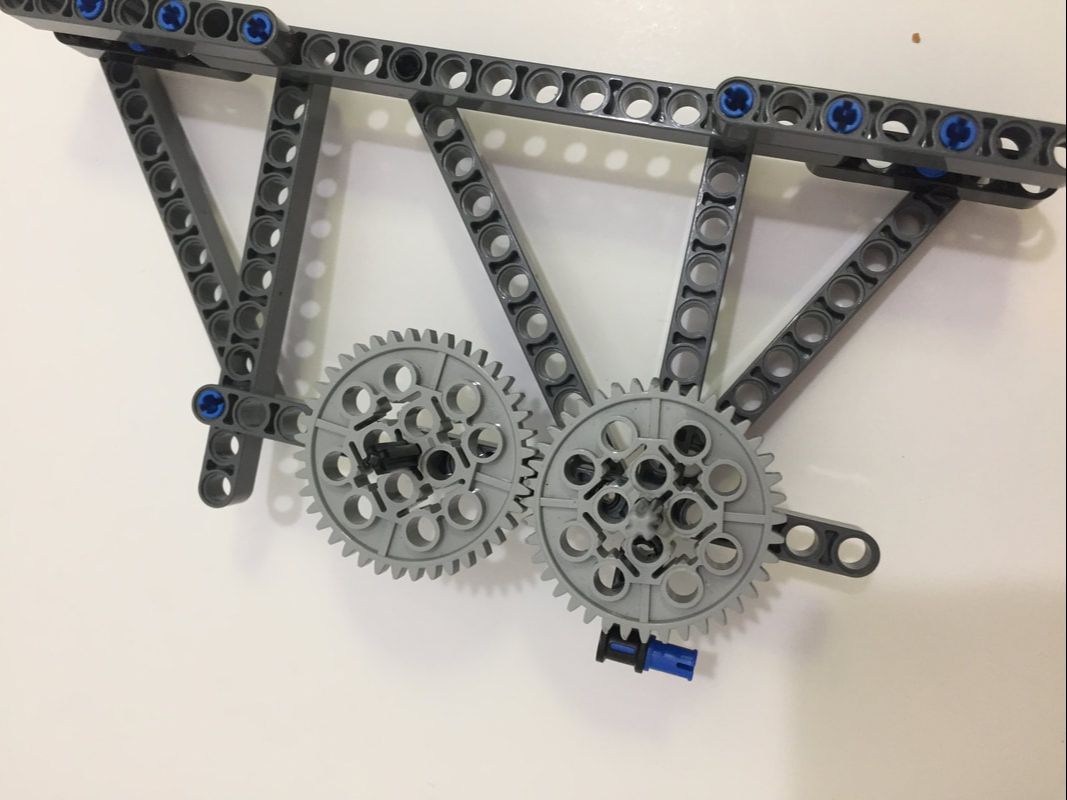
Battery Box mounting (EV3 further down)
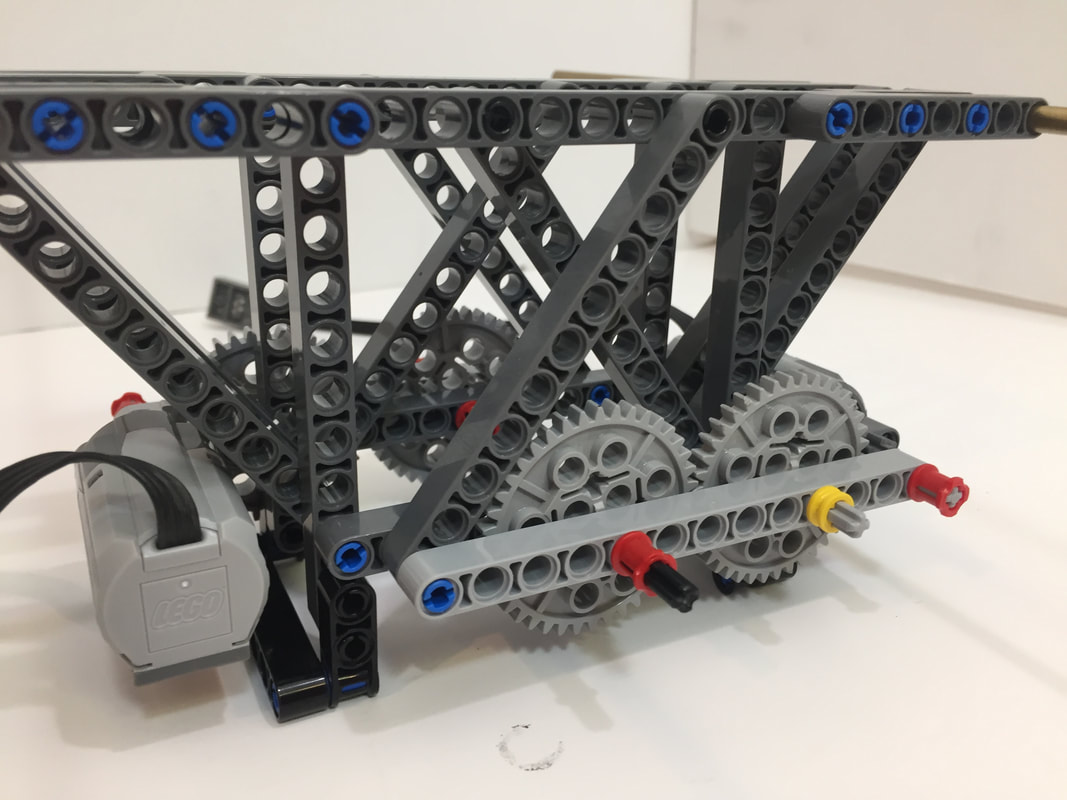
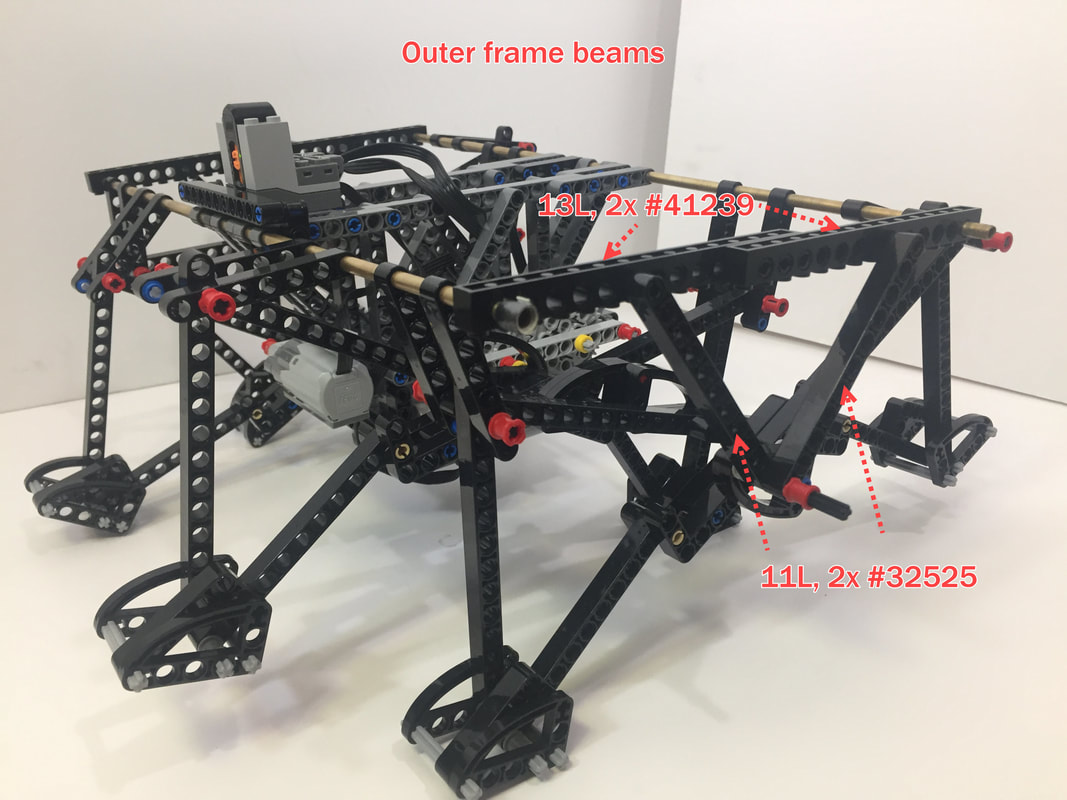
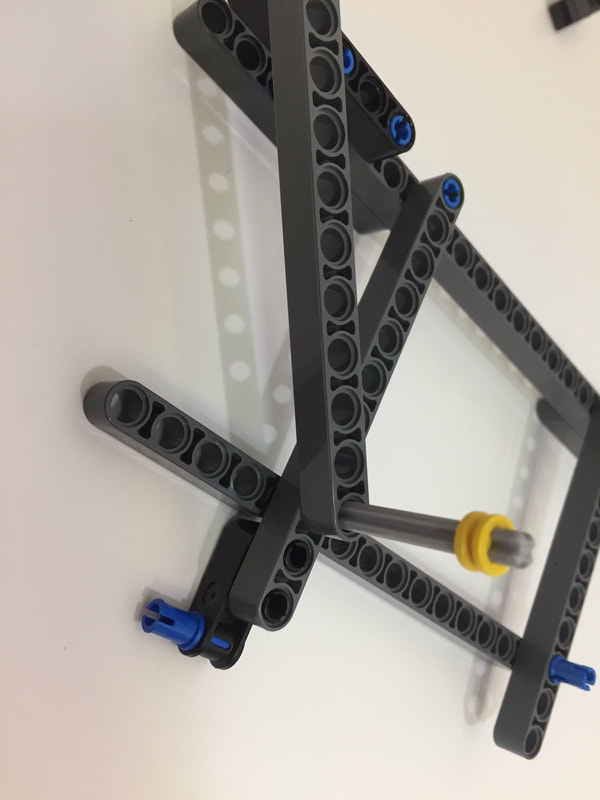
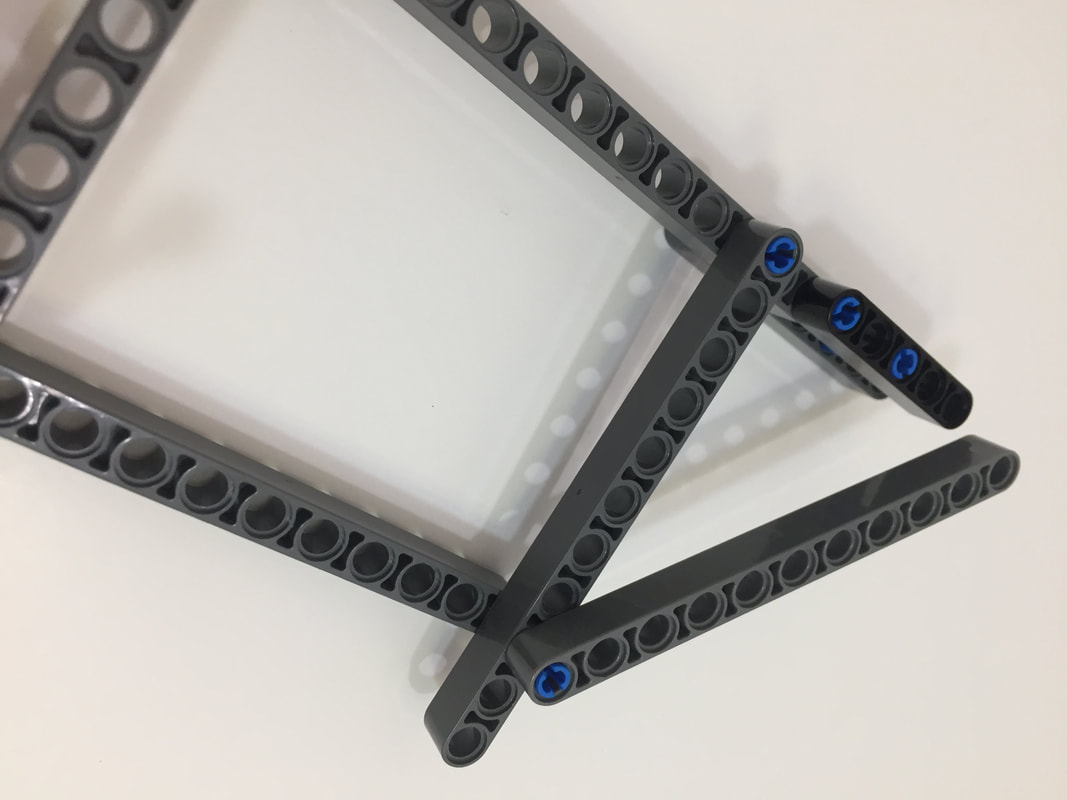
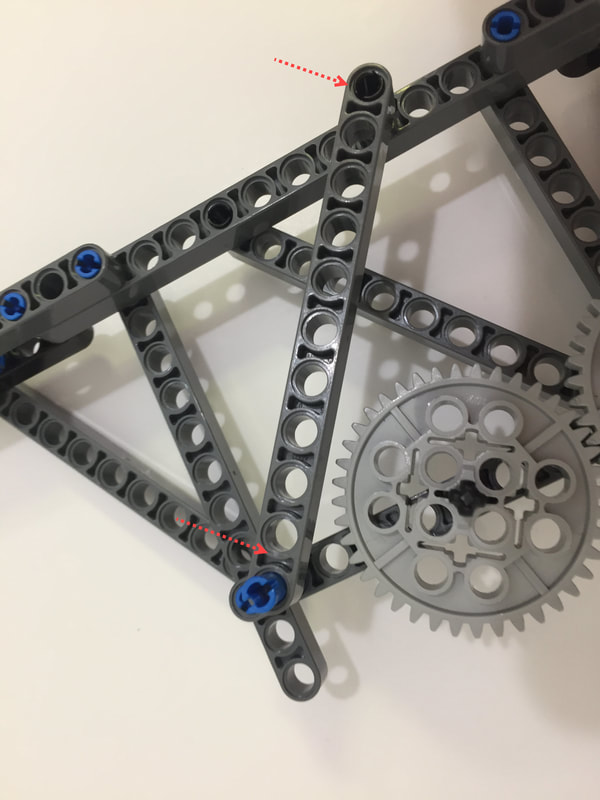
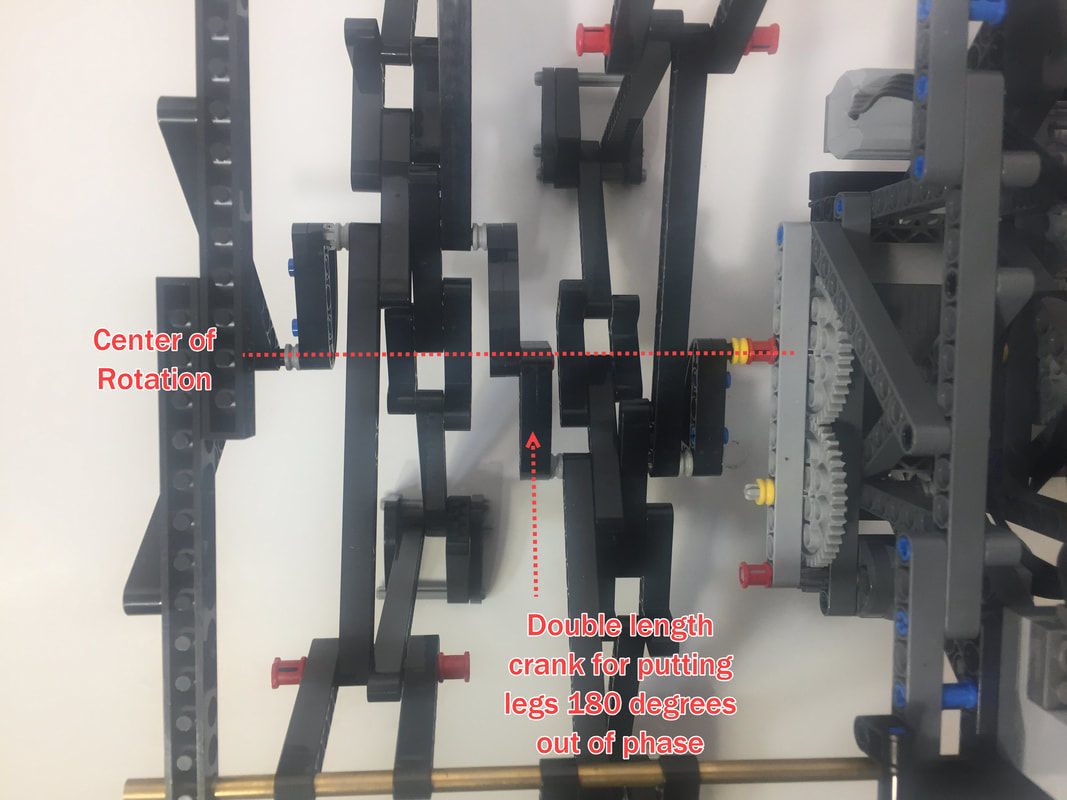
Be sure to add outer frames, so that the outside axle connects to its Center of Rotation. The diagonals are beams with 11 holes, connected to the 6th hole of the top beam.

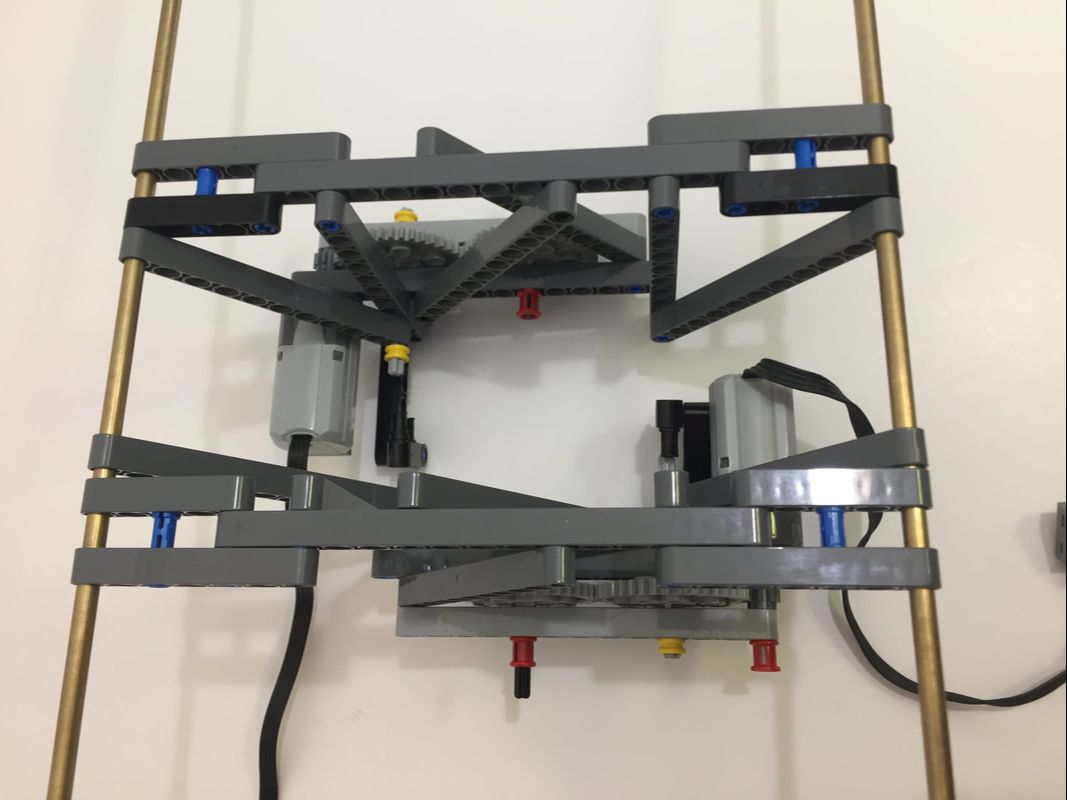
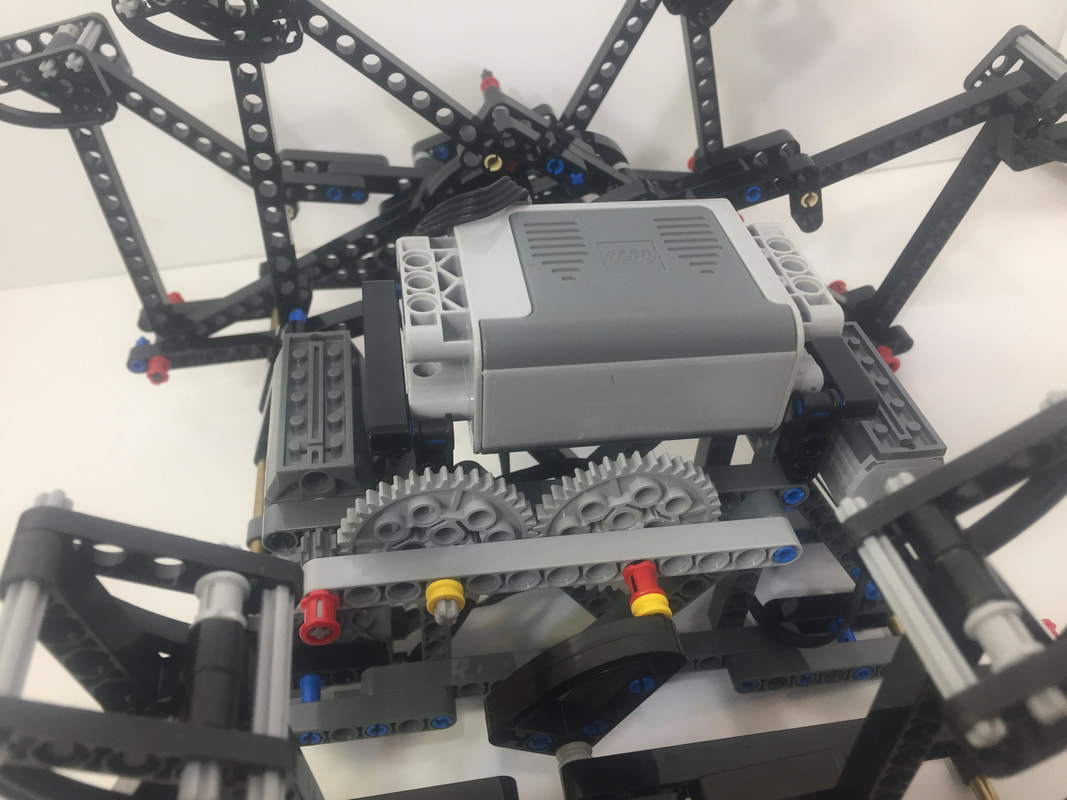
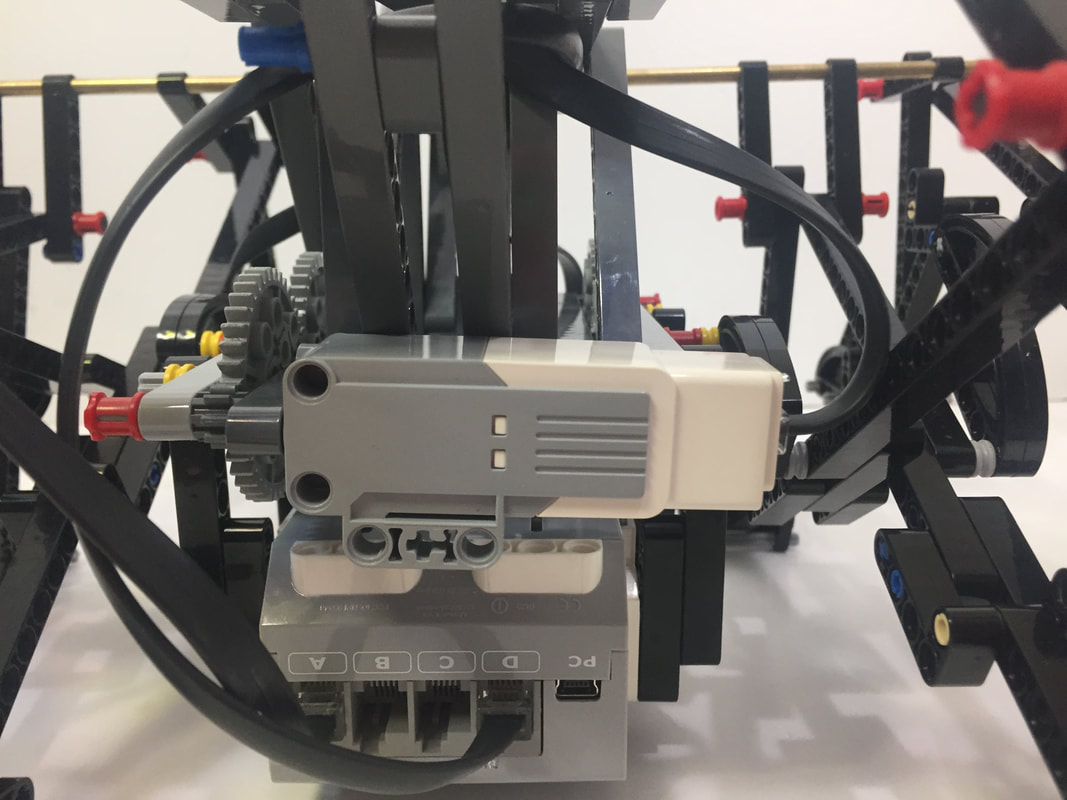
EV3 Mounting:
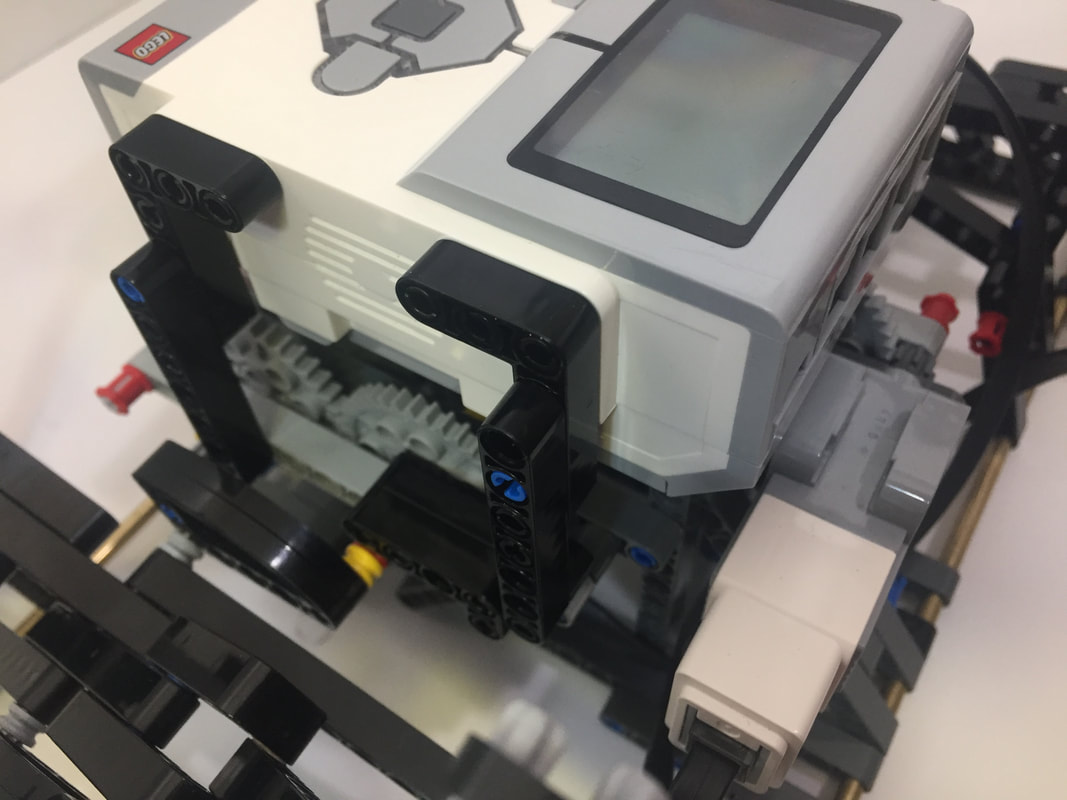

Be sure to add outer frames, like below, so that the outside axle connects to its Center of Rotation. The diagonals are beams with 11 holes, connected to the 6th hole of the top beam.

12 Leg Strider
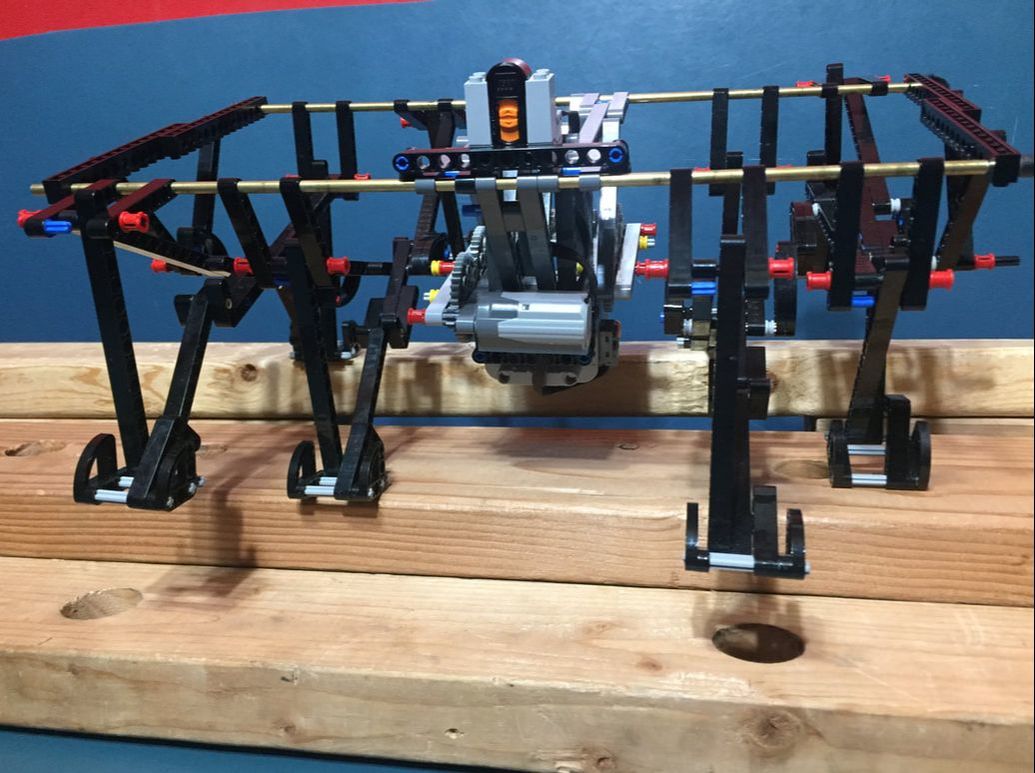
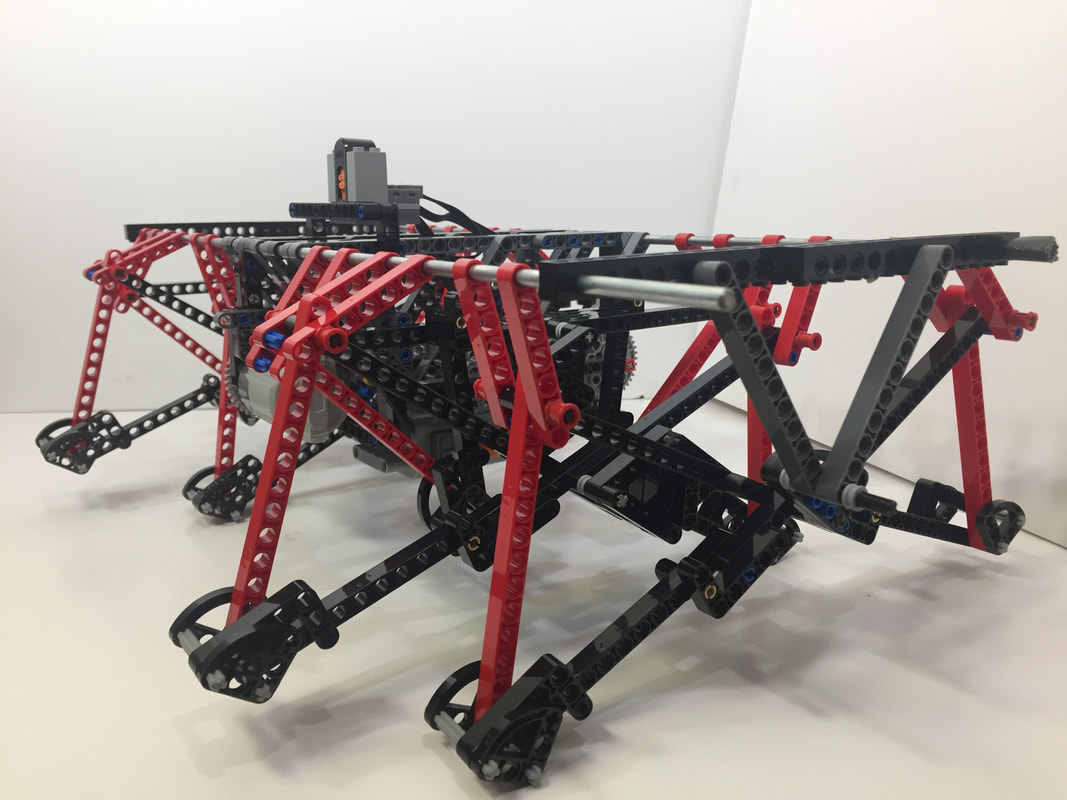
Below are some images of a 12 leg Strider using LEGO's #8882 Power Function XL motors. Four more diagonals were added to the outside of the frame to strengthen it a bit more for its load bearing test, but adding them is just an option. Also, the version in these images used an XL motor geared up by 1:1, which works well on surfaces with friction, like on carpeting, but its feet are too fast for smooth surfaces like wood or tile floors.
Note: 12 leg Striders also run well with the medium motors geared down by 5:1 (like 8 leg Striders), which do not require a longer beam for the gear train as built below.
Be sure to add outer frames, like below, so that the outer axle connects to the leg's Center of Rotation. The diagonals are beams with 11 holes, connected to the 6th hole of the top beam.
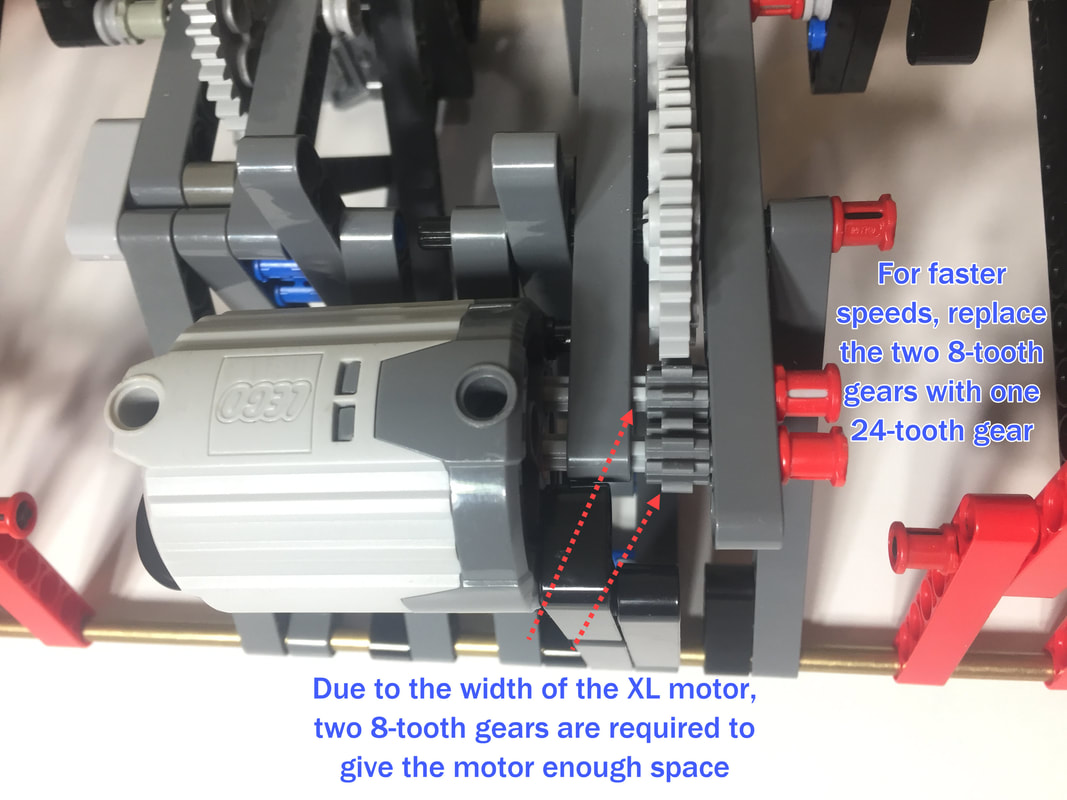
Below are videos of 3 different speed options for the XL motor: slow using an 8 tooth gear, medium using a 24 tooth gear, and fast using a 40 tooth gear.
Slow (8 tooth gear, or a 5:1 gear ratio) - note that two 8-tooth gears were needed per side due to the width of the XL motor.
24 tooth gear, or a 5:3 gear ratio:
40 tooth gear, or a 1:1 gear ratio:
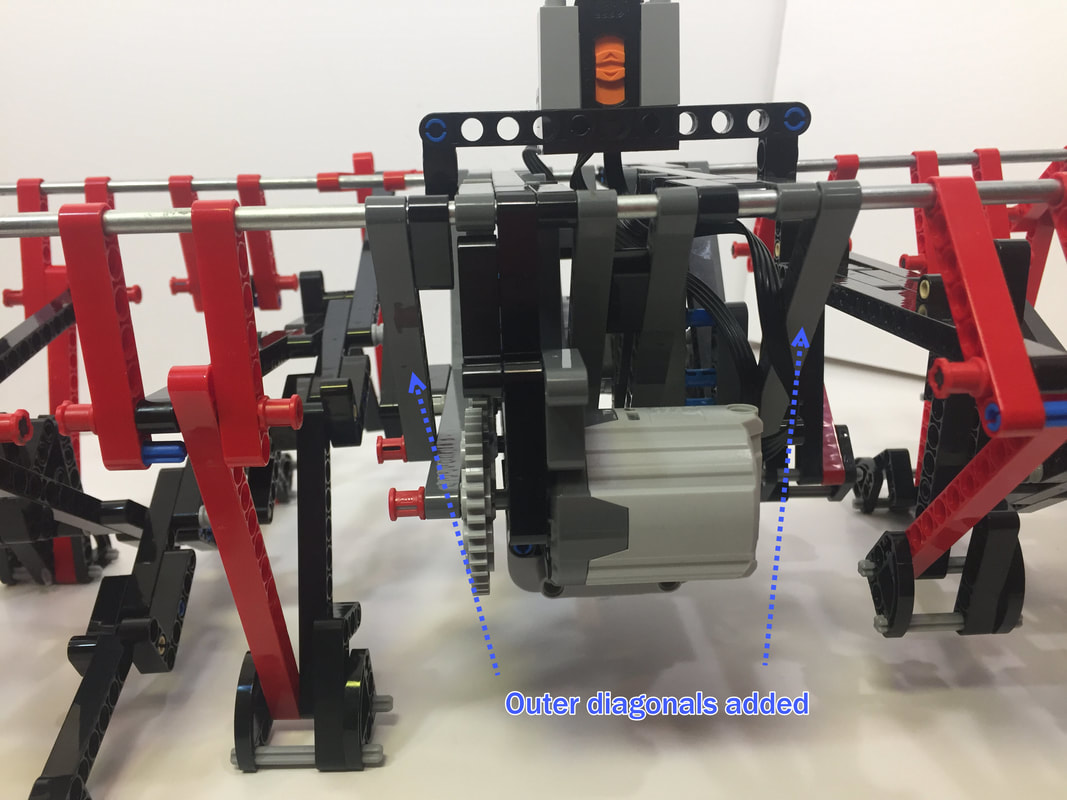
Four more diagonals were added to the outside of the frame to strengthen it a bit more for its load bearing test, but adding them is just an option.
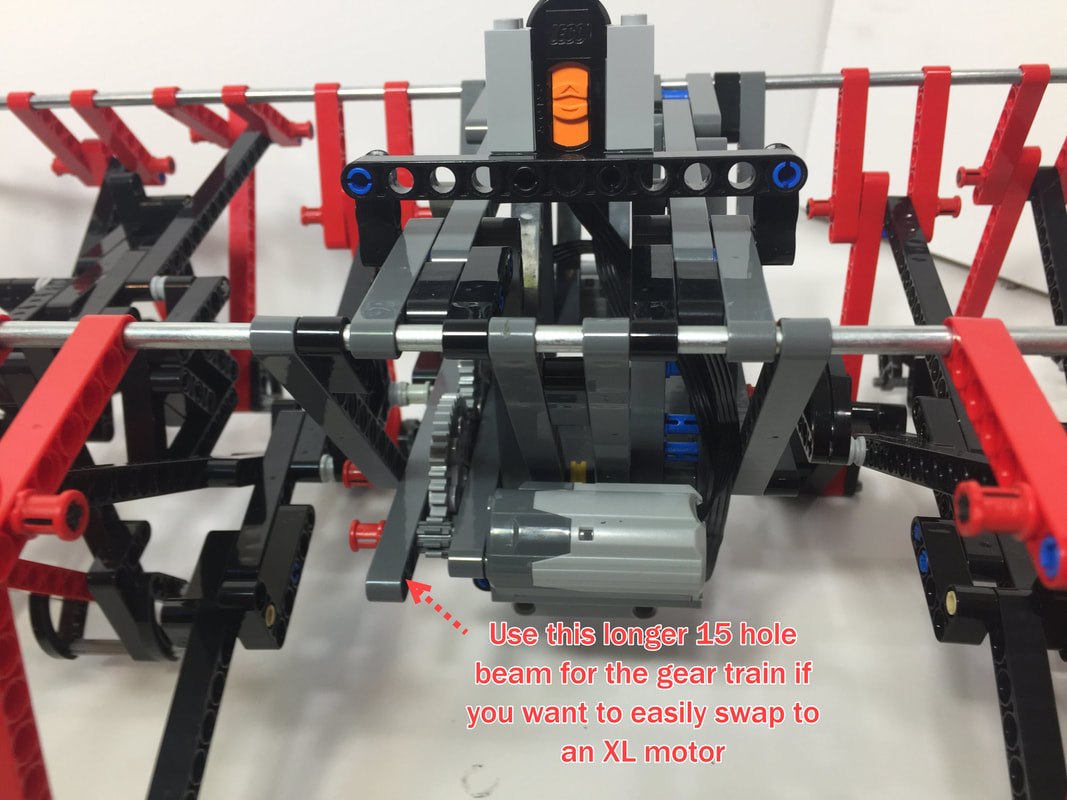
XL Motor Mounting
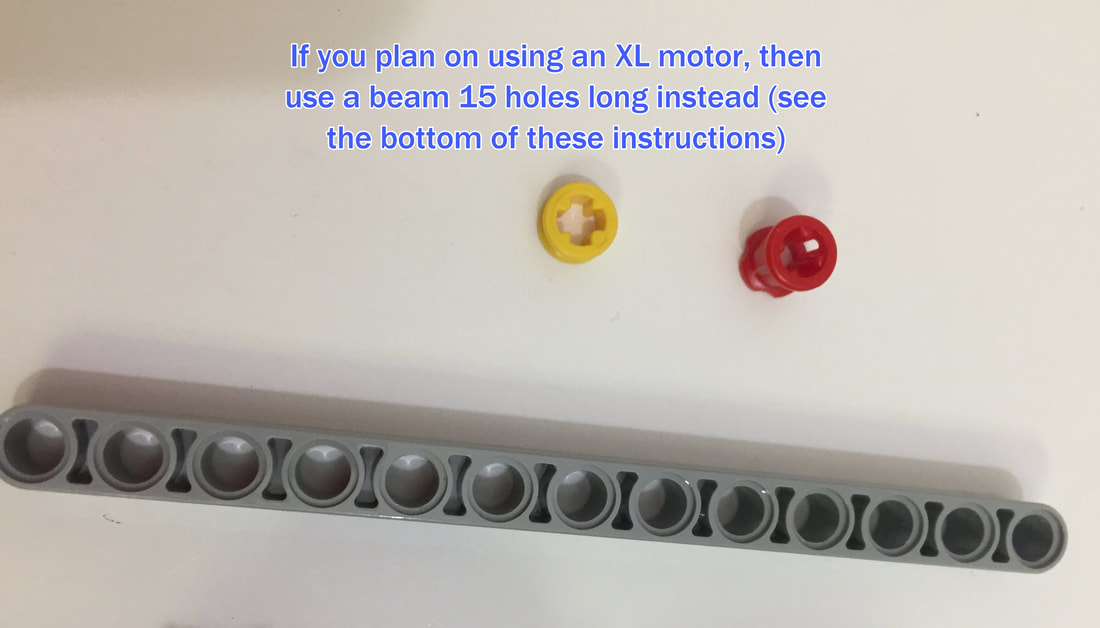
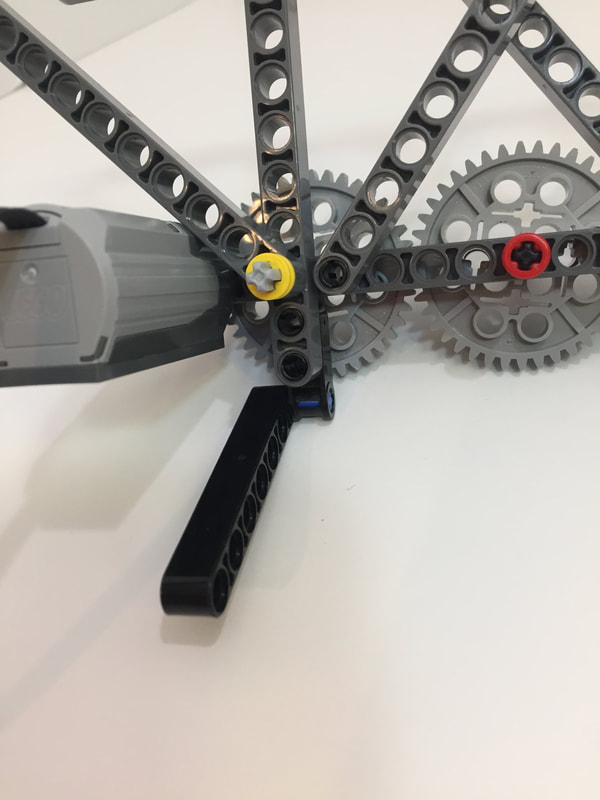
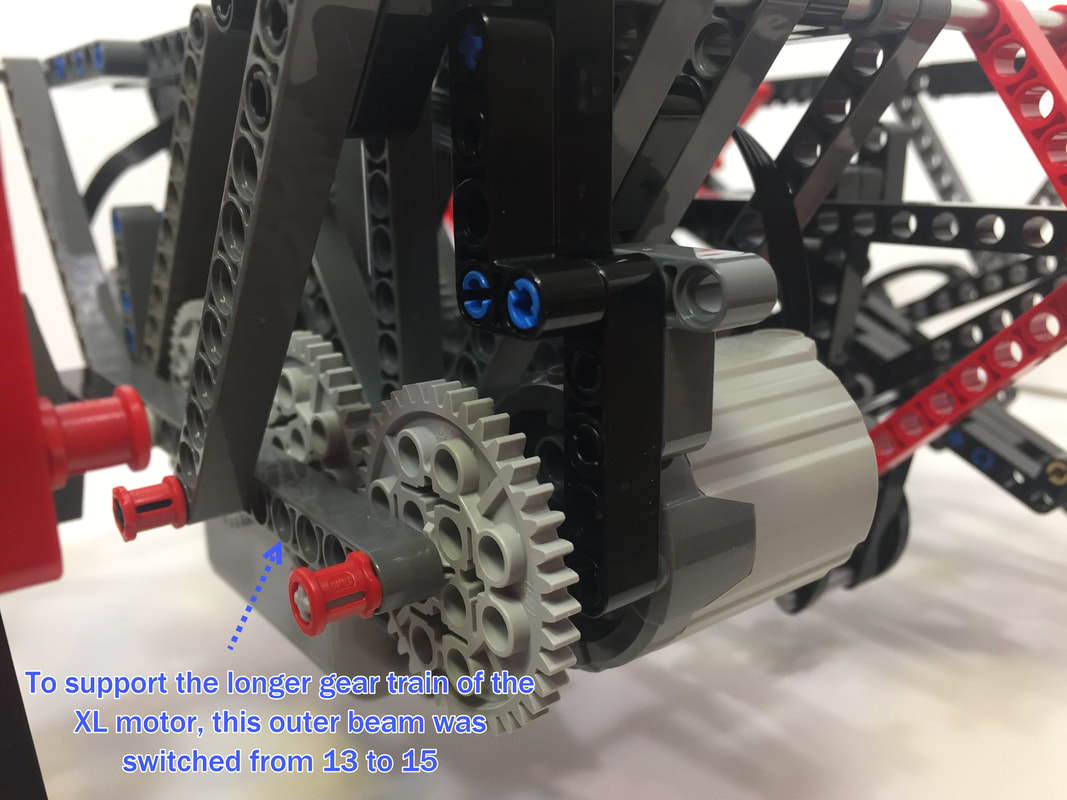
If you want to use XL motors, then you'll need to extend the length of the beams supporting the gear train. The outer beam will need to be switched from 13 to 15, and the inner beam can be extended with the assemblage of parts shown further down.
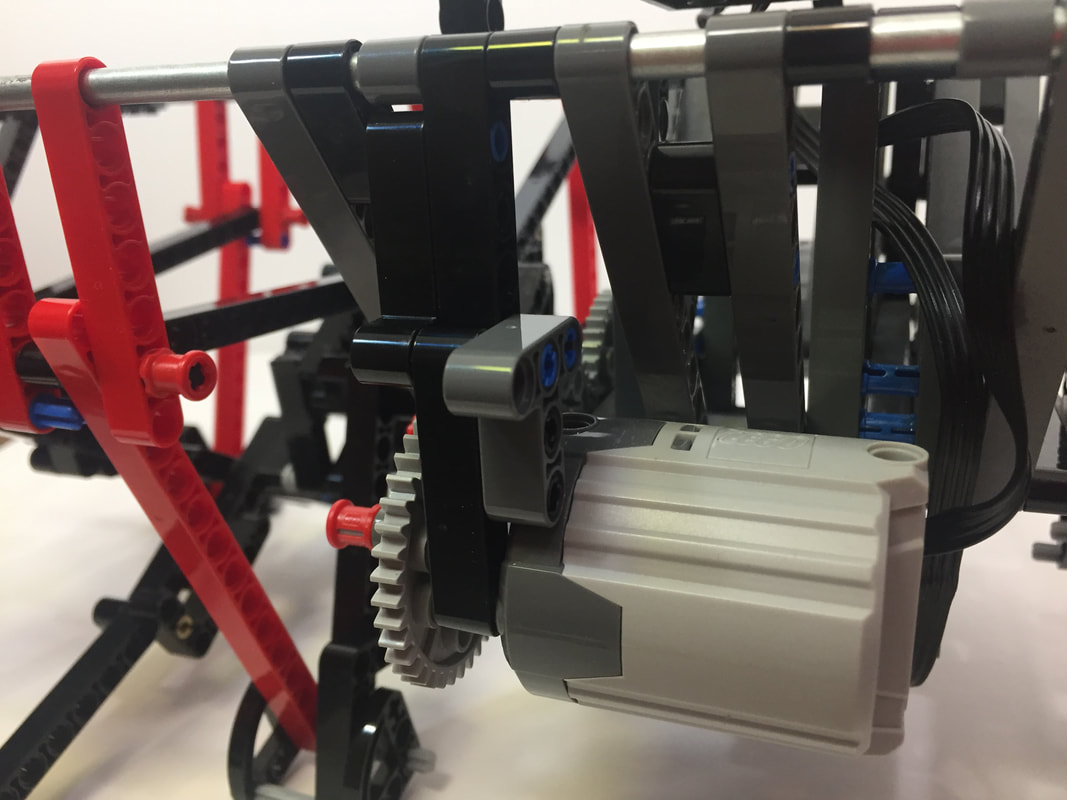
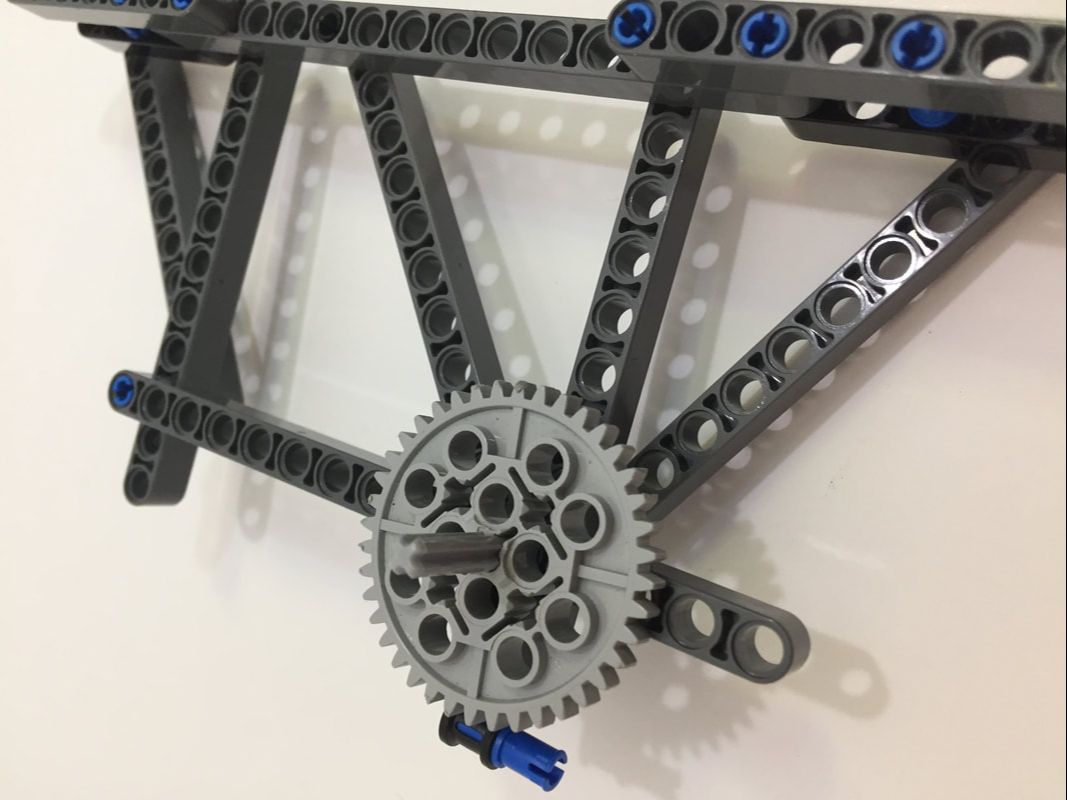
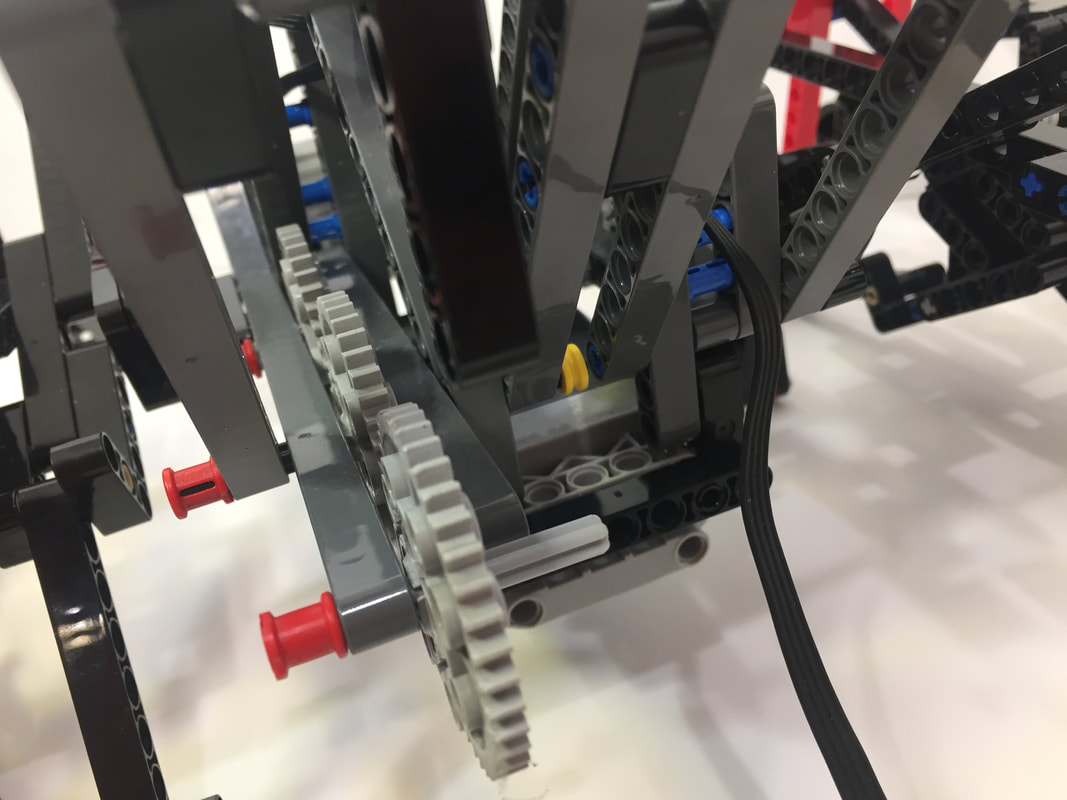
Strider's gear train for the slowest/highest torque option using an 8-tooth gear for a 5:1 gear ratio
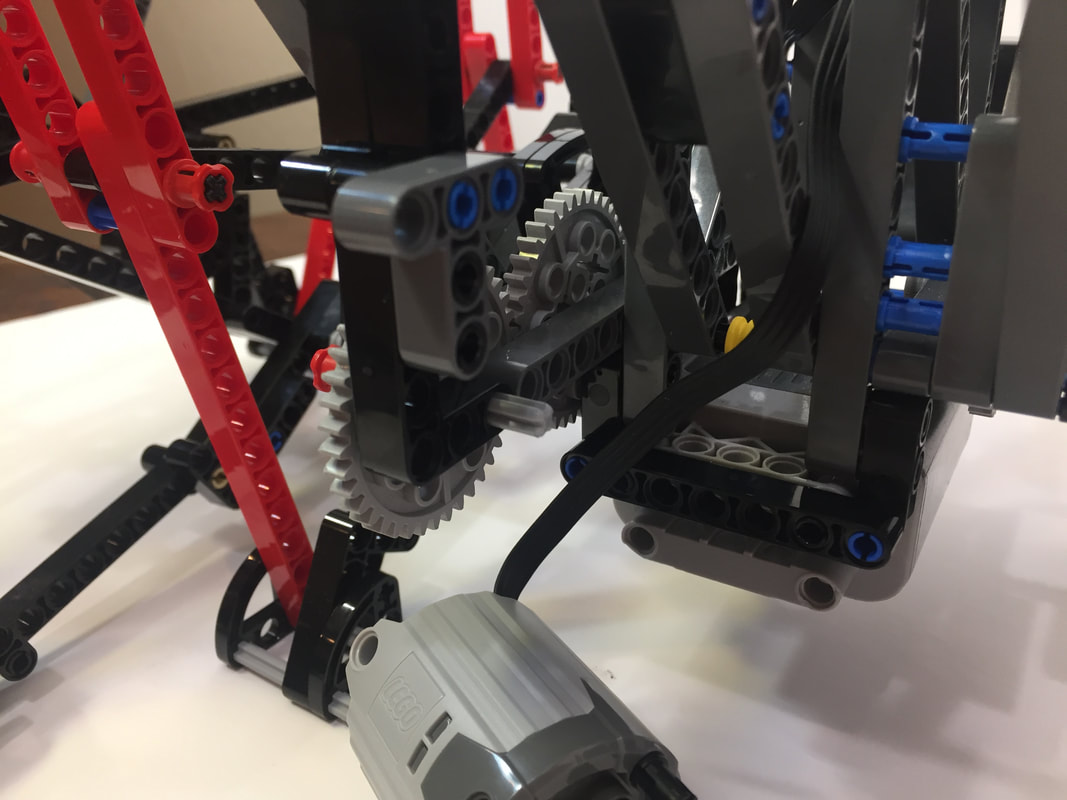
Below shows how the XL motor was mounted for the 40 tooth gear, but it can be mounted many different ways. Also, the following images show adding a 40 tooth gear for the fastest version of Strider, but a 24 tooth gear can be added in the same fashion, and 8 tooth gears can also be added but you will need two of them per side due to the XL motor's width.
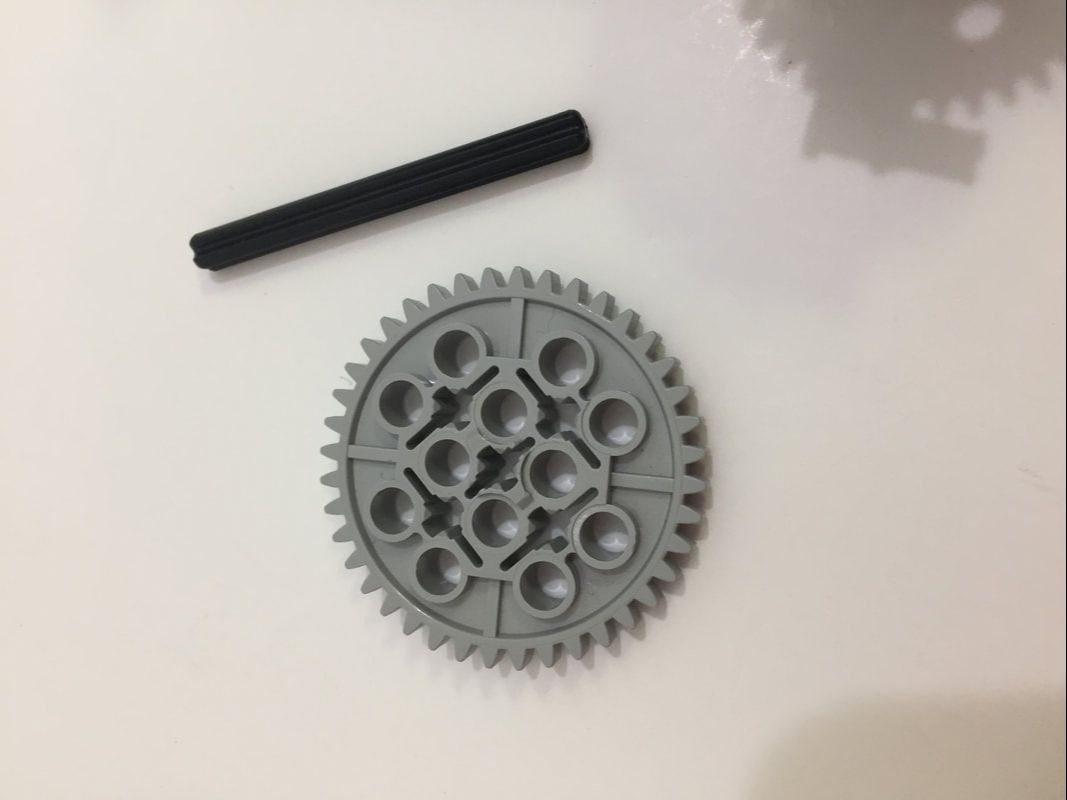
1. add the gear to the 15L beam:
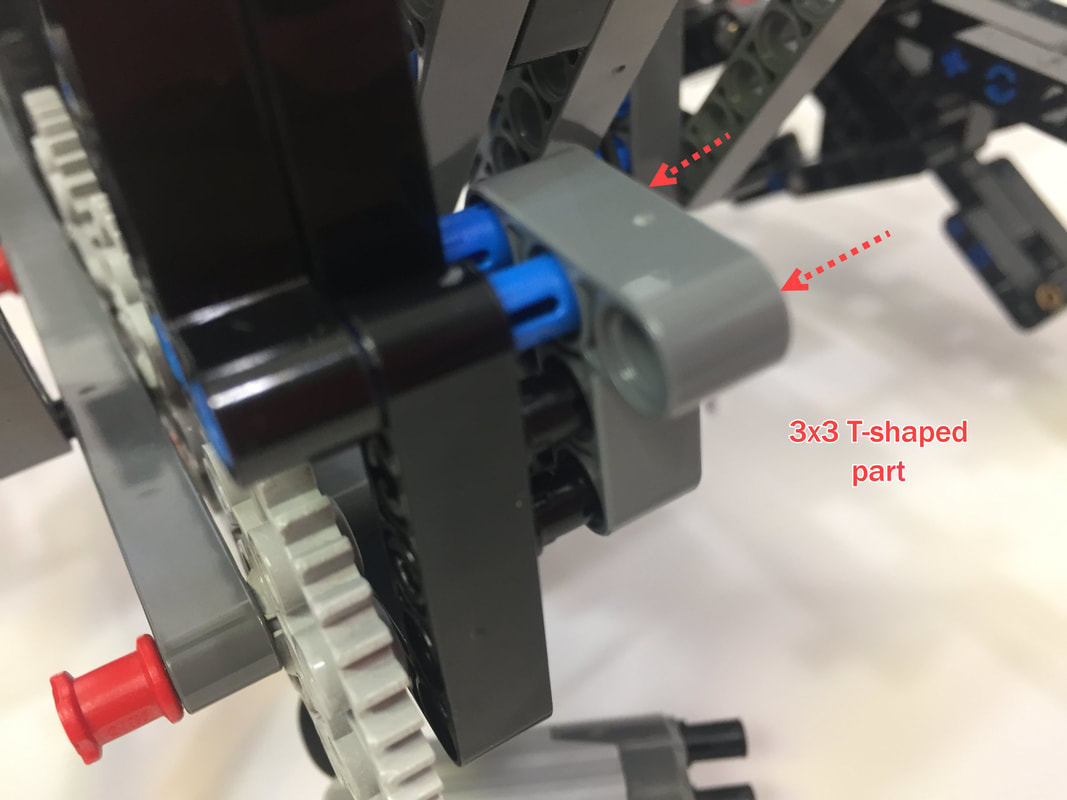
2. Add a 5 hole beam to the metal support rod, which is easiest to add when first sliding the metal rods thru the frame!

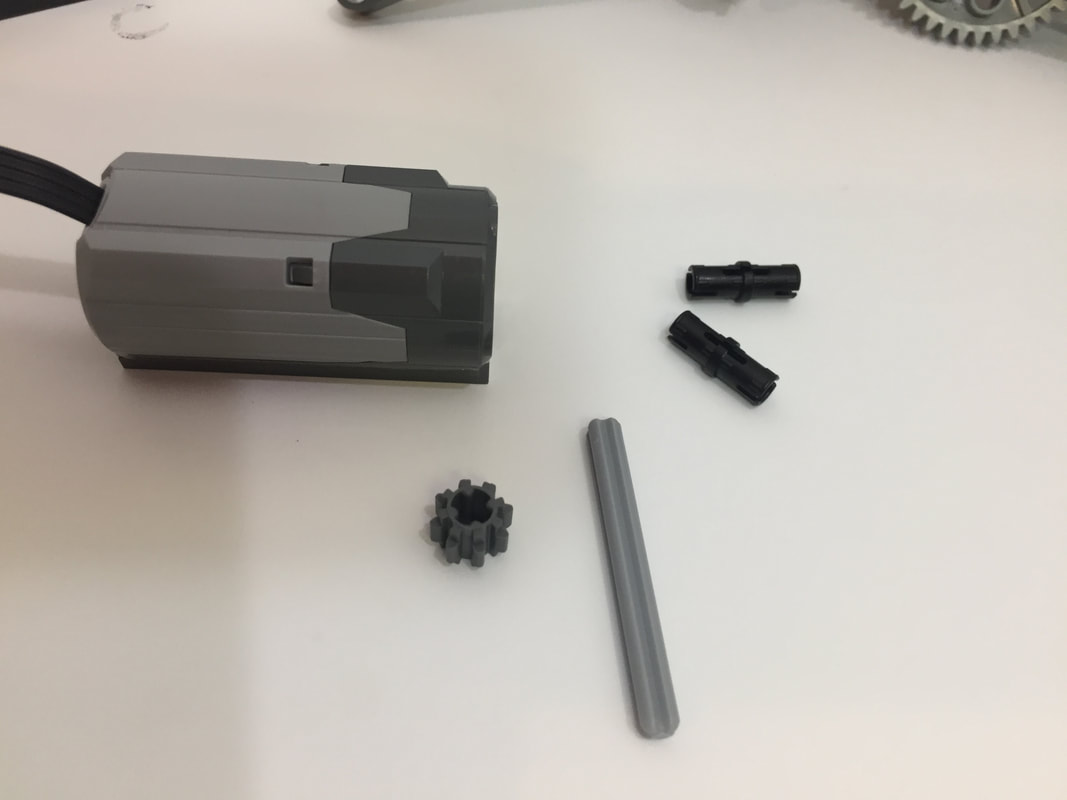
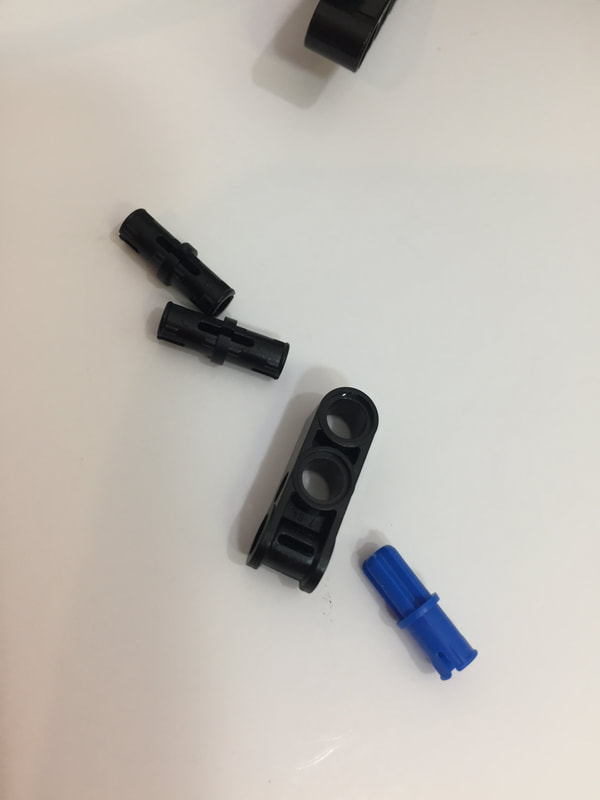
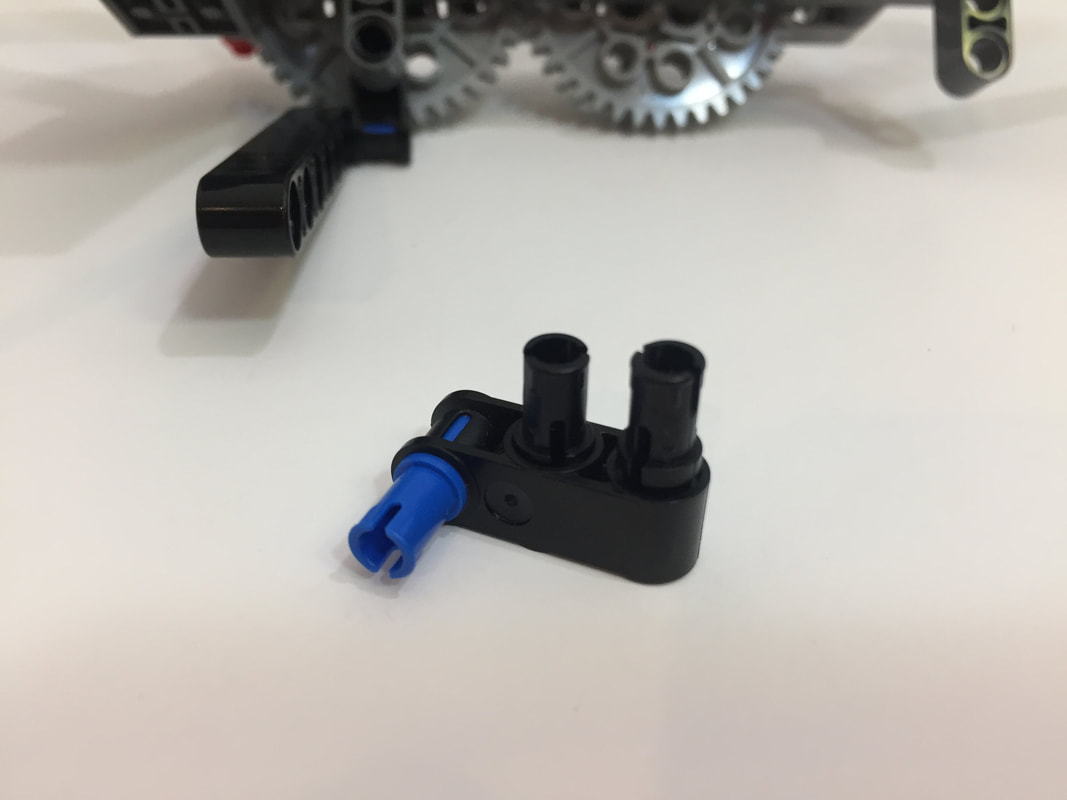
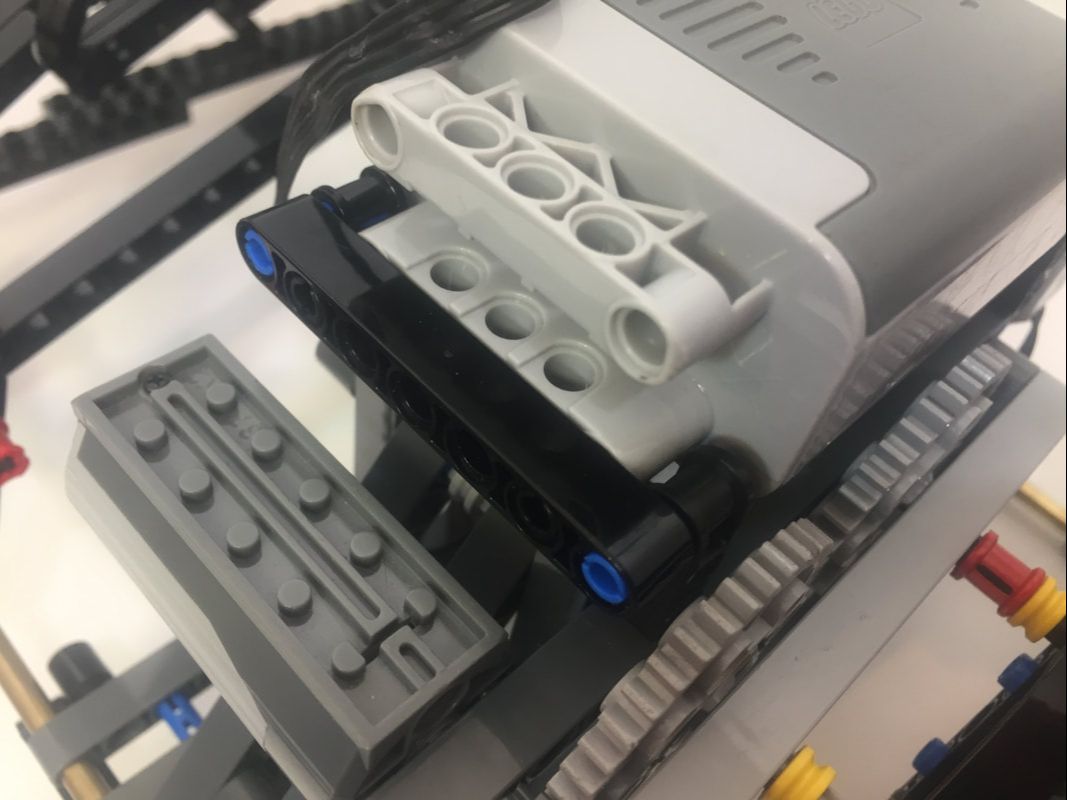
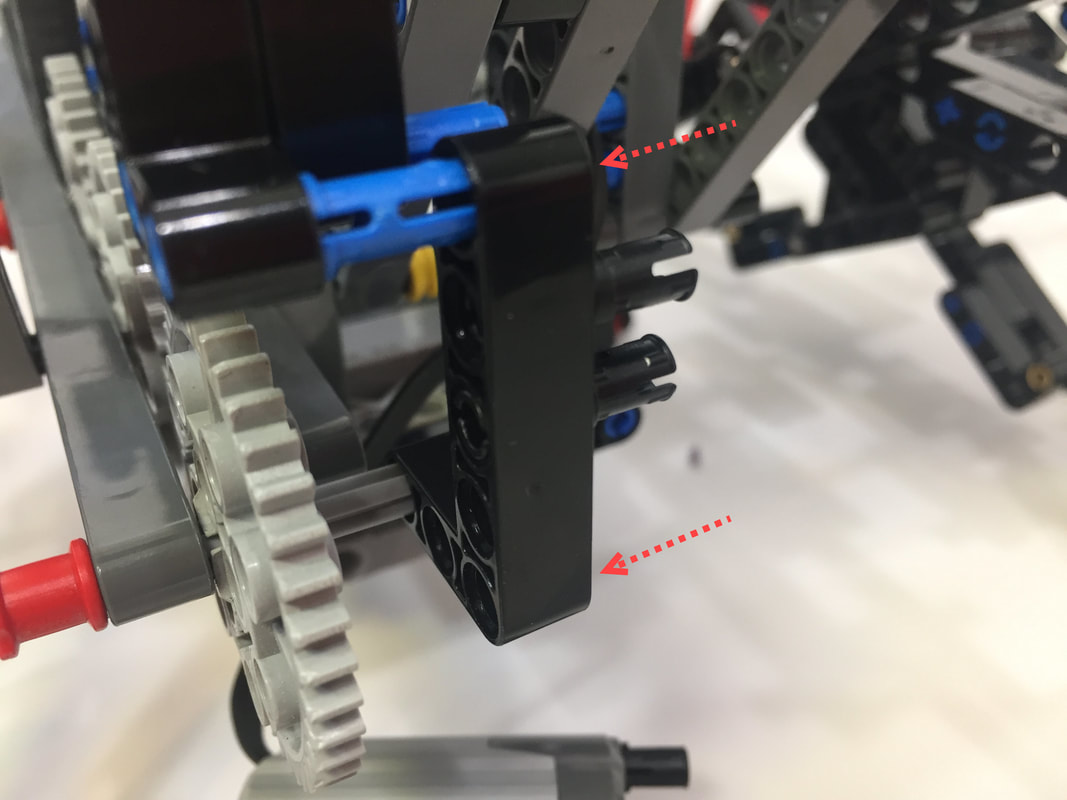
3. Put 4 pins into the XL motor, and then assemble the below parts as shown in the following images
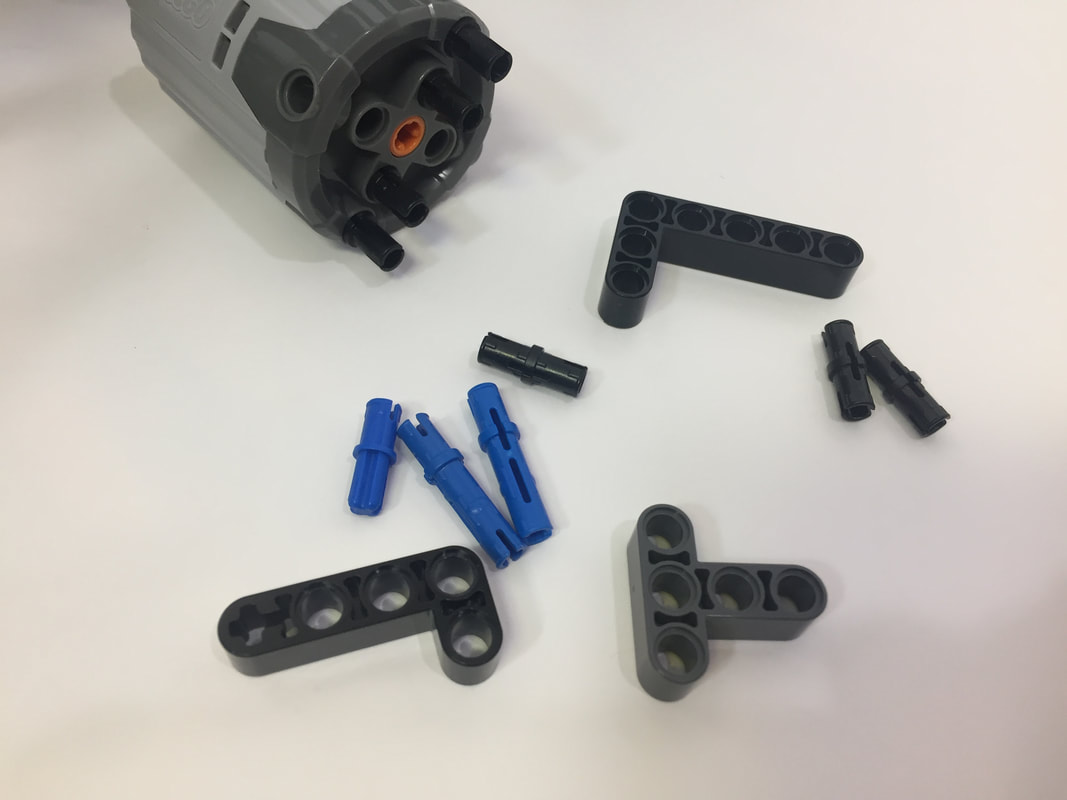
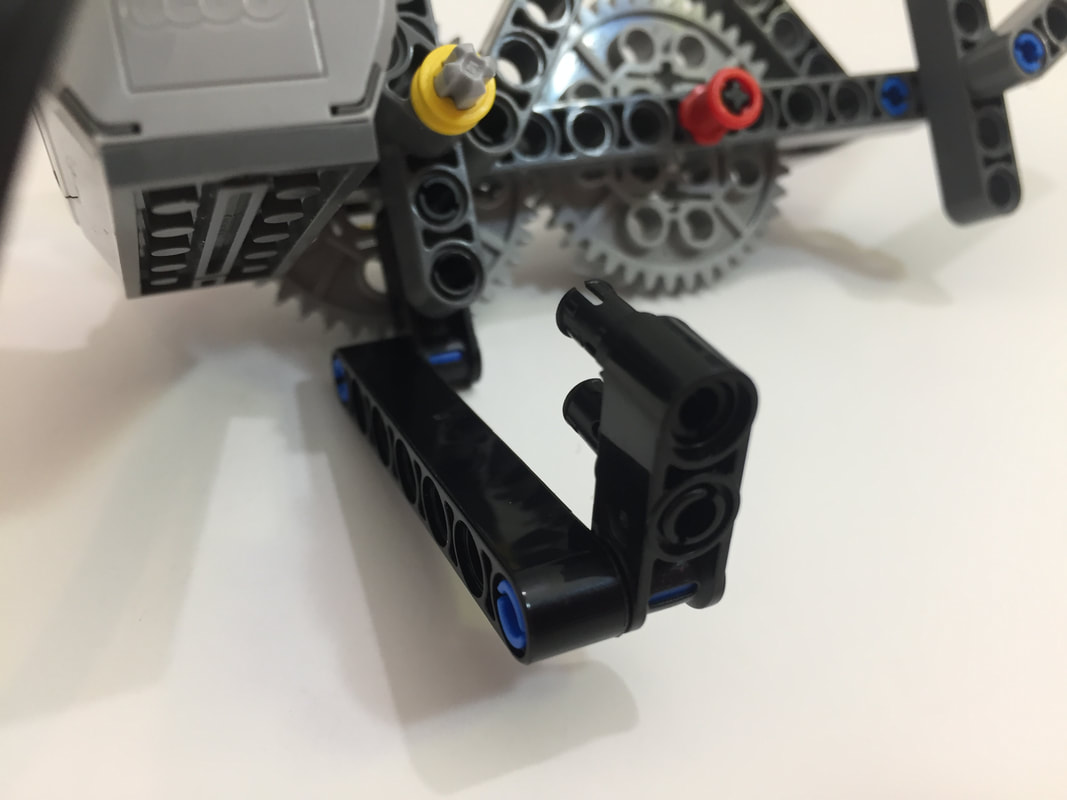
Be sure to press the above 2x4 L-shaped part further in until it is touching the 5-hole beam.
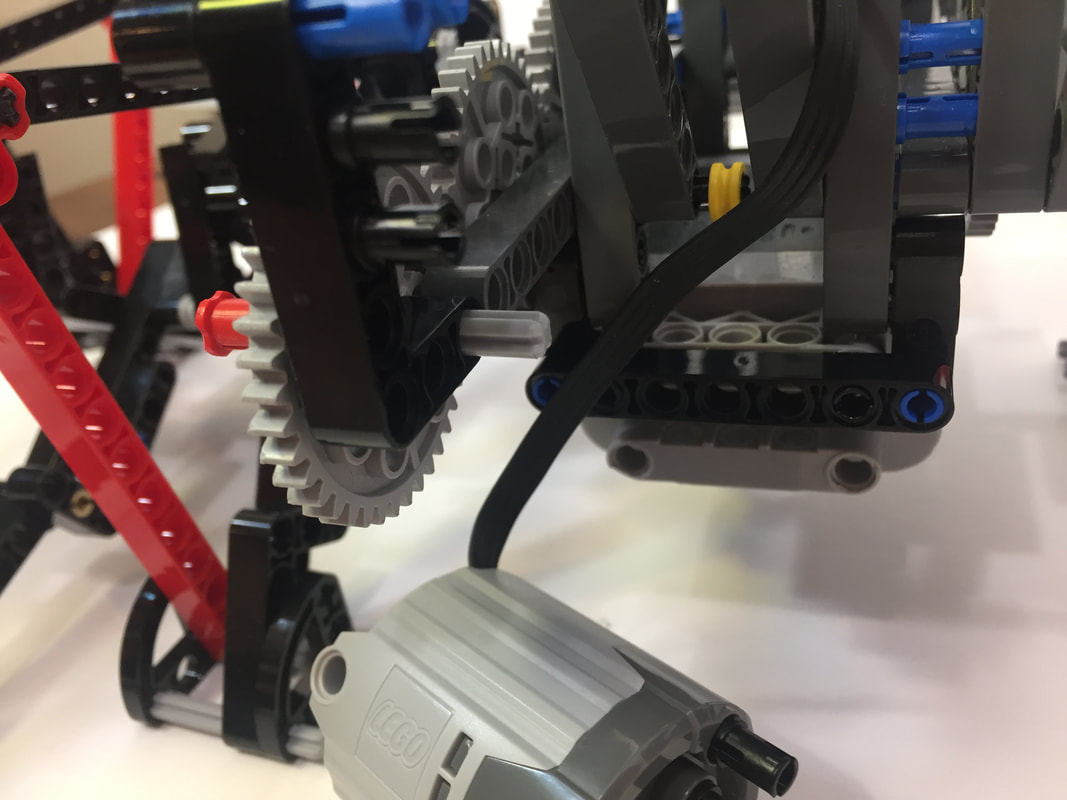
Then attach the motor