|
TrotBot's lower leg pins tend to come out when the legs experience sideways forces, as can happen when turning TrotBot on terrain with a lot of friction (like on thick carpeting).
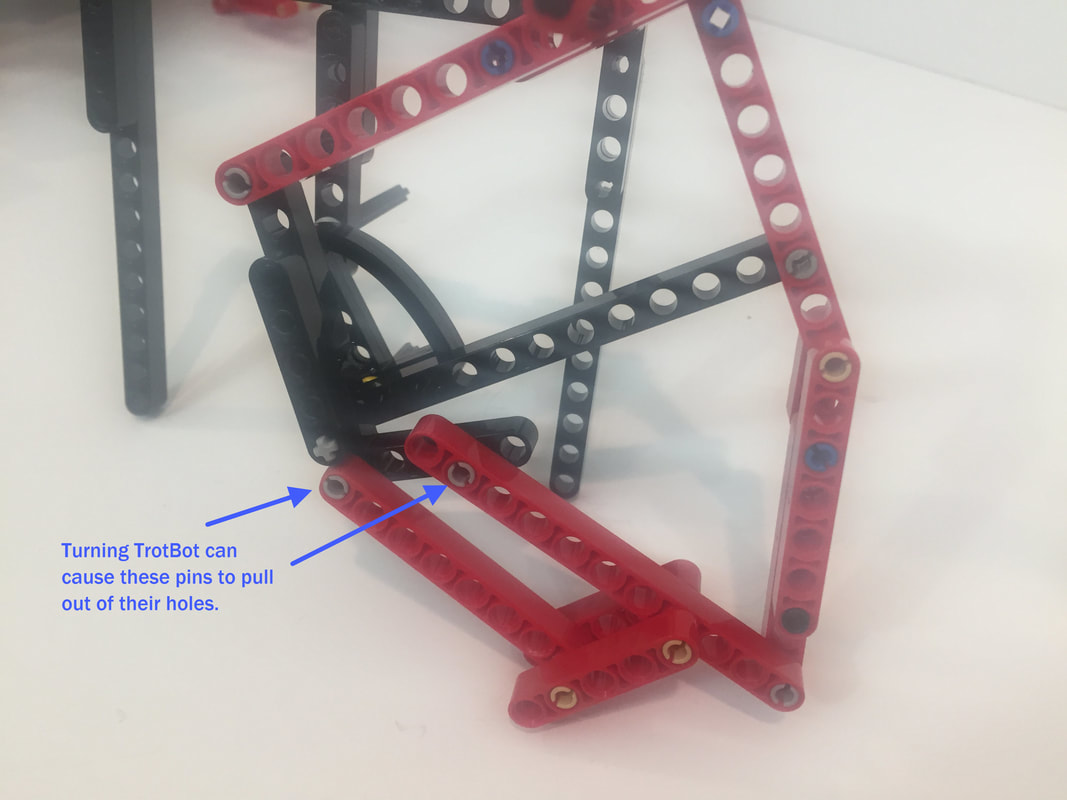
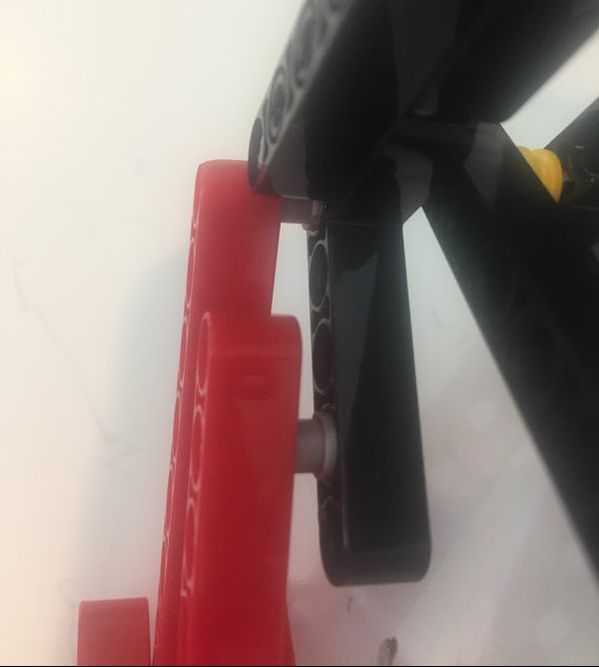
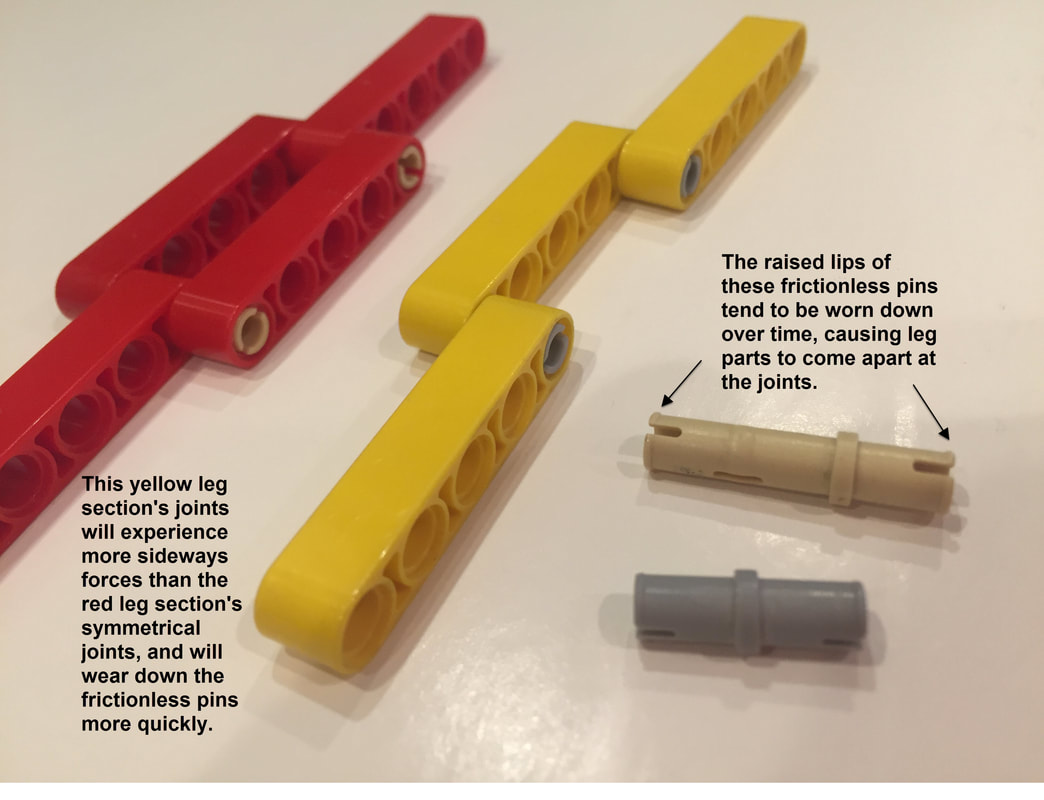
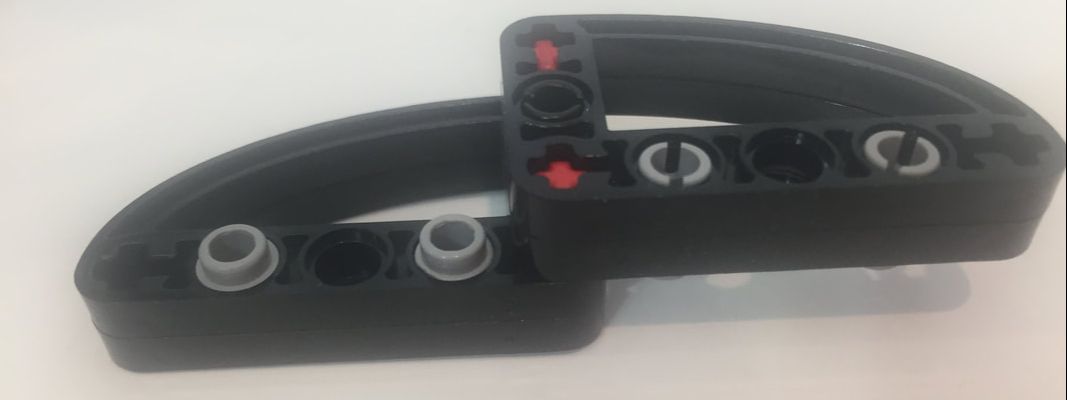
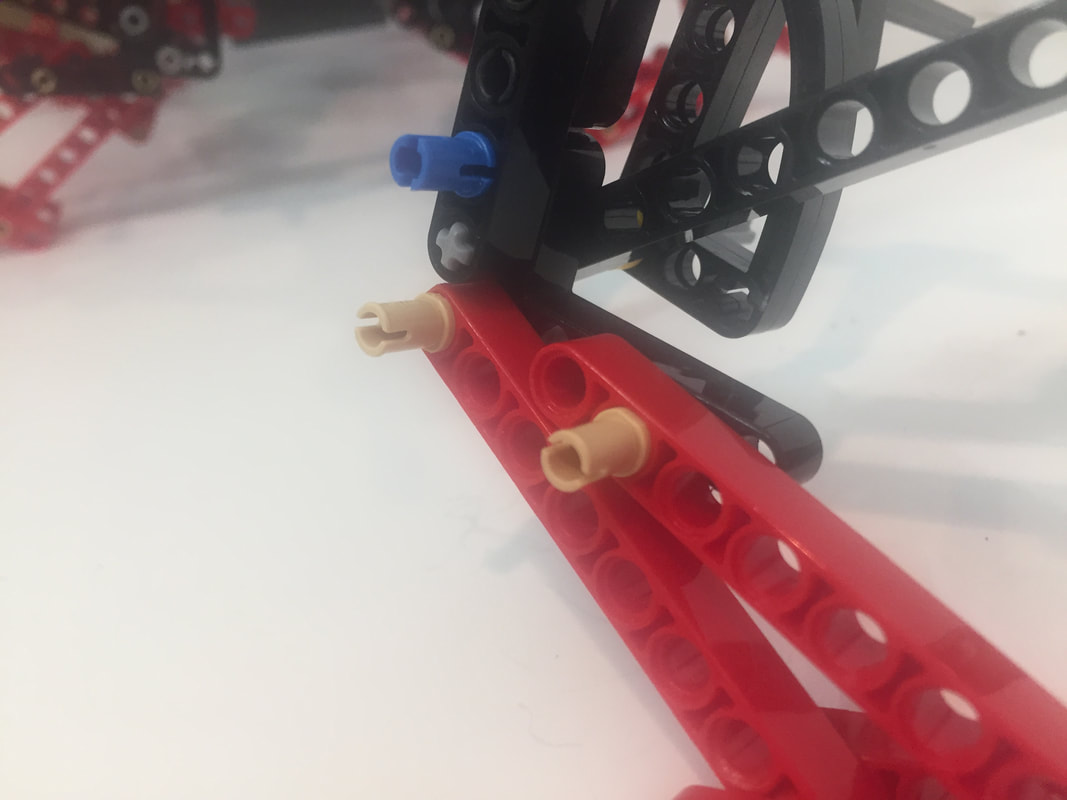
If the legs aren't snapped back in place, then friction on the pin's lips will wear them down, and the pins will no longer join with a sharp "snap", causing them to pull out more easily. Ideally, joints should be 3 beams wide and symmetrical like the red chain of beams below, which prevents pins from pulling out or bending sideways when bearing weight:
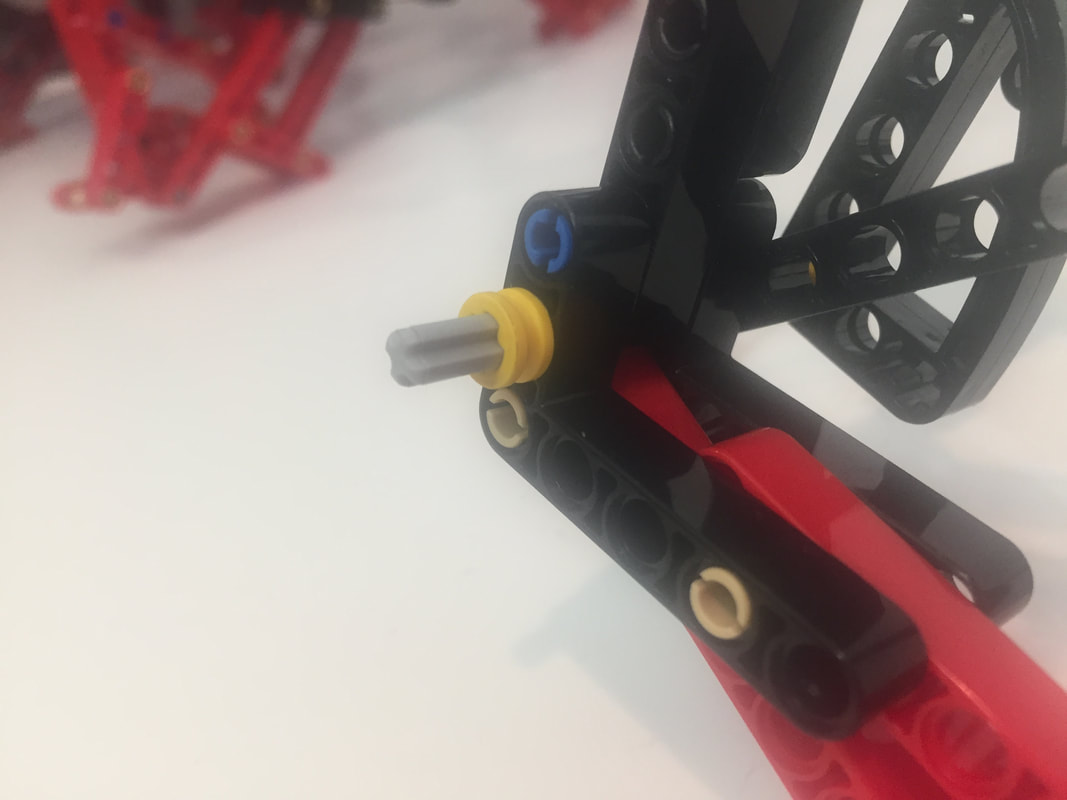
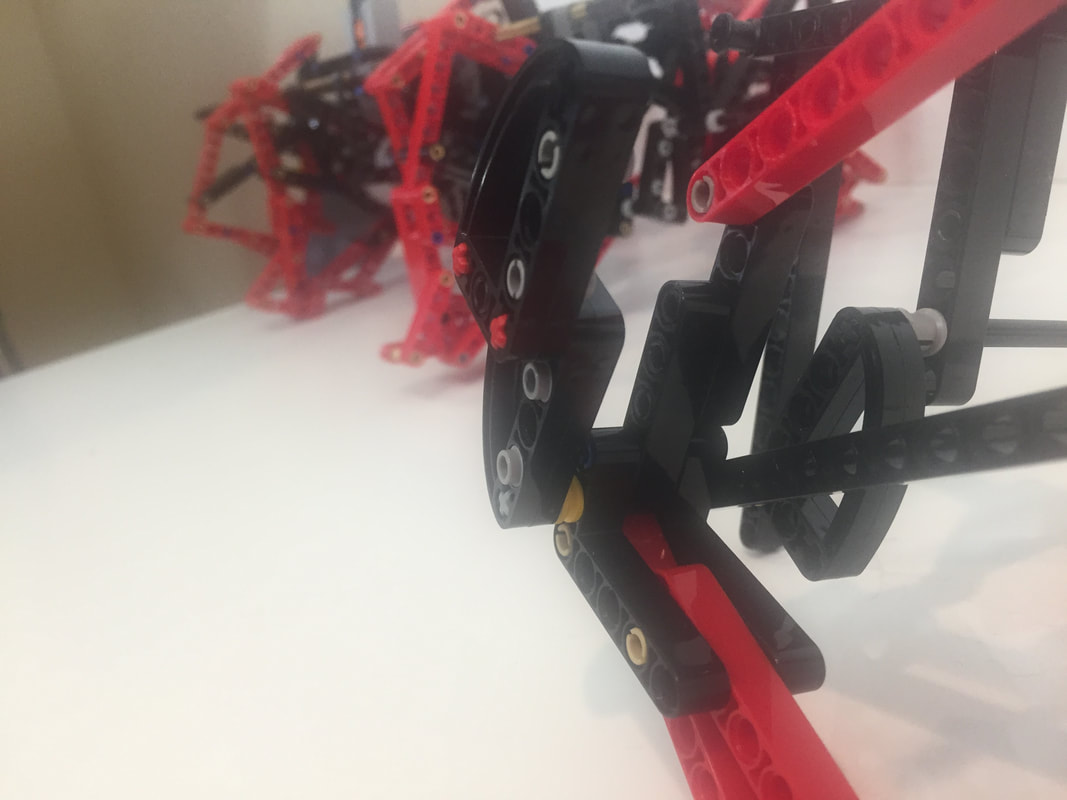
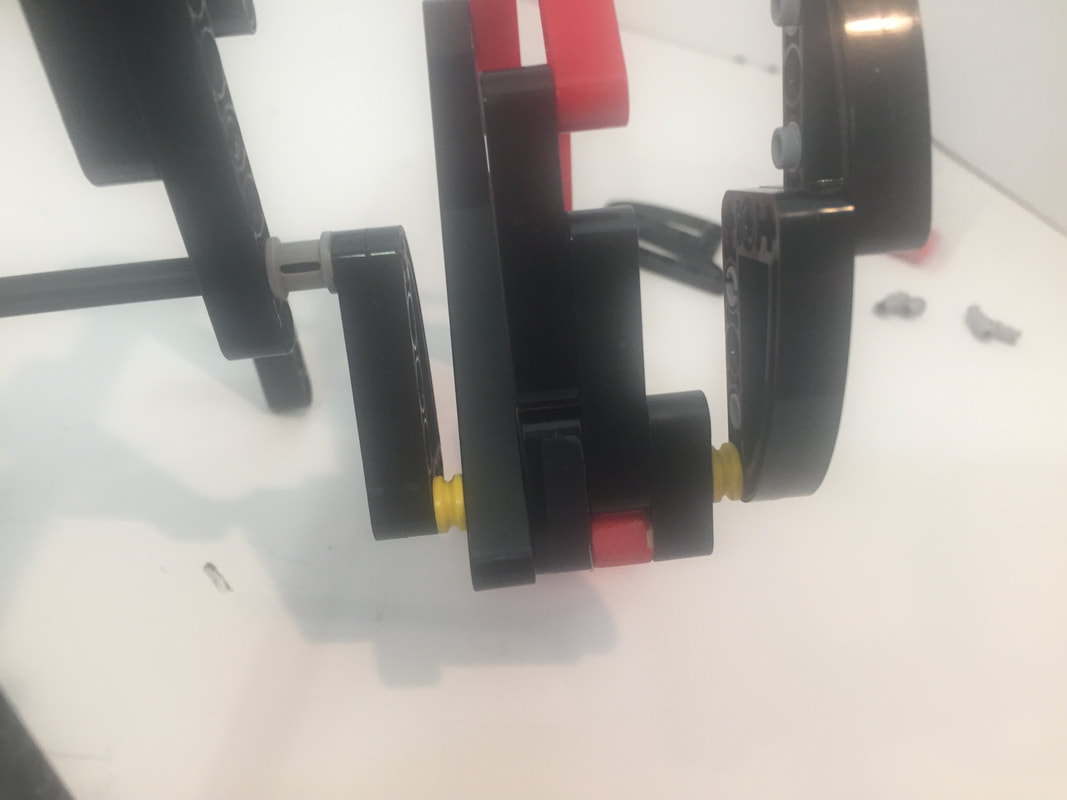
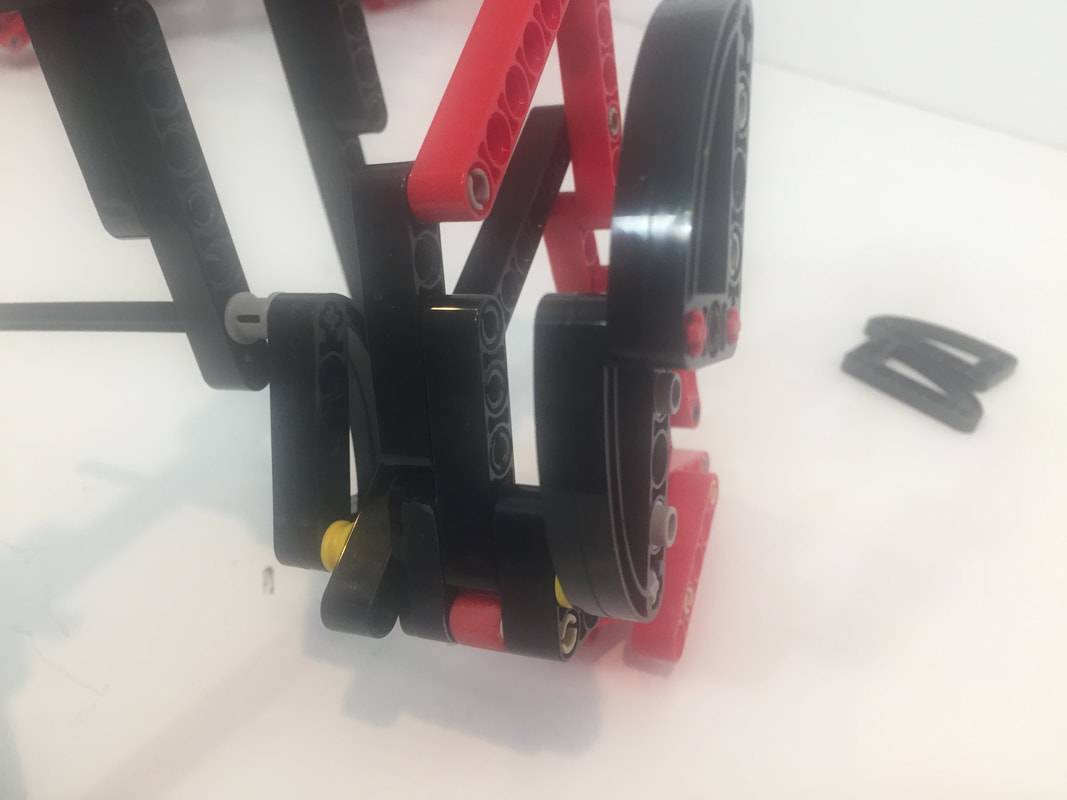
However, using LEGO's parts to sandwich TrotBot's leg joints inline like the red beams above would add a lot of width to the robot. Instead, I sandwiched the leg joints by attaching an additional 3x5 L-shaped beam to the outside of the legs, which is a bit off center but still works well with LEGO's high strength-to-weight ratios. I tested these new attachments by turning TrotBot on some thick carpeting, which would usually cause a few of the leg's pins to pull out. Below the video are some pictures of how I added the parts, and I used these attachments in my TrotBot version 3 builds.
I've got a few other ideas to test over the next few weeks, and then I'll post some new TrotBot instructions with the improvements. UPDATE: Here are the new instructions with a part list.
4 Comments
Harold Carey
8/22/2017 12:50:03 am
Your instructions include several parts that I cannot find. Is the crank a EV3 part? Lego part? The curved portion 3D-printed and glued to a 3x5-hole EV "L"? Or is the entire product produced by a 3D printer?
Ben Vagle
9/4/2017 01:49:45 pm
I posted a parts list here:
Ben Vagle
8/22/2017 02:48:36 pm
Hi Harold,
Ben Vagle
8/22/2017 03:13:26 pm
Sorry, the short gray pins used for the crank can be found here: Leave a Reply. |
Categories
All
Archives
February 2023
|

 RSS Feed